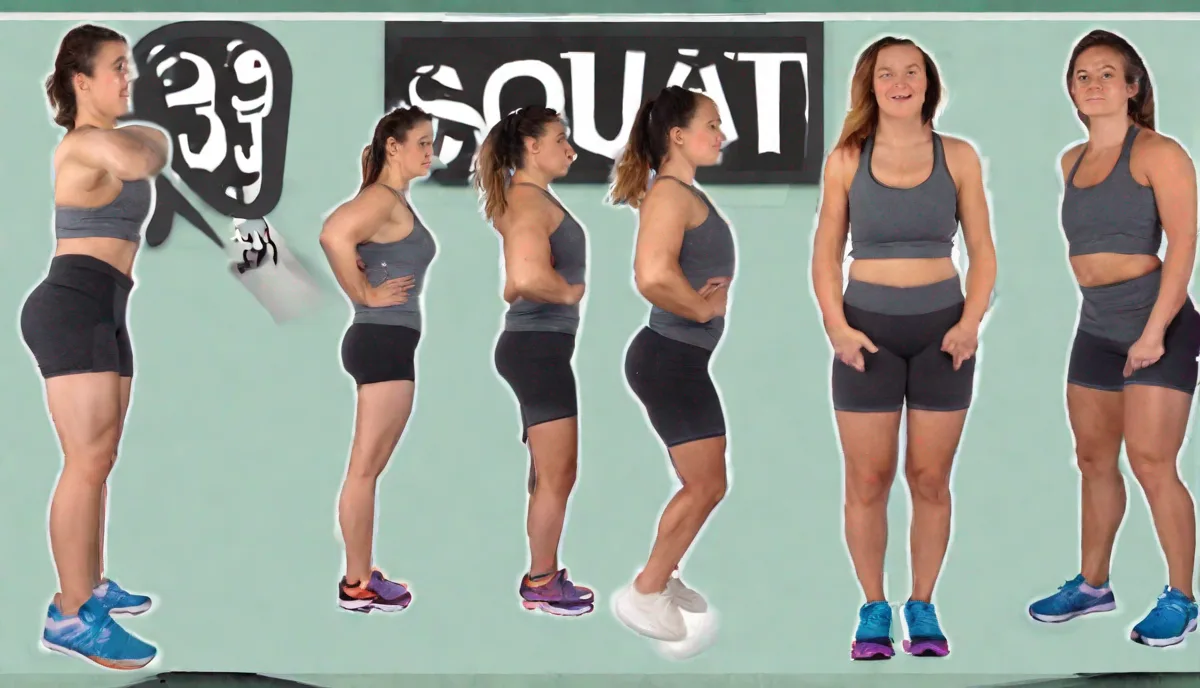
Embarking on a squat challenge can be a fun and effective way to strengthen your legs, build muscle, and improve fitness. However, it’s important to listen to your body and not overdo it. Rushing into an intense 30-day challenge without properly preparing could lead to injury or burnout.
Benefits of Squats
When done with proper form, squats are tremendously beneficial. Here are some of the main benefits:
- Build stronger legs and glutes
- Improve posture and balance
- Burn calories and fat
- Increase metabolism
- Reduce risk of injury
Getting Started
Before jumping straight into a 30-day squat challenge, make sure your body is prepared by following these tips:
- Perfect your squat form. Work on body mechanics to avoid injury.
- Start with bodyweight squats. Get comfortable before adding weight.
- Build up slowly over 2-3 weeks. Listen to your body.
- Make sure to recover between squat days. Rest is crucial.
Sample 30-Day Squat Challenge Routine
Here is one approach to a 30-day squat challenge that progressively increases volume:
| Week | Sets x Reps |
|---|---|
| Week 1 | 3 x 10 squats (3 days/week) |
| Week 2 | 3 x 15 squats (3 days/week) |
| Week 3 | 4 x 15 squats (4 days/week) |
| Week 4 | 4 x 20 squats (4 days/week) |
This allows your body to adapt while gradually increasing the volume. Listen to your body and adjust as needed. The most important thing is to avoid injury.
Advanced Squat Variations to Enhance Progression
While the standard bodyweight squat is the foundation of any 30-day challenge, relying solely on one movement pattern can lead to plateaus and repetitive strain. To keep the challenge engaging and target different muscle fibers, you should incorporate variations that shift the mechanical load. For instance, the Sumo Squat requires a wider stance with toes pointed outward at a 45-degree angle. This variation places a significant emphasis on the adductors (inner thighs) and the gluteus medius, which are often neglected in a narrow-stance squat. When performing Sumo squats, focus on keeping your knees tracking directly over your toes to avoid internal rotation, which can stress the medial collateral ligament.
For those looking to increase the intensity without adding external weights, unilateral movements like the Bulgarian Split Squat are invaluable. By elevating your rear foot on a sturdy chair or bench, you force the lead leg to stabilize the entire body weight. This not only builds incredible quad strength but also addresses muscular imbalances between your left and right sides. If you find your balance wavering during split squats, try focusing your gaze on a fixed point three to five feet in front of you on the floor. This visual anchor helps the vestibular system maintain equilibrium while your lower body works through the range of motion.
Another powerful variation is the Goblet Squat, which can be performed with a household object like a heavy water jug or a backpack if you lack traditional dumbbells. Holding the weight at chest height acts as a counterweight, allowing you to sit deeper into the squat with a more upright torso. This is particularly beneficial for individuals with limited ankle mobility who struggle to stay upright during bodyweight squats. The anterior load also engages the core and upper back, turning a lower-body movement into a comprehensive functional exercise. As you progress through your 30-day journey, consider alternating these variations every other workout to ensure a well-rounded stimulus for your lower body.
Optimizing Mobility: Pre-Squat and Post-Squat Routines
A common hurdle in any squat challenge is the progressive tightening of the hip flexors and ankles. To sustain a high volume of reps over 30 days, you must integrate a mobility routine that prepares the joints for load. Before starting your daily reps, spend three minutes on dynamic stretching. Movements like the “World’s Greatest Stretch” or deep lunges with a thoracic twist help lubricate the hip sockets and activate the spinal stabilizers. Ankle dorsiflexion is also critical; if your ankles are stiff, your body will compensate by leaning too far forward or lifting the heels, which shifts the stress from the muscles to the lower back.
To improve ankle mobility, try the wall-facing ankle stretch: stand a few inches from a wall and try to touch your knee to the wall without your heel lifting off the ground. Move your foot back an inch at a time until you find the limit of your range. Performing this for 60 seconds per side before squatting can significantly improve your depth and form. Additionally, hip internal and external rotation exercises, such as the 90/90 stretch, can help clear space in the hip joint, allowing for a smoother descent and reducing the likelihood of the “pinching” sensation many feel in the front of the hip during deep squats.
Post-workout recovery is equally vital to prevent the accumulation of metabolic waste and muscle soreness (DOMS). After completing your challenge reps for the day, focus on static stretching. The pigeon pose is highly effective for releasing the glutes and piriformis, which can become tight from high-volume squatting. Hold each stretch for at least 30 to 45 seconds, breathing deeply into the diaphragm. This signals the parasympathetic nervous system to take over, shifting the body from a state of exertion to a state of repair. Consistency in mobility work is what separates those who finish the 30 days feeling strong from those who finish feeling stiff and prone to injury.
The Science of Recovery: Fueling and Repairing Muscle Tissue
Completing hundreds of squats over a month creates micro-tears in the muscle fibers. While this is the intended stimulus for growth and toning, the actual “building” happens during rest periods and through nutritional support. To maximize the results of your challenge, prioritize protein intake. Aim for a source of high-quality protein, such as lean meats, legumes, or a plant-based shake, within 60 to 90 minutes of your workout. Protein provides the amino acids necessary for muscle protein synthesis, the process of repairing those micro-tears to make the muscle fibers thicker and more resilient.
Hydration plays a secondary but equally important role. Muscles are approximately 75% water, and even mild dehydration can lead to a decrease in strength and an increase in perceived exertion. When you are dehydrated, your blood volume drops, making it harder for your heart to pump oxygen-rich blood to your working muscles. Throughout the 30-day challenge, aim to consume at least half your body weight in ounces of water daily. If you are sweating significantly or performing the challenge in a warm climate, consider adding electrolytes like magnesium, potassium, and sodium to your water to prevent cramping and support nerve signaling.
Sleep is the final pillar of the recovery triad. During deep sleep stages, the body releases the majority of its daily growth hormone, which is essential for tissue repair and fat metabolism. If you are cutting back on sleep while increasing your physical activity, you may find that your strength plateaus by the third week of the challenge. Aim for 7 to 9 hours of quality sleep. If your legs feel particularly heavy or “dead” on a specific day, it may be a sign of systemic fatigue. In these instances, it is better to perform your squats at a lower intensity or break them into smaller sets throughout the day rather than skipping them entirely or pushing through with poor form.
Troubleshooting Form: Addressing the “Butt Wink” and Knee Valgus
As the repetitions increase during the latter half of the 30-day challenge, form fatigue often sets in, leading to two common biomechanical errors: the “butt wink” and knee valgus. The butt wink, or posterior pelvic tilt, occurs at the bottom of the squat when the pelvis tucks under and the lower back rounds. This often happens because of tight hamstrings or a lack of hip socket depth. To fix this, stop your descent just before your tailbone begins to tuck. Over time, as your mobility improves, you will be able to go deeper without losing the neutral curve of your spine. Maintaining a tight core—imagine someone is about to punch you in the stomach—can also help stabilize the pelvis throughout the movement.
Knee valgus, or the inward collapsing of the knees, is another frequent issue, especially as the legs tire. This is typically caused by weak hip abductors or an overreliance on the quadriceps. To correct this, imagine you are trying to “screw” your feet into the floor. Your right foot should feel like it is trying to rotate clockwise and your left foot counter-clockwise, even though they remain planted. This external rotation torque engages the glutes and forces the knees to track outward. If you find your knees still caving in, try placing a light resistance band just above your knees during your warm-up sets. Pushing against the band provides tactile feedback that trains your brain to keep the knees aligned.
Breathing technique is also a critical component of form that many beginners overlook. Instead of taking shallow breaths, use the Valsalva maneuver or a modified version of it: take a deep breath into your belly at the top of the movement, hold it as you descend to create intra-abdominal pressure, and exhale forcefully as you drive back up through the sticking point. This pressure acts like an internal weight belt, protecting your spine and providing a stable base from which your legs can generate power. Proper breathing not only improves safety but also allows you to handle higher rep counts with less cardiovascular strain.
Mastering Tempo and Time Under Tension (TUT)
To truly transform your physique during a 30-day squat challenge, you should look beyond the total number of reps and consider the “Time Under Tension” (TUT). TUT refers to how long your muscles are working during a set. If you rush through 20 squats in 30 seconds, you are using momentum more than muscle. Instead, try a controlled tempo such as a 3-1-1 rhythm: three seconds to descend (eccentric phase), a one-second pause at the bottom (isometric phase), and one second to explode upward (concentric phase). This slower eccentric phase causes more controlled muscle damage, which leads to greater strength gains and muscle definition.
The isometric pause at the bottom is particularly effective for building “bottom-end” strength. Many people use a “bounce” at the bottom of a squat to get back up, utilizing the stretch reflex of the tendons. By pausing for one or two seconds, you eliminate that momentum and force the muscles to produce force from a dead stop. This is an excellent way to break through plateaus. If you find the 30-day challenge is becoming too easy by Week 3, don’t just add more reps—slow down your tempo. You will find that 15 reps performed with a slow tempo are significantly more challenging than 30 reps performed quickly.
Additionally, consider adding “pulse” squats at the end of your sets. A pulse squat involves moving only in the bottom third of the range of motion. This keeps the muscles in their most disadvantaged and hardest-working state without any rest at the top. Adding 5 to 10 pulses after your main set will create a significant metabolic burn and help improve your muscular endurance. These tempo manipulations allow you to customize the challenge to your specific goals, whether you are looking for raw strength, endurance, or muscle hypertrophy.
Equipment and Footwear for Long-Term Success
While squats can be done barefoot or in any shoes, your choice of footwear can drastically alter your mechanics. Many modern running shoes have thick, compressed foam heels designed for shock absorption during impact. However, for squatting, this soft base can be unstable, much like trying to squat on a mattress. This instability can cause your ankles to wobble and reduce the amount of force you can transfer into the ground. For the 30-day challenge, consider squatting in flat-soled shoes like Chuck Taylors or even barefoot if your environment allows. A flat, hard sole provides a stable platform and better “ground feel,” allowing for more consistent balance.
If you have significant ankle mobility issues, you might benefit from specialized weightlifting shoes which have a raised, non-compressible heel. This artificial elevation reduces the amount of ankle dorsiflexion required to reach depth, allowing you to keep your chest up and your weight distributed over your mid-foot. However, use these as a tool rather than a crutch; continue working on your natural mobility so you aren’t dependent on the shoes. For home workouts, a simple DIY trick is to place a thin book or two small weight plates under your heels to achieve a similar effect during your most challenging sets.
Beyond footwear, small pieces of equipment can add variety. Resistance bands, as mentioned before, are excellent for glute activation. If you find your grip or upper body strength is a limiting factor when you start adding weights, consider using a dip belt to hang weights from your waist, which removes the load from your spine and shoulders entirely. This is an excellent edge case for individuals with chronic lower back issues who still want to participate in a high-volume squat challenge. By removing the spinal loading, you can push your legs to failure without risking a disc injury or excessive vertebral compression.
Mental Fortitude and Habit Stacking for the 30-Day Journey
The biggest challenge of a 30-day program isn’t physical—it’s psychological. Most participants feel highly motivated during the first week, but that motivation often wanes during the “middle dip” (Days 10 through 20) when the initial excitement has faded and the cumulative fatigue starts to set in. To overcome this, utilize a technique called “habit stacking.” Attach your squat routine to an existing habit you already perform without thinking. For example, commit to doing your squats immediately after you brush your teeth in the morning or while waiting for your morning coffee to brew. By tethering the new behavior to an established one, you reduce the cognitive load required to get started.
Visualization is another tool used by elite athletes that can be applied to your challenge. Before you begin your set, take 30 seconds to visualize yourself performing the reps with perfect form. Feel the floor beneath your feet, imagine the tension in your quads, and see yourself finishing the set strong. This mental rehearsal primes the motor pathways in your brain, making the actual physical movement feel more fluid and less daunting. If you are struggling with high rep counts, try “chunking” the set. Instead of thinking about 50 squats, think about five sets of 10. Focusing on the immediate, smaller goal makes the larger task feel manageable and prevents the mental surrender that often leads to skipping days.
Finally, keep a visual log of your progress. Whether it is a physical calendar where you cross off days with a red marker or a digital tracker, the act of recording your success provides a dopamine hit that reinforces the habit. If you miss a day, don’t fall into the “all or nothing” trap. The goal of a 30-day challenge is consistency, not perfection. If life gets in the way on Day 14, simply pick up where you left off on Day 15. The cumulative effect of 29 days of squats is vastly superior to quitting entirely because you missed one. By the end of the month, the physical changes in your legs and glutes will be a testament to your discipline, but the mental resilience you developed will be the most lasting benefit of the journey.
FAQ
What muscles do squats work?
Squats are a compound exercise that works multiple muscle groups, including your glutes, quadriceps, hamstrings, and calves. They also engage your core and lower back muscles for stabilization.
How low should I squat?
Aim to squat down until your thighs are parallel or just below parallel to the floor. Going any lower increases injury risk. Descend slowly then drive through your heels to stand back up.
How wide or narrow should my squat stance be?
Your feet should be shoulder-width apart or slightly wider to provide stability. Avoid an overly wide or narrow stance, which can throw off your form.
Should my knees track over my toes when squatting?
It’s best to avoid letting your knees travel too far forward over your toes, as this puts more stress on the knee joint. Focus on pushing your hips back and down through your heels.
What can I do if my heels come up when I squat?
If your heels lift off the ground, it usually indicates weak glutes and tight calves. Try some glute exercises to strengthen them. You can also put small plates under your heels to help you stay grounded.
Related posts:
 Perfect Your Squat Form
 This Full-Body Resistance Band Workout Will Transform Your Home Gym
 Understanding Gym Equipment
 15-Minute No-Equipment HIIT
 The Victoria’s Secret Fashion Show Glutes Workout Revealed
 PHA Bodyweight Workout: Efficient Fitness Anywhere, Anytime
 Full-Body Workout Routines for Your Home
 Master the Jump-Lunge-Squat Combo