The Joys of Propagating Plants
There is something deeply fulfilling about propagating your own plants from cuttings or divisions. As any gardener knows, nurturing life from a small seedling or clipping into a flourishing plant is a wonderfully rewarding process.
Key takeaways
- Select healthy, non-flowering stems and cut just below a node to maximize hormone concentration for root development.
- Use a porous mix of equal parts coco coir and perlite to ensure adequate oxygen circulation and prevent root-rotting fungi.
- Place cuttings in bright, indirect light and maintain a warm root zone between 70-75 degrees Fahrenheit for optimal growth.
- Ventilate your propagation cover daily for 15-20 minutes to prevent fungal growth and promote healthy air circulation.
- Transition rooted cuttings to new pots gradually by slowly increasing airflow to prevent transplant shock.
Choosing Plant Cuttings
When selecting plant cuttings to root, look for healthy, pest-free sections of non-flowering growth. Cut just below a leaf node using clean, sharp shears. Remove any flowers, buds or lower leaves that would sit below the soil surface when potted.
Preparing for Planting
Fill small pots with a well-draining propagation mix. Moisten the mix before inserting your cuttings. Using a pencil, make holes deep enough to bury a few nodes of the cutting below the surface. Gently firm the mix around the cutting.
Caring for Cuttings
Place pots in a warm area out of direct sun. Cover pots with plastic to create a greenhouse environment. Check soil moisture daily and water just enough to keep mix barely damp, allowing the cuttings to root without sitting in soggy soil.
Transplanting Rooted Cuttings
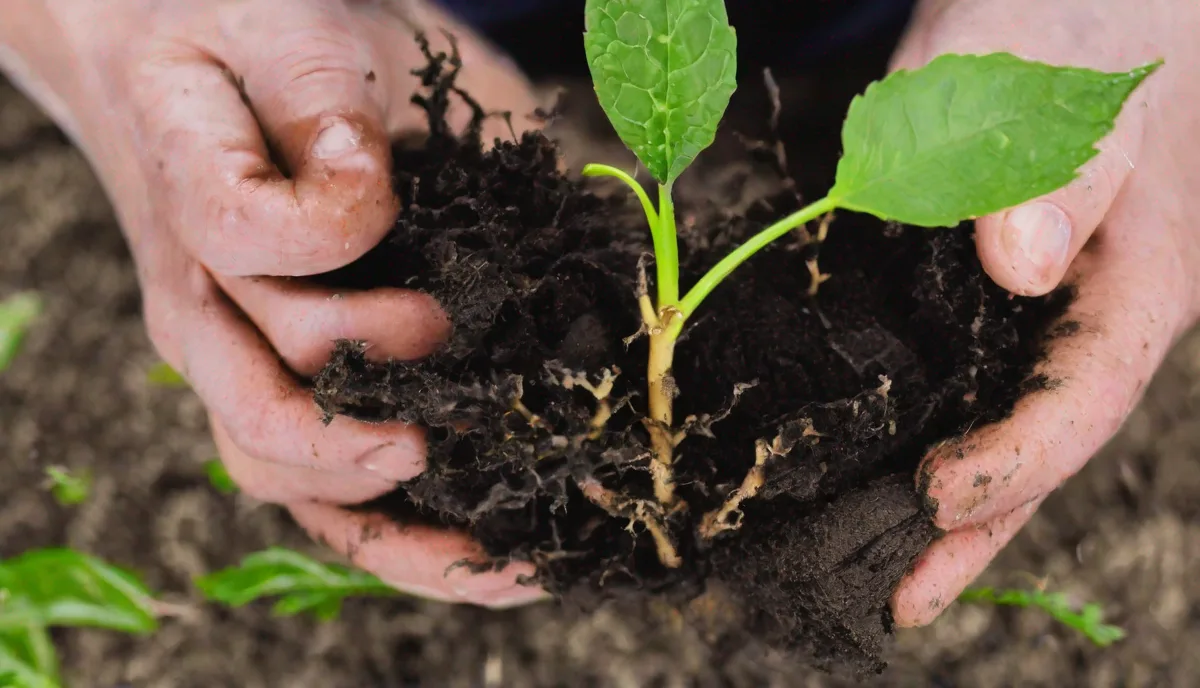
In a few weeks, tug gently on cuttings to check for resistance from new root growth. When roots are established, acclimate plants to a sunny spot for a few days before transplanting into larger containers with fresh potting mix. Fertilize sparingly at first as new plants transition to life on their own roots.
The Rewards of Propagation
As propagating plants is highly accessible to gardeners of all levels, why not give it a try? With a little care and patience, you can multiply your plants and share the joy with friends and neighbors. Most importantly, enjoy the process and the sense of wonder as tiny cuttings grow into robust new plants!
Mastering the Science of Node Anatomy
To achieve consistent success, one must look beyond the surface of a stem and understand the biological potential hidden within the nodes. A node is the meristematic junction where leaves, aerial roots, and branches emerge; it contains a concentrated supply of auxins, the plant hormones responsible for root initiation. When you make your cut, aim for approximately one-quarter inch below the node. If the internodal space is too long, the cutting directs unnecessary energy toward maintaining that stem rather than focusing on root development. Conversely, cutting too close to the node risks tissue damage that invites pathogens. For woody plants like rosemary or lavender, look for semi-hardwood—the stage where the stem is flexible but no longer bright green—as this tissue has the optimal balance of stored carbohydrates to fuel root growth before the cutting can photosynthesize efficiently.
The Role of Substrate Aeration and Porosity
While standard potting soil is excellent for mature plants, it is often too dense for delicate, developing root hairs. Rooting requires a high oxygen-to-moisture ratio. If your substrate is too compact, the lack of gas exchange leads to anaerobic conditions, which are the primary breeding ground for pythium and other root-rotting fungi. A professional propagation blend should prioritize aeration; consider a mix of 50% coco coir (for moisture retention) and 50% coarse perlite or pumice (for drainage). Avoid fine-grained sand, which can pack down into a concrete-like consistency when wet, suffocating the cutting. If you are struggling with cuttings that turn black at the base, it is almost always a sign that your medium is retaining too much water and not enough air. Testing your mix is simple: squeeze a handful of moistened medium; it should clump slightly but crumble apart easily when poked. If it stays in a tight ball, it is too dense.
Optimizing Environmental Variables: Light and Temperature
New cuttings are essentially “living on borrowed time” because they lack a root system to replace water lost through transpiration. While they need light to trigger the physiological processes of growth, intense, direct light will cause the leaves to wilt faster than the stem can uptake water. Diffused, bright, indirect light is the gold standard. A north-facing windowsill or a spot protected by a sheer curtain works best. Temperature is equally critical; most indoor tropicals prefer a bottom heat of 70-75°F (21-24°C) to stimulate root cell division. Using a heat mat specifically designed for propagation can cut rooting times in half during colder months. However, be wary of overheating; if the temperature at the root zone exceeds 80°F, you risk cooking the delicate tissues. Always monitor the ambient temperature, ensuring it remains stable, as drastic fluctuations can cause the plant to drop its leaves in a stress response.
The Art of Moisture Management and Humidity Control
Creating a greenhouse effect is vital, but it is a double-edged sword. While high humidity prevents the cutting from dehydrating, it also creates a stagnant environment where mold thrives. If you use a plastic bag or a clear dome, you must implement a daily “airing out” routine. Remove the cover for 15 to 20 minutes every day to circulate fresh air and prevent the buildup of fungal spores. If you notice condensation dripping heavily from the top of your cover, your humidity is too high; wipe the inside of the plastic or move the container to a slightly cooler location. For those who find plastic covers cumbersome, consider using a propagation tray with a humidity dome or simply misting the foliage occasionally, though misting should be done sparingly to avoid water sitting in the leaf axils, which can cause rot.
Common Pitfalls: Troubleshooting Stagnant Cuttings
Sometimes, a cutting remains healthy and green for weeks but refuses to produce roots. This is often an issue of hormonal balance or light quality. If a cutting is placed in light that is too dim, it may survive on stored energy but lack the “signal” to start root production. Moving it to a slightly brighter location can sometimes jumpstart the process. Another edge case involves “water-logged” stems; if you have been using rooting hormone, ensure you are not applying it directly to the cut end in a way that blocks the vascular tissue. Dipping the stem in hormone and then tapping off the excess is crucial. If a cutting starts to yellow from the bottom up, it is a classic sign of nitrogen deficiency or root rot. Inspect the base; if it is firm and white or light brown, the plant is healthy. If it is mushy, slimy, or smells “sour,” remove it immediately to prevent the infection from spreading to your other cuttings.
Transitioning: The Delicate “Hardening Off” Phase
The most common mistake gardeners make is moving a rooted cutting directly from the high-humidity propagation environment into a standard houseplant setting. This is shock, and it often leads to the sudden collapse of the plant. Once your cuttings have established a root system at least one to two inches long, begin the transition by incrementally increasing the airflow. Open the plastic bag or remove the dome for longer periods each day over the course of a week. This allows the stomata on the leaves to adjust to lower humidity levels. Only after the plant has spent 48 hours completely uncovered without wilting should you consider repotting. When you do repot, choose a container only slightly larger than the root ball; a pot that is too large will hold excess water, once again inviting the very root rot you worked so hard to avoid.
Frequently Asked Questions
What type of soil is best for rooting plant cuttings?
The best soil mix for rooting plant cuttings is a loose, well-draining propagation or seed starting mix. You can make your own by mixing equal parts peat moss, perlite and vermiculite.
Should I use rooting hormone on plant cuttings?
Using a rooting hormone like indole-3-butyric acid (IBA) can help promote faster root growth on many types of plant cuttings. However, it is not essential for all plants.
How often should I water newly rooted plant cuttings?
Check the soil moisture daily and water newly rooted cuttings just enough to keep the soil barely moist, taking care not to oversaturate it. Reduce watering frequency once cuttings are established.
What causes planted cuttings to die?
Overwatering is the most common cause of death in freshly planted cuttings. Fungal diseases, improper soil mix leading to root rot, and lack of warmth can also prevent cuttings from rooting properly.
When can I transplant my rooted cuttings?
Gently tug on cuttings after a few weeks; if you feel resistance from new root growth, the cutting is ready to be transplanted into a larger pot with fresh potting mix. Gradually transition plants to more sun over 7-10 days before moving outdoors.
Related posts:
 The Best Indoor Herb Garden Kits for Fresh Flavors Year-Round
 How to Propagate Succulents
 Urban Outfitters’ Faux Plant Collection
 Plant Propagation Tips
 Bring Nature Indoors with These Stunning Hanging Plants
 Transform Your Bathroom Into a Tropical Oasis: The Complete Guide to Thriving Plants
 Tiny Green Therapy: How Mini Plants Are Revolutionizing the Workspace
 Plant Propagation Tips