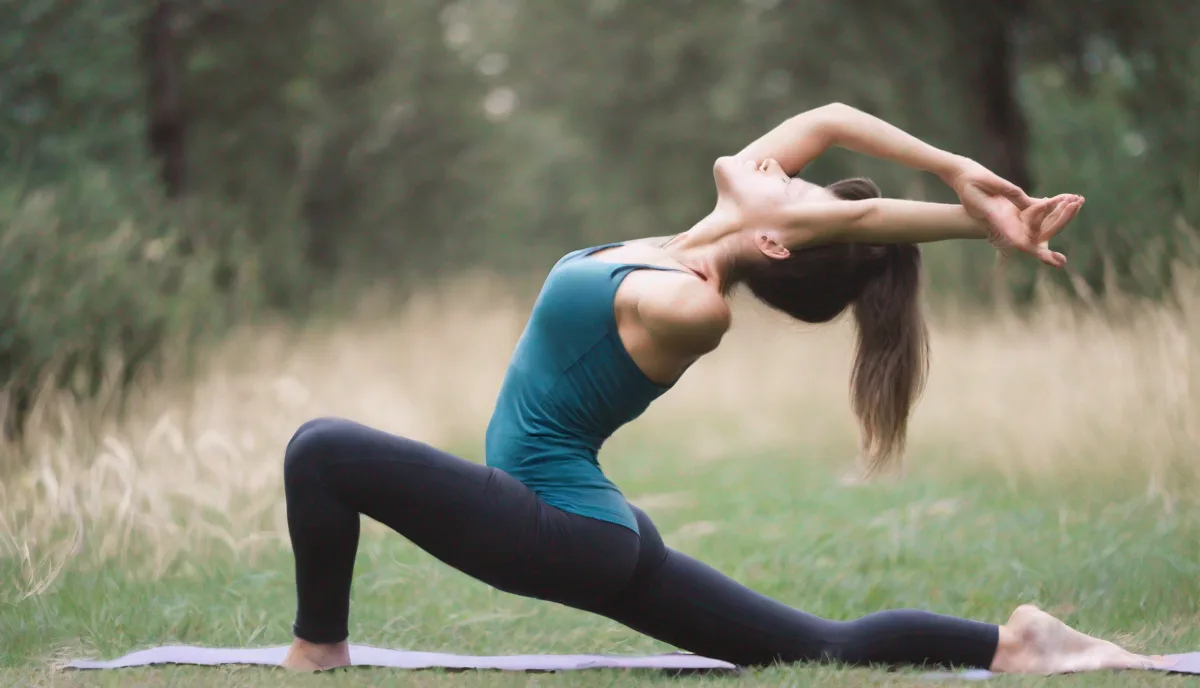
Exploring Advanced Yoga
Yoga is a practice that promotes harmony between mind, body and spirit. While yoga can provide profound benefits for both beginners and advanced practitioners, exploring more complex poses requires care and guidance to avoid injury.
Preparing Your Body and Mind
Before attempting advanced poses like handstands, arm balances and binds, it’s essential to build a strong foundation. This includes improving flexibility, building core and upper body strength, and cultivating concentration and body awareness. Rushing into intense poses without proper preparation can lead to pulls, strains or falls.
Finding an Experienced Teacher
A qualified yoga instructor provides essential guidance on proper alignment, modifications and safe sequencing for advanced students. Building a nurturing student-teacher relationship fosters an atmosphere of trust and respect, enabling you to progress at your own pace. Teachers also help prevent injury by identifying limitations and honoring each student’s unique abilities.
Being Mindful and Listening to Your Body
Pay close attention to alignment cues from your instructor during each pose. Notice areas of tightness or discomfort, and ease up or come out of poses when needed. Advanced yoga requires patience, self-acceptance and non-judgment as you work within your body’s changing capacity day to day. Refrain from competitiveness – progress manifests differently for every student.
Sample Advanced Poses
Here are some common advanced yoga poses to explore once you’ve built sufficient strength, flexibility and balance:
- Crow pose
- Headstand
- Handstand
- King pigeon pose
- Revolved half moon
Refined Mechanics of Advanced Arm Balances
Moving beyond the foundational Crow Pose (Bakasana) requires a deeper understanding of the body’s center of gravity and the synergistic relationship between the serratus anterior and the core. In advanced arm balances like Eight-Angle Pose (Astavakrasana) and Side Crow (Parsva Bakasana), the practitioner must master the “shelf” created by the triceps while maintaining a strong protraction of the shoulder blades. To enter Astavakrasana, for instance, one must first achieve a high degree of hip mobility to hook the leg over the shoulder. The secret to the lift is not brute force but the internal thigh squeeze against the humerus, which creates a closed loop of tension, making the body feel lighter.
Edge cases often arise when practitioners have differing limb lengths or hypermobility in the elbows. For those with long humerus bones, the center of gravity shifts further forward, requiring a more pronounced lean to find the balance point. Conversely, those with hyperextension (genu recurvatum) in the elbows must be vigilant about keeping a micro-bend to engage the biceps and triceps effectively, preventing the weight from crashing into the joint capsule. Transitioning from Side Crow into Eka Pada Koundinyasana I (One-Legged Arm Balance) involves a sophisticated rotation of the torso and a scissoring action of the legs. This transition demands that the obliques remain fully engaged to prevent the hips from sagging toward the floor, which would otherwise terminate the pose prematurely.
The Architecture of Deep Backbends and Spinal Integrity
While King Pigeon (Eka Pada Rajakapotasana) introduces the concept of spinal extension, advanced backbends like Full Bow (Purnadhanurasana) and Full Wheel (Urdhva Dhanurasana) with various leg lifts require a sophisticated distribution of the curve across the entire spine. A common pitfall in advanced backbending is “hinging” at the lumbar-sacral junction (L5-S1), which can lead to compression and long-term injury. To mitigate this, practitioners must focus on the internal rotation of the thighs and the engagement of the transverse abdominis to support the lower back from the front. This creates space in the vertebrae, allowing the thoracic spine—which is naturally more rigid due to the rib cage—to find its maximum extension.
Kapotasana (Full Pigeon Pose) is often considered the pinnacle of backbending. It requires not just spinal flexibility but an immense opening of the iliopsoas and quadriceps. When performing this pose, the practitioner reaches back to grasp the heels while the shins remain grounded. The transition into this depth should be gradual; any sharp pain in the sacroiliac (SI) joint is a signal to back off. Using a bolster beneath the pelvis can provide the necessary height to explore the backbend without compromising the lower back. Furthermore, maintaining a steady Ujjayi breath is crucial here; the breath acts as an internal barometer, ensuring the nervous system remains in a parasympathetic state despite the intense physical demand.
Advanced Inversions and the Forearm Foundation
The transition from Headstand (Sirsasana) to Forearm Stand (Pincha Mayurasana) represents a significant leap in shoulder stability requirements. In a forearm stand, the base of support is larger than a handstand but smaller than a headstand, yet it lacks the tripod stability of the head on the floor. The primary challenge is preventing the elbows from splaying outward, which causes the shoulders to collapse and the back to “banana” or over-arch. Utilizing a yoga block between the hands and a strap just above the elbows can provide the external resistance needed to train the subscapularis and infraspinatus muscles to hold the humerus in the socket.
Once stability in Pincha Mayurasana is achieved, the practitioner can explore “Hollowback” variations, which combine an inversion with a thoracic backbend. This requires a paradoxical movement: pushing the floor away to maintain height while simultaneously melting the chest through the arms. The gaze (Drishti) shifts from between the forearms toward the toes, requiring a high level of proprioception. For those struggling with the balance, practicing at a wall—not just with the back to the wall, but facing the wall—can help in identifying the exact moment the ribs flare, allowing for a more vertical and controlled alignment.
Complex Binds and Standing Balance Integration
Advanced standing poses often incorporate binds that test both balance and shoulder girdle flexibility. Bird of Paradise (Svarga Dvijasana) is a prime example, requiring the practitioner to bind the arms around a thigh while standing on one leg and then extending the bound leg toward the ceiling. The difficulty lies in the transition from the crouched, bound position to the upright stance. This move requires a powerful engagement of the standing leg’s gluteus medius and a slow, controlled unfurling of the spine. If the hamstring of the extended leg is tight, it will pull the torso forward, breaking the vertical line and causing a fall.
Another complex variation is the Bound Revolved Half Moon (Baddha Parivritta Ardha Chandrasana). This pose combines a deep twist, a balance, and a bind. The challenge here is the rotational stability of the standing hip. Because the arms are occupied with the bind, they cannot be used for balance, forcing the neurological system to rely entirely on the small stabilizing muscles of the ankle and foot. Practitioners should master the unbound version of Revolved Half Moon with perfect alignment before attempting the bind, as the bind limits the ability to “escape” the pose safely if balance is lost. Ensuring the chest remains open and the gaze is directed upward helps maintain the integrity of the twist.
Exploring Hip Mobility and Leg-Behind-Head Postures
The progression into “leg-behind-head” poses, such as Eka Pada Sirsasana, marks a transition into the most advanced tiers of hip external rotation. These postures require the femur to rotate deeply within the acetabulum (hip socket) without putting undue stress on the knee’s collateral ligaments. A common mistake is forcing the foot behind the neck by pulling on the ankle, which can lead to meniscus tears. Instead, the movement must come from the hip joint itself. Preparatory poses like Agnistambhasana (Fire Log Pose) and deep Lizard lunges are essential to ensure the joint capsule is sufficiently hydrated and mobile.
When the leg is successfully placed behind the head, the practitioner must then work on sitting upright. This requires a strong core to counter the weight of the leg pressing the head forward. In more advanced variations like Yoga Nidrasana (Yogic Sleep Pose), both legs are placed behind the head while the practitioner lies on their back. This pose is not merely a feat of flexibility but a deep internalizing practice. The pressure of the legs against the back of the neck stimulates the vagus nerve, which can induce a profound state of calm, provided the practitioner does not feel claustrophobic or physically strained. It is an edge case where the physical and the psychological aspects of yoga intersect most clearly.
Subtle Body Engagement: Bandhas in High-Level Asana
As asana practice becomes more advanced, the physical movements become secondary to the internal locks known as Bandhas. Mula Bandha (the root lock) and Uddiyana Bandha (the abdominal lock) are essential for “lightness” in transitions, particularly when jumping back from forward folds or pressing into handstands. Mula Bandha involves the subtle lifting of the pelvic floor, which stabilizes the pelvis and creates a solid foundation for the spine. Without this engagement, advanced poses can feel heavy and disjointed.
Uddiyana Bandha, practiced as an “upward flying” of the diaphragm, is particularly useful in arm balances and inversions. By drawing the navel in and up, the practitioner shifts their center of mass higher, making it easier to balance on the hands. In advanced twists, the engagement of these locks protects the spinal discs by creating intra-abdominal pressure, ensuring that the rotation happens evenly across the vertebrae rather than at a single point. Mastering the Bandhas requires a shift in focus from the external shape of the pose to the internal energetic flow, often described as moving from the “gross” body to the “subtle” body.
Longevity and Injury Prevention in Intensive Practice
The pursuit of advanced yoga poses must be balanced with a rigorous recovery protocol to ensure longevity. The repetitive nature of Vinyasa transitions and the extreme ranges of motion in advanced asana can lead to overuse injuries, such as “Yoga Butt” (proximal hamstring tendinopathy) or wrist impingement. To prevent these, practitioners should incorporate “counter-posing” and eccentric strengthening. For example, after a session focused on deep backbends, gentle forward folds and twists help to neutralize the spine. Strengthening the hamstrings through active movements, rather than just stretching them, is vital for protecting the attachment points at the sit bones.
Wrist health is another critical area for advanced practitioners. Constant weight-bearing on the hands can strain the carpal ligaments. Regularly performing wrist therapeutic exercises—such as stretching the forearms in all directions and practicing “clawing” the mat with the fingertips (Hasta Bandha)—can distribute the weight more evenly and reduce the pressure on the carpal tunnel. Furthermore, recognizing the difference between “good pain” (the dull ache of muscle work or safe stretching) and “bad pain” (sharp, shooting, or localized joint pain) is the hallmark of an advanced student. Honoring the need for rest days and perhaps incorporating restorative yoga or Yin yoga ensures that the connective tissues have time to remodel and strengthen between intensive sessions.
FAQ
What yoga poses require upper body strength?
Poses like crow, handstand, arm balances, and certain arm support backbends and inversions require considerable upper body and core strength.
How often should I practice advanced yoga poses?
When starting out, 2-3 times per week with rest days in between allows your body to integrate the openness and strength being developed. Frequency can increase gradually as your practice advances if you’re not experiencing injury or fatigue.
How long does it take to build up to advanced poses?
It’s very individual, but most students require a minimum of 1-2 years of consistent practice starting at beginner levels before having sufficient strength, flexibility and concentration for advanced postures. Be patient with yourself and focus on the journey rather than the goal.
What safety precautions should I take?
Practice advanced poses near a wall in case you need to step down. Use a mat with grip, and avoid practicing on slippery surfaces. Have blankets or bolsters available for support. Ensure the room is free from clutter or objects you could fall on. Know your limits each practice session.
Can I practice advanced yoga at home?
Building your practice with an experienced teacher’s guidance maximizes safety and proper technique. Once you’ve developed a strong foundation, you can incorporate some simpler advanced postures into home practice, while continuing to study with your teacher for more complex poses requiring spotting.
Related posts:
 Instagram’s Period Yoga Phenomenon
 Yoga Tips for Beginners
 PHA Bodyweight Workout: Efficient Fitness Anywhere, Anytime
 Lindsay Ellingson’s Stress-Relieving Yoga Move
 Master Chair Pose Without Falling Over: A Yoga Guide for Real People
 Thread the Needle Pose Guide
 Managing Hip Pain from Sitting
 Dangers of Over-Stretching