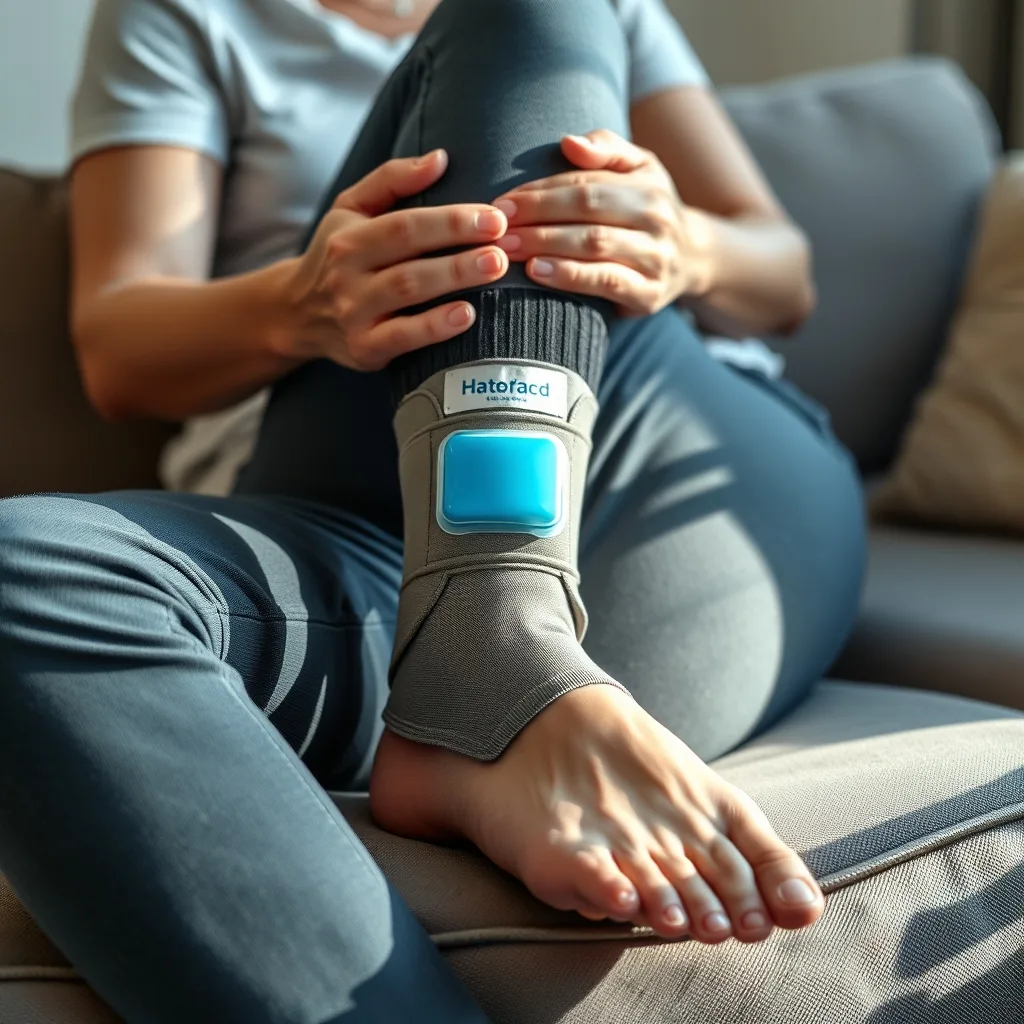
Recovering from an ankle twist can feel frustrating, especially when you’re eager to get back to daily routines or favorite sports. While a mild sprain often heals with time and proper care, navigating the recovery process wisely can reduce swelling, restore mobility, and lower the risk of future injury. This guide walks you through each stage—from the first moments after the twist to a confident return to activity—offering practical, evidence‑based steps you can implement at home and in consultation with health professionals.
Key takeaways
- Use the RICE protocol (Rest, Ice, Compression, Elevation) during the first 48 hours to manage inflammation and swelling.
- Perform gentle range-of-motion exercises like the alphabet stretch once acute swelling subsides to prevent joint stiffness.
- Incorporate resistance band training and balance drills to restore ankle stability and proprioception before returning to sports.
- Consume adequate protein, vitamin C, and healthy fats to support collagen synthesis and accelerate ligament tissue repair.
- Seek professional evaluation if you experience persistent instability, inability to bear weight, or severe, rapidly spreading bruising.
1. Understanding the Anatomy of an Ankle Twist
The ankle joint is a complex hinge formed primarily by the tibia, fibula, and talus bones. Ligaments—particularly the anterior talofibular ligament (ATFL) and the calcaneofibular ligament (CFL)—stabilise the joint against inversion (turning inward) and eversion (turning outward). A “twist” usually refers to an inversion sprain, where the foot rolls inward, stretching or tearing these ligaments.
Sprains are graded by severity:
- Grade I: Microscopic ligament fibers stretch, causing mild pain and little swelling.
- Grade II: Partial tearing leads to moderate pain, swelling, and some loss of stability.
- Grade III: Complete rupture produces significant swelling, bruising, and marked instability.
Knowing the grade helps you decide how aggressively to treat the injury and when to involve a clinician.
2. Immediate First‑Aid: The RICE Principle
During the first 24–48 hours, the goal is to control inflammation and protect the joint. The RICE protocol—Rest, Ice, Compression, Elevation—remains the cornerstone of early care.
- Rest: Avoid weight‑bearing activities that provoke pain. Use crutches or a cane if necessary.
- Ice: Apply a cold pack (or a bag of frozen peas wrapped in a towel) for 15‑20 minutes every 2‑3 hours. Cold constricts blood vessels, limiting swelling.
- Compression: An elastic bandage or a neoprene sleeve provides gentle pressure, reducing fluid accumulation. Ensure it’s snug but not so tight that it impairs circulation.
- Elevation: Keep the ankle above heart level—prop it on pillows while seated or lying down—to aid venous return.
These steps can be continued for the first 48‑72 hours, after which you’ll transition to gentle movement.
3. When to Seek Professional Evaluation
While many ankle twists heal with home care, certain signs warrant a prompt medical assessment:
- Inability to bear weight after 24 hours.
- Severe bruising that spreads rapidly.
- Persistent instability or a feeling that the ankle “gives way.”
- Deformity, such as an obvious misalignment of the foot.
- Intense pain that does not improve with RICE.
A qualified clinician—such as a physical therapist, sports medicine physician, or orthopaedic specialist—can perform a physical exam, order imaging (X‑ray, ultrasound, or MRI), and tailor a rehab plan. Early diagnosis of a higher‑grade sprain or associated fracture prevents chronic issues.
4. Rest, Activity Modification, and Early Mobility
Rest does not mean complete immobility. After the acute swelling subsides (usually 2‑3 days), gentle range‑of‑motion (ROM) exercises prevent stiffness and promote circulation.
Example ROM routine (Days 2‑5):
- Alphabet exercise: Sit with your leg extended, use your big toe to “write” the letters of the alphabet in the air. This moves the ankle through all planes without weight‑bearing.
- Toe‑to‑heel rocks: While seated, gently rock the foot from heel‑down to toe‑down 10‑15 times, focusing on smooth movement.
Perform these 2‑3 times daily, stopping if pain spikes beyond a mild discomfort level (rated ≤ 3/10).
5. Progressive Strengthening (Weeks 2‑4)
Once pain is manageable and you can bear weight without sharp spikes, introduce strengthening exercises. Strong muscles around the ankle—especially the peroneals, tibialis anterior, and gastrocnemius—support the ligaments and improve joint stability.
Key strengthening drills:
- Theraband eversion/inversion: Sit with the foot anchored, loop a resistance band around the forefoot. Pull the foot outward (eversion) for 12‑15 repetitions, then inward (inversion) for the same count. Start with light resistance and progress as tolerated.
- Heel raises: Stand facing a wall for balance, rise onto the balls of your feet, hold 2 seconds, then lower. Perform 3 sets of 12‑15 reps. To increase difficulty, progress to single‑leg raises.
- Mini‑squats: With feet hip‑width apart, lower into a shallow squat (≈ 30° knee bend) while keeping weight evenly distributed. Aim for 2‑3 sets of 10 reps.
Incorporate these 3‑4 times per week, allowing at least one rest day between sessions.
6. Balance and Proprioception Training (Weeks 3‑6)
Proprioception—the sense of joint position—often diminishes after a sprain. Restoring it is crucial for preventing re‑injury, especially if you engage in sports or uneven terrain.
Balance drills:
- Single‑leg stand: Stand on the injured leg, eyes open, for 30 seconds. Progress to eyes closed, then to a softer surface (foam pad or pillow).
- Dynamic wobble board: Using a balance board, perform controlled tilts forward, backward, and side‑to‑side. Start with 2‑minute sessions, increasing duration as stability improves.
- Catch‑and‑throw: While standing on the injured leg, have a partner gently toss a soft ball. Catch and return it, maintaining balance. This adds a functional, reactive component.
Balance work should be done daily, but keep sessions short (5‑10 minutes) to avoid fatigue‑related compensation.
7. Returning to Sports or High‑Impact Activities
Re‑entering sport requires a graduated approach that respects tissue healing timelines. A typical progression might look like:
- Low‑impact cardio: Swimming or stationary cycling for 15‑20 minutes, 3‑4 times per week (Weeks 4‑5).
- Controlled agility drills: Ladder drills, side‑shuffles, and light jogging on flat ground. Begin with 5‑10 minutes, monitoring pain.
- Sport‑specific drills: Replicate movements unique to your activity (e.g., cutting for basketball, sprint starts for soccer) at 50 % intensity, then increase by 10‑15 % each week.
- Full participation: Once you can complete sport‑specific drills without pain, swelling, or instability for at least two consecutive sessions, you may resume full competition.
Throughout this phase, continue strength and balance work to maintain the gains you’ve built.
8. Monitoring Progress and Recognising Red Flags
Even with diligent rehab, some individuals experience lingering symptoms. Keep a brief log noting:
- Daily pain level (0‑10 scale).
- Swelling presence (none, mild, moderate, severe).
- Functional milestones (e.g., “walked 500 m without limp”).
If you notice any of the following, pause the program and consult a professional:
- Sudden increase in pain after a specific exercise.
- Re‑emergence of swelling after previously resolved.
- Persistent sense of instability despite strengthening.
- New numbness or tingling in the foot.
Early intervention can prevent chronic ankle instability, which is linked to long‑term joint degeneration.
9. Preventing Future Ankle Twists
Prevention is a natural extension of recovery. Incorporate these habits into your regular routine:
- Regular proprioceptive training: Even after full recovery, spend 5‑10 minutes a few times weekly on balance boards or single‑leg stands.
- Strength maintenance: Perform calf raises and theraband work at least twice a month to keep the supporting musculature strong.
- Appropriate footwear: Choose shoes that provide adequate arch support and lateral stability, especially for trail running or court sports.
- Warm‑up before activity: Dynamic stretches (leg swings, ankle circles) increase blood flow and improve joint mobility.
- Surface awareness: When possible, avoid uneven terrain or sudden direction changes on slick surfaces.
By embedding these practices, you’ll reduce the likelihood of another twist and support overall lower‑body health.
1. Nutrition, Hydration, and Supplement Strategies for Accelerated Ankle Tissue Repair
While mechanical loading and movement dominate most recovery protocols, the cellular machinery that rebuilds torn ligaments and damaged cartilage relies heavily on the nutrients delivered by the bloodstream. A well‑balanced diet can shorten the inflammatory phase, support collagen synthesis, and improve overall energy levels, allowing you to adhere more consistently to your rehab schedule.
Key macronutrients
- Protein: Aim for 1.2‑1.6 g of high‑quality protein per kilogram of body weight daily. Sources such as lean poultry, fish, eggs, low‑fat dairy, legumes, and whey protein provide the essential amino acids (especially glycine, proline, and lysine) that serve as building blocks for collagen.
- Complex carbohydrates: Adequate glycogen stores are vital for the energy‑intensive process of tissue remodeling. Include whole grains, sweet potatoes, quinoa, and fruit to maintain stable blood‑sugar levels and avoid fatigue during exercise sessions.
- Healthy fats: Omega‑3 fatty acids (EPA and DHA) found in fatty fish, chia seeds, and walnuts have anti‑inflammatory properties that can blunt the post‑injury cytokine surge. Aim for at least 1 g of combined EPA/DHA per day, either from food or a high‑quality fish‑oil supplement.
Micronutrients that directly influence ligament healing
| Micronutrient | Primary Role | Food Sources |
|---|---|---|
| Vitamin C | Co‑factor for pro‑collagen hydroxylation, essential for stable collagen fibers | Citrus fruits, bell peppers, strawberries, broccoli |
| Zinc | Supports DNA synthesis and fibroblast proliferation | Oysters, pumpkin seeds, lean beef, lentils |
| Vitamin D & Calcium | Facilitate bone‑ligament interface health; deficiency can delay remodeling | Fortified dairy, salmon, egg yolk, sunlight exposure |
| Magnesium | Regulates muscle relaxation and reduces cramping during early weight‑bearing | Almonds, spinach, black beans, dark chocolate |
For athletes or highly active individuals, timing of nutrient intake can be leveraged for maximal benefit. Consuming a protein‑rich snack (15‑20 g protein) within 30‑45 minutes post‑exercise spikes muscle protein synthesis and also supplies amino acids to the injured ligament. Pair this with a carbohydrate source (e.g., a banana) to replenish glycogen and promote insulin‑mediated nutrient transport.
Supplement considerations and cautions
- Collagen peptides (hydrolyzed type I/III) taken with vitamin C have shown modest improvements in tendon and ligament tensile strength in several randomized trials. A typical dose is 10 g per day, mixed into a smoothie.
- Glucosamine and chondroitin sulfate are more commonly discussed for cartilage, but some clinicians recommend them for ankle sprains that involve articular surface irritation. Evidence is mixed; use only if tolerated.
- Avoid high doses of NSAIDs beyond the acute phase, as they can impair collagen synthesis. If pain control is needed, discuss alternative modalities with your provider.
Hydration is equally important. Dehydrated connective tissue loses elasticity, increasing the risk of re‑injury during later phases. Aim for at least 2.5‑3 L of water per day, adjusting upward for hot climates or heavy sweating.
2. Advanced Physical‑Therapy Modalities: When and How to Integrate Them
Beyond the foundational exercises, many clinicians incorporate adjunctive technologies to accelerate healing, manage pain, and improve proprioceptive feedback. These tools are most effective when paired with, not substituted for, the core rehab program.
Therapeutic ultrasound
- Mechanism: High‑frequency sound waves (1‑3 MHz) create micro‑vibrations that increase local blood flow and promote collagen alignment.
- Protocol example: 5‑minute continuous mode at 1 MHz, 1.0 W/cm², applied over the ATFL and CFL region 3‑4 times per week during weeks 2‑4.
- Edge case: Patients with pacemakers, active malignancy, or acute infection should avoid ultrasound.
Low‑level laser therapy (LLLT) / photobiomodulation
- Delivers specific wavelengths (typically 660 nm red and 810 nm near‑infrared) that stimulate mitochondrial activity, reducing oxidative stress.
- Clinical studies suggest a reduction in pain scores by 30‑40 % after a series of 10‑12 treatments, especially in Grade II sprains.
- Recommended dosage: 4‑6 J/cm² per point, treating the lateral ankle capsule and peroneal tendons.
Electrical stimulation (NMES & TENS)
- Neuromuscular electrical stimulation (NMES): Triggers involuntary muscle contractions, preserving calf strength during early non‑weight‑bearing phases. Use 10‑20 minute sessions, 2‑3 times per week.
- Transcutaneous electrical nerve stimulation (TENS): Provides analgesia by activating the gate‑control mechanism. Low‑frequency (2‑10 Hz) or high‑frequency (80‑100 Hz) settings can be trialed based on patient comfort.
- Contra‑indications include open wounds, active skin infections, and pregnancy over the abdomen.
Blood‑flow restriction (BFR) training
Applying a pneumatic cuff to the proximal thigh (or calf for ankle work) at 50‑70 % of arterial occlusion pressure allows low‑load resistance (20‑30 % of 1RM) to elicit hypertrophic and strength gains comparable to high‑load training. For ankle rehab, BFR can be combined with seated ankle dorsiflexion or plantarflexion using a light resistance band. Begin with 2 weeks of BFR after the acute swelling has resolved, monitoring for excessive pain or numbness.
When to progress to modality‑enhanced rehab
- Swelling reduced to < 2+ on the standard edema scale (i.e., mild puffiness).
- Pain level ≤ 3/10 at rest and ≤ 5/10 during gentle ROM.
- Patient demonstrates adequate skin integrity and no contraindicating medical devices.
Always coordinate with a licensed physical therapist who can adjust parameters based on individual response. Over‑reliance on passive modalities without active movement can lead to “downgrading” of functional gains.
3. Psychological Resilience and Pain‑Management Techniques During Recovery
Physical injury inevitably triggers an emotional response. Anxiety about re‑injury, frustration from limited mobility, and the fear of losing athletic identity can all impair adherence to rehab and prolong healing. Incorporating mental‑skill training can mitigate these barriers.
Cognitive‑behavioral strategies
- Thought‑recording: Keep a brief journal noting situations that provoke negative thoughts (e.g., “I’ll never run again”) and replace them with realistic counter‑statements (“My rehab plan is evidence‑based and I’m progressing daily”).
- Goal‑setting hierarchy: Break the overall recovery timeline into micro‑goals (e.g., “Walk 50 m without limp”) and celebrate each achievement. This reinforces a sense of competence.
Mind‑body techniques for pain modulation
- Progressive muscle relaxation (PMR): Systematically tense and release muscle groups from head to toe, ending with the ankle. A 10‑minute PMR session before bedtime can lower sympathetic tone, reducing nocturnal pain spikes.
- Guided imagery: Visualize the ankle ligament fibers knitting together, feeling warmth and strength. Studies show that vivid imagery can decrease perceived pain by up to 20 %.
- Breathing exercises: Box breathing (4‑seconds inhale, hold, exhale, hold) activates the parasympathetic nervous system, which can be especially useful during early weight‑bearing when anxiety peaks.
Social support and accountability
Engage a rehab partner—whether a teammate, family member, or a virtual coach—to perform joint exercises, track progress, and provide encouragement. Peer support groups (online forums, local sports‑medicine clubs) often share practical tips and reduce feelings of isolation.
When psychological factors become a red flag
- Persistent catastrophizing (“I’ll be disabled forever”) lasting more than 4 weeks.
- Significant sleep disruption (> 2 hours lost per night) despite pain control.
- Withdrawal from previously enjoyable activities unrelated to the ankle injury.
If any of these appear, consider a referral to a sports psychologist or a licensed counselor experienced in injury rehabilitation.
4. Return‑to‑Work and Daily‑Living Strategies: Bridging the Gap Between Rehab and Real‑World Function
Most readers focus on sports, yet many individuals need to resume occupational tasks—standing for long periods, climbing ladders, or operating machinery—before they feel ready for competition. A structured occupational‑return plan minimizes setbacks and protects the healing ligament.
Phase‑based work reintegration
- Phase 1 (Days 3‑7): Light duties that avoid weight‑bearing on the injured side. Examples: desk work, answering phones, or using a stool while performing tasks that require minimal ankle motion.
- Phase 2 (Weeks 2‑3): Introduce brief standing periods (5‑10 minutes) interspersed with seated breaks. Use a supportive orthotic shoe or a rigid ankle brace to limit inversion.
- Phase 3 (Weeks 4‑5): Gradually increase standing time to 2‑3 hours, incorporate light stair navigation, and practice safe lifting techniques (bend at the hips, keep the load close to the body).
- Phase 4 (Weeks 6‑8): Full duty with modifications as needed. If the job requires frequent pivoting, schedule short proprioceptive “reset” breaks (single‑leg stance for 30 seconds) every hour.
Employers can facilitate this progression by providing ergonomic equipment—adjustable height workstations, anti‑fatigue mats, and supportive footwear.
Ergonomic adaptations for the ankle‑injured worker
- Use a rolling stool or chair with wheels to reduce the need for repetitive foot pushes.
- Place frequently used items within arm’s reach to limit bending or twisting.
- Apply a night‑time ankle splint or compression sleeve to control swelling that can otherwise impede morning mobility.
Monitoring functional readiness
Employ a simple “work‑simulation checklist” at the end of each day:
- Can I walk 10 minutes without pain?
- Is there any new swelling after the shift?
- Do I feel stable when stepping onto a curb?
If any answer is “no,” revert to the previous phase for an additional 3‑5 days before progressing.
5. Managing Chronic Ankle Instability (CAI) and When Surgical Intervention Becomes Necessary
Even after an apparently successful rehab, up to 30 % of individuals develop chronic ankle instability—a condition characterized by recurrent “giving way,” persistent soreness, and functional limitations. Early identification and targeted interventions can prevent long‑term joint degeneration.
Risk factors for CAI
- Inadequate early proprioceptive training.
- Returning to high‑impact activities before achieving ≥ 90 % strength symmetry.
- Underlying ligamentous laxity (e.g., generalized hypermobility syndrome).
- Improper footwear or lack of external support during sport.
Rehabilitation protocol for established CAI
- Dynamic stability drills: Lateral hops, single‑leg hop‑for‑distance, and “star excursion balance test” variations performed 3‑4 times weekly.
- Neuromuscular re‑education: Use a dual‑task paradigm—balance on a wobble board while performing a cognitive task (e.g., reciting months backwards). This mimics real‑world multitasking and improves cortical integration.
- Functional strengthening: Incorporate eccentric calf raises (slow lowering phase) and resisted ankle eversion with a theraband at 70‑80 % of maximal voluntary contraction.
- Manual therapy: Soft‑tissue mobilization of the peroneal muscles and joint mobilizations of the talocrural joint to restore normal arthrokinematics.
Progress should be measured with the Cumberland Ankle Instability Tool (CAIT) score; aim for a score > 27/30 before sport return.
Surgical considerations
If a patient fails to achieve functional stability after 4‑6 months of intensive rehab, or if there is a confirmed complete ATFL rupture with mechanical laxity on stress radiographs, a ligament‑repair or reconstruction may be indicated. Common procedures include:
- Broström‑Gould repair: Direct suturing of the ATFL and reinforcement with the inferior extensor retinaculum.
- Allograft reconstruction: Utilized when tissue quality is poor; involves graft fixation with interference screws.
Post‑operative protocols typically mirror non‑operative rehab but with a longer protected phase (4‑6 weeks non‑weight‑bearing) followed by a gradual re‑introduction of proprioceptive work. Success rates exceed 85 % for return to pre‑injury activity levels when rehab adherence is high.
6. Leveraging Technology: Wearables, Mobile Apps, and Tele‑Rehab for Optimized Recovery
Digital health tools have transformed how patients track progress, receive feedback, and stay motivated. When integrated thoughtfully, technology can complement traditional hands‑on therapy.
Wearable inertial measurement units (IMUs)
- Small sensors placed on the foot and shank capture real‑time ankle dorsiflexion/plantarflexion angles, inversion‑eversion velocity, and ground‑reaction forces.
- Data are streamed to a clinician dashboard, allowing remote monitoring of symmetry between injured and uninjured sides.
- Alert thresholds can be set—for example, if inversion exceeds 15° during a gait cycle, the system prompts the user to pause and perform a balance check.
Mobile rehabilitation apps
Many apps offer customizable exercise libraries, video demonstrations, and built‑in timers. Look for platforms that include:
- Progressive stage gating (unlock next exercise only after meeting criteria).
- Pain‑rating entry fields that automatically flag concerning trends.
- Integration with smartwatch heart‑rate data to ensure cardio components stay within target zones (e.g., 60‑70 % of max HR during low‑impact cycling).
Tele‑rehab consultations
Video‑based sessions allow therapists to assess gait, observe exercise technique, and adjust parameters without the patient traveling to a clinic. Key best practices include:
- Ensure a stable camera angle that captures the entire lower limb.
- Use a calibrated ruler or smartphone app to measure ankle range during the session.
- Document any compensatory movements (e.g., hip hiking) that may indicate residual instability.
Potential pitfalls
- Over‑reliance on numeric targets can lead to “gaming” the system—performing the motion without proper quality. Clinicians should prioritize movement fidelity over quantity.
- Data privacy: Verify that the chosen platform complies with HIPAA or equivalent regulations.
When used judiciously, these technologies provide objective metrics, increase patient engagement, and facilitate early detection of setbacks, ultimately shortening the overall recovery timeline.
FAQ
1. How long does a typical Grade I ankle twist take to heal?
Generally, a mild Grade I sprain resolves within 1‑2 weeks with proper RICE care and gentle mobility work. Full return to high‑impact sport may take 3‑4 weeks as strength and balance are restored.
2. Can I use heat instead of ice after the first 48 hours?
Yes. After acute inflammation subsides, applying a warm compress for 10‑15 minutes can increase blood flow, relax tightened muscles, and aid tissue remodeling. Avoid heat while swelling is still prominent.
3. Are over‑the‑counter ankle braces helpful during recovery?
A soft neoprene brace can provide mild compression and remind you to limit extreme motions. For moderate to severe sprains, a more supportive lace‑up brace or a semi‑rigid stirrup may be recommended by a therapist during later phases.
4. Should I do stretching if my ankle feels tight?
Gentle static stretches—such as calf‑gastrocnemius and soleus stretches—are beneficial once pain is low (≤ 3/10). Hold each stretch for 20‑30 seconds, repeat 2‑3 times, and avoid bouncing.
5. Is it safe to take anti‑inflammatory medication while recovering?
Non‑prescription NSAIDs (e.g., ibuprofen) can reduce pain and swelling when used as directed. However, they should not replace physical rehab and are best taken for short periods. Discuss any medication plan with your healthcare provider, especially if you have underlying health conditions.
Related posts:
 What Is the Role of Physical Therapy in the Recovery from a Torn Ligament?
 Do Ankle Weights Actually Work?
 Ankle Mobility Exercises
 Dangers of Over-Stretching
 Stretches to Relieve Foot Pain
 ACL Injury Surgery: What You Need to Know
 The Simple Ankle Fix That Will Transform Your Entire Workout
 PHA Bodyweight Workout: Efficient Fitness Anywhere, Anytime