Proper Bike Fit
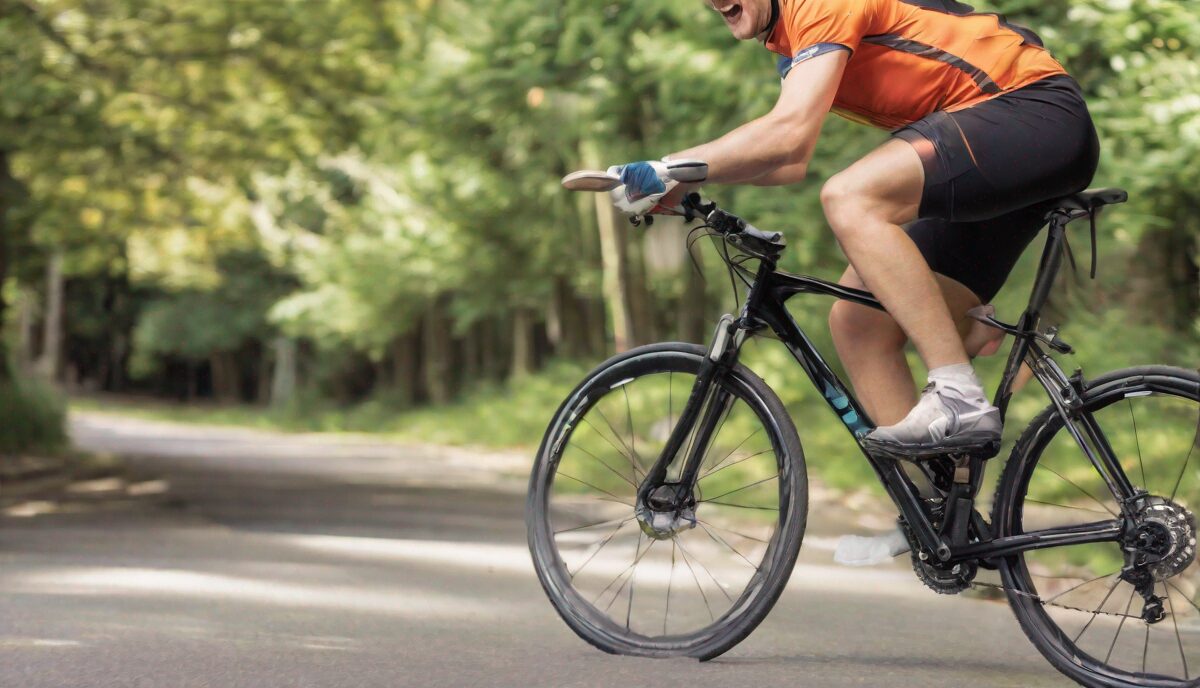
A properly fitted bike is essential for avoiding crotch pain on long rides. When your seat is too high or too low, too far forward or back, it can place undue pressure on sensitive tissues. Visit your local bike shop and ask for a professional bike fitting to find your optimal saddle height and fore/aft position.
Use Padded Shorts
Padded bike shorts help relieve pressure in the perineal area by providing extra cushioning and support. Look for shorts with a dense foam pad or gel inserts. Apply chamois cream inside the shorts to prevent chafing and reduce friction.
Adjust Your Saddle Angle and Position
Slight adjustments to your saddle angle and fore/aft position can distribute pressure more evenly across your sit bones while riding. A level saddle is a good starting point. Experiment with tilting the nose up or down a few degrees to find the sweet spot.
Stand Up Periodically
Get out of the saddle every 10-15 minutes, even for just 30 seconds. This allows blood flow to return to compressed areas and gives your tissue a break. Standing up engages your core and activates different muscle groups as well.
Maintain Good Posture
Keep your back straight, abs engaged, elbows bent, and avoid rounding your shoulders when riding. Proper bike posture improves power transfer and handling while reducing strain on the neck, arms, and crotch region. Sit with equal weight distributed across both sit bones.
Selecting the Right Saddle Shape and Width
While adjusting the position of your current seat is helpful, the physical design of the saddle itself often determines whether a ride is a pleasure or a chore. Many cyclists make the mistake of assuming that a softer, wider, or more cushioned seat is always better. In reality, excessive padding can actually increase pressure on the perineum because your sit bones sink into the foam, allowing the edges of the padding to press into the sensitive soft tissues of the crotch.
The most critical feature to look for is a relief channel or a “cut-out.” These saddles feature a longitudinal gap or a dip in the center, specifically designed to reduce pressure on the pudendal nerve and the surrounding blood vessels. For riders who experience numbness, a cut-out is often the single most effective hardware change they can make. By removing the material directly beneath the soft tissue, the weight is shifted entirely onto the ischial tuberosities (the sit bones), which are designed to bear weight.
Saddle width is equally important. If a saddle is too narrow, your sit bones will hang off the edges, causing you to slide forward and place more weight on the nose of the seat. Conversely, a saddle that is too wide can cause inner-thigh chafing as you pedal. When shopping, consider the material: leather breaks in over time to match your specific anatomy, whereas gel provides immediate comfort but may degrade or shift over time. For those riding high-vibration surfaces like gravel or cobblestones, a saddle with integrated springs or a carbon-fiber rail system that offers a slight “flex” can absorb micro-shocks that would otherwise contribute to pelvic fatigue.
The “No Underwear” Rule and Fabric Science
One of the most common mistakes novice cyclists make is wearing traditional underwear beneath their padded bike shorts. This is a recipe for disaster. Padded shorts, or “chamois,” are engineered to be worn directly against the skin. The padding is designed to wick moisture away and provide a seamless barrier between your body and the saddle. When you add a layer of cotton underwear, you introduce seams that act like sandpaper against your skin during the thousands of revolutions of a long ride.
Cotton is particularly problematic because it is hydrophilic; it absorbs sweat and holds onto it, keeping the skin damp and soft. Damp skin is far more susceptible to friction and “road rash” in the groin area. In contrast, high-quality cycling shorts are made from synthetic blends like Lycra, Spandex, or Polyester. These materials are hydrophobic, meaning they push moisture away from the skin to the outer layer of the fabric where it can evaporate. This keeps the skin dry and maintains its structural integrity, significantly reducing the risk of chafing.
Furthermore, consider the density of the chamois. For short commutes, a thin, breathable pad is sufficient. However, for rides exceeding three hours, a high-density foam or a multi-layered gel pad is necessary to prevent the “bottoming out” effect, where the padding compresses completely, leaving you sitting on the hard plastic shell of the saddle. If you find that even the best shorts are causing irritation, ensure you are using a chamois cream that is specifically formulated for cycling; these are thicker than standard lotions and provide a long-lasting lubricated barrier that prevents skin-on-skin or skin-on-fabric friction.
Measuring Your Sit Bones for a Precision Fit
To truly eliminate crotch pain, you must move beyond trial and error and understand your specific anatomy. Your sit bones, known as the ischial tuberosities, are the two hard points at the bottom of your pelvis. The goal of any saddle is to support these bones exclusively, leaving the soft tissues in the middle untouched. If you are using a saddle that is narrower than the distance between your sit bones, you will naturally tilt your pelvis or slide forward, leading to the very pressure you are trying to avoid.
You can measure your sit bone width at home using a simple method involving a piece of corrugated cardboard. Place a piece of cardboard on a hard, flat surface (like a wooden chair or a bench). Sit on the cardboard and lean forward slightly to mimic your riding position, putting your full weight down. When you stand up, you will see two distinct indentations where your sit bones pressed into the cardboard. Measure the distance between the centers of these two indentations in millimeters.
Once you have this measurement, you can match it to saddle specifications. Most manufacturers provide a width chart. Generally, you want a saddle that is slightly wider than your measurement to ensure full support. For example, if your sit bones are 120mm apart, a 135mm to 145mm saddle is typically ideal. This precision ensures that the weight is distributed across the skeletal structure of the pelvis rather than the nerves and blood vessels of the perineum, effectively eliminating the “hot spots” that lead to numbness and pain.
Managing Pelvic Tilt and Core Stability
Comfort isn’t just about the gear you use; it’s about how you move on the bike. A common cause of crotch pain is “anterior pelvic tilt,” where the pelvis rotates forward, tipping the top of the pelvis toward the handlebars. This rotation shifts the rider’s weight off the sit bones and directly onto the soft tissues of the perineum. This often happens as a rider becomes fatigued and their core muscles stop supporting their upper body, causing them to “slump” into the saddle.
To combat this, focus on maintaining a neutral pelvic position. Imagine your pelvis as a bowl of water; you want to keep that bowl level so the water doesn’t spill forward. This requires active engagement of the transverse abdominis and the lower back muscles. By keeping your core tight, you create a stable platform that allows your legs to power the pedals without shifting your center of gravity forward onto the nose of the saddle.
Practicing a “pelvic rock” while riding can also help. Every few miles, consciously tilt your pelvis back and forth to find the center point where the pressure is most evenly distributed across the rear of the saddle. If you feel pressure building in the front, it is a signal that your core has relaxed and your pelvis has tilted. Re-engaging your abs and lifting your chest will shift that weight back to the ischial tuberosities, providing immediate relief and preventing long-term inflammation of the pelvic floor.
Adapting Gear for Different Terrains and Bike Types
The pressure points on your crotch change depending on the type of bike you are riding and the terrain you are covering. A road bike, with its aggressive, leaned-forward geometry, puts more weight on the front of the saddle. In contrast, a hybrid or cruiser bike keeps the rider upright, shifting the weight almost entirely to the rear. A saddle that works for a commuter bike will likely be far too wide and cumbersome for a road bike, potentially causing thigh chafing and inefficiency.
For mountain bikers, the challenge is different. The constant movement—shifting weight from back to front to navigate steep descents and climbs—means the saddle needs to be narrower to allow for maximum leg clearance. Furthermore, the jarring impact of rocks and roots can cause “micro-trauma” to the pelvic region. This is where a dropper post becomes a tool for comfort, not just performance. By dropping the saddle out of the way during technical descents, you remove all pressure from the crotch and allow your body to act as the primary suspension system.
If you ride a mix of terrains, you might consider having different saddles for different bikes. For long-distance touring, look for saddles with a wider “wing” to support the pelvis during 8-hour days. For sprinting or racing, a firmer, narrower saddle reduces friction and improves power transfer. The edge case here is the “mixed-use” rider who uses one bike for everything; in this scenario, a medium-width saddle with a significant center cutout and a suspension seat post can provide a versatile compromise that absorbs road buzz and reduces perineal pressure across various riding styles.
Post-Ride Recovery and Hygiene Management
Preventing crotch pain doesn’t end when you stop pedaling. The environment created by padded shorts—heat, moisture, and friction—is a breeding ground for bacteria and fungi. If not managed, this can lead to “saddle sores,” which are infected hair follicles or small abscesses that can make riding impossible for weeks. The most important post-ride habit is to remove your cycling kit immediately after your ride. Staying in damp, salt-crusted Lycra for even an hour after a ride can irritate the skin and invite infection.
Shower as soon as possible using a mild, pH-balanced soap. Avoid harsh scrubs in the perineal area, as the skin is already sensitized from the friction of the ride. If you notice small red bumps or “hot spots,” apply an antibacterial ointment or a soothing zinc-oxide cream to help the skin recover. For those prone to chronic saddle sores, using a diluted tea tree oil solution or a specialized antimicrobial wash can help keep the skin clear.
FAQ
What causes crotch pain on a bike?
Crotch pain while cycling is often caused by too much pressure on sensitive nerves and soft tissues. Common culprits include an improper bike fit, lack of padding, and poor riding posture.
Should my saddle be level when riding?
Most riders do best with a level saddle as a starting point. However, some tilt the nose up or down slightly to find the most comfortable angle – usually within 5 degrees of level.
How often should I get out of the saddle when riding?
Experts recommend getting out of the saddle for 30 seconds every 10-15 minutes when riding long distances. This allows blood flow to return to compressed tissues.
What kind of bike shorts help prevent crotch pain?
Bike shorts with a high-density foam pad or gel inserts provide extra cushioning to prevent crotch pressure and discomfort. Chamois cream inside the shorts can also reduce friction and hot spots.
Should I lean forward or sit upright to prevent saddle pain?
Maintain a straight back with your weight centered evenly across both sit bones. Avoid rounding your shoulders. An upright posture prevents excessive pressure on your crotch while allowing you to breathe deeply.
Related posts:
 Managing Hip Pain from Sitting
 PHA Bodyweight Workout: Efficient Fitness Anywhere, Anytime
 Common Kegel Exercise Mistakes: Perfecting Your Pelvic Floor Workouts
 SoulCycle’s Home Bike That Brings Studio Energy to Your Living Room
 Cyclist’s Guide to Preventing Saddle Sores
 How to Rock Bike Shorts
 Tension Headaches and Pelvic Floor
Cyclist’s Guide to Preventing Saddle Sores