
Starting a compost pile is one of the most rewarding steps you can take toward a more sustainable household. Not only does composting divert significant waste from landfills, but it also creates nutrient-rich material that transforms garden soil. Whether you have a sprawling backyard or a small apartment balcony, there’s a composting method that will work for your space and lifestyle.
What Is Composting and Why It Matters
Composting is the natural process of decomposition that transforms organic materials into a dark, crumbly, earthy-smelling substance called humus. This happens continuously in forests and grasslands as leaves fall and plants die, breaking down through the activity of microorganisms, insects, and fungi. Home composting simply accelerates and manages this process.
The environmental benefits are substantial. Food scraps and yard waste make up roughly 30% of what households send to landfills. In landfills, this organic matter decomposes without oxygen, producing methane—a greenhouse gas far more potent than carbon dioxide. When you compost, decomposition happens aerobically (with oxygen), dramatically reducing those emissions while creating a valuable resource.
For gardeners, finished compost is often called “black gold” for good reason. It improves soil structure, helps sandy soil retain moisture, helps clay soil drain better, and provides slow-release nutrients that plants can actually use. Unlike synthetic fertilizers, compost feeds the soil ecosystem, supporting beneficial bacteria, fungi, and earthworms that contribute to long-term soil health.
Understanding the Carbon to Nitrogen Ratio
Successful composting comes down to balancing two types of materials: greens and browns. This balance refers to the carbon-to-nitrogen ratio, which ideally sits around 30 parts carbon to 1 part nitrogen by weight. In practice, this translates to adding roughly two to three parts brown materials for every one part green materials.
Brown materials are carbon-rich and include dried leaves, straw, sawdust, shredded paper, cardboard, and wood chips. These materials provide energy for the microorganisms doing the decomposition work. They also add bulk and create air pockets that keep the pile oxygenated. Brown materials tend to decompose slowly on their own.
Green materials are nitrogen-rich and include fruit and vegetable scraps, coffee grounds, fresh grass clippings, and plant trimmings. Nitrogen is essential for microbial growth and reproduction. Without enough green materials, a compost pile will sit cold and inactive for months. With too many greens, the pile can become slimy and develop unpleasant odors.
Coffee grounds deserve special mention—they’re technically brown in color but chemically green because of their nitrogen content. They’re an excellent addition to compost piles, especially for urban composters who may have limited access to other nitrogen sources. Many coffee shops will gladly give away their spent grounds for free.
Choosing the Right Composting Method
The best composting system is the one you’ll actually use consistently. Consider your available space, how much organic waste you generate, and how quickly you want finished compost.
Open piles or bins work well for homeowners with yard space. You can simply stack materials in a corner, or contain them with wire mesh, wooden pallets, or a plastic bin with ventilation holes. This method is inexpensive and can handle large volumes of material. The main drawbacks are slower decomposition (typically six months to a year) and potential attractiveness to pests if food scraps aren’t buried properly.
Tumbling composters are enclosed drums mounted on a frame that allows easy turning. These speed up decomposition significantly—often producing finished compost in as little as six to eight weeks under ideal conditions. They’re more expensive but solve the problem of turning a pile manually. They’re also fully enclosed, which deters pests.
Worm composting (vermicomposting) is ideal for apartment dwellers or anyone with limited outdoor space. Special worms—typically red wigglers (Eisenia fetida)—consume food scraps and produce castings that are exceptionally rich in nutrients and beneficial microorganisms. A properly maintained worm bin has no odor and can fit under a kitchen sink or on a balcony. This method requires more attention to what you feed the worms and maintaining proper moisture levels.
Bokashi composting is a fermentation method that can handle all food waste, including meat and dairy, which other methods can’t process effectively. You layer food scraps with bran inoculated with beneficial microorganisms in an airtight bucket. After two weeks of fermentation, the material is buried in soil or added to a traditional compost pile to finish breaking down. Bokashi is particularly useful as a preprocessing step for difficult materials.
Materials to Include and What to Avoid
Knowing what goes into a compost pile—and what stays out—is crucial for success. A good rule of thumb: if it was recently alive and comes from a plant, it’s probably compostable. But there are important exceptions.
Always compost: Fruit and vegetable scraps, coffee grounds and paper filters, tea bags (remove staples), eggshells, nutshells, bread and grains, yard trimmings, leaves, grass clippings, shredded paper and cardboard, sawdust from untreated wood, hair and fur, and dryer lint from natural fibers.
Compost with caution: Citrus peels decompose slowly and should be chopped small. Onions and garlic in large quantities may repel worms in vermicomposting systems. Pine needles are acidic and decompose slowly; use them sparingly unless you need to lower soil pH. Diseased plants should not be composted unless you’re confident your pile will reach temperatures high enough to kill pathogens (131-170°F for several days).
Never compost: Meat, fish, bones, and dairy products attract pests and create odors in standard composting systems (though they can work in bokashi). Pet waste from cats and dogs can contain parasites dangerous to humans. Coal or charcoal ash contains substances toxic to plants. Glossy or colored paper may contain heavy metals in inks. Synthetic fabrics, plastics, and anything treated with persistent herbicides should all stay out.
When in doubt, ask yourself: could this material introduce toxins, pathogens, or persistent chemicals into my garden? If the answer is uncertain, it’s better to keep it out of your compost.
Step-by-Step Guide to Starting Your First Pile
Starting a compost pile is simpler than most people expect. Choose a location that’s convenient to access year-round—composting shouldn’t require a special trip. A spot with partial shade helps prevent the pile from drying out completely in summer, while some sun exposure can help maintain warmth in cooler months.
Begin with a layer of coarse brown materials like small twigs or straw. This base layer improves drainage and airflow at the bottom of the pile. Add a layer of green materials—your food scraps or fresh grass clippings—then cover with another layer of browns. Continue layering until you’ve added all your available materials, always finishing with a brown layer on top to deter flies and mask any food odors.
Water each layer as you build. The pile should feel like a wrung-out sponge—moist but not dripping. If you squeeze a handful and water runs out, it’s too wet. If it feels dusty and dry, add more water. Moisture is essential for microbial activity, but too much water displaces oxygen and leads to anaerobic conditions and odors.
Size matters for hot composting. A pile needs to be at least 3 feet in each dimension to insulate the center enough for heat to build up. Smaller piles will still decompose, just more slowly. If you’re using a bin or tumbler, follow the manufacturer’s recommendations for filling.
Maintaining Your Compost Pile
A compost pile thrives on benign neglect, but a little attention goes a long way toward faster results. The two main maintenance tasks are turning and monitoring moisture.
Turning introduces fresh oxygen into the pile, which reinvigorates aerobic decomposition. Every time you turn a hot compost pile, you’ll notice the temperature spike again as microbes respond to the new oxygen supply. For fastest results, turn weekly. But even turning once a month produces compost much faster than a completely neglected pile. A compost fork or aerator tool makes this job easier, and tumbling composters eliminate the need for manual turning entirely.
Monitor moisture throughout the season. In hot, dry weather, a pile can lose moisture rapidly. Cover open piles with a tarp or carpet remnant to retain moisture. In rainy climates, the same cover prevents the pile from becoming waterlogged. If your pile does get too wet, add more brown materials and turn it to introduce air and absorb excess moisture.
Temperature is a useful indicator of activity. An active hot compost pile will reach 100-160°F in the center. You can feel this warmth by hand, or use a compost thermometer for precision. If the pile never heats up, it likely needs more nitrogen, more water, or better aeration. Troubleshooting is straightforward: adjust the balance of materials and moisture, then wait a week and check again.
Chop larger materials into smaller pieces to speed decomposition. A whole watermelon will take months to break down; chopped into chunks, it might disappear in weeks. Running leaves over with a lawn mower, chopping kitchen scraps, and shredding paper all increase surface area for microbes to work on.
Harvesting and Using Finished Compost
Compost is finished when it’s dark brown to black, crumbly, and has an earthy smell. You shouldn’t be able to recognize the original materials, though some stubborn items like avocado pits or woody stems may still be visible. These can be pulled out and returned to an active pile for further breakdown.
The simplest harvesting method is to stop adding fresh materials to one pile while starting a new pile with incoming waste. After a few months, the original pile will finish decomposing. With a single bin, you can lift off the bin structure, set it up in a new location, and shovel the less-decomposed outer material into the new bin. The finished material from the center and bottom can go straight to the garden.
Sifting through a half-inch mesh screen removes larger particles and creates a uniform product ideal for potting mixes and top-dressing lawns. The oversize material goes back into the active pile. Sifting is optional—un-sifted compost works perfectly well for most garden applications.
Use finished compost as a soil amendment by digging it into garden beds before planting. A layer of one to two inches worked into the top six inches of soil provides significant benefits. As a mulch, compost helps retain moisture and suppress weeds while slowly releasing nutrients. For container plants, mix compost into potting soil at up to one-third by volume. Compost tea—made by steeping compost in water—creates a liquid fertilizer for foliar feeding or soil drenches.
Don’t worry about getting every bit of material perfectly finished. Slightly unfinished compost is still beneficial and will continue breaking down in the soil. The goal is a practical soil amendment, not a laboratory-grade product.
Troubleshooting Common Problems
Most compost problems have simple solutions. A pile that smells bad is usually too wet or has too many green materials. Add brown materials, turn the pile to introduce air, and cover it to prevent additional moisture. Ammonia odors specifically indicate excess nitrogen—add more carbon materials and turn.
A pile that’s not decomposing may be too dry, too small, or lacking nitrogen. Check moisture first—dry piles are common in sheltered locations. Add water when turning. If moisture seems fine, add more green materials or even a nitrogen fertilizer to jumpstart microbial activity. Small piles may not heat up well; combine multiple small piles or add more material.
Pests generally aren’t a problem with properly managed compost. Fruit flies can be discouraged by always burying food scraps under a layer of brown materials. If rodents become an issue, switch to an enclosed bin or tumbler and avoid adding grains and cooked foods that attract them. Never add meat, dairy, or oily foods to open piles.
A pile that was hot and has now cooled down isn’t failing—it’s progressing. Temperature naturally declines as easily decomposed materials are consumed. If you want to maintain heat, turn the pile and add fresh nitrogen-rich materials. Otherwise, accept that the active heating phase is done and the pile will continue curing at ambient temperatures.
Composting in Apartments and Small Spaces
Living without a yard doesn’t mean composting is off the table. Urban dwellers have several effective options that fit in kitchens, on balconies, or even under sinks. The key is matching your method to your waste volume and how much involvement you want.
Countertop bokashi bins handle the widest range of food waste in the smallest footprint. These airtight containers use beneficial microorganisms to ferment scraps through an anaerobic process. Because fermentation preserves rather than decomposes, there’s no odor when the bin is sealed, and you can include meat, dairy, and cooked foods that would cause problems in other systems. A standard bokashi bin holds about five gallons and fits inside a cabinet. Every time you add scraps, sprinkle a small amount of inoculated bran and press the material down to remove air pockets. When the bin fills—typically every two to four weeks for a household—the fermented material needs to finish decomposing in soil or a traditional compost pile. Many urban gardeners bury it directly in raised beds or donate it to community gardens. The liquid that drains from the spigot makes an excellent fertilizer when diluted ten to one with water.
Electric composters have gained popularity for their speed and convenience. These countertop appliances use heat and mechanical agitation to dehydrate and break down food scraps in as little as four hours. The output isn’t true compost—it’s more accurately a dried, partially decomposed material that needs to cure in soil before it becomes fully biologically active. Electric composters work well for people who want zero involvement beyond pressing a button, but they require electricity and represent a significant upfront investment compared to other methods.
Community composting programs offer another path for apartment residents. Many cities now provide drop-off locations at farmers markets, community gardens, or dedicated composting facilities. Some programs accept a wider range of materials than home systems can handle, including meat, bones, and compostable plastics. Collect your scraps in a sealed container or bag in the freezer to prevent odors and fruit flies, then drop them off weekly. This approach requires minimal effort and no equipment beyond a collection container.
Indoor worm bins remain the gold standard for producing high-quality finished product in small spaces. A properly maintained worm bin produces castings richer in nutrients than standard compost, and the liquid that drains from the bin—often called worm tea—makes a potent liquid fertilizer. Red wigglers process roughly half their body weight in food each day, so a pound of worms can handle about half a pound of daily scraps. The main challenges are maintaining proper moisture, avoiding overfeeding, and keeping the bin temperature between 55 and 77°F. Worms will attempt to escape if conditions become too wet, too dry, too acidic, or too hot, so monitoring is more important than with other methods.
Advanced Techniques for Faster Decomposition
Hot composting represents the turbocharged version of standard methods, producing finished compost in as little as 18 days under optimal conditions. The process relies on building a pile large enough to retain heat, maintaining the ideal carbon-to-nitrogen ratio with precision, and turning at specific intervals to maintain oxygen levels. The Berkeley method, developed at the University of California, provides a reliable framework: build a pile at least four feet in each dimension, turn every other day for two weeks, then let it cure. Done correctly, internal temperatures reach 140-160°F, hot enough to kill most weed seeds and pathogens.
Achieving those temperatures requires attention to detail that goes beyond casual composting. Chop all materials to under two inches—smaller pieces decompose faster because microbes have more surface area to colonize. Mix green and brown materials thoroughly rather than layering them, ensuring uniform nitrogen distribution. Check moisture by the squeeze test throughout the pile, not just in one spot. A compost thermometer helps track whether temperatures are reaching the target range. If temperatures plateau below 130°F, the pile likely needs more nitrogen or water. If temperatures exceed 165°F, beneficial organisms begin to die, and you should turn the pile to release excess heat.
Compost charging involves inoculating your pile with fungal spores, beneficial bacteria, or mycorrhizal fungi to enhance the biological activity of the finished product. While compost naturally develops these organisms over time, adding them intentionally can increase their populations. Finished high-quality compost, forest soil, or commercial inoculants all work as sources. Mix the inoculant into the pile during construction or add it during turning. This approach is particularly valuable if you’re making compost for specific purposes—mycorrhizal-rich compost for perennial plantings, or bacterially-dominant compost for annual vegetables.
Static pile composting offers a middle ground between the labor-intensive hot composting and the slow passive approach. By building a pile with careful attention to the C:N ratio, moisture, and particle size, then adding ventilation pipes or aeration cones at the base, you can achieve moderately high temperatures without the need for regular turning. Air naturally convects upward through the pile as warm air rises, pulling fresh oxygen in from the bottom. This method takes longer than actively turned hot compost—typically three to four months—but requires almost no maintenance after the initial setup.
Winter composting in cold climates benefits from insulation strategies that extend the active season. Surrounding a pile with straw bales, stacking bags of leaves around the perimeter, or covering with a thick tarp all help retain heat. In regions with harsh winters, decomposition may slow dramatically or stop entirely, but the pile will reactivate when temperatures rise. Some dedicated composters in cold climates maintain active piles year-round by building them inside insulated bins in garages or sheds, using the heat from decomposition itself to keep the process going.
Compost Tea and Extracts: Liquid Fertilizer from Your Pile
Compost tea transforms the nutrients and beneficial microorganisms in finished compost into a liquid form that plants can absorb rapidly through both roots and foliage. The simplest method—steeping compost in water for several days—creates a nutrient-rich brew, though opinions differ on whether aerated or non-aerated methods produce better results.
Non-aerated compost tea is straightforward: fill a burlap sack or old pillowcase with finished compost, suspend it in a bucket of water for three to seven days, then dilute the resulting liquid and apply it to plants. This method extracts soluble nutrients and some microorganisms, though the anaerobic conditions that develop may favor less beneficial organisms. Non-aerated tea works well as a soil drench but isn’t recommended for foliar application because anaerobic bacteria can potentially harm plant surfaces.
Aerated compost tea uses an aquarium pump or similar air source to maintain oxygen levels during brewing. This approach favors aerobic bacteria and fungi, theoretically producing a more biologically active product. Typical brewing time is 24 to 48 hours with constant aeration. Many practitioners add microbial food sources—molasses, kelp meal, fish hydrolysate—to encourage rapid reproduction of beneficial organisms. The resulting tea should smell earthy and pleasant, never rotten or foul. Use aerated tea within a few hours of brewing while microbial populations are at their peak.
Safety considerations matter with both methods. Never use compost made from pet waste or manure from carnivorous animals in tea destined for edible crops, as pathogens can persist in liquid extracts. If your compost didn’t reach high temperatures during decomposition, assume it may contain pathogens and avoid using it for tea on vegetables. Well-made hot compost that sustained temperatures above 131°F for several days is the safest choice for tea production.
Compost extract offers a simpler alternative focused on soluble nutrients rather than microbial populations. Mix finished compost with water at about one part compost to five parts water, stir well, and use immediately or within a day. Extracts provide a quick nutrient boost without the complexity of brewing. They work well as a soil drench for transplants, seedlings, or any plants showing signs of nutrient deficiency.
Seasonal Rhythms: Working with Natural Cycles
Composting follows seasonal patterns whether you plan for them or not. Understanding these cycles helps you work with natural processes rather than against them, maximizing efficiency throughout the year.
Spring brings abundant green materials as lawns start growing and garden cleanup generates fresh plant matter. This is often when nitrogen availability peaks, making it easier to build hot piles. If you’ve been adding to a pile all winter, spring is the time to turn it and let the warming weather jumpstart decomposition. Save some of those fall leaves you stockpiled to balance all the fresh greens coming available now.
Summer offers the fastest decomposition rates thanks to warm temperatures that keep microbial activity high. The main challenge is moisture management—piles can dry out rapidly during hot spells. Check moisture weekly and water as needed, ideally in the morning so the moisture has time to absorb before evaporating. Summer is also when fruit flies and other insects are most active, so bury food scraps promptly and maintain a good brown layer on top.
Fall provides the year’s most abundant carbon source: fallen leaves. This is the time to stockpile browns for the coming months. Shred leaves with a lawn mower or shredder to reduce their volume and speed decomposition. Store them in bags, bins, or a dedicated leaf pile near your compost area. A cubic yard of loose leaves compresses to about a third that volume when shredded. The leaves you collect now will balance the kitchen scraps you’ll generate all winter and spring.
Winter slows decomposition dramatically in cold climates, but the process doesn’t stop entirely if you’ve built a sufficiently large, well-insulated pile. More importantly, the freeze-thaw cycles that occur at the edges of the pile help break down cell structures in plant material, essentially doing some of the decomposition work mechanically. Keep adding materials throughout winter even if nothing seems to be happening—you’re building the pile that will burst into activity when spring arrives.
Timing your compost production to your garden’s needs improves both systems. Plan to have finished compost ready for spring bed preparation by stopping additions to one pile in late summer or early fall the previous year. Start a new pile for ongoing waste while the first one cures. This staged approach—having multiple piles at different stages—creates a continuous supply once you’ve been composting for a year or two.
Using Compost for Specific Garden Needs
Finished compost isn’t a one-size-fits-all product. How you use it—and even how you make it—can be tailored to specific plants, soil conditions, and garden situations.
For vegetable gardens, compost provides the consistent, balanced nutrition that heavy-feeding crops like tomatoes, squash, and corn demand. Work two to three inches of compost into the top six inches of soil before planting each spring. For established perennial vegetables like asparagus and rhubarb, top-dress with an inch of compost each spring, keeping it a few inches away from crowns to prevent rot. Leafy greens respond well to compost tea applied as a foliar spray every two to three weeks during the growing season.
For established trees and shrubs, surface application works better than incorporation, which can damage surface roots. Spread compost in a wide circle extending from the drip line outward, one to two inches deep. This mimics the natural process of leaf litter decomposition that feeds trees in forest ecosystems. Avoid piling compost against trunks or stems, which can encourage rot and pest problems. Apply in spring or fall when roots are actively growing.
For lawn care, screen your compost through a quarter-inch mesh to create a fine material that spreads easily. Apply as a top-dressing after aeration, raking it into the holes to improve soil structure deep in the root zone. A quarter-inch layer is sufficient—more can smother grass. Lawns benefit most from compost applied in fall, when cool temperatures and consistent moisture allow nutrients to integrate before the next growing season.
For container plants, blend compost with other ingredients rather than using it straight. Pure compost holds too much moisture for most containers and doesn’t provide adequate drainage. A mix of one-third compost, one-third coir or peat moss, and one-third perlite or vermiculite creates a balanced growing medium. For acid-loving plants like blueberries and azaleas, use partially decomposed pine needles or oak leaves in your compost to help lower pH.
For seed starting, finished compost must be fully decomposed and screened finely. Even then, it’s best mixed with other materials because the nutrient levels in pure compost can burn delicate seedlings. A blend of mature compost, vermiculite, and fine coir at roughly equal proportions works for most seeds. Some gardeners prefer sterilizing the mix by baking it in an oven at 180°F for 30 minutes to kill any damping-off fungi, though this also kills beneficial organisms.
Expanding Your System: Multiple Bins and Batch Processing
Single-bin systems work fine for small households, but anyone generating substantial organic waste benefits from a multi-bin setup. The classic three-bin system—one active bin for fresh additions, one bin finishing decomposition, and one bin storing finished or nearly finished compost—creates a continuous pipeline that matches the rhythm of waste generation.
Building multiple bins from pallets, wire mesh, or lumber costs far less than buying multiple commercial units. Position bins side by side so you can easily turn material from one into the next. A three-bin system also lets you use the batch method: fill one bin completely in a short period with carefully layered, properly moistened materials, then let it cook without additions. Meanwhile, start filling the second bin. By the time the second bin fills, the first has finished or nearly finished.
The batch method produces more consistent compost than continuous addition because all material decomposes under similar conditions for similar durations. It also eliminates the problem of finished compost contaminated with fresh food scraps—the material in a batch bin all reaches the same stage of decomposition together.
Capacity planning helps you size your system appropriately. A typical household generates one to two cubic yards of compostable material annually—kitchen scraps, yard waste, and paper products combined. That volume reduces by half to two-thirds during decomposition. Plan for about one cubic yard of bin space per person in the household, slightly more if you generate substantial yard waste. It’s better to have too much capacity than too little; an overfilled bin doesn’t function well.
Leaf mold bins deserve consideration alongside traditional compost. Leaves decomposed separately—without added nitrogen—create a distinctive product called leaf mold, which excels at moisture retention and soil structure improvement. A simple wire cylinder filled with fall leaves produces usable leaf mold in one to two years with no maintenance. It’s not as nutrient-rich as compost, but it makes an excellent mulch for woodland plants, a component of potting mixes, and a soil amendment for moisture-loving plants. If you have abundant leaves and limited nitrogen sources, this approach makes better use of your carbon materials than trying to balance them all in a hot compost pile.
Integrated systems combine multiple methods to handle different waste streams. A typical setup might include: a kitchen countertop collector for daily scraps, a bokashi bucket for meat and dairy waste, a worm bin for fruit and vegetable trimmings, and an outdoor bin for yard waste and the output from the other systems. This layered approach handles almost any organic material a household produces while creating multiple finished products with different characteristics for different garden uses.
Frequently Asked Questions About Composting
How long does it take to make compost?
The timeline varies dramatically based on method and management. A hot compost pile that’s turned regularly and has optimal moisture and material balance can produce finished compost in two to three months. A passive pile that’s never turned might take a year or more. Vermicomposting typically takes three to six months. Temperature matters too—composting slows significantly in winter in cold climates. The good news is that even slow compost eventually finishes.
Can I compost in winter?
Yes, though the process slows or stops when temperatures drop below freezing. Continue adding materials to your pile throughout winter. The freeze-thaw cycles actually help break down cell structures in plant materials, so when spring arrives, decomposition accelerates. In very cold climates, insulating your pile with straw bales or a thick layer of leaves can help maintain some activity through winter months.
Do I need to add compost starters or activators?
Generally, no. The microorganisms responsible for decomposition are already present on the surfaces of the materials you’re composting. Adding garden soil, finished compost, or even a shovelful of natural soil introduces plenty of decomposer organisms. Commercial activators may speed the initial startup slightly, but they’re rarely necessary for successful composting. Save your money and simply add a handful of healthy soil from your yard.
Why does my compost pile attract bugs?
Most insects in a compost pile are beneficial and part of the decomposition process. Sow bugs, pill bugs, centipedes, beetles, and various larvae all help break down organic matter. Fruit flies can become a nuisance if food scraps are left exposed on the surface—always bury fresh additions under brown materials. If you see large numbers of flies or maggots, you may have added meat or dairy, which should be removed and disposed of differently.
Can I put weeds in my compost pile?
It depends on the weeds and your composting method. Annual weeds that haven’t gone to seed are fine to add freely. Perennial weeds with vigorous root systems like bindweed or quackgrass can survive composting and re-sprout in your garden—these are better disposed of or dried thoroughly before composting. Weeds that have gone to seed require a hot compost pile (131°F or higher sustained for several days) to kill the seeds. If your pile doesn’t reliably get that hot, keep seedy weeds out.
Related posts:
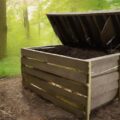 The Best Compost Bins for Eco-Friendly Waste Management
 Starbucks’ Surprising Pepper Nitro Jerky
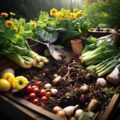 Composting Made Easy: The Best Foods to Include in Your Compost Pile
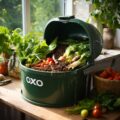 OXO Compost Bin Review
OXO Compost Bin Review
OXO Compost Bin Review
 What to Do With Vegetable Scraps So They Don’t Go To Waste
 Inedible Food Scraps You Didn’t Know You Could Eat
 Common Composting Mistakes and How to Avoid Them