
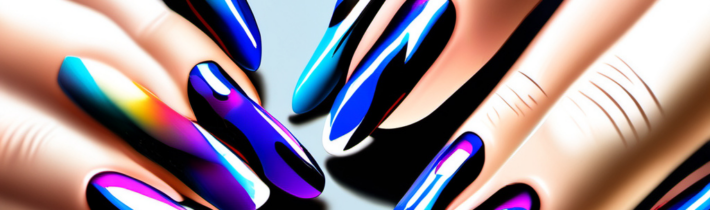
For many, the world of nail art feels like a gated community, accessible only to those with the steady hands of a surgeon and the patience of a monk. We gaze at intricate floral patterns and geometric masterpieces on social media, then look down at our own shaky attempts and wonder if we should just stick to a single coat of beige. However, there is a technique that defies the need for perfection, a method so inherently forgiving that it actually looks better when it is slightly irregular. This is the brush stroke nail art technique, often referred to as the dry brush method, and it is the ultimate equalizer in the world of beauty.
The beauty of the brush stroke technique lies in its organic nature. Unlike traditional nail art that requires crisp lines or perfectly symmetrical shapes, this style thrives on texture, transparency, and the visible path of the bristles. It mimics the look of an abstract canvas, allowing you to layer colors in a way that creates depth and movement without the stress of precision. Whether you are a seasoned DIY enthusiast or someone who has never picked up a detailing brush, this technique offers a path to professional-looking results that celebrate the unique touch of the artist. In this guide, we will explore the nuances of this method, from the essential tools to the subtle movements that transform a simple manicure into a work of wearable art.
Understanding the Philosophy of the Brush Stroke
Before diving into the physical application, it is helpful to understand why the brush stroke technique is so effective. In traditional painting, the brush stroke is a signature—a record of the artist’s movement and pressure. In nail art, we often try to hide these marks, aiming for a finish so smooth it looks like plastic. The brush stroke technique flips this narrative. It invites the texture of the polish to be the star of the show. By using a nearly dry brush, you create wispy, feathered edges that allow the colors underneath to peek through.
This method is compassionate toward the beginner because there are no mistakes, only layers. If a stroke is too thick, you can wait for it to dry and layer a thinner, contrasting color over it. If the placement feels off, the abstract nature of the design allows you to add more strokes until the composition feels balanced. It is a meditative process that encourages experimentation. Instead of holding your breath to keep your hand still, you are encouraged to move with a certain level of intentional randomness. This shift in mindset—from perfectionism to expressionism—is what makes this technique a ‘genius’ hack for anyone looking to elevate their self-care routine.
The Essential Toolkit for Abstract Artistry
While you can achieve a basic brush stroke look with the bottles already in your collection, a few specific tools will make the process significantly easier and the results more refined. The most important tool is, of course, the brush. While the standard brush that comes inside a polish bottle works for larger strokes, a set of inexpensive nail art brushes can offer more variety. Specifically, a flat square brush and a fan brush are excellent for creating different textures. The flat brush allows for wide, confident sweeps, while the fan brush creates a series of fine, parallel lines that look like rain or grass.
Beyond brushes, you will need a non-porous palette. This could be a piece of aluminum foil, a ceramic tile, or a plastic lid. You need a space to deposit drops of polish and, more importantly, a place to wipe off the excess. Paper towels are also non-negotiable; they are the primary tool for ‘drying’ your brush before it touches your nail. Finally, ensure you have a high-quality base coat to protect your natural nail and a long-wearing top coat to seal the texture. Because this technique involves layering, a quick-dry top coat is often preferred to prevent the layers from smudging into one another if they aren’t fully set.
Mastering the Dry Brush Technique: A Step-by-Step Guide
The core of this style is the ‘dry brush’ application. To begin, apply your base coat and a solid base color. White, nude, or a very light grey are popular choices because they provide a clean canvas that makes subsequent colors pop. Once the base color is completely dry—and this is crucial—you can begin the art. Choose your first accent color. Open the bottle and wipe the brush against the neck until almost all the polish is gone. Then, take that brush to your paper towel and dab it until it leaves only a faint, streaky mark rather than a solid blob.
Now, apply the brush to your nail using light, flicking motions. You can go vertically, horizontally, or diagonally. The goal is to see the individual hairs of the brush reflected in the polish on your nail. Repeat this process with two or three more colors, overlapping them slightly. The magic happens in the overlap; where a semi-transparent blue meets a semi-transparent yellow, a hint of green will emerge, adding complexity to the design. Don’t worry about covering the entire nail. Leaving some of the base color visible creates a sense of negative space that keeps the design looking modern and intentional. Finish with a generous layer of top coat, which will smooth out the physical ridges of the polish while preserving the visual texture.
Color Theory and Layering for Maximum Impact
Choosing the right colors is perhaps the most creative part of the process. For a sophisticated, professional look, consider the ‘Rule of Three.’ Select one neutral (like gold, silver, or white), one deep tone (like navy, forest green, or burgundy), and one bright or mid-tone (like coral, mint, or lavender). This combination ensures that there is enough contrast to see the individual strokes while maintaining a cohesive aesthetic. If you want a more subtle look, try a monochromatic palette. Using three different shades of blue—from a pale sky blue to a deep midnight—creates a watery, ethereal effect that is incredibly soothing.
The order in which you layer your colors also matters. Generally, it is best to start with your darkest or most vibrant color. These ‘anchor’ the design. Then, layer your lighter or metallic colors on top. Metallics are particularly effective in the brush stroke technique because the mica particles catch the light in the ridges of the strokes, adding a three-dimensional quality to the nail. If you find the colors are blending too much and becoming muddy, it usually means your brush wasn’t ‘dry’ enough or you didn’t wait long enough between colors. Patience is the only real requirement here; give each color a minute to set before introducing the next.
Geometric vs. Organic: Finding Your Style
Once you are comfortable with the basic flicking motion, you can start to play with the directionality of your strokes to create different ‘vibes.’ For a geometric, architectural look, keep all your strokes strictly horizontal and vertical. This creates a cross-hatch pattern that resembles woven fabric or a city grid. Use a flat-edged brush for this to keep the ends of the strokes relatively square. This style looks particularly striking with high-contrast colors like black, white, and a single neon accent.
For a more organic, ‘fine art’ feel, use curved strokes and varying pressures. Start the stroke with a bit more pressure and lift the brush as you move, creating a tapered, wispy end. This mimics the look of flower petals or feathers. You can also try ‘stippling,’ which involves poking the nail with the tip of a dry brush to create a speckled, granite-like texture. Mixing these techniques—some long sweeps and some short stipples—adds a level of sophistication that makes people ask which salon you visited. The key is to experiment on one ‘accent nail’ first if you feel overwhelmed, then expand the design to the rest of your hand as your confidence grows.
Troubleshooting Common Brush Stroke Hurdles
Even the most forgiving technique can have its hiccups. The most common issue is the ‘blob.’ This happens when there is still too much liquid polish in the neck of the brush or hidden within the bristles. When you press down on the nail, the polish rushes out, creating a solid patch instead of a textured stroke. If this happens, don’t panic. You can either use a clean brush dipped in acetone to gently wipe it away (if the base coat is dry enough to withstand it) or simply wait for it to dry and turn it into a ‘feature’ by layering a different color over it.
Another common frustration is ‘dragging.’ This occurs when the previous layer of polish isn’t dry enough, and the new stroke pulls the old polish along with it, creating a smeared look. To avoid this, work in very thin layers. Because the dry brush method uses so little polish, each layer should dry almost instantly, but if you are using a thicker formula, give it an extra moment. Finally, if your finished art looks dull or ‘scratchy,’ it’s likely because you haven’t applied a top coat yet. The top coat is the ‘varnish’ that brings the painting to life, deepening the colors and adding the shine that signifies a finished manicure.
Adapting the Technique for Different Nail Shapes and Lengths
One of the reasons the brush stroke technique is a ‘genius’ choice is its versatility across different nail canvases. If you have very short nails, horizontal strokes can actually make the nail bed appear wider, while vertical strokes can create the illusion of length. For short nails, it is often best to keep the strokes smaller and more concentrated toward the tips or one side of the nail to avoid overwhelming the small surface area.
For those with long almond or coffin-shaped nails, you have a much larger playground. You can experiment with ‘gradient’ brush strokes, where the colors are more concentrated at the base and fade out toward the tip, or vice versa. The elongated shape of the nail allows for longer, more dramatic sweeps that can follow the curve of the nail edge. Regardless of your length, always remember to ‘cap the free edge.’ This means running your top coat brush along the very thickness of the tip of your nail. Because brush stroke art involves texture near the edges, capping is essential to prevent the polish from chipping or lifting prematurely.
Maintenance and Longevity of Hand-Painted Nails
You have spent time creating a masterpiece, so you naturally want it to last. The longevity of a brush stroke manicure is often better than a standard solid color because chips are much harder to spot amidst an abstract design. However, the extra layers of polish can make the manicure slightly thicker, which might lead to peeling if not cared for properly. Apply a fresh layer of top coat every two to three days to maintain the shine and provide a fresh shield against the elements.
Hydration is also key. Use cuticle oil daily; it keeps the skin around the nail soft and prevents the polish from becoming brittle. When performing household chores, especially those involving water or cleaning chemicals, wear gloves. This simple habit can double the life of your manicure. If you do get a small chip at the tip, the brush stroke technique allows for an easy fix. Simply take your ‘dry brush,’ add a few wispy strokes of one of the colors used in the design over the chip, and re-apply top coat. It will blend perfectly into the existing art, making your manicure look fresh for up to two weeks.
Creative Inspiration: Five Themes to Try This Weekend
If you are staring at your polish collection and feeling uninspired, try one of these five curated themes to get your creative juices flowing. First, the ‘Sunset Horizon’: Use a white base, then layer strokes of soft peach, vibrant orange, and a touch of deep purple at the very tips. It creates a warm, glowing effect that feels like a summer evening. Second, the ‘Industrial Slate’: Use a light grey base with strokes of charcoal, silver metallic, and a tiny hint of matte black. This look is edgy, modern, and looks fantastic with silver jewelry.
Third, try the ‘Ethereal Garden’: Start with a sheer pink base. Layer strokes of sage green, lavender, and white. This creates a soft, impressionist floral vibe that is perfect for spring. Fourth is the ‘Midnight Galaxy’: Use a navy blue base and layer strokes of royal blue, silver glitter, and a few dots of white. The dry brush technique perfectly mimics the look of nebulae and star clusters. Finally, the ‘Minimalist Earth’: On a nude base, use only two colors—terracotta and olive green. Keep the strokes sparse and concentrated on only two nails for a sophisticated, ‘quiet luxury’ aesthetic. Each of these themes utilizes the same basic movement but tells a completely different story.
Leveraging Polish Viscosity for Varied Textures
While the existing guide touches on color choice, the physical consistency—or viscosity—of your polish plays a massive role in the final aesthetic of a brush stroke design. Not all polishes are created equal when it comes to the dry brush technique. For instance, high-pigment ‘one-coat’ creams are the gold standard for creating sharp, defined striations. Because they carry a heavy load of color, even the tiniest amount left on the bristles will leave a visible, opaque mark. This is ideal for geometric looks or when you want the ‘bristle marks’ to be the focal point of the design.
Conversely, ‘jelly’ or sheer polishes offer a completely different opportunity. When used with a dry brush, jelly polishes create a watercolor-like transparency. Instead of sharp lines, you get soft, hazy washes of color that are perfect for building depth. By layering a jelly blue over a jelly yellow, you don’t just get green; you get a luminous, stained-glass effect that looks lit from within. If you encounter a polish that is too thick or ‘gloppy,’ adding a single drop of nail polish thinner (not acetone) can restore the fluidity needed for those long, elegant sweeps. On the other end of the spectrum, holographic and shimmer polishes contain tiny particles that behave differently under a dry brush. Instead of a solid line, they leave behind a trail of ‘fairy dust’ that is more scattered. Using a holographic polish as your final ‘dry’ layer adds a holographic ‘veil’ that shifts in the light without obscuring the colors beneath.
The Art of the Naked Canvas: Negative Space Brush Strokes
One of the most modern iterations of this technique is the ‘negative space’ or ‘naked nail’ look. Instead of applying a solid base color like white or nude, you apply your brush strokes directly over a clear base coat or a very sheer, skin-tone tint. This approach leans into the ‘clean girl’ aesthetic, making the art feel intentional, airy, and high-fashion. The key to mastering negative space is placement. Because the rest of the nail is bare, the eye is naturally drawn to where the color begins and ends.
Try the ‘sideways sweep’: focus your brush strokes only on the outer third of the nail, leaving the center and the cuticle area completely clear. This creates a framing effect that elongates the fingers. Another sophisticated variation is the ‘cuticle crown,’ where tiny, multidirectional strokes are concentrated near the base of the nail and fade out toward the middle. This is particularly effective for those growing out a professional manicure, as it can hide the gap between the polish and the cuticle. When working with negative space, the quality of your base coat is paramount. Since the natural nail is visible, use a ridge-filling base coat to create a smooth, glass-like surface. This ensures that the dry brush strokes don’t ‘catch’ on any natural imperfections in the nail plate, which could make the design look accidental rather than artistic.
Advanced Layering: Creating Faux-Marble and Natural Stone Effects
Beyond abstract splashes, the brush stroke technique can be used to mimic the complex patterns found in nature, specifically marble, quartz, and turquoise. To achieve a marble effect, you need to evolve the ‘flick’ into a ‘wiggle.’ Start with a white or very light grey base. Use a fine detailing brush or the very corner of a flat brush with a tiny amount of charcoal or soft grey polish. Instead of a straight line, move your hand in a shaky, irregular zig-zag motion. This creates the ‘veins’ seen in Carrara marble.
To add realism, immediately follow up with a ‘dry’ brush dipped in a clear top coat or a sheer white (often called a ‘milky’ polish). Gently swipe over the edges of your grey veins. This blurs the lines slightly, making them look like they are receding into the stone rather than sitting on top of it. For a turquoise look, use a bright teal base and create ‘matrix’ strokes using a dry brush with a mix of copper and black. The copper adds a metallic glint that mimics the pyrite often found in natural turquoise. The beauty of these stone effects is that they rely entirely on the ‘mistakes’ of the brush—the skips, the breaks in the line, and the uneven pressure are exactly what make the final result look like genuine mineral formations.
The Ergonomics of Self-Application: Mastering Your Non-Dominant Hand
The biggest hurdle for any DIY nail artist is the dreaded ‘other hand.’ We’ve all been there: the left hand looks like a masterpiece, while the right hand looks like it was painted during an earthquake. However, the brush stroke technique is uniquely suited to overcome this because it doesn’t require the fine motor control of drawing a straight line. The secret to success with your non-dominant hand is to move the nail, not the brush.
Try this: hold the brush completely still with your non-dominant hand. Rest the hand you are painting on the table, and slowly slide your finger underneath the brush. By moving your ‘good’ hand to create the stroke, you utilize the muscle memory and stability you already possess. Another tip for the non-dominant hand is to use shorter, ‘staccato’ strokes. Instead of trying to sweep across the whole nail—which requires a long, controlled arc—make three or four small ‘dabs’ or ‘ticks.’ Because this is an abstract style, these smaller marks will blend into a cohesive design once the top coat is applied. If you find your non-dominant hand is still applying too much pressure (leading to the ‘blobs’ mentioned earlier), try holding the brush further back on the handle. This naturally reduces the downward force and encourages a lighter, airier stroke.
Mixed Media Synergy: Integrating Foils, Studs, and Stamping
Once you have mastered the basic dry brush, you can treat it as a background for ‘mixed media’ nail art. Brush strokes provide a rich, textured backdrop that makes 3D elements or precision stamping pop. For example, applying gold leaf or nail foils over a dry brush design adds a layer of luxury. Wait for your brush strokes to be about 90% dry—they should feel slightly tacky to the touch. Press a small piece of gold foil onto the nail and pull it away quickly. The foil will only stick to the tackiest parts of the brush strokes, creating a distressed, ‘shabby chic’ metallic accent that looks like an expensive antique.
If you enjoy nail stamping but find it looks too ‘flat’ on a solid color, try stamping a simple geometric grid or a botanical silhouette over a multi-colored brush stroke base. The complexity of the colors underneath will show through the gaps in the stamp, giving the design an incredible sense of depth. You can also use a dotting tool to add ‘structure’ to the abstraction. After completing your strokes, add three perfectly circular dots in a vertical line near the side of the nail. The contrast between the organic, messy strokes and the perfect, mathematical dots creates a high-end ‘gallery art’ vibe. This juxtaposition is a favorite among professional technicians because it looks incredibly difficult to execute while actually being quite simple.
Transitional Finishes: Playing with Matte and High-Gloss Contrasts
One of the most overlooked ways to elevate the brush stroke technique is through the use of contrasting finishes. Most people default to a high-shine top coat, which is beautiful, but mixing matte and gloss can take the ‘texture’ narrative to a new level. Consider the ‘Velvet and Glass’ look: apply a matte top coat over your entire finished brush stroke design. Once it is completely dry, take a high-gloss top coat and, using the dry brush method, apply a few strategic sweeps over the matte surface. This creates a ‘spot-varnish’ effect where parts of the nail catch the light while others remain soft and muted.
This technique is particularly effective with darker color palettes, like navy, forest green, or black. The gloss strokes look like rain on a windowpane or ripples in a dark pond. Alternatively, you can use a matte top coat only on the base color, then apply your brush strokes using a metallic or high-shimmer polish and leave them as-is (without a final top coat). This leaves the metallic strokes physically raised and shiny against a flat background, emphasizing the ‘hand-painted’ nature of the art. Note that skipping a final top coat will reduce the longevity of the manicure, so this ‘tactile’ version is best saved for special events or weekends rather than a two-week wear.
The “Speed-Paint” Strategy for Busy Schedules
The brush stroke technique is the ultimate ’emergency’ nail art for when you have a big event but only fifteen minutes to get ready. Unlike traditional manicures that require a perfect, streak-free application of two coats of color (which can take ages to dry), the dry brush method thrives on thinness. Because you are wiping almost all the polish off the brush, the layers are incredibly thin—almost molecular. This means they dry nearly instantly.
For a ‘five-minute masterpiece,’ apply one quick coat of a sheer nude polish. While that is setting (which should take about 60 seconds), pick two contrasting colors. Do your dry brush sweeps on just the ring finger and the thumb as ‘accent nails.’ Leave the other fingers with just the sheer nude. This ‘minimalist accent’ look is a staple on fashion runways because it looks intentional and curated. Because the layers are so thin, you can apply a quick-dry top coat almost immediately without fear of the ‘smushing’ or ‘bubbling’ that happens when you try to rush a standard thick manicure. It is the only nail art technique that actually benefits from a fast, slightly hurried application, as it prevents you from overthinking the placement and keeps the strokes looking energetic and fresh.
Frequently Asked Questions
Can I use gel polish for the brush stroke technique?
Yes, you can absolutely use gel polish, but the process is slightly different. Since gel does not air-dry, you don’t have to worry about the polish drying on your brush. However, this means you must be even more intentional about wiping the brush ‘dry’ on a palette to achieve the streaky effect. You will need to cure each color layer briefly (about 10-30 seconds) to ‘set’ the strokes so they don’t bleed into the next color. The final result with gel is often very smooth and extremely durable.
What if my hands are very shaky?
The brush stroke technique is actually the best style for shaky hands! Because the design is abstract and ‘messy’ by nature, a little wobble in your stroke just adds to the unique texture of the art. To help stabilize yourself, try sitting at a table and resting both elbows on the surface. Rest the pinky finger of your painting hand on the table or on your other hand to create a ‘bridge’ that steadies the brush. Remember, there are no straight lines required here.
How do I clean my brushes between colors?
If you are using regular nail polish, you can clean your brushes by swirling them in a small cup of pure acetone and then wiping them on a lint-free wipe. Make sure the brush is completely dry of acetone before dipping it into the next color, as acetone will thin the polish and ruin the ‘dry’ effect. If you are using the same brush for similar colors (like two different shades of pink), you can often just wipe the brush very thoroughly on a paper towel until no more color comes off, rather than using a full acetone rinse.
Does this technique work on very short nails?
Absolutely. In fact, many people prefer abstract brush strokes on short nails because it adds interest without requiring the ‘real estate’ that a complex drawing would. The key for short nails is to use smaller strokes and perhaps limit your color palette to two accent colors plus a base. This prevents the nail from looking cluttered. Vertical strokes are especially flattering on shorter nails as they draw the eye upward, creating a longer appearance.
Can I use acrylic paint instead of nail polish?
Yes, many professional nail artists use high-quality acrylic craft paint for the brush stroke technique. Acrylic paint is often easier to work with because it is water-based, dries quickly, and has a very high pigment load, which is great for thin strokes. If you use acrylic paint, you must apply it over a buffed (matte) surface so it sticks, and you must seal it with a very good top coat, as acrylic paint will wash off with water if not protected. It’s a great way to practice because you can easily wipe it off with water if you don’t like the result before it dries.
Related posts:
 Stronger Nails Self-Care Tips
 Nail Polish Is Getting a Major, Nontoxic Makeover
 Holiday Glitter Nail Trends
 Fall’s Hottest Nail Polish Trends
 Drugstore Nail Kit Must-Haves
 Meditation Meets Manicures at Sundays NYC
 How to Apply Color Street Nails Like a Pro
 The Avocado Oil Nail File That’s Changing Everything