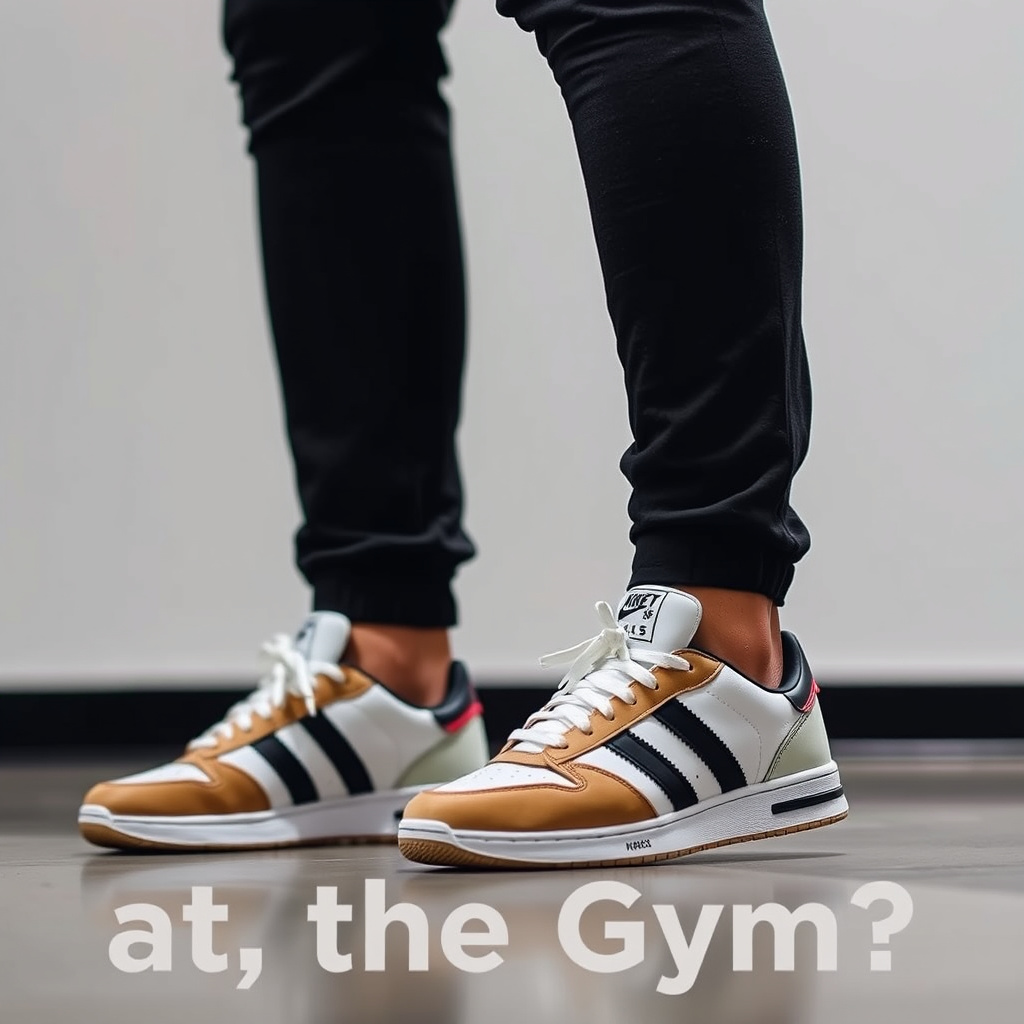
When you step onto the gym floor you may wonder whether the sneakers you wear on the street can handle the demands of a workout. The short answer is that it depends on the type of training you do and the condition of the shoes. This guide breaks down the biomechanics safety considerations and practical tips so you can decide with confidence.
Understanding the Difference Between Street and Gym Shoes
Street sneakers are built for varied surfaces such as concrete asphalt and occasional light trails. Their outsoles usually feature a flexible rubber compound that prioritizes comfort during long walks. Gym shoes on the other hand are engineered for specific movements like lateral shifts heavy lifts and rapid direction changes. The midsole density the heel counter and the outsole pattern all serve a performance purpose that street models rarely address.
Key distinctions include the level of medial support the stiffness of the forefoot and the presence of a flat stable platform for weightlifting. A running shoe may have a high stack height and a curved rocker which helps forward propulsion but reduces ground feel during a squat. A cross trainer typically offers a lower profile a wider base and a firmer heel to keep the foot locked in place.
Impact on Stability and Balance
Stability starts at the foot. When you perform a deadlift or a lunge the foot must act as a solid base. Street sneakers with soft midsoles compress under load causing the ankle to wobble. This micro instability forces the kinetic chain to compensate increasing the risk of knee valgus or lower back strain. A firm gym shoe limits compression so the force travels efficiently from the ground through the hips.
Balance drills such as single leg hops or plyometric circuits also suffer when the shoe collapses. The unpredictable give makes it harder to land softly and to maintain proprioceptive feedback. If you notice your ankles rolling inward during bodyweight movements it is a sign that the shoe is too soft for the task.
Cushioning and Shock Absorption Needs
Cushioning is not universally good. For high impact cardio like treadmill intervals a moderate amount of foam protects joints. For heavy strength work excessive cushioning dissipates the force you intend to generate. Street sneakers often use plush EVA or gel units that feel comfortable on a sidewalk but act like a sponge under a barbell. The result is a loss of power output and a feeling of sinking into the floor.
Consider the type of session. If your routine mixes running and lifting you may benefit from a hybrid shoe with a dual density midsole. If you lift exclusively a minimal drop firm platform will give you the most direct force transfer.
Traction Patterns and Floor Safety
Gym floors are typically polished rubber or hardwood. Street outsoles designed for gritty pavement can be overly aggressive causing scuff marks or even damaging the surface. Conversely a smooth street sole may slip on a dusty weight room floor. Gym shoes use a multidirectional herringbone or a flat rubber compound that grips without marking.
Test traction by performing a quick lateral shuffle. If the shoe slides more than a few centimeters you risk losing control during a clean or a box jump. Many facilities also prohibit shoes that leave black marks so a dedicated pair avoids potential fees.
Durability and Wear Considerations
Using street sneakers for heavy lifting accelerates wear on the midsole and the upper. The repetitive compression of a squat cycle breaks down foam faster than walking miles on pavement. The upper may stretch around the toe box during deep knee bends leading to a loose fit over time. Replacing a pair every few months becomes costly compared with investing in a purpose built model that lasts a year or more under gym conditions.
Inspect the outsole after each month. Look for uneven wear patterns especially on the medial edge which signals overpronation under load. Rotate two pairs if you train daily to extend lifespan.
When Street Sneakers Might Be Acceptable
There are scenarios where your everyday pair can suffice. Light mobility work yoga or bodyweight circuits that stay low impact place minimal demand on stability. A short warm up jog on a treadmill before a lifting session is also fine if you switch to a firmer shoe for the main lifts. The key is to match the shoe to the most demanding movement of the day.
If you only train once a week and the session is under thirty minutes of moderate intensity the risk of injury from a soft shoe is low. Still keep an eye on any discomfort in the knees or ankles as an early warning.
How to Test Your Current Pair Before a Session
Perform a quick three step check. First stand barefoot then in the sneakers and compare ankle alignment. Second do a bodyweight squat and note any wobble or heel lift. Third execute a single leg hop and observe landing control. If any test reveals instability swap to a gym shoe for that workout.
You can also press the midsole with your thumb. A firm resistance indicates a denser foam suitable for lifting. A deep sink suggests the shoe will compress under load.
Choosing a Dedicated Gym Shoe If You Decide to Upgrade
Look for a low drop (zero to four millimetres) a wide toe box and a flat rubber outsole. Brands that specialize in cross training often label models as training shoes rather than running shoes. Try them on with the socks you wear for lifting and walk around the store performing a few air squats. The heel should lock in without slipping and the forefoot should feel stable when you shift weight side to side.
Budget friendly options exist but prioritize construction quality over flashy aesthetics. A well made pair will protect your joints and improve performance for years.
Specialized Footwear for Distinct Training Modalities
Olympic lifting demands a rigid, elevated heel that lets the lifter achieve deep squat positions while keeping the torso upright. Shoes designed for this purpose typically feature a hard thermoplastic heel of 0.75 to 1 inch, a non‑compressible midsole, and a strap across the midfoot to lock the foot in place. Powerlifting, by contrast, favors a flat, zero‑drop platform with a wide base to maximize ground contact during the squat, bench, and deadlift. Many powerlifters choose a minimalist leather shoe or a dedicated deadlift slipper that eliminates any heel lift altogether.
CrossFit and high‑intensity interval training blend heavy lifts with sprints, box jumps, and rope climbs. A hybrid trainer for this environment usually combines a modest heel drop of 4 to 6 millimetres, a durable rubber outsole with multidirectional lugs, and a reinforced toe cap for rope work. The midsole is firmer than a running shoe but retains enough cushion to absorb repeated impact on plyometric movements.
Functional training and strongman events add odd‑object carries, sled pushes, and farmer’s walks. Here the priority shifts to lateral stability and abrasion resistance. Look for a shoe with a wide medial flare, a high‑abrasion rubber compound on the lateral sidewall, and a secure lacing system that can be tightened quickly between events. Some athletes even use a low‑profile hiking shoe with a sticky rubber sole for maximal grip on uneven surfaces.
Endurance‑focused sessions such as long treadmill runs or rowing intervals still benefit from a dedicated running shoe, but the transition to a lifting shoe should be planned. Keeping a pair of each at the gym eliminates the compromise of a single hybrid that under‑performs for both modalities.
Fit, Sizing, and Customization: Orthotics, Insoles, Heel Lifts, and Straps
Even a perfectly engineered shoe can fail if the fit does not match the athlete’s foot geometry. Measure both feet at the end of a training session when they are slightly swollen; size to the larger foot and allow a thumb’s width of space at the longest toe. A snug midfoot lock prevents the foot from sliding forward during heavy eccentrics, which is a common cause of black‑toe bruising.
Custom orthotics or over‑the‑counter insoles can be inserted into most training shoes, but the added thickness changes the effective heel height and may alter the shoe’s stability profile. Test the combination with a few warm‑up sets before committing to a full session. If the insole raises the heel more than 3 millimetres, consider a shoe with a lower stock drop to keep the overall platform height consistent.
Heel lifts are a targeted tool for athletes with limited ankle dorsiflexion. A 5‑millimetre lift can instantly improve squat depth without sacrificing the firm platform needed for force transfer. However, lifts should be viewed as a temporary aid while mobility work addresses the underlying restriction. Permanent reliance on lifts can weaken the intrinsic foot muscles over time.
Midfoot straps or Boa dial systems add a second layer of security, especially for movements that generate high shear forces such as cleans and snatches. When tightening a strap, aim for even pressure across the arch rather than a single point of compression. Uneven tension can create hot spots and alter the natural pronation‑supination cycle during dynamic lifts.
Shoe Rotation, Maintenance, and Longevity Strategies
Rotating two or three pairs of training shoes extends the life of each by allowing the midsole foam to fully decompress between sessions. A practical schedule: assign one pair to heavy lifting days, a second to mixed‑modal conditioning, and a third to pure cardio or mobility work. Label the shoes with a small piece of tape to avoid accidental crossover.
After each workout, remove the insoles and let both the shoe and the insole air dry in a well‑ventilated area. Moisture trapped in the midsole accelerates foam breakdown and can foster bacterial growth that leads to odor. Avoid direct heat sources such as radiators or hair dryers; excessive heat warps the rubber outsole and can delaminate the upper.
Clean the outsole with a stiff brush and mild soap to remove chalk, rubber dust, and floor residue that degrade traction. For leather or synthetic uppers, a damp cloth followed by a conditioner appropriate to the material preserves suppleness and prevents cracking at stress points like the toe box and heel counter.
Track wear by photographing the outsole every month. Look for asymmetrical wear patterns: excessive medial wear may indicate overpronation under load, while lateral wear can signal a narrow stance or supinated foot strike. Replace a shoe when the midsole shows permanent compression lines, the outsole tread depth falls below 2 millimetres, or the upper no longer holds the foot securely during a maximal effort lift.
Transitioning Between Shoe Types: Adaptation Period, Injury Prevention, and Periodization
Switching from a cushioned running shoe to a firm lifting platform changes the sensory input to the plantar mechanoreceptors. The nervous system needs roughly two to three weeks of progressive exposure to recalibrate proprioception. Start by wearing the new shoe for the warm‑up and the first working set only, then gradually increase the volume each session.
During the adaptation window, monitor for signs of overload: Achilles tendon soreness, plantar fascia tightness, or knee discomfort during deep flexion. If any symptom persists beyond a mild, transient ache, reduce the load or revert to the previous shoe for that movement while continuing mobility drills for the ankle and hip.
Periodize footwear alongside training cycles. In a hypertrophy block where volume is high and loads moderate, a slightly more forgiving hybrid shoe can reduce cumulative joint stress. In a strength or peaking block, transition to the most rigid platform available to maximize force transfer. This planned variation mirrors the way athletes periodize intensity and volume.
For athletes returning from lower‑extremity injury, a gradual shoe transition can be part of the rehabilitation protocol. Begin with a shoe that offers modest cushioning and a 4‑millimetre drop, then progress to a zero‑drop model as tissue tolerance improves. Coordinate the footwear progression with the physiotherapist’s load‑management plan to avoid re‑injury.
Environmental and Facility Considerations: Floor Types, Temperature, Humidity, and Home vs Commercial Gyms
Commercial gyms typically install high‑density rubber flooring that is forgiving on joints but can be slick when dust accumulates. A shoe with a flat, non‑marking rubber compound and a subtle herringbone pattern provides reliable grip without leaving scuff marks that many facilities penalize. In contrast, home gyms often use interlocking foam tiles or bare concrete. Foam tiles compress under heavy loads, so a shoe with a slightly broader base distributes pressure more evenly and reduces the feeling of sinking.
Wooden platforms used for Olympic lifting require a shoe with a hard, non‑compressible heel that does not damage the surface. Some lifters apply a thin layer of athletic tape to the heel of their lifting shoe to protect the wood while maintaining the necessary rigidity. For turf or synthetic grass areas used in sled pushes, a shoe with aggressive multidirectional lugs prevents slippage during high‑force drives.
Temperature and humidity affect both the shoe materials and the floor. Cold rubber becomes harder, reducing traction; a brief warm‑up jog in the shoes before heavy lifting can bring the outsole to optimal temperature. High humidity can make rubber floors tackier, which may increase the risk of sudden foot lock during rapid direction changes. Adjust footwear choice accordingly: a slightly more flexible forefoot can mitigate abrupt stops on a sticky surface.
If you train across multiple venues, consider a modular shoe system: a base training shoe with interchangeable heel inserts or strap kits that adapt to the specific floor and movement demands of each location. This reduces the need to own a full arsenal of specialized shoes while still addressing the key variables of each environment.
Budget vs Premium: Cost‑Per‑Use Analysis, Buying Used, Brand Technologies, and Certification Standards
A $180 pair of dedicated lifting shoes that lasts 18 months of four‑day‑per‑week training yields a cost per session of roughly $0.55. A $70 budget model that compresses after six months costs about $0.90 per session when replacement frequency is factored in. Calculating cost per use rather than sticker price often reveals that the premium option is cheaper over the long term.
Buying used can be viable if the midsole shows no permanent compression lines and the outsole tread depth exceeds 3 millimetres. Inspect the heel counter for cracks, the strap hardware for corrosion, and the insole for excessive wear. Avoid shoes that have been stored in damp conditions, as hidden foam degradation may not be visible externally.
Major brands invest in proprietary technologies: a carbon‑fiber heel plate for stiffness, a TPU midfoot cage for lockdown, or a dual‑density foam that blends a firm heel with a softer forefoot. While marketing language can be hyperbolic, independent lab tests (often published in strength‑and‑conditioning journals) provide objective data on compression set, energy return, and shear resistance. Prioritize models that cite third‑party validation.
Certification standards such as the International Powerlifting Federation (IPF) approved footwear list or USA Weightlifting (USAW) equipment guidelines define minimum heel height, sole rigidity, and strap requirements for competition. Even if you never compete, choosing a shoe that meets these standards guarantees a baseline of performance and safety that many recreational models lack.
Frequently Asked Questions
- Can I wear running shoes for weightlifting?
- Running shoes usually have a high cushioned heel and a curved rocker which reduces stability during heavy lifts. They are not ideal for squats or deadlifts.
- Do I need separate shoes for cardio and strength?
- If your program includes both high impact cardio and heavy lifting a hybrid cross trainer with dual density foam can cover both. Otherwise dedicated pairs give the best results.
- Will street sneakers damage the gym floor?
- Aggressive tread patterns can scuff rubber flooring and leave marks that many facilities charge for. A flat gym sole avoids this problem.
- How often should I replace gym shoes?
- Replace when the midsole shows permanent compression the outsole wears unevenly or the upper loses structural integrity typically every six to twelve months for regular use.
- Is it safe to do plyometrics in street sneakers?
- Plyometrics demand quick ground contact and stable landings. Soft street midsoles increase ground contact time and reduce control raising injury risk.
Related posts:
 Meghan Markle’s High Heel Hack
 Hoka Bondi 8: Maximum Cushioning Review
 White Sneaker Cleaning Hack
 Hoka Bondi 7 Sale at Urban Outfitters
 Spring Step-Up: The Season’s Freshest Sneakers for Every Workout and Lifestyle
 Step Into Compassion: The Best Vegan Shoe Brands Making Waves
 Guide to HOKA Sneakers
 Smart Shoe Shopping Tips Everyone Should Know