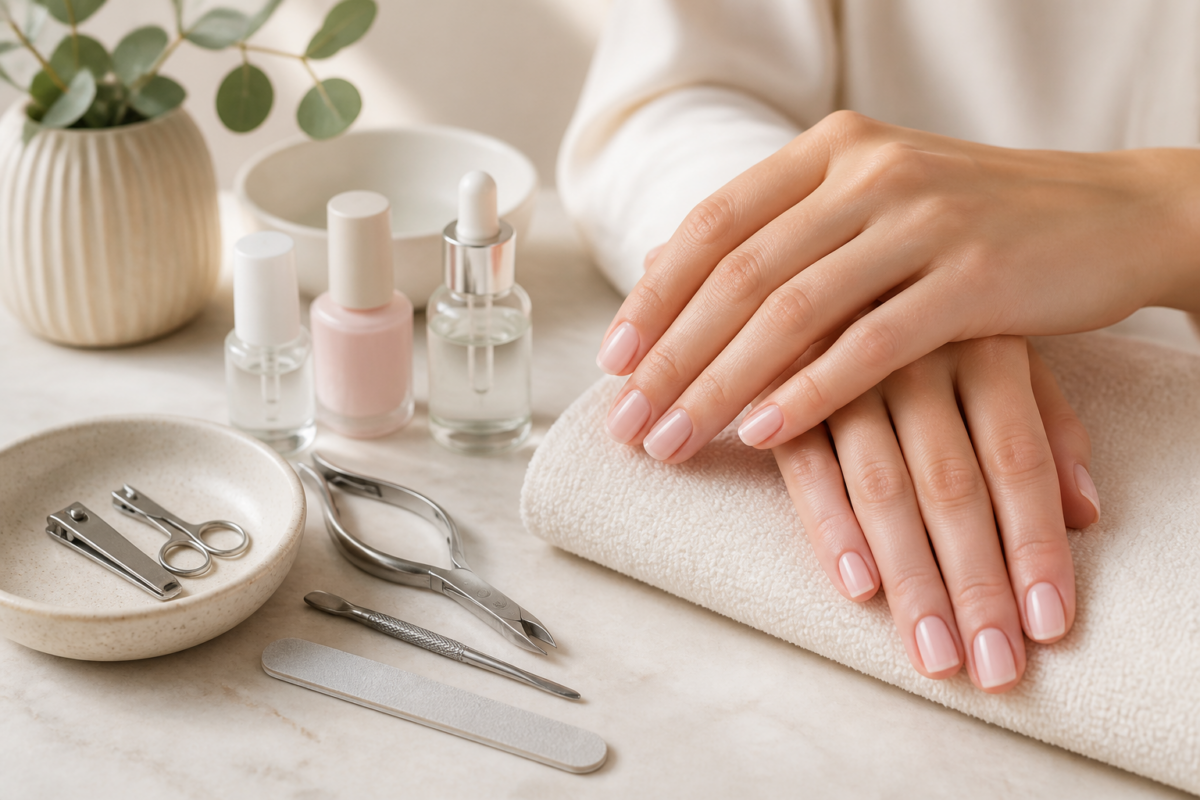
Achieving a salon-quality manicure at home is a rewarding ritual that offers more than just aesthetic appeal; it provides a moment of mindfulness and self-care in a busy schedule. However, the secret to a long-lasting, professional-looking manicure lies not in the color of the polish, but in the quality and cleanliness of your tools. A proper manicure requires a specific set of essentials to ensure nail health, cuticle care, and a flawless finish. In this guide, we will explore the fundamental tools every enthusiast needs, how to use them effectively, and how to maintain a sanitary environment to protect your nail health.
The Foundation: Preparing the Canvas with Sanitization
Before a single drop of polish touches your nails, the most critical step is sanitization. Using dirty tools can introduce bacteria, fungi, or viruses under the nail plate or around the cuticles, leading to painful infections like paronychia or fungal nail infections. A clean manicure begins with clean hands and sterilized instruments.
To maintain a hygienic workspace, keep a dedicated jar of 70% isopropyl alcohol. Before you begin your routine, wipe down your cuticle pusher, nippers, and tweezers with an alcohol pad. If you use metal tools, soaking them in alcohol for a few minutes is highly effective. Additionally, ensure your workspace is clear of dust and debris. A clean environment prevents lint from sticking to wet polish, which is a common cause of a “bumpy” finish. By prioritizing sanitation, you transform a simple beauty routine into a safe, professional-grade treatment.
Essential Shaping Tools: Files and Buffers
The shape of your nails is determined during the filing stage. Using the wrong type of file can cause micro-fractures in the nail plate, leading to peeling and splitting. To do this correctly, you need a variety of grit levels. A coarse file (around 100-150 grit) is generally too aggressive for natural nails and should be reserved for acrylics. For natural nails, look for an emery board or a glass file with a grit of 180 to 240.
Glass files are widely considered the gold standard for natural nails. Unlike traditional emery boards, which can leave jagged edges, glass files seal the edge of the nail as you file, preventing future peeling. When filing, always move in one direction—from the outer corner toward the center. Sawing back and forth creates heat and friction that weakens the nail structure. Once shaped, use a soft buffer (220-300 grit) to smooth the surface of the nail. This removes ridges and creates a smooth base for polish application, but be careful not to over-buff, as this thins the nail plate.
Cuticle Care: Pushers and Nippers
Cuticles are the body’s natural defense mechanism, acting as a waterproof seal to protect the nail matrix from infection. A common mistake in home manicures is cutting the cuticle too aggressively. Instead of cutting the skin itself, the goal should be to gently push back the dead skin cells that have grown onto the nail plate.
An orange wood stick is a gentle, disposable option for beginners, but a stainless steel cuticle pusher is a more durable and precise tool. Use the tapered end to gently lift the cuticle after soaking your hands in warm, soapy water. For any actual skin that needs trimming, use high-quality cuticle nippers. Only use nippers on truly dead, hanging skin (hangnails); never cut the living skin around the nail, as this can lead to inflammation and permanent nail deformity. Using these tools with precision ensures a clean, elongated nail look without the risk of injury.
Nail Strengthening and Treatment Products
Not every manicure requires color. Many people find that a “naked” manicure—focusing purely on health—is the most effective way to maintain strong nails. To achieve this, you need a high-quality cuticle oil and a nail strengthener or hardener.
Cuticle oil is perhaps the most underrated essential. Applying it daily, especially after washing your hands, keeps the skin around the nails supple and prevents cracking. Look for oils containing jojoba or vitamin E, as these have small enough molecular structures to penetrate the nail plate. Following oiling, a nail strengthener can provide an extra layer of protection for those with thin or brittle nails. However, use strengtheners sparingly; over-using them can make nails too rigid, causing them to snap instead of bend. A balanced approach of hydration and protection is key to long-term nail health.
The Art of Polish Application: Base and Top Coats
The longevity of your manicure depends heavily on the layers you apply. Many beginners skip the base coat to save time, but this is a mistake. A base coat serves two purposes: it prevents the pigments in colored polish from staining your natural nails, and it provides a slightly textured surface that helps the color adhere better.
Once your color is applied, the top coat is your finishing touch. A high-quality top coat prevents chipping and adds a high-shine finish that mimics a salon professional. For long-lasting results, choose a quick-drying top coat if you are in a rush, or a gel-effect top coat for a thicker, glossier look. Remember to apply thin, even layers. Thick layers are prone to bubbling and take much longer to dry, often leading to smudges. For the best results, apply the top coat to the very edge (the “free edge”) of the nail to seal the color and prevent lifting.
Removing Polish Without Damage
How you remove your polish is just as important as how you apply it. Many people use harsh, acetone-heavy removers that strip the nails of natural oils, leaving them dry and brittle. While acetone is effective for removing gel or dark pigments, it can be quite drying.
For regular polish, opt for an acetone-free remover. When removing polish, soak a cotton pad in remover, press it firmly against the nail for several seconds to break down the pigment, and then swipe downward in one motion. Avoid scrubbing aggressively, which can drag pigment into the cuticles. If you are removing gel polish, you will need acetone and a specific soaking technique (often involving foil wraps) to prevent damaging the natural nail plate. Always follow a polish removal session with a generous application of cuticle oil to rehydrate the skin and nails.
Creating a Professional Workspace at Home
You don’t need a professional salon setup, but a dedicated, organized space will significantly improve your experience. A clutter-free table prevents polish bottles from tipping and provides room to lay out your tools. Invest in a small towel or a silicone manicure mat to place your tools on; this prevents them from rolling away and protects your furniture from stains.
Lighting is another crucial factor. A bright, direct light source—like a desk lamp—is essential for seeing the fine details of your cuticle work and ensuring your polish application is smooth and even. Having your essentials organized in a small acrylic organizer or a dedicated makeup bag makes the process more enjoyable and efficient. When your tools are ready and your space is set, the manicure becomes a relaxing ritual rather than a messy chore.
Advanced Tool Maintenance: Sterilization vs. Sanitization
While many enthusiasts understand the need for cleanliness, there is a vital distinction between sanitizing tools and sterilizing them that can determine the long-term health of your nail bed. Sanitization refers to reducing the number of germs on a surface using soap or alcohol; this is perfect for routine cleaning between manicures. However, for professional-grade safety, especially if you are sharing tools with family members, sterilization is the goal.
For a home setup, using a dedicated UV-C LED sterilizer can be a game-changer. These compact devices use ultraviolet light to kill bacteria and viruses on metal tools, providing a layer of protection that simple alcohol wipes might miss. If you prefer chemical methods, a specialized hospital-grade disinfectant soak is more effective than 70% isopropyl alcohol for deep cleaning metal implements. Always ensure tools are completely dry after cleaning, as moisture trapped in the crevices of cuticle nippers can encourage microbial growth. A professional-grade routine involves a three-step process: wash with warm soapy water to remove physical debris, soak in a disinfectant for the manufacturer-recommended time, and then rinse and dry thoroughly.
The Science of Grit: Selecting the Right Abrasive for Every Nail Type
Understanding the grit numbers on your files is essential to prevent chronic nail thinning. The grit number represents the number of abrasive particles per square inch; the higher the number, the finer the grit. Using a 100-grit file on a thin, natural nail is like using sandpaper on fine wood—it will cause immediate structural damage. For those with naturally thin or brittle nails, you should strictly stick to 240-grit or higher for shaping.
Edge cases arise when dealing with different nail textures. For example, if you have “peeling” nails (onychoschizia), avoid using coarse buffers on the nail surface, as this can exacerbate the separation of the nail layers. Instead, use a very fine 400-grit buffer only to smooth the edges of the peeling area. Furthermore, if you are working on artificial enhancements like gel or acrylic, you will require a much lower grit (around 100-150) to effectively remove the product without spending hours buffing. Mastering the grit hierarchy ensures you achieve the desired shape without compromising the integrity of the nail plate.
Ergonomics and Precision: Mastering the Grip
A professional-looking manicure requires steady hands, which is often hindered by poor tool ergonomics. Many inexpensive kits feature thin, slippery handles that force your hand into a tight, cramping position. This leads to fatigue and, more importantly, loss of precision during delicate tasks like nipping hangnails or pushing back cuticles.
When selecting tools, look for stainless steel implements with textured or matte-finished handles. These provide a secure grip even if your hands become slightly oily or damp during a soak. For cuticle work, the angle of the tool is just as important as the grip. When using a cuticle pusher, hold it at a 45-degree angle to the nail plate. Holding it too vertically can gouge the nail, while holding it too flat makes it difficult to reach the proximal nail fold. If you find yourself struggling with hand fatigue, consider using a manicure desk lamp with a magnifying lens. This allows you to maintain a relaxed posture while having the visual clarity needed to perform intricate work without straining your eyes or hands.
Nail Health Diagnostics: Identifying When to Pause
Even with the best tools, a manicure enthusiast must know when to stop. Part of a complete manicure kit should include a “diagnostic eye.” You must learn to recognize the signs of nail distress that indicate you should skip the polish and focus entirely on recovery. White spots (leukonychia) can sometimes be caused by physical trauma from improper filing or aggressive cuticle pushing. If you notice vertical ridges, these are often a sign of aging or dehydration, requiring more frequent oiling rather than more buffing.
Redness, swelling, or tenderness around the nail fold (paronychia) is a clear signal to cease all cuticle work immediately. If you notice discoloration—such as yellowing or greening under the nail—this is a strong indicator of a fungal or bacterial infection. In these instances, no amount of polishing or buffing will help; the nail requires a break from all chemical products and a consultation with a professional. A truly professional manicure kit includes the wisdom to know that sometimes, the best tool is no tool at all.
Optimizing Product Chemistry: Avoiding Common Chemical Pitfalls
The chemistry of your manicure products plays a massive role in the longevity of your set. One common issue is the “shrinkage” effect, where nail polish pulls away from the edges of the nail as it dries. This is often caused by using a base coat that is incompatible with the polish or applying it to a nail that still contains residual moisture or oils. To prevent this, ensure the nail plate is completely dehydrated with a lint-free wipe soaked in pure acetone or alcohol before any product is applied.
Another critical factor is the “layering logic.” When applying multiple layers of polish, you must respect the drying time of each. If you apply a second layer of color before the first has chemically set, you trap solvent underneath, which leads to bubbling and premature lifting. For gel-based products, the UV/LED lamp you use must be compatible with the specific wavelength of the gel. Using an underpowered lamp can lead to “under-curing,” where the polish looks dry on top but remains soft and gummy underneath, which can lead to serious allergic reactions to the unreacted monomers. Always check the wavelength (nm) of your lamp against the requirements of your gel polish.
Seasonal Manicure Adjustments: Adapting to Environment
Your manicure routine should not be static; it must adapt to the changing seasons and your environment. In winter, the air becomes significantly drier, which strips moisture from the nail plate and the surrounding skin. During these months, your manicure essentials should shift toward heavy hydration. Increase the frequency of cuticle oil application to three times a day and consider using a thicker, cream-based hand salve in addition to your oils.
Conversely, in humid summer months, the challenge shifts from dryness to longevity. High humidity can prevent certain types of polish from setting properly and can cause the skin to swell slightly, making cuticle work more delicate. During summer, prioritize high-quality quick-dry top coats and consider using a nail primer to help the polish adhere better in moist conditions. If you live in a climate with extreme temperature fluctuations, be aware that your nails will expand and contract slightly; this is why choosing a flexible, high-quality top coat is essential to prevent cracking during sudden weather changes.
FAQ
1. How often should I file my nails?
Regular filing is fine, but it should be done when the nails are dry. Filing wet nails can cause them to tear more easily. Aim to shape them once a week or whenever you notice an uneven edge.
2. Is it safe to cut my cuticles?
Generally, no. You should only cut dead skin (hangnails) that is clearly separated from the nail. Attempting to cut the actual cuticle can lead to infection and damage to the nail matrix.
3. Why is my nail polish peeling so quickly?
This is often due to oils on the nail plate or improper preparation. Ensure you have cleaned your nails thoroughly with alcohol before applying polish, and always use a base coat and a top coat.
4. What is the difference between a file and a buffer?
A file is used to shape the length and edges of the nail, while a buffer is used to smooth the surface of the nail plate to create an even texture for polish application.
5. How can I stop my nails from breaking?
Focus on hydration. Regularly applying cuticle oil and using a nail strengthener can help. Additionally, avoid using your nails as tools (like opening cans) and ensure you are getting a balanced diet with sufficient biotin and protein.
Related posts:
 Brush Stroke Genius: The Nail Art Technique Anyone Can Master
 How to Apply Color Street Nails Like a Pro
 Mindful Manicures: How to Finally Stop Biting Your Nails for Good
 The Avocado Oil Nail File That’s Changing Everything
 One Simple Oil Trick That Will Make Your Manicure Last Forever
 Ten Out of Ten: The Clean Nail Polish Brand That’s Worth the Splurge
 Deborah Lippmann’s Cure: Jennifer Garner’s Secret
 Spring Fling Fingers: The Nail Colors That Scream New Season Energy