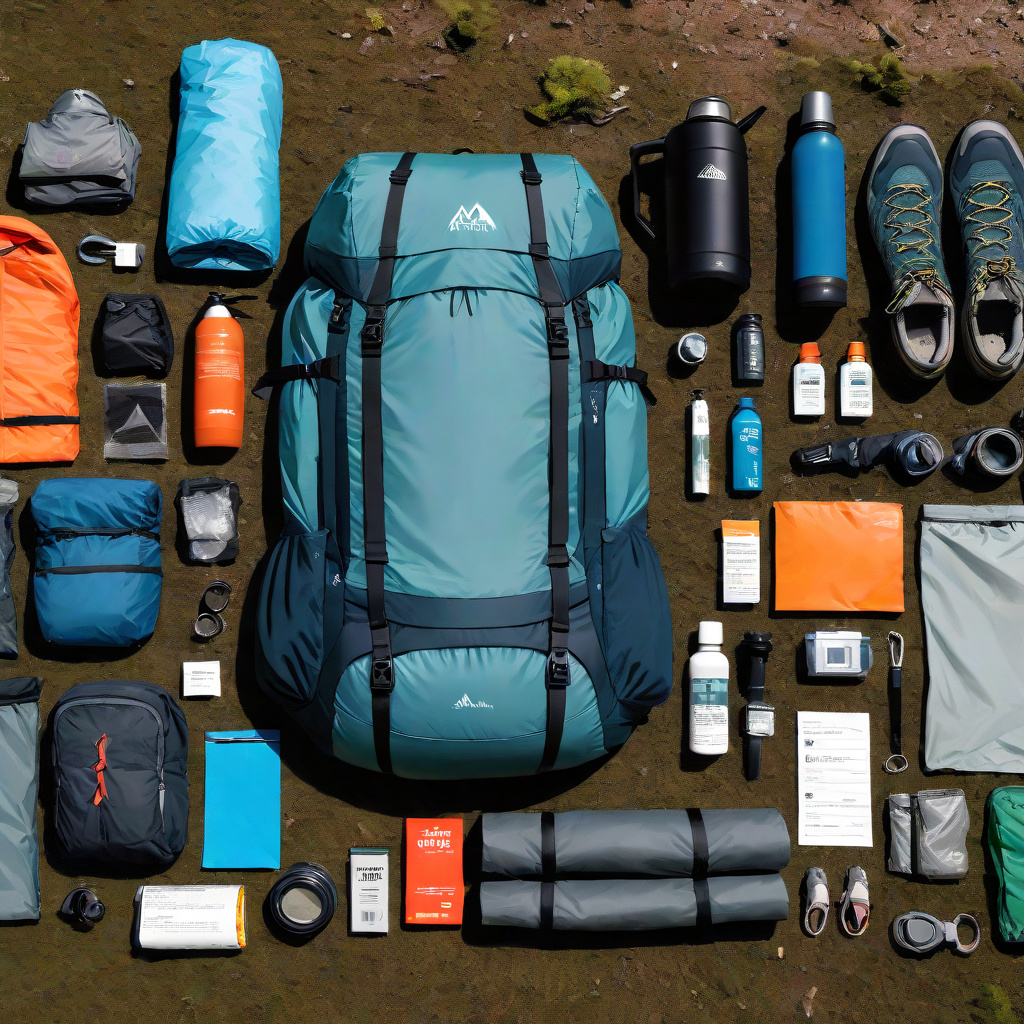
Whether you’re planning your first trail adventure or you’re a seasoned hiker looking to refine your gear selection, having the right packing list makes all the difference between a memorable outdoor experience and an uncomfortable struggle. This comprehensive guide breaks down exactly what you need for different types of hikes, organized by priority and use case, so you can pack smart without overthinking it.
Essential Safety and Navigation Items
Safety gear isn’t optional, regardless of how short or familiar your hike might be. Conditions can change quickly outdoors, and being prepared for the unexpected is what separates a minor inconvenience from a serious situation.
Start with a detailed map of your hiking area and a compass, even if you plan to use your phone for navigation. Download offline maps to your phone before you leave, since cell service is unreliable on most trails. A portable battery pack or solar charger keeps your devices functional throughout the day.
Pack a basic first aid kit containing adhesive bandages in multiple sizes, gauze pads, medical tape, antiseptic wipes, blister treatment supplies, pain relievers, any personal medications, tweezers, and a small emergency blanket. Check expiration dates on items before each season and replace anything that’s outdated.
A whistle can signal for help much more effectively than shouting, and it weighs almost nothing. Three short bursts is the universal distress signal. Include a headlamp or flashlight with extra batteries, even for day hikes that should end before dark—delays happen, and you don’t want to navigate unfamiliar terrain in darkness without a reliable light source.
Hydration and Nutrition Essentials
Proper hydration and nutrition directly impact your energy, endurance, and enjoyment on the trail. Plan for at least half a liter of water per hour of moderate hiking, and more in hot weather or at high elevation.
Bring a reusable water bottle or hydration bladder system that holds enough for your planned duration, plus extra for unexpected delays. Consider a water filter or purification tablets if you’ll be hiking where natural water sources are available, allowing you to refill rather than carrying all your water from the start.
Pack calorie-dense, easily digestible snacks that don’t require refrigeration. Trail mix with nuts and dried fruit provides quick energy and healthy fats. Nut butter packets, energy bars, jerky, cheese, crackers, and fresh fruit like apples or oranges all travel well. Avoid foods that will melt, crush easily, or require elaborate preparation.
Bring more food than you think you’ll need. Hiking burns significant calories, and having extra provisions means you can take your time, rest when needed, and handle unexpected situations without worrying about running out of fuel.
Clothing Layers for Changing Conditions
Weather in natural settings can shift dramatically, especially in mountainous or coastal areas. The layering system gives you flexibility to adapt as temperatures change and your activity level varies.
Your base layer should wick moisture away from your skin. Choose synthetic materials or merino wool rather than cotton, which stays wet and loses its insulating properties. A mid-layer like a fleece or lightweight insulated jacket provides warmth, while an outer shell protects against wind and rain.
Wear hiking-specific pants or shorts that allow full range of motion and dry quickly. Bring an extra pair of socks and keep them in a waterproof bag—dry socks can transform your comfort level if your feet get wet. Consider bringing lightweight gloves and a warm hat, even in summer, since temperatures drop significantly at higher elevations.
Your rain jacket should be waterproof rather than just water-resistant, and it should pack down small enough to fit in your daypack without taking up excessive space. Test all your layering pieces together before your hike to ensure they work as a system.
Footwear and Foot Care
Your feet carry you through every step of your hiking experience, making proper footwear and foot care critical to your success and comfort on the trail.
Choose hiking boots or trail shoes based on your terrain and personal preference. Boots provide more ankle support and protection on rocky, uneven trails, while lighter trail runners work well for established paths with minimal obstacles. Break in new footwear thoroughly before your hike—at least 20-30 miles of walking—to identify and address any pressure points.
Wear moisture-wicking hiking socks without cotton content, and consider liner socks underneath for additional blister prevention. Bring blister prevention supplies like moleskin or specialized blister bandages, and apply them at the first sign of hot spots rather than waiting until blisters form.
Pack an extra pair of insoles if you use custom orthotics, and bring the broken-in pair of shoes you know works rather than experimenting with something new on an important hike.
Backpack and Organization System
The right backpack keeps your gear accessible, distributes weight comfortably, and protects your belongings from the elements. For day hikes, a 20-30 liter pack usually provides sufficient space, while overnight trips require 50-70 liters depending on your gear and the season.
Look for a pack with padded shoulder straps, a hip belt to transfer weight from your shoulders, and a chest strap for stability. Multiple compartments and external attachment points help organize gear so you can find items quickly without unpacking everything.
Use packing cubes or dry bags to organize items by category and protect them from moisture. Keep frequently needed items like snacks, sunscreen, and your map in easily accessible pockets. Heavy items should sit close to your back and near your shoulders, with lighter gear packed toward the outside and bottom.
Practice packing and wearing your loaded pack before your hike. Adjust all straps so weight sits primarily on your hips rather than pulling down on your shoulders. Your pack should feel balanced and stable when you move, without shifting side to side or pulling you backward.
Sun and Weather Protection
Exposure to sun, wind, and temperature extremes takes a toll on your body, but simple protective measures keep you comfortable and prevent damage that could cut your hike short or cause lasting harm.
Apply broad-spectrum sunscreen with at least SPF 30 before you start hiking, and reapply every two hours, especially at higher elevations where UV radiation intensifies. Bring the bottle with you rather than applying once and forgetting about it. A wide-brimmed hat shields your face and neck, while sunglasses with UV protection prevent eye damage and reduce glare.
Lip balm with SPF protects your lips, which are particularly vulnerable to sun and wind damage. Consider bringing lightweight sun gloves if you’ll be in intense sun for extended periods.
Insect repellent keeps biting insects at bay in buggy areas. Choose a formulation appropriate for your destination—some regions require stronger concentrations or specific ingredients for adequate protection. Permethrin-treated clothing provides an additional defense layer without needing to apply chemicals directly to your skin.
Tools and Repair Items
A few simple tools can solve common problems that arise on the trail, from equipment failures to minor injuries, preventing small issues from ending your hike prematurely.
A multi-tool or pocket knife handles various tasks like cutting cord, opening packages, making emergency repairs, or preparing food. Include duct tape wrapped around a trekking pole or water bottle—just a few feet can temporarily fix torn gear, secure bandages, or patch a hole.
Bring extra ziplock bags for organizing small items, protecting electronics, or carrying out trash. Lightweight cord or paracord has countless uses for hanging food, securing gear, creating makeshift repairs, or setting up an emergency shelter.
Trekking poles reduce impact on your knees during descents, improve balance on uneven terrain, and can be used to test water depth or push aside vegetation. Adjustable poles accommodate different users and terrain types.
Items for Overnight and Multi-Day Hikes
Extended hiking trips require additional gear beyond day hike essentials, with careful attention to weight since you’ll carry everything on your back for the entire journey.
Choose a sleeping bag rated for temperatures at least 10-15 degrees colder than you expect to encounter, since ratings represent survival temperatures rather than comfort levels. A sleeping pad insulates you from cold ground and provides cushioning—closed-cell foam pads are durable and inexpensive, while inflatable pads pack smaller and offer more comfort.
Your tent or shelter should be freestanding if possible, easy to set up in various conditions, and light enough to carry comfortably. Practice setting it up at home so you’re not learning in the dark after a long day of hiking.
Pack a lightweight stove and fuel for cooking, along with a pot, eating utensils, and biodegradable soap. Plan meals that require minimal cooking and cleanup. Store food properly in bear canisters or hung bags where required, keeping all scented items away from your sleeping area.
Bring a small trowel for digging catholes, biodegradable toilet paper, and a system for packing out used paper where required. Include a small towel, toothbrush and toothpaste, and any other personal hygiene items you need.
Pre-Hike Conditioning and Physical Preparation
Even the most meticulously packed gear won’t compensate for inadequate physical readiness. Your body is your most important piece of equipment, and preparing it specifically for hiking demands prevents injury, increases enjoyment, and expands the range of trails you can confidently tackle.
Start conditioning at least four to six weeks before a challenging hike, focusing on exercises that mimic hiking movements. Stair climbing with a weighted pack builds the specific muscle groups you’ll use on inclines and develops cardiovascular capacity under load. Begin with 10-15 pounds and gradually increase to match your expected pack weight. Aim for three conditioning sessions per week, alternating between longer, moderate-intensity workouts and shorter, high-intensity intervals.
Strengthen your core, glutes, and stabilizer muscles through targeted exercises like single-leg deadlifts, planks, and lateral lunges. These muscles prevent falls on uneven terrain and reduce knee strain during descents. If you’ll be hiking at altitude, consider incorporating high-intensity interval training to improve your body’s oxygen utilization, though nothing fully replicates altitude adaptation except time spent at elevation.
Practice hiking with your actual pack, progressively loaded, on terrain similar to your planned route. This reveals footwear issues, pack fit problems, and physical limitations while you still have time to address them. Pay attention to how your body responds the day after training—persistent pain signals a need to modify your approach or seek professional guidance before committing to a demanding trail.
Navigation Skills Beyond Carrying the Tools
Carrying a map and compass means nothing if you don’t know how to use them effectively when technology fails or conditions deteriorate. Navigation competence transforms tools from dead weight into genuine safety assets.
Before your hike, study your route thoroughly on both topographic maps and satellite imagery. Identify key landmarks, water sources, elevation changes, and potential bailout points. Note the declination for your area and understand how to adjust your compass accordingly—magnetic north and true north differ by varying amounts depending on your location, and this difference matters when converting between map bearings and field bearings.
Practice taking bearings on known landmarks and following them in familiar areas before relying on these skills in wilderness settings. Learn to estimate distances by timing your pace—count how many steps you take to cover 100 meters on flat ground, then adjust for inclines and terrain roughness. This pace counting, combined with bearing following, enables you to navigate accurately even in dense fog or featureless terrain where landmarks disappear.
Understand how to identify your position using terrain association, matching the land features you see with contour lines on your map. Notice ridge lines, valleys, stream drainages, and slope angles. In emergency situations, this skill helps you determine whether you’re lost or simply temporarily uncertain, and it guides decisions about whether to continue, backtrack, or stay put. Download and learn to use offline GPS apps like Gaia GPS or AllTrails as backup systems, but never rely solely on battery-powered navigation.
Seasonal and Regional Gear Variations
A packing list that works perfectly for summer hiking in the Pacific Northwest will leave you unprepared for desert trails in Arizona or alpine routes in Colorado. Regional characteristics and seasonal conditions require thoughtful adaptation of your standard kit.
Desert hiking demands dramatically increased water capacity—sometimes three to four liters per person for a half-day hike—along with sun protection that covers every exposed skin surface. Lightweight, light-colored long sleeves and pants often provide better protection than shorts and tank tops, preventing both sunburn and excessive water loss through perspiration. Electrolyte supplements become essential rather than optional when hiking in extreme heat, as water alone doesn’t replace the minerals lost through heavy sweating. Start morning hikes before dawn to complete mileage during cooler hours, and carry a small umbrella for portable shade during unavoidable midday exposure.
Mountain and alpine environments require layers that handle rapid weather changes and significant temperature drops with elevation gain. Bring insulation even on warm valley days, since summits can be 30-40 degrees colder with wind chill. Microspikes or lightweight crampons extend your season into shoulder months when trails hold snow, and trekking poles become crucial for testing snow bridges over streams. At elevations above 8,000 feet, expect stronger UV radiation, increased dehydration risk, and potential altitude effects—plan for slower pacing and additional rest stops as your body works harder in thinner air.
Wet climate hiking in places like the Pacific Northwest or Appalachian regions during humid seasons requires aggressive moisture management. Pack rain gear that breathes well, not just waterproof shells that trap condensation inside. Bring extra dry socks and consider waterproof boots versus quick-drying trail runners—opinions divide based on whether you prefer keeping feet dry temporarily or accepting wet feet that dry faster. Use dry bags for all clothing layers and electronics, and choose synthetic insulation over down, which loses warming capacity when damp. Gaiters prevent mud, water, and debris from entering your boots on sodden trails.
Winter hiking introduces cold injury risks that require specialized knowledge and equipment. Insulated, waterproof boots rated for the temperatures you’ll encounter, along with extra insulation layers, hand and toe warmers, and a thermos with hot liquid for emergency warming. Learn to recognize frostbite and hypothermia signs in yourself and others. Shorten your planned mileage significantly, as winter hiking takes considerably longer per mile due to snow depth, ice navigation, and the physical demands of moving in heavy clothing.
Group Hiking Coordination and Shared Gear
Hiking with others changes your packing strategy, offering opportunities to distribute weight and share resources while requiring coordination to ensure nothing critical gets left behind in the division of responsibilities.
Designate one person as the gear coordinator who maintains a master checklist and confirms each item is actually packed by someone before departing. This prevents the common scenario where everyone assumes someone else brought the first aid kit or water filter. For overnight trips, shared items like tents, stoves, and cookware should be distributed equitably by weight—don’t burden one person with all the heavy communal gear while others carry only personal items.
Establish a communication plan before starting, especially if your group might separate on the trail. Set specific regrouping points and times, agree on maximum separation distances, and ensure everyone knows the planned route including any potential modifications. Carry a small notepad to leave messages at trail junctions if groups split unexpectedly. In areas with limited cell coverage, consider FRS radios for maintaining contact, though they work best in open terrain and have limited range in dense forest or mountainous topography.
Plan your pace for the slowest member of the group, not the fastest. Pushing less experienced or less fit hikers beyond their comfortable pace leads to exhaustion, injury, and miserable experiences that discourage future outdoor participation. Faster hikers can add distance by scouting ahead then returning, taking side trails, or doing conditioning circuits while the group rests. Establish a protocol where the person at the back of the line is responsible for alerting the group if anyone falls too far behind or needs assistance.
Discuss risk tolerance and emergency protocols before problems arise. What conditions would cause your group to turn back? Who makes that decision? What happens if someone gets injured—does everyone return together or does part of the group continue while others escort the injured person out? These conversations feel awkward but prevent conflicts and dangerous decision-making when stress levels are high and opinions diverge.
Minimalist and Ultralight Approaches
Reducing pack weight enhances speed, decreases fatigue, and opens up longer distance possibilities, but transitioning to ultralight hiking requires understanding what you truly need versus what provides psychological comfort.
Start by weighing every item in your pack and recording it in a spreadsheet. This base weight inventory reveals where your weight comes from—many hikers discover their pack itself weighs five to eight pounds before anything goes in it, or that their sleeping bag accounts for a third of their total weight. Target the heaviest items first, since replacing a four-pound sleeping bag with a two-pound version makes more difference than obsessing over whether your toothbrush weighs half an ounce.
Evaluate each item’s weight-to-value ratio by considering how often you use it and whether lighter alternatives exist. A heavy camera might be worth carrying if photography drives your hiking motivation, while a bulky camp chair you rarely use just adds fatigue. Multi-use items reduce total weight—your trekking poles can support a tarp shelter, your rain jacket stuff sack can be a pillow, your cook pot can be a coffee mug. Question everything: Do you need a full travel-size toiletry bottle or just a small decanted amount? Do you need five days of clothing or can you wash and reuse?
Ultralight hiking demands skill trade-offs. A lightweight tarp shelter requires more site selection expertise than a freestanding tent. Minimal insulation requires smart campsite choices and active warming strategies. Reduced safety margins mean better planning, more accurate weather forecasting, and honest assessment of your abilities. Don’t sacrifice safety items like navigation tools, first aid supplies, or emergency shelter while you’re still developing your outdoor judgment.
Test weight reductions incrementally on shorter trips before committing to a minimalist approach on challenging routes. Some comfort items genuinely improve your experience enough to justify their weight, while others get carried from habit rather than utility. Your optimal packing list evolves with experience, and what works for elite ultralight hikers may not suit your goals, pace, or enjoyment preferences.
Digital Tools and Technology Integration
Modern technology offers powerful hiking aids, but effective integration means understanding both capabilities and limitations while maintaining analog backup systems for critical functions.
Smartphone apps now provide detailed trail maps, elevation profiles, real-time location tracking, and even plant and wildlife identification. Download all maps and trail data before leaving cell coverage, and enable airplane mode to extend battery life—GPS functionality works without cellular connection. Consider using your phone’s screen recording feature to capture a video walkthrough of your route map before hiking, giving you a reviewable reference if you become disoriented.
Satellite communicators like Garmin inReach or SPOT devices enable two-way messaging and SOS functions from anywhere, providing genuine safety enhancement for remote hiking. These devices require subscription services but offer peace of mind for solo hikers and allow you to share your location with family members who worry when you’re out of contact. Program important contacts before your trip and understand the device’s limitations—message delivery may take minutes or hours depending on satellite positioning, and SOS features shouldn’t replace sound judgment about avoiding risky situations.
Action cameras and lightweight drones capture perspectives impossible with phone cameras, but they add weight, require batteries, and need skill to use effectively without disrupting wildlife or other hikers’ experiences. Many areas prohibit drone use in wilderness areas or national parks, so research regulations before packing this equipment. If documenting your hike matters to you, plan specific photo stops rather than constantly interrupting your rhythm for shots—this approach yields better images and more enjoyable hiking.
Fitness trackers and smartwatches monitor heart rate, elevation gain, and calories burned, providing useful data for conditioning and pacing. Some models include ABC sensors (altimeter, barometer, compass) that supplement navigation without pulling out your phone. However, all electronic devices share the fundamental vulnerability of battery dependence, so critical navigation must always have analog backup. Bring a USB battery pack sized to your trip length, and consider a small solar panel for extended trips where you can charge during breaks in sunny locations.
Leave No Trace Principles in Practice
Understanding Leave No Trace principles intellectually differs from implementing them consistently during your hikes. These practices preserve trail conditions for future users and protect the ecosystems you came to enjoy.
Plan ahead to minimize your impact by choosing durable surfaces for breaks and camping. Established trails and campsites concentrate use in already-disturbed areas, preventing the spread of erosion and vegetation damage. When you must travel off-trail, spread out your group’s footsteps rather than walking single file to avoid creating new trail scars. In pristine areas where no obvious camping spot exists, choose rock, gravel, dry grass, or snow over delicate vegetation, and move your camp daily to prevent lasting impressions.
Pack out everything you pack in, including small items people often overlook like orange peels, pistachio shells, and bits of trail mix that spill from snack bags. Food scraps don’t just disappear—they alter wildlife behavior, attract pests, and decompose slowly in dry or cold climates. Carry a small trash bag for your garbage plus a separate one for trash you find on the trail. Microtrash like tiny bits of wrapper or broken gear pieces accumulate over time and never biodegrade, so police your rest areas carefully before leaving.
Dispose of human waste properly by digging catholes six to eight inches deep at least 200 feet from water, trails, and campsites. In high-use areas or sensitive environments like deserts and alpine zones, pack out all toilet paper and hygiene products in sealed bags—decomposition takes months to years in these conditions. Some heavily used areas now require packing out all solid waste using WAG bags or similar systems. While unpleasant to discuss, improper waste disposal spreads disease, pollutes water sources, and creates disgusting discoveries for other hikers.
Respect wildlife by observing from a distance rather than approaching for photos or attempting to feed animals. Human food harms wildlife health and trains animals to associate people with easy meals, creating dangerous situations and often leading to animals being killed by rangers when they become too bold. Store all food and scented items properly, and never leave food unattended even for brief bathroom breaks. If you encounter wildlife on the trail, give them space to move away—you’re the visitor in their home.
Frequently Asked Questions
How do I know what size backpack I need for a day hike versus an overnight trip?
For day hikes lasting less than 8 hours, a 20-30 liter backpack typically provides enough space for water, snacks, extra layers, and safety gear. As you add distance or move into overnight territory, you’ll need 40-50 liters for a single night, and 50-70 liters for multi-day trips depending on season and gear choices. The best approach is to gather all your gear for a specific trip, then try packing it into different sized packs to see what actually fits comfortably with room for easy access to frequently used items. Remember that bigger isn’t always better—excess space tempts you to bring unnecessary items that add weight.
What should I do if I realize I forgot something important after I’ve started my hike?
First, assess whether the forgotten item is truly essential for safety or merely convenient. Critical safety items like adequate water, navigation tools, or necessary medications warrant turning back if you’re still close to the trailhead. For less critical items, evaluate whether you can safely continue without them or find a reasonable workaround. Many hikers carry items they never actually need, so you might be fine without certain things. If you’re unsure about continuing safely, it’s always better to turn back and reschedule than to push forward unprepared. Use this experience to create a physical checklist you review before each hike so you catch missing items before leaving home.
How much water should I bring, and how do I know if I’m drinking enough while hiking?
A general guideline is half a liter of water per hour of moderate hiking, adjusted upward for hot weather, high elevation, or strenuous terrain. For a four-hour hike, start with at least two liters, plus extra for safety margins. Signs of adequate hydration include pale yellow urine, consistent energy levels, and feeling generally comfortable. Thirst is actually a late indicator of dehydration, so drink regularly throughout your hike rather than waiting until you feel thirsty. If you notice dark urine, headaches, dizziness, or unusual fatigue, increase your water intake immediately. In hot conditions or during intense exertion, you may also need electrolyte replacement to maintain proper mineral balance.
Can I use regular athletic clothes for hiking, or do I need specialized hiking gear?
You can absolutely start hiking in regular athletic clothes, as long as you avoid cotton and choose synthetic or wool fabrics that wick moisture and dry quickly. Many running or workout clothes function perfectly well on the trail. The main differences in specialized hiking gear include more durable fabrics that resist tears from brush and rocks, additional pockets for carrying small items, and design features like reinforced knees or zip-off legs. As you hike more frequently or tackle more challenging terrain, you’ll naturally discover which specialized pieces add meaningful value to your experience. Start with what you have, pay attention to what works and what doesn’t, then upgrade specific items based on your actual needs rather than buying everything new at once.
What’s the best way to prevent and treat blisters on a hiking trip?
Blister prevention starts with properly fitted, broken-in footwear and good quality hiking socks without cotton content. Many experienced hikers use a liner sock under their regular hiking sock to reduce friction. Before your hike, apply preventive products like Body Glide or specialized blister prevention tape to areas where you commonly develop hot spots. During your hike, address any uncomfortable rubbing immediately—don’t wait for a blister to form. Stop and apply moleskin, blister bandages, or tape at the first sign of irritation. If a blister does develop, whether you drain it depends on its size and location. Small blisters often heal better if left intact, while larger ones may need careful draining with a sterilized needle, followed by covering with a specialized blister bandage that cushions the area and stays in place. Keep the area clean and monitor for signs of infection.
Related posts:
 Blister Protectors: The Ultimate Solution for Comfortable Boots
 You *Need* to Spend at Least an Hour Getting Professionally Fitted for Hiking Boots—Here’s Why It Matters
 New York’s Empire State Trail Guide
 Hitting the Trails This Summer: Hiking Tips for the Whole Family
 Travel Packing Tips From Norma Kamali
 Lea Michele’s Hiking Workout Routine
 Cheryl Strayed’s Hiking Boot Choice
 Jessica Biel’s Minimalist Packing Tips