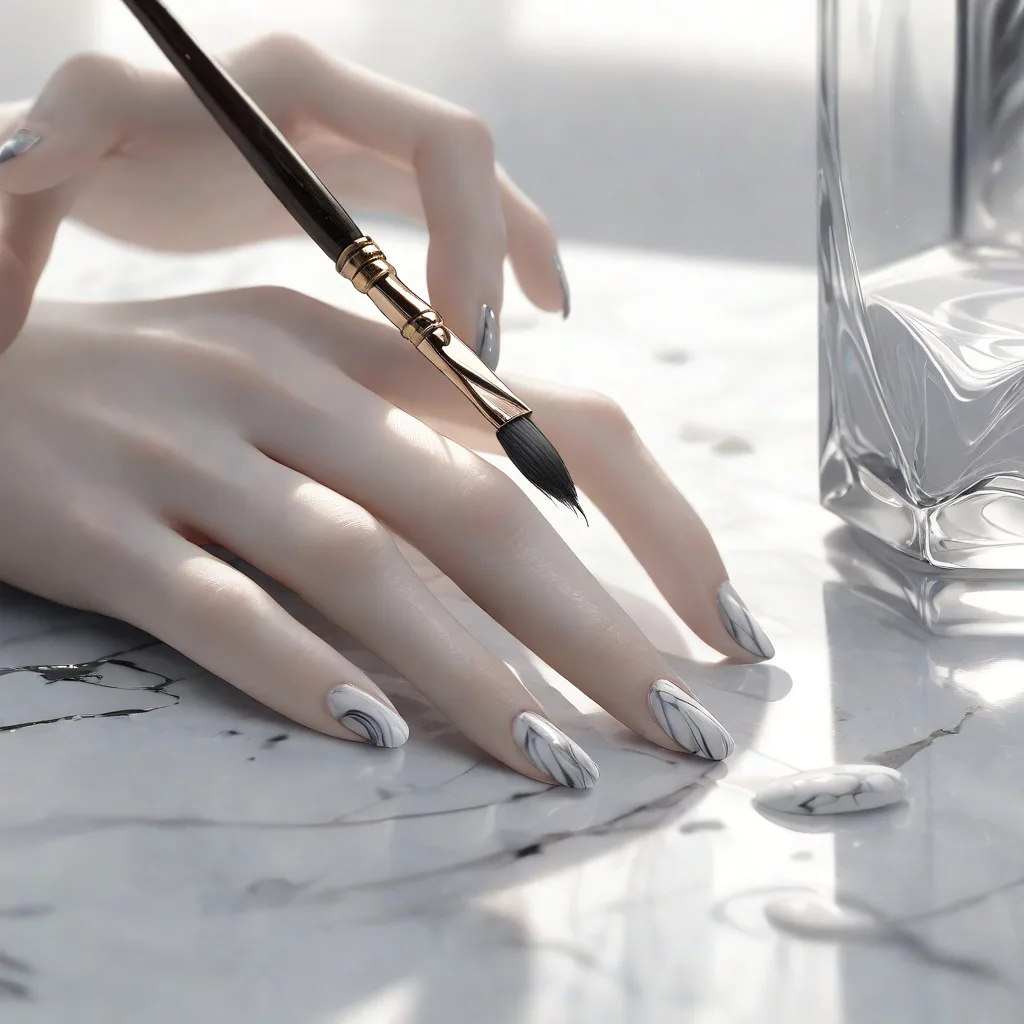
There is something inherently luxurious about the look of marble. From the sweeping halls of ancient palaces to the sleek countertops of modern kitchens, the organic, swirling patterns of natural stone evoke a sense of timeless elegance and sophistication. It is no surprise that this aesthetic has transitioned from architecture to the world of beauty, specifically in the form of marble nail art. While achieving this intricate look often seems reserved for high-end salons and professional nail technicians, the truth is that you can create stunning marble nails in the comfort of your own home.
Key takeaways
- Use room-temperature water for water marbling to ensure the polish spreads properly and does not clump or sink.
- Create realistic stone patterns by varying vein thickness and using jagged, broken lines rather than continuous, uniform strokes.
- Apply a high-gloss top coat to blend polish layers and provide the depth seen in natural marble.
- Prepare nails by buffing, cleaning with alcohol, and applying a base coat to help the marble design adhere better.
- Seal the manicure by capping the nail edges with a top coat and using cuticle oil daily to prevent chipping.
Marble nails are a favorite among beauty enthusiasts because they are incredibly versatile. Whether you prefer a classic white-and-grey Carrara look, a moody black-and-gold aesthetic, or a whimsical pastel swirl, the marble technique allows for endless creativity. The beauty of the marble effect lies in its imperfection; unlike precise geometric art, marble nails thrive on organic flow and unpredictable blending. This makes it an ideal project for beginners who may not have a steady hand but want a high-impact result.
In this comprehensive guide, we will walk you through everything you need to know to master marble nails. From gathering the right supplies to exploring different techniques—including the famous water marble and the more accessible brush-swirl method—you will learn how to transform your nails into miniature pieces of art. By the end of this tutorial, you will have the confidence to experiment with colors and textures, turning your weekly manicure into a relaxing ritual of self-care and artistic expression.
Essential Supplies for Home Marble Nails
Before you dive into the creative process, having the right toolkit is essential. While you don’t need professional-grade equipment, certain tools will make the process significantly easier and the results more polished. The key to a successful home manicure is preparation; when you have everything laid out, you can focus on the artistry without the stress of searching for a missing bottle of polish.
- High-Quality Nail Polish: You will need a base color (usually white or a light neutral) and two to three accent colors for the veining. For water marbling, specialized “water marble” polishes are recommended as they have a specific consistency that allows them to float. However, many standard brands work if they are relatively thin.
- Base Coat and Top Coat: A base coat protects your natural nail from staining, while a high-gloss top coat is non-negotiable for marble nails. The top coat not only seals the design but also blends the layers of polish together, giving the marble that “depth” seen in real stone.
- Nail Art Brushes: A very fine liner brush is crucial for creating thin, realistic veins. A small sponge or a flat brush can also be useful for blending colors.
- Toothpicks or Dotting Tools: If you don’t have professional nail art brushes, a toothpick is a fantastic, accessible alternative for dragging polish into swirls.
- Acetone and a Cleanup Brush: A small, flat synthetic brush dipped in acetone is the secret to a professional finish. It allows you to clean up the edges around your cuticles with precision.
- A Small Plastic Cup or Beaker: For the water marble technique, you will need a container with straight sides (rather than tapered) to make dipping your finger easier.
- Room Temperature Water: Water that is too hot or too cold can cause the polish to clump or sink too quickly.
Preparing Your Nails for a Professional Finish
The secret to a manicure that lasts and looks salon-quality isn’t just in the art; it’s in the preparation. If your nail bed is uneven or your cuticles are overgrown, the final look will be compromised. Taking ten minutes to properly prep your canvas ensures that the polish adheres better and the marble patterns look seamless.
Start by removing any old polish completely. Use a gentle nail buffer to smooth the surface of the nail, but be careful not to over-buff, as this can thin the nail plate. Push back your cuticles using a wooden orange stick or a cuticle pusher. If you prefer to trim your cuticles, do so very cautiously or simply use a cuticle remover liquid to soften them. This creates a clean edge that makes the final art pop.
Next, shape your nails. Marble patterns look particularly striking on almond or coffin-shaped nails because the elongated surface provides more room for the veins to flow. Once shaped, wipe each nail with a lint-free wipe soaked in rubbing alcohol or acetone. This removes natural oils and dust, which is the primary cause of polish lifting or peeling.
Finally, apply a thin, even layer of base coat. The base coat acts as a double-sided adhesive, bonding to the nail and providing a smooth surface for the color. Let the base coat dry completely before moving on to the color. If you are using the brush-swirl technique, apply your main base color (e.g., a crisp white) and let it dry fully. If you are doing water marbling, you can apply the base color, but ensure it is 100% dry, or the water may cause the base to smudge.
The Water Marble Technique: A Step-by-Step Guide
Water marbling is perhaps the most visually exciting method, as it creates an organic, fluid pattern that is nearly impossible to replicate by hand. While it requires a bit of practice, the results are breathtaking. The process relies on the surface tension of water to suspend the polish.
Step 1: Prepare the Water. Fill your plastic cup with room-temperature water. Ensure the water is still and the cup is placed on a stable surface. If the water is too cold, the polish will stay in a tight bead; if it is too hot, it may sink instantly.
Step 2: Drop the Polish. Take your first polish color and drip 2-3 drops onto the surface of the water. The polish should spread into a circle. Repeat this with your second and third colors, dropping them slightly off-center from the first drop. You will see the colors begin to overlap and create a marbled effect.
Step 3: Create the Swirls. Use a toothpick or a needle to gently drag through the polish. Move the toothpick in a figure-eight motion or create thin, wavy lines. Be careful not to touch the bottom of the cup; you only want to manipulate the polish floating on the surface.
Step 4: The Dip. Gently dip your finger into the water at a 45-degree angle. Slowly press down and then lift straight up. The polish will cling to your nail, transferring the pattern from the water to your nail bed.
Step 5: Clean and Seal. Before the polish fully dries, use your cleanup brush and acetone to wipe away the excess polish from your skin and cuticles. Once the nail is clean and dry, apply a generous layer of top coat. This is the “magic step” where the streaks of the water marble blend into a smooth, stone-like finish.
The Wet-on-Wet Brush Technique: An Easier Alternative
If water marbling feels too intimidating or you don’t have the specific polish required, the wet-on-wet technique is a fantastic alternative. This method mimics the look of marble by blending colors directly on the nail while they are still tacky.
Start by applying your base color and letting it dry. Once dry, take a second, lighter color (like a soft grey) and apply a small, irregular blob of polish to the center of the nail. While this blob is still wet, take a third, darker color (like a deep charcoal) and place a tiny dot on the edge of the first blob.
Now, using a thin liner brush or a toothpick, gently “drag” the darker color into the lighter color using a swirling motion. Do not over-mix; the goal is to leave some distinct lines while allowing the edges to blur. This creates a natural, smoky effect that looks remarkably like real marble.
For added dimension, you can add a tiny amount of gold or silver metallic polish to a few spots. Use the brush to pull the metallic polish into a very thin line, mimicking the mineral veins found in luxury marble. Because this technique is done directly on the nail, you have more control over where the “veins” go, allowing you to customize the look for each finger.
Creating Realistic Veining for a Natural Stone Look
The difference between a “swirly nail” and a “marble nail” is in the veining. Real marble doesn’t have perfect circles or uniform lines; it has fractures, clusters, and fading edges. To achieve a realistic stone look, you need to focus on the dynamics of the lines.
Vary the Thickness: When drawing your veins, start with a slightly heavier press of the brush and then gradually lift the brush as you move across the nail. This creates a line that tapers off, which is exactly how natural mineral veins appear. Avoid making lines of the same width throughout the entire design.
Use “Broken” Lines: Instead of one continuous line from the cuticle to the tip, create short, jagged segments. Leave small gaps in the veins. This suggests that the “stone” has natural breaks and adds to the authenticity of the effect.
Layer Your Grays: To create depth, don’t rely on just one shade of grey. Use a light grey for the broad, cloudy areas and a dark charcoal or navy for the thin, sharp veins. By layering these, you create a 3D effect that makes the nail look like a solid slab of stone rather than a flat painting.
The Power of the Top Coat: The final secret to realistic veining is the top coat. A thick, glossy top coat fills in the ridges of the polish and slightly blurs the sharpest edges of your lines. This mimics the polished surface of a marble countertop and blends the colors together seamlessly.
Common Mistakes and How to Fix Them
Even with a tutorial, nail art can be finicky. The most common frustration for beginners is the “blob” effect, where the polish becomes a muddy mess rather than a clean marble. This usually happens because of over-mixing. Remember that marble is about contrast; if you swirl the colors too many times, they will blend into one solid, muted tone. If this happens, it’s easier to wipe the nail clean with acetone and start over than to try and fix it.
Another common issue in water marbling is the polish sinking. If your polish drops sink to the bottom of the cup immediately, it is likely because the polish is too thin or the water is too warm. To fix this, try a different brand of polish or ensure your water is exactly room temperature. Some people find that adding a tiny drop of dish soap to the water helps break the surface tension just enough to keep the polish floating.
Smudging is the enemy of the marble manicure. Because marble designs often require multiple layers of polish, the drying time is longer. To prevent smudges, avoid touching anything for at least 20 minutes after the final top coat. Using a quick-dry top coat or a drying spray can significantly reduce the risk of ruining your hard work.
Finally, many beginners forget to clean their cuticles before the polish dries. Once the polish is hard, removing it from the skin requires more scrubbing, which can lead to the design being pulled off the nail. Always keep your acetone-dipped cleanup brush handy and clean as you go.
Choosing the Perfect Color Palettes for Every Season
One of the best parts of marble nails is that they can be adapted to fit any mood or season. While white and grey are the classic choices, experimenting with color can turn a traditional look into a fashion statement.
- Spring: Pastel Ethereal. Combine a milky white base with soft lavender, mint green, and a hint of iridescent shimmer. This creates a “quartz” look that feels light, airy, and fresh for the spring season.
- Summer: Tropical Marble. Use a bright turquoise or coral base with swirls of gold and white. This mimics the look of polished sea stones or exotic minerals, making it perfect for beach vacations and sunny days.
- Autumn: Moody Earth Tones. Embrace the changing leaves with a deep forest green or burnt orange base. Add veins of chocolate brown and metallic copper. This palette feels cozy, rich, and sophisticated.
- Winter: Frozen Elegance. Go for a deep navy or a stark black base with crisp white and silver veining. This “night sky” marble effect is striking and pairs perfectly with winter knitwear and holiday parties.
Maintaining Your Marble Manicure for Long-Lasting Wear
Once you have achieved the perfect marble look, you want it to last as long as possible. Because nail art involves more layers than a standard manicure, it can be more prone to chipping if not maintained correctly. The key to longevity is protection and hydration.
Start by “capping the free edge.” When applying your top coat, run the brush along the very edge (the tip) of your nail. This seals the polish and prevents it from lifting at the tip, which is where most chips begin. For extra durability, apply a fresh layer of top coat every three to four days. This refills any microscopic scratches and keeps the gloss looking fresh.
Hydration is equally important. Acetone and frequent polishing can dry out your nail beds and cuticles, making them prone to cracking. Use a high-quality cuticle oil every night before bed. Not only does this keep your skin looking healthy, but it also creates a moisture barrier that helps prevent the polish from becoming brittle and peeling.
Finally, be mindful of your activities. Wear gloves when cleaning with harsh chemicals or washing dishes. Hot water and detergents can soften the polish and cause the marble design to lift. By taking these simple precautions, you can keep your stunning marble nails looking professional for two weeks or more.
Mimicking Specific Gemstones and Rare Minerals
While the standard white-and-grey marble is a timeless choice, you can elevate your home manicure by studying the specific visual characteristics of different gemstones. Each mineral has a unique “fingerprint” in terms of color distribution and veining patterns. By adjusting your blending technique, you can transform your nails into miniature replicas of precious stones.
The Jade Effect: To achieve a realistic jade look, you need to focus on translucency and depth. Start with a sheer, milky mint green base. Instead of opaque white veins, use a slightly lighter shade of green and a tiny amount of white polish. The key here is to create “clouds” of color rather than sharp lines. Use a sponge to dab the lighter green in irregular patches, then use a fine liner brush to add very faint, wispy white streaks. This mimics the organic, semi-transparent quality of nephrite or jadeite.
Amethyst Crystals: Amethyst is characterized by its deep purples and crystalline fractures. Begin with a gradient base, moving from a deep plum at the cuticle to a light lavender at the tip. While the polish is still tacky, use a toothpick to draw sharp, angular lines—unlike the flowing curves of marble, amethyst looks more like shattered glass. Add a few dots of iridescent white or silver at the intersection of these lines to simulate the way light catches the facets of a crystal.
Black Onyx with Gold Veining: For a high-drama look, use a stark, opaque black base. Onyx often features very thin, high-contrast veins. Use a metallic gold polish, but dilute it slightly with a drop of clear top coat on a palette to make it more fluid. Draw long, sweeping lines that vary in thickness, ensuring some lines are almost microscopic. To add a layer of realism, add a few tiny “flecks” of gold around the main veins, simulating the natural impurities found in raw stone.
Rose Quartz: This is all about softness. Use a sheer, pale pink base. Instead of drawing veins, use the “smoke” technique: take a white polish and a makeup sponge, dabbing very lightly in the center of the nail to create a soft, hazy glow. Then, use a very thin brush to create a few undulating, barely-visible white lines. The goal is to make the design look as though it is floating beneath the surface of the nail, creating that coveted 3D depth.
Integrating Chrome Powders and Holographic Accents
To move beyond traditional polish and enter the realm of high-fashion nail art, you can integrate chrome powders and holographic elements. These materials add a metallic sheen that mimics the reflective properties of polished minerals and adds a futuristic edge to the organic marble patterns.
The Chrome Overlay: Chrome powder is a game-changer for marble art. For a “liquid metal” marble look, complete your marble design using the wet-on-wet technique with white and silver. Once you have applied a no-wipe gel top coat and cured it under a UV lamp, use a sponge applicator to rub a silver or pearl chrome powder over the entire nail. The powder adheres to the surface, turning the white veins into shimmering metallic ribbons and the base into a pearlescent stone. This creates a mirror-like finish that is impossible to achieve with standard polish.
Holographic Depth: If you prefer a more whimsical or celestial marble, incorporate holographic glitter or linear holo polishes. Instead of using a solid accent color for your veins, use a holographic silver. The linear holographic particles create a “rainbow” effect when the nail catches the light, simulating the internal fire of an opal. For an even more complex look, apply a thin layer of holographic glitter polish before your marble veining. This creates a shimmering background that looks like mineral deposits trapped inside the stone.
Edge Case: Avoiding the “Metallic Mud” Look. A common mistake when mixing chrome or metallic polishes with marble is over-blending. If you swirl a metallic polish too much into a cream polish, the metallic particles break up and the color becomes muted or “muddy.” To prevent this, always apply your metallic veins last. Let the base marble colors set slightly so the metallic lines sit on top of the design rather than sinking into it, preserving the sharp, reflective contrast.
Strategic Design Layouts and Composition
A full set of marble nails can be stunning, but varying the composition across your hand can make the manicure look more intentional and artistic. Thinking like a painter—considering balance, negative space, and focal points—will prevent the design from feeling overwhelming.
The Negative Space Marble: This modern approach involves leaving a portion of the natural nail exposed. You can achieve this by applying a clear base coat and then creating the marble effect only on the tips (a marble French manicure) or in a diagonal slice across the nail. For a “floating stone” effect, create a marble circle or organic blob in the center of the nail, leaving the edges clear. This creates a clean, minimalist aesthetic that is particularly flattering on shorter nails.
Marble-to-Solid Gradient: Instead of making every nail a marble pattern, create a visual transition. For example, make your thumb and pinky solid colors (using the darkest shade from your marble palette), your index and ring fingers a subtle, light marble, and your middle finger a bold, high-contrast marble. This creates a rhythmic flow across the hand and prevents the patterns from competing with one another.
Asymmetrical Veining: Avoid the temptation to make every nail a mirror image of the other. In nature, no two slabs of marble are identical. When designing your veins, vary the direction of the flow. On one nail, let the veins run vertically from cuticle to tip; on the next, let them swirl diagonally. This asymmetry is what makes the art look organic rather than stamped or manufactured.
Combining Marble with Geometric Accents: For a sophisticated, architectural look, pair your organic marble swirls with sharp, clean lines. Use painter’s tape or a strip of cardstock to block off a section of the nail. Paint one half a solid matte color and the other half a marble pattern. The contrast between the rigid geometric line and the fluid marble veins creates a visually stimulating tension that looks incredibly professional.
Advanced Textural Finishes: Matte vs. High-Gloss
The final texture of your nail can completely change the perceived material of your marble. While a high-gloss finish mimics polished luxury countertops, a matte finish can make your nails look like raw, unpolished stone or frosted glass.
The Raw Slate Look: To achieve the appearance of raw slate or honed limestone, use a matte top coat. Matte finishes absorb light, which emphasizes the contrast between the colors and removes the “plastic” look of some polishes. This is particularly effective for moody palettes—think charcoal, deep navy, or forest green. When you apply a matte top coat over a marble design, the veins appear more embedded in the surface, giving the nail a tactile, stone-like quality.
The Mixed-Texture Technique: One of the most advanced ways to add dimension is by mixing matte and gloss on a single nail. First, apply a matte top coat over your entire marble design. Once dry, take a high-gloss top coat and a very fine liner brush. Carefully trace over only the main veins of the marble with the gloss. This creates a stunning visual effect where the “stone” is matte, but the “mineral veins” are shimmering and reflective. This mimics the way some natural stones have crystalline veins that catch the light differently than the surrounding rock.
Managing Matte Longevity: Matte top coats tend to wear off faster than glossy ones and can sometimes pick up stains from makeup or dark clothing. To keep your matte marble looking fresh, avoid using oil-based products directly on the nail surface, as they can create “shiny spots” on the matte finish. If the matte look begins to fade, you can lightly buff the surface with a very fine buffer and re-apply a thin layer of matte top coat.
DIY Tool Innovations and Household Hacks
You don’t need to spend a fortune on professional nail art kits to achieve complex marble effects. Many household items can be repurposed to create textures that professional brushes cannot.
The Aluminum Foil Technique: For a “crackle’ marble effect that looks like weathered stone, try using a small piece of aluminum foil. Instead of painting the vein, dip the edge of a crumpled piece of foil into your accent color and lightly press it onto the nail. This creates erratic, jagged edges and tiny voids in the color, mimicking the natural fractures found in granite or quartzite.
Makeup Sponge Smudging: For a “smoke” or “cloud” effect that provides a base for your veins, use a wedge makeup sponge. Apply a small amount of polish to the sponge and dab it onto the nail in a stippling motion. This creates a diffused, airbrushed look that removes the streaks associated with brushes. By layering two different shades of a sponge-dabbed color, you create a soft, 3D atmospheric depth that makes the subsequent sharp veins pop.
The Cardstock Edge: If you struggle with a shaky hand when drawing long veins, cut a thin strip of cardstock or a business card. Dip the very edge of the card into the polish and “swipe” it across the nail in one quick, confident motion. This creates a perfectly straight but thin line that you can then smudge slightly with a toothpick to make it look more natural. This is an excellent way to create the long, sweeping veins seen in large-scale marble architecture.
Using a Cotton Swab for “Soft Focus” Marble: If your veins look too sharp or artificial, take a cotton swab (Q-tip) dipped in a tiny amount of clear top coat. Gently tap the edges of your wet veins. This “blurs” the line, creating a gradient effect that mimics the way colors bleed into one another in natural stone. This is the secret to moving from a “painted” look to a “natural” look.
Troubleshooting Complex Application Issues
As you move into more advanced marble techniques, you may encounter technical issues that go beyond simple smudging. Understanding the chemistry of your polish can help you solve these problems on the fly.
Dealing with “Shrinking” Top Coats: Some high-gloss top coats suffer from “shrinkage,” where the polish pulls away from the edges of the nail as it dries, leaving a gap of bare nail at the tips. This is often caused by applying the top coat too thickly or using it over a base that isn’t fully set. To prevent this, apply your top coat in thin, even layers. If shrinkage occurs, do not try to “fill in” the gap with more top coat, as this often leads to more shrinking. Instead, use a tiny liner brush to fill the gap with the base color, let it dry, and then re-seal the entire nail with a thinner layer of top coat.
Eliminating Air Bubbles: Small bubbles in the top coat can ruin the illusion of a smooth stone surface. Bubbles are usually caused by shaking the polish bottle (which traps air) or applying the polish too quickly. Instead of shaking, roll the bottle between your palms to mix the pigment. Additionally, avoid applying the top coat immediately after a heavy session of art; give the marble layers a few minutes to “outgas” before sealing them. If a bubble appears, you can carefully pop it with a needle before it dries, then smooth the area with the brush.
Managing Layer Thickness and Peeling: Marble art often requires multiple colors and a thick top coat, which can lead to “bulk” on the nail. If the polish becomes too thick, it is more likely to peel off in one large piece (called “sheeting”). To avoid this, ensure each layer is as thin as possible. If you find the design is becoming too thick, use a fine-grit buffer to gently level the surface of the nail before applying the final top coat. This removes the excess bulk while preserving the design, ensuring a sleek, professional profile that resists peeling.
Correcting “Muddy” Blends: If you realize your wet-on-wet blend has become too muddy, you don’t always have to start over. You can “rescue” the design by adding a high-contrast element on top. For example, if a grey and white blend looks too flat, add a very sharp, dark charcoal vein or a shimmering gold line. The high contrast draws the eye away from the muddy areas and creates the illusion of intentional depth and complexity.
Frequently Asked Questions
Q: Can I do marble nails with gel polish?
A: Yes, but the process is different. You cannot use the water marble technique with gel because gel requires UV/LED curing and will not float on water. Instead, use the wet-on-wet brush technique. Apply your gel colors, swirl them with a fine brush, and cure them under the lamp immediately to “freeze” the design in place. Finish with a gel top coat and a final cure.
Q: Why does my water marble look like dots instead of swirls?
A: This usually happens if the polish is too thick or if the water is too cold, causing the polish to stay in a tight bead. Try shaking your polish bottles well or warming them slightly in your hands before use. Also, ensure you are dripping the polish from a low height; dropping it from too high can cause it to splash and break the circle.
Q: Which nail shape is best for marble art?
A: While any shape works, almond, oval, and coffin shapes are generally preferred. These shapes provide a longer “canvas,” which allows the marble veins to flow more naturally from the base to the tip. On very short or square nails, the design can sometimes look a bit crowded, so keep your veins smaller and more subtle.
Q: How do I get a “cloudy” look instead of sharp lines?
A: To achieve a soft, cloudy marble effect, use a sponge. Dab a small amount of your accent color onto a makeup sponge and lightly press it onto the base color. This creates a diffused, hazy look. You can then add a few very thin, sharp lines with a liner brush to create a contrast between the clouds and the veins.
Q: Is there a way to do marble nails without any special brushes?
A: Absolutely. A toothpick is the best substitute for a liner brush. For the broader blending, you can use a cotton swab (Q-tip) to gently smudge the polish while it’s still wet. Even a piece of cardstock cut into a thin strip can be used to drag polish into a veining pattern.
Related posts:
 Mindful Manicures: How to Finally Stop Biting Your Nails for Good
 The Rise of 3D Printed Nail Art
 The Avocado Oil Nail File That’s Changing Everything
 How to Fix an Ingrown Toenail Like a Pro
 Spring Fling Fingers: The Nail Colors That Scream New Season Energy
 Clean Manicure Essentials
 Ten Out of Ten: The Clean Nail Polish Brand That’s Worth the Splurge
 Brush Stroke Genius: The Nail Art Technique Anyone Can Master