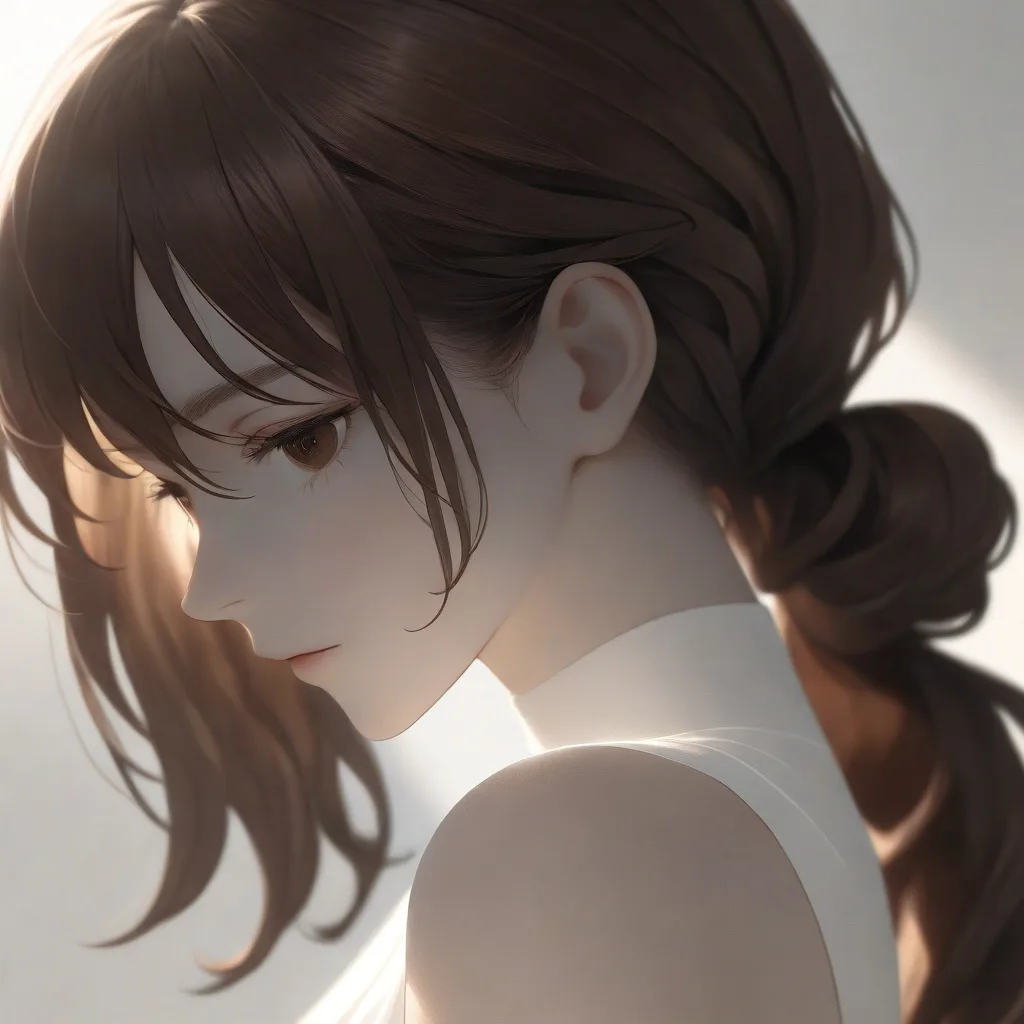
Whether you’re heading to a casual brunch, a busy workday, or a special evening event, a low ponytail with curls offers a polished yet effortless vibe. This style combines the sleekness of a low bun with the soft romance of loose curls, creating a look that works for straight, wavy, or curly hair. Below you’ll find a step‑by‑step guide, product recommendations, and troubleshooting tips that let you master the perfect low ponytail with curls every time.
Key takeaways
- Prep hair with lightweight products and heat protection to ensure curls hold their shape without becoming weighed down or damaged.
- Choose the right curling method—foam rollers, irons, or twist-and-pin—based on your hair texture and available styling time.
- Create a polished base by using a velvet scrunchie and wrapping a strand of hair around the elastic to hide it.
- Customize curl patterns and placement to flatter your specific face shape and balance your facial proportions.
- Adjust your routine for environmental factors like humidity or winter dryness to keep your style fresh throughout the day.
Understanding the Basics: What Makes a Low Ponytail with Curls Look Good
The appeal of a low ponytail with curls lies in its balance of structure and movement. The low placement anchors the hair close to the neck, which can elongate the face and highlight jawlines, while the curls add texture, volume, and a touch of femininity. Key visual elements include:
- Clean, defined part: A centered or slightly off‑center part creates symmetry and helps the curls sit naturally.
- Consistent curl size: Uniform curls (or a deliberate mix of sizes) prevent a tangled, unkempt appearance.
- Secure base: The ponytail should feel snug but not tight, allowing the curls to drape without pulling on the scalp.
Understanding these fundamentals will guide your product choices and technique.
Preparing Your Hair: Cleaning, Conditioning, and Prepping
Even the best styling tools can’t rescue hair that’s overly dry or weighed down. Follow these prep steps for optimal results:
- Wash with a lightweight shampoo: Choose a formula that cleans without stripping natural oils. For fine hair, a volumizing shampoo works best; for thicker hair, a moisturizing option can help.
- Condition strategically: Apply conditioner mainly to the mid‑lengths and ends. If you have fine hair, consider a leave‑in conditioner instead of a heavy rinse‑out product.
- Detangle gently: Use a wide‑tooth comb or a detangling brush while the hair is still damp. This prevents breakage and ensures even curl formation.
- Apply a heat‑protectant spray: Even if you plan to curl with a non‑heat method (e.g., rollers), a protective mist helps maintain moisture.
Allow your hair to air‑dry until it is about 80 % dry; this “damp but not wet” state is ideal for most curling techniques.
Choosing the Right Tools and Products
The tools you select will depend on your hair type, desired curl size, and how long you need the style to last.
| Tool | Best For | Typical Cost (USD) |
|---|---|---|
| 45‑mm Ceramic Curling Iron | Fine to medium hair, tighter curls | $30‑$50 |
| 1‑inch Foam Rollers | All hair types, soft loose curls | $10‑$20 |
| Velvet Scrunchies | Securing low ponytail without dents | $5‑$15 |
| Lightweight Hairspray (10‑15 g) | Flexible hold, no stiffness | $8‑$12 |
| Finishing Serum or Light Oil | Adding shine and taming flyaways | $12‑$25 |
For a truly low‑impact routine, foam rollers paired with a gentle mousse can achieve beautiful curls without heat, reducing the risk of damage.
Creating Soft Curls: Techniques for Different Hair Types
Below are three reliable methods. Choose the one that matches your hair’s texture and the amount of time you have.
1. Foam‑Roller Method (All Hair Types)
- Divide damp hair into 1‑inch sections.
- Apply a light mousse or curl‑enhancing cream to each section.
- Wrap each section around a 1‑inch foam roller, rolling from root to tip.
- Secure the rollers with a gentle clip or simply let the foam’s grip hold.
- Allow hair to dry completely (air‑dry or use a diffuser on low heat for 15‑20 minutes).
- Remove rollers, gently separate curls with fingertips, and lightly mist with hairspray.
2. Classic Curling Iron (Fine to Medium Hair)
- Heat the iron to 300‑350 °F (150‑180 °C). Lower temperatures are safer for fine hair.
- Take a 1‑inch strand, wrap it around the barrel away from your face, and hold for 6‑8 seconds.
- Release and immediately clamp the curl with a clothespin for 15 seconds to set the shape.
- Continue around the head, leaving the top layer slightly looser for a natural finish.
- After all curls are formed, allow them to cool, then gently run fingers through to soften.
3. Twist‑and‑Pin Method (Curly or Coily Hair)
- Section hair into 2‑inch strips while damp.
- Twist each strip tightly, then coil the twist around its base to form a small “corkscrew.”
- Secure with a bobby pin or a small elastic.
- Let hair air‑dry or use a hooded dryer for 30‑40 minutes.
- Unpin and fluff the curls with a wide‑tooth comb.
All three methods produce curls that can be brushed out into soft waves, which is essential for blending into the low ponytail.
Assembling the Low Ponytail: Step‑by‑Step Guide
Now that you have curls, follow these precise steps to build the ponytail.
- Define the part: Use a fine-tooth comb to create a clean middle or side part, depending on your face shape. A side part can soften a round face, while a middle part adds symmetry.
- Gather the curls: With both hands, sweep the curls back toward the nape. Keep the hair loose; you’ll tighten it later.
- Form the base: Place a small elastic (or a discreet hair tie) just above the hairline, anchoring the front section. This prevents the ponytail from slipping forward.
- Secure the ponytail: Using a velvet scrunchie, pull the hair down to the desired low position—typically at the base of the neck or just a few centimeters above. Avoid pulling too tightly; you want a relaxed, “gathered” look.
- Adjust the curls: Gently pull at the outer edges of the ponytail to let the curls fall naturally. If the curls appear flat, lightly back‑comb the root area for added volume.
- Wrap a strand: Take a small piece of hair from the ponytail, wrap it around the elastic, and secure it underneath with a bobby pin. This hides the tie and adds a polished finish.
Take a moment to look at the overall silhouette. The ponytail should sit low, the curls should cascade just past the shoulders, and the overall shape should be smooth without bulges.
Securing the Style: Finishing Touches and Long‑Lasting Hold
To keep the low ponytail with curls fresh throughout the day, apply these finishing steps:
- Light mist of flexible hairspray: Hold the can 12‑18 inches away and spray in a circular motion. This creates a fine mist that locks the curls without making them crunchy.
- Apply a shine serum: Warm a few drops between your palms and smooth over the length of the ponytail, focusing on the ends.
- Control flyaways: Use a soft toothbrush or a small amount of anti‑frizz cream on the hairline and behind the ears.
- Check for movement: Gently tug the ponytail side‑to‑side. If it shifts, add a second scrunchie or a thin elastic underneath the first for extra grip.
These steps add durability while preserving the soft, bouncy feel of the curls.
Adapting the Look for Different Occasions
The low ponytail with curls is versatile. Here are three quick adaptations:
| Occasion | Adjustment | Key Details |
|---|---|---|
| Casual Day Out | Messier curls, loose scrunchie | Use a larger foam roller for beach‑wave texture; leave a few wispy strands out for a relaxed vibe. |
| Office/Professional | Sleeker curls, polished finish | Opt for tighter, uniform curls; choose a neutral‑colored elastic; add a subtle low‑shine serum. |
| Evening Event | Glamorous volume, decorative accessory | Create larger, more defined curls; secure with a jeweled hairpin or a silk ribbon wrapped around the base. |
Each variation requires only minor tweaks, allowing you to reuse the same base technique.
Common Mistakes and How to Fix Them
Even experienced stylists can slip up. Below are frequent errors and quick remedies.
- Over‑tightening the ponytail: This flattens curls and creates tension. Fix: Loosen the scrunchie slightly, then gently pull the hair upward to add volume.
- Using too much product: Heavy mousse or gel can weigh curls down. Fix: Lightly rinse out excess product before curling, or apply a small amount of lightweight leave‑in conditioner instead.
- Uneven curl size: Mismatched curls look messy. Fix: Re‑curl the larger sections with a smaller barrel, or gently comb the larger curls into a softer wave.
- Visible elastic: A bright hair tie can ruin the polished look. Fix: Hide the elastic with a wrapped strand or switch to a transparent or fabric-covered scrunchie.
- Flyaway hairs around the face: These can distract from the sleek silhouette. Fix: Lightly dab a touch of anti‑frizz serum on a small brush and smooth the hairline.
Addressing these issues as they arise ensures the style stays elegant from start to finish.
Customizing Curl Patterns for Different Face Shapes
When a low ponytail with curls is paired with the right curl pattern, it can visually balance a face’s proportions. Below are three common face‑shape categories and the curl‑type adjustments that create the most flattering silhouette.
- Round faces: Aim for curls that add vertical length. Use a 1‑inch barrel or 1‑inch foam rollers, but pull the curls slightly tighter at the crown and let them loosen toward the ends. The resulting elongated waves draw the eye upward, counteracting the roundness.
- Heart‑shaped faces: Soften a broad forehead by creating volume at the jawline. Wrap larger, looser curls (1½‑inch to 2‑inch) around the lower half of the ponytail and keep the top section smoother. A subtle side part can also shift visual weight away from the forehead.
- Long or rectangular faces: Add width by incorporating side‑swept curls. After forming the base ponytail, pull a handful of curls from each side and gently tug outward before securing. This creates a gentle “C” shape that broadens the cheek area.
Edge‑case tip: If you have a diamond‑shaped face (narrow forehead and chin with wide cheekbones), balance the widest part of the face by keeping the curls tighter at the sides and allowing a soft, relaxed curl at the crown. This reduces cheekbone emphasis while preserving overall harmony.
Practical example: A client with an oval face and fine hair wanted a more dramatic look for a wedding. The stylist used a 45‑mm curling iron for tight, springy curls at the nape, then brushed the top layer into a loose, beach‑wave texture. The contrast added dimension without overwhelming the natural oval balance.
Integrating Hair Extensions and Clip‑In Curls into a Low Ponytail
Extensions can extend length, add volume, or introduce a contrasting curl texture that ordinary hair may not achieve on its own. The key is seamless blending.
- Select the right type: For a low ponytail, clip‑in tape extensions that are 2‑3 inches longer than your natural hair work best. Choose a curl pattern that matches or slightly exaggerates the curls you plan to create.
- Prep the extensions: Lightly mist them with a dry‑touch spray to eliminate static. If the extensions are straight, pre‑curl them using a 1‑inch wand, then allow them to cool before clipping.
- Clip strategically: Divide the hair into a top and bottom layer. Clip the extensions into the bottom layer, close to the scalp, so they become part of the ponytail’s foundation. This prevents the extensions from sliding out when the ponytail is pulled low.
- Blend the textures: After securing the ponytail, use a wide‑tooth comb to gently lift sections of the natural hair over the extensions. This interweaves the two textures, creating a unified look.
- Secure the finish: Wrap a small strand of natural hair around the elastic, as described in the original guide, to hide any visible clips. Finish with a light mist of flexible hairspray to lock the blend.
Edge case: For clients with extremely fine hair, a single layer of clip‑ins can cause the ponytail to feel heavy and pull at the scalp. Counter this by using a silicone‑based grip spray on the scalp before clipping, which increases friction without adding weight.
Season‑Specific Adjustments: Summer Heat, Winter Dryness, and Humidity Control
Environmental factors dramatically affect curl longevity. Tailor your product choices and technique to the season to keep the low ponytail looking fresh.
Summer Heat (30 °C / 86 °F and above)
- Product swap: Replace heavy serums with a lightweight, oil‑free shine mist. Look for ingredients like glycerin that provide a cooling effect.
- Tool modification: Opt for a low‑heat curling wand (max 300 °F) or a no‑heat method such as foam rollers. Excess heat can cause curls to loosen faster under high ambient temperatures.
- Protective finish: Apply a humidity‑blocking hairspray that contains silicone polymers. These create a microscopic barrier that repels sweat and sea‑salt water.
Winter Dryness (below 10 °C / 50 °F)
- Moisture boost: Incorporate a hydrating curl cream containing hyaluronic acid or panthenol before curling. This helps the curls retain moisture despite indoor heating.
- Heat‑less styling: Use a satin or silk hair wrap overnight to lock in moisture and prevent friction‑induced frizz.
- Finish with oil: A few drops of argan oil applied after the hairspray adds a protective sheen that combats static.
High Humidity (70 %+ relative humidity)
- Pre‑curl prep: Apply a curl‑defining gel that contains polymer film formers (e.g., PVP/VA). These create a semi‑rigid shell around each strand, resisting moisture absorption.
- Strategic teasing: Lightly back‑comb the crown area before forming the ponytail. The added lift prevents the hair from flattening when humidity causes the curls to expand.
- Post‑style rescue kit: Keep a travel‑size anti‑frizz spray and a small boar‑bristle brush in your bag. A quick spritz and gentle brush can revive curls without re‑heating.
Edge case: In climates that swing between hot and humid (e.g., coastal cities), layer a light mist of sea‑salt spray after the hairspray. The salt adds texture that helps curls hold while still providing a flexible finish.
Travel‑Friendly Low Ponytail with Curls: Tools, Packing, and On‑the‑Go Fixes
Frequent flyers, road‑trippers, and backpackers need a low‑maintenance version of the style that survives luggage compression and limited power sources.
- Compact tools: Choose a dual‑voltage 25‑mm curling wand with a foldable handle. Its smaller barrel creates soft, natural waves that require less time to set.
- Travel‑size products: Opt for a 30‑ml heat protectant spray, a 15‑ml lightweight mousse, and a 20‑ml flexible hairspray. All comply with TSA liquid limits.
- Pre‑curl in the hotel: While the room’s hair dryer is warming up, dampen your hair with a spray bottle, then wrap 1‑inch foam rollers. The rollers can sit on a pillow while you unpack, making efficient use of downtime.
- Emergency touch‑up: Keep a mini hairbrush with a built‑in comb and a small bottle of dry‑touch spray. A quick mist followed by a gentle brush restores shape without heat.
- Packing strategy: Place curling tools in a padded pouch surrounded by soft clothing to prevent damage. Store the scrunchie and bobby pins in a zip‑lock bag to avoid loss.
Example scenario: A photographer on a week‑long shoot in a desert town used only foam rollers and a travel‑size mousse. Each morning, she rolled her damp hair while the sunrise illuminated the tent, allowing the curls to set naturally. By the end of the day, a light mist of hairspray kept the ponytail intact despite wind and sand.
Edge case: If you’re traveling with limited electricity (e.g., camping), a battery‑operated mini diffuser can be attached to a portable hair dryer. Set it to low heat and use it to dry the rollers faster, cutting the setting time in half.
Eco‑Conscious Styling: Sustainable Tools, Products, and Waste‑Reduction
Beauty enthusiasts increasingly seek greener alternatives. Below is a roadmap for making the low ponytail with curls environmentally friendly without sacrificing performance.
Tools with a smaller carbon footprint
- Biodegradable curling rods: Brands now offer ceramic barrels made from recycled aluminum and coated with plant‑based non‑toxic polymers. These heat evenly and last longer, reducing replacement frequency.
- Reusable silicone rollers: Unlike disposable foam, silicone rollers can be sterilized in hot water and reused indefinitely. Their grip is strong enough to hold damp hair without clips.
- Solar‑powered hair dryer: A compact dryer equipped with a solar panel can charge via sunlight, perfect for outdoor events.
Product choices that minimize plastic waste
- Refillable spray bottles: Purchase a 500‑ml refill pouch of flexible hairspray and transfer it to a glass atomizer. Glass is recyclable and reduces micro‑plastic shedding.
- Zero‑waste curl creams: Look for jars with bamboo lids and formulas that use natural emulsifiers like lecithin instead of synthetic surfactants.
- Solid shampoo bars: A sulfate‑free bar can be used in the prep stage; it produces less wastewater and eliminates plastic bottles.
Waste‑reduction habits during styling
- Reuse bobby pins by storing them in a magnetic strip rather than discarding after each use.
- Collect used cotton pads in a small bin; they can be composted if they’re 100 % cotton.
- When removing the ponytail, gently unwind the scrunchie instead of cutting it off. A high‑quality fabric scrunchie can last years.
Edge case: For those with sensitive scalps, some eco‑friendly products may contain higher concentrations of natural oils that can cause buildup. Counteract this by incorporating a monthly clarifying rinse using diluted apple‑cider vinegar.
Advanced Finishing Techniques: Braids, Wraps, and Decorative Accents
Beyond the basic low ponytail, integrating braids or decorative elements can elevate the style for weddings, photo shoots, or everyday glam.
Incorporating a hidden braid
- After forming the curls, separate a thin 1‑inch section from each side of the head, near the temples.
- Take the left section and braid it three‑strand style, keeping it close to the scalp. Secure the end with a discreet elastic.
- Repeat on the right side, mirroring the braid.
- Gather the remaining hair (including the two braids) into the low ponytail. The braids will be concealed within the curl mass, adding hidden texture.
Edge case: For very thick hair, the braids may add bulk that pushes the ponytail upward. To compensate, pull the ponytail slightly lower on the neck and use a wider scrunchie to distribute tension evenly.
Silk ribbon wrap
A silk ribbon can replace the traditional scrunchie for a luxe finish. Choose a ribbon width of 1 cm and a length of 30 cm. Wrap the ribbon around the base of the ponytail twice, tucking the ends under the last coil. The silk’s smooth surface reduces friction, helping the curls stay smooth.
Floral or jeweled accents
Insert a small dried rosebud or a crystal hairpin between two curls near the crown. For a more dramatic effect, thread a thin chain through the base of the ponytail before securing the scrunchie; the chain will peek through the curls, catching light.
Practical tip: When using metallic accessories, apply a light coating of anti‑frizz serum first. The serum creates a barrier that prevents the metal from snagging delicate curls.
Post‑Style Hair Care: Protecting the Scalp and Maintaining Curl Integrity
Even after the look is perfect, proper aftercare extends the life of the style and safeguards hair health.
- Scalp massage: Gently massage the nape with fingertips for 30 seconds each night. This stimulates blood flow and reduces tension caused by the low ponytail’s pull.
- Night‑time protection: Sleep on a satin pillowcase or wrap the ponytail in a silk scarf. Both reduce friction that can cause curls to unravel and prevent split‑ends.
- Refresh spray: Mix 1 part distilled water, 1 part rose water, and a few drops of lightweight leave‑in conditioner in a spray bottle. Lightly mist the curls in the morning to revive bounce without re‑curling.
- Weekly deep conditioning: Use a protein‑rich mask (e.g., keratin or collagen) once a week. Apply to the mid‑lengths and ends, avoiding the scalp to prevent excess oiliness near the ponytail base.
- Elastic rotation: If you wear the low ponytail frequently, rotate the position of the scrunchie (e.g., a few centimeters left or right) each day. This prevents localized stress on the same hair follicles.
Edge case: Clients with alopecia‑prone areas may experience increased shedding if the ponytail is too tight. In such cases, replace the elastic with a fabric‑covered, non‑binding band and limit wear to under 4 hours per day.
By integrating these post‑style practices, the low ponytail with curls remains vibrant, and the hair stays resilient for the next styling session.
FAQ
Q1: Can I create a low ponytail with curls on very short hair?
Yes. If your hair is at least 3‑4 inches long, you can use small foam rollers or a mini curling wand. For ultra‑short cuts, consider a half‑up low ponytail that incorporates the curls from the longer top layer.
Q2: How long will the curls hold if I’m active (e.g., walking, light exercise)?
With a flexible hairspray and a secure scrunchie, curls typically stay intact for 6‑8 hours of normal activity. For longer endurance, opt for a stronger hold spray and avoid excessive humidity.
Q3: Is it safe to use a curling iron on damp hair?
Never curl hair that is wet; it can cause uneven heat distribution and damage. Hair should be damp (about 80 % dry) and have a heat protectant applied before using any hot tool.
Q4: What’s the best way to remove the style without causing breakage?
Start by loosening the scrunchie gently, then use your fingers to unwind the curls from the base. If you used bobby pins, remove them first. Finish by lightly brushing with a wide‑tooth comb.
Q5: Can I add accessories like flowers or pearls to the low ponytail?
Absolutely. Insert a small flower or pearl between the curls near the base, or thread a thin ribbon through the scrunchie for an extra decorative touch. Just ensure the accessory is lightweight to avoid pulling on the hair.
Related posts:
 Perfect Curly Hair Routine
 The Return of Silk Scrunchies
 The Half-Ponytail Updo Celebrities Can’t Stop Wearing This Season
 Easy Summer Updos for Every Hair Type
 Blow Drying Hair Without Damage: Expert Tips
 The Five-Minute Fix for Ponytail Frizz That Actually Works
 The Best Hair Ties for Every Hair Type and Style
 Silk Hair Ties: Gentle on Hair, Tough on Tangles