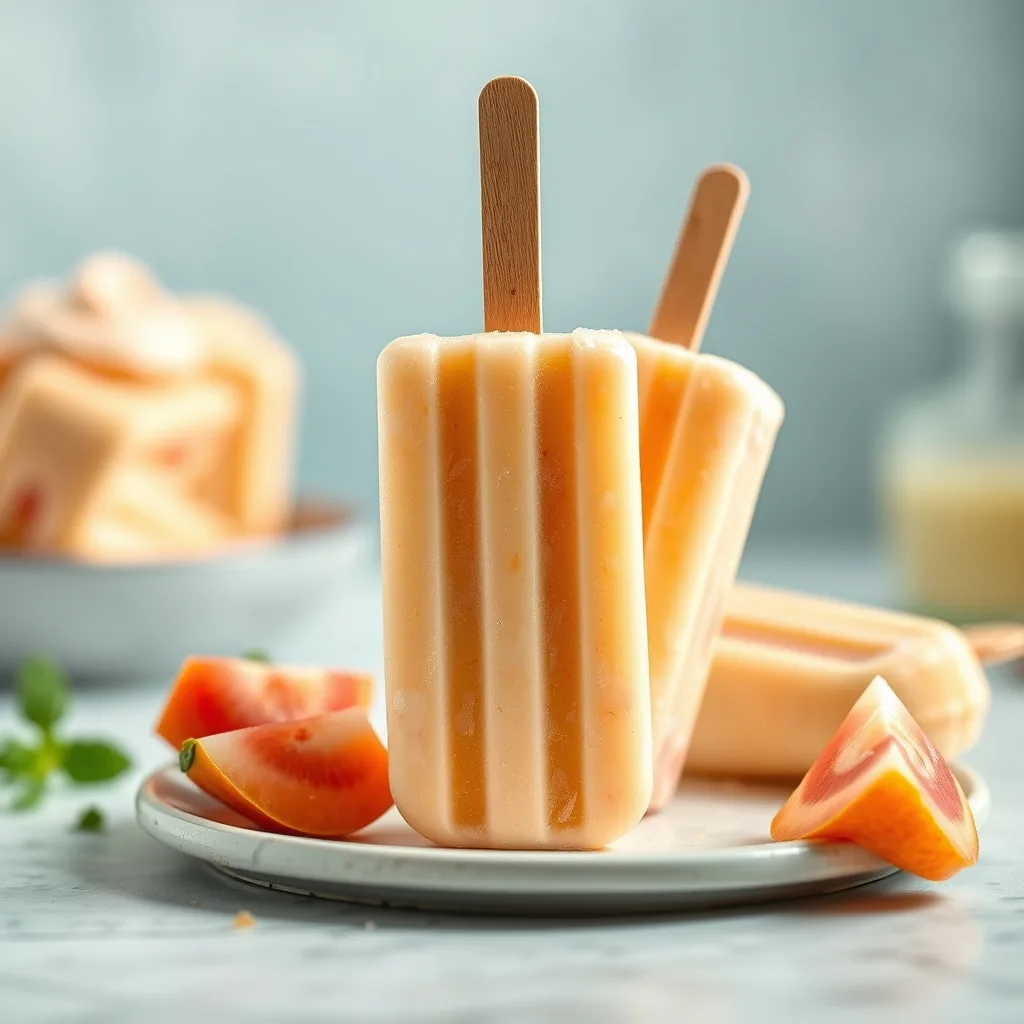
There’s something magical about the taste of a classic creamsicle – the bright orange sorbet swirled with a velvety vanilla ribbon that instantly transports you to warm afternoons spent chasing ice‑cream trucks. For many, that flavor is forever linked to childhood summers, backyard picnics, and the simple joy of a frozen treat. But for those who avoid dairy, either for health reasons, ethical choices, or lactose intolerance, recreating that nostalgic flavor can feel like a culinary puzzle.
This article walks you through a completely dairy‑free, dreamy creamsicle that captures the iconic orange‑vanilla duo without a single splash of milk or cream. We’ll cover the science behind the texture, the best plant‑based ingredients, step‑by‑step instructions, creative twists, storage tips, and even a short FAQ to troubleshoot common issues. By the end, you’ll have a reliable, crowd‑pleasing recipe that feels like a summer memory in every bite.
Why a Dairy‑Free Creamsicle Works – The Science of Texture
Traditional creamsicles rely on dairy fat to create a smooth, creamy mouthfeel. When you remove dairy, you lose that natural emulsifier and fat structure. The trick is to replace it with plant‑based fats and stabilizers that mimic the same sensory experience. Coconut milk, cashew cream, and avocado are popular choices because they contain medium‑chain triglycerides and a high proportion of saturated fat, which freeze into a soft‑serve consistency rather than a hard ice block.
In addition to fat, we need a stabilizer to prevent ice crystals from forming. Arrowroot powder, tapioca starch, or a small amount of xanthan gum can create a silkier texture. Finally, a touch of acidity (like lemon juice) balances the sweetness and heightens the orange flavor, much like the original recipe.
Choosing the Right Plant‑Based Base
Three plant‑based bases work especially well for a dairy‑free creamsicle:
- Coconut Milk (Full‑Fat) – Provides a buttery mouthfeel and subtle tropical notes that complement orange without overpowering it.
- Cashew Cream – Neutral in flavor, high in protein, and creates a luxuriously smooth texture when blended.
- Silken Tofu – Offers a neutral canvas and a protein boost; ideal for those who want a lower‑fat version.
For this recipe we’ll use full‑fat coconut milk because its natural fat content yields a rich, melt‑in‑your‑mouth texture that most people associate with classic creamsicles. If you have a coconut allergy, swap in an equal amount of cashew cream and add a teaspoon of coconut oil to preserve the fat level.
Ingredient List – Fresh, Simple, and Seasonal
All ingredients are chosen for flavor authenticity, nutritional balance, and accessibility. The quantities below make about 1.5 quarts (6 cups) of frozen treat, enough for 8–10 servings.
- 2 cups full‑fat canned coconut milk (shake the can well before opening)
- 1 cup fresh orange juice (about 2–3 large navel oranges, strained)
- ¼ cup orange zest (use a microplane for fine zest)
- ½ cup organic maple syrup or agave nectar (adjust to taste)
- 2 tbsp arrowroot powder (or tapioca starch)
- 1 tsp pure vanilla extract
- ¼ tsp sea salt
- 1 tsp freshly squeezed lemon juice (optional, for brightness)
- ¼ tsp xanthan gum (optional, for extra creaminess; skip if you prefer a softer texture)
All of these ingredients are pantry‑friendly, and the fresh orange zest provides the aromatic punch that bottled flavorings can’t match.
Equipment You’ll Need for a Professional Result
While you can improvise, using the right tools makes the process smoother and ensures a consistent texture.
- Immersion blender or high‑speed countertop blender – to fully incorporate the arrowroot and achieve a silky base.
- Fine mesh strainer – for removing any zest fibers after blending.
- Ice cream maker – optional but highly recommended for a true soft‑serve consistency. If you don’t own one, a freezer‑safe metal loaf pan and a sturdy spatula will work.
- Measuring cups and spoons – for precise ratios.
- Thermometer (optional) – to monitor the mixture if you’re heating it to activate the starch.
Step‑by‑Step: From Base to Freezer
1. Prepare the orange flavor. In a small saucepan, combine the orange juice, orange zest, and lemon juice. Warm over low heat for 2‑3 minutes, just until fragrant. Do not boil, as high heat can degrade the bright citrus notes.
2. Activate the starch. In a separate bowl, whisk together the arrowroot powder (or tapioca starch) with ¼ cup of the coconut milk until smooth. This slurry prevents clumping when added to the warm liquid.
3. Combine the base. Add the remaining coconut milk, maple syrup, vanilla extract, and sea salt to the saucepan with the orange mixture. Stir gently and bring the mixture to a gentle simmer (around 180 °F/82 °C). Once simmering, whisk in the arrowroot slurry. Continue to whisk for another 1‑2 minutes until the mixture thickens slightly – it should coat the back of a spoon.
4. Cool the mixture. Remove the saucepan from heat and transfer the mixture to a large bowl. Let it sit at room temperature for about 10 minutes, then cover and refrigerate for at least 2 hours, or until completely chilled. Chilling the base before freezing reduces ice crystal formation.
5. Optional: Add xanthan gum. If you opted for xanthan gum, sprinkle it over the chilled mixture and blend with an immersion blender for 30 seconds. This step creates a uniform emulsion and adds a luxurious body.
6. Freeze. If you own an ice cream maker, pour the chilled mixture into the machine and churn according to the manufacturer’s instructions (usually 20‑25 minutes). For a no‑machine method, pour the mixture into a metal loaf pan, cover tightly, and place in the freezer. Every 30‑45 minutes, stir vigorously with a spatula to break up ice crystals. Repeat until the texture is smooth (about 3‑4 hours).
7. Serve. Scoop the creamsicle into chilled bowls or cones. Garnish with a thin orange slice, a drizzle of extra maple syrup, or a sprinkle of toasted coconut flakes for added texture.
Creative Variations to Keep Summer Fresh
Once you master the base, you can experiment with seasonal twists while keeping the dairy‑free integrity.
- Berry‑Infused Creamsicle – Replace half of the orange juice with pureed strawberries or raspberries. Adjust sweetness by adding a bit more maple syrup.
- Spiced Citrus – Add ¼ tsp ground ginger and a pinch of cinnamon to the warm orange mixture for a warm‑spice version that pairs well with autumn evenings.
- Low‑Sugar Option – Use a sugar‑free monk fruit blend instead of maple syrup and increase the vanilla to 1 ½ tsp to maintain flavor depth.
- Protein Boost – Blend in ¼ cup unflavored pea protein isolate after the mixture is chilled. This is ideal for post‑workout recovery without altering taste.
Storing and Re‑Freezing – Keeping the Dream Alive
Proper storage preserves the creamy texture and prevents freezer burn.
- Short‑term storage – Transfer the finished creamsicle to an airtight container and keep it in the freezer for up to 2 weeks. Let it soften at room temperature for 5‑10 minutes before serving.
- Long‑term storage – For storage beyond two weeks, press a piece of parchment paper directly onto the surface before sealing. This reduces exposure to air.
- Re‑freezing – If you’ve scooped out a portion and need to refreeze, gently fold the leftover into a fresh batch of the base before churning. This prevents a grainy texture caused by repeated freezing cycles.
Nutritional Snapshot – What You’re Getting
While exact numbers vary by brand, a typical ½‑cup serving of this dairy‑free creamsicle provides roughly:
- Calories: 150‑180 kcal
- Fat: 10‑12 g (mostly saturated from coconut, plus a modest amount of heart‑healthy medium‑chain triglycerides)
- Carbohydrates: 18‑22 g (natural sugars from orange and maple syrup)
- Protein: 1‑2 g
- Fiber: 1 g (from orange zest)
- Sodium: 30 mg
Because the recipe uses whole‑food sweeteners and fresh fruit, it avoids refined sugars and artificial additives. It’s also free of cholesterol and dairy‑derived lactose, making it suitable for most dietary preferences.
Tips for Perfect Summer Success – Troubleshooting Common Issues
Problem: Ice crystals form and the texture becomes grainy. Solution: Ensure the base is fully chilled before freezing, and if using a freezer‑only method, stir every 30‑45 minutes. Adding a pinch of xanthan gum or increasing the arrowroot amount by ½ tsp can also improve smoothness.
Problem: The flavor feels flat after freezing. Solution: Citrus aromas diminish with cold. Boost the orange zest by another teaspoon before blending, or finish with a splash of fresh orange juice just before serving.
Problem: The mixture is too soft and doesn’t firm up. Solution: Check the fat content of your coconut milk; “light” versions contain less fat and may not solidify properly. Use a full‑fat can and consider adding 1‑2 tbsp coconut oil to increase firmness.
Problem: The mixture separates after chilling. Solution: This usually means the starch wasn’t fully activated. Re‑heat the base gently, whisk in an extra teaspoon of arrowroot slurry, and cool again before freezing.
Problem: The final product is too sweet. Solution: Reduce the maple syrup by half and add an extra splash of lemon juice for balance. Remember that cold temperatures mute sweetness, so a slightly less sweet base often tastes perfect when served.
Harvesting and Selecting the Perfect Citrus for a Dairy‑Free Creamsicle
When the goal is to recreate that unmistakable summer memory, the orange component becomes the star of the show. Not all oranges are created equal, and the subtle differences in sugar content, acidity, and aromatic oils can dramatically shift the final flavor profile. Below is a practical guide to sourcing, storing, and preparing citrus so that every spoonful bursts with authentic sunshine.
- Navel oranges (late winter to early spring) – Their thick skin yields abundant zest and a sweet, low‑acid juice that mirrors the classic creamsicle taste. Choose fruit that feels heavy for its size; this usually indicates higher juice yield.
- Blood oranges (mid‑winter) – Offer a raspberry‑like undertone and a striking ruby hue. When blended into the base, they create a visually appealing pink‑orange swirl without additional coloring.
- Valencia oranges (summer months) – Higher in citric acid, they lend a brighter bite that can cut through richer plant‑based fats. Pair them with a touch more sweetener if you prefer a milder palate.
- Mandarins and tangerines – Their thin skins make zest extraction effortless, and the juice is naturally sweeter. Use them when you want a less tart, more candy‑like finish.
Edge case tip: If you live in a region where fresh oranges are out of season, frozen orange segments (unsweetened) retain most of their volatile oils when thawed quickly in an ice bath. After thawing, strain the liquid through a fine‑mesh sieve to remove excess water, then proceed with the recipe. The resulting juice may be slightly diluted, so compensate with a teaspoon of orange extract or an extra half‑teaspoon of zest.
Storage matters as much as selection. Whole oranges keep best at 45‑55°F with high humidity; a refrigerator crisper drawer works for most home cooks. Once cut, wrap the halves in a damp paper towel and place them in an airtight container; use within 48 hours to avoid oxidation. For zest, grate only what you need and freeze the remainder in a zip‑top bag on a sheet of parchment – this prevents clumping and preserves the essential oils for months.
Alternative Plant‑Based Fats and Thickeners: Beyond Coconut and Arrowroot
While coconut milk provides a convenient source of saturated fat, there is a whole palette of plant‑derived emulsifiers that can be swapped in to meet specific dietary goals, flavor preferences, or allergen restrictions. Below are four categories of alternatives, each paired with suggested usage ratios and troubleshooting notes.
- Macadamia cream – Blend soaked macadamia nuts (1 cup) with 1 cup water until silky. The resulting cream contains ~20 g of fat per cup, most of which is monounsaturated, yielding a buttery mouthfeel that pairs beautifully with citrus. Use a 1:1 substitution for coconut milk, but add 1 tbsp of refined coconut oil if you need extra firmness during freezing.
- Oat‑based “cream” – Combine rolled oats (½ cup) with 1 ½ cups cold water, blend, then strain. The liquid is lower in fat but high in beta‑glucan, which acts as a natural stabilizer. To achieve a comparable texture, increase the starch component (e.g., 3 tbsp tapioca starch) and incorporate a pinch of lecithin.
- Avocado‑oil emulsion – Whisk together ripe avocado flesh (½ cup), ¼ cup neutral oil (such as avocado or grapeseed), and ¼ cup water. This creates a rich, green‑tinged base that adds a subtle buttery note. Because the fat is unsaturated, the mixture stays softer; counterbalance with 1‑2 tbsp of melted cocoa butter or a small amount of gelatin (if not vegan).
- Chia‑gel thickener – Soak 2 tbsp chia seeds in ¼ cup water for 10 minutes; the resulting mucilaginous gel can replace up to ½ cup of arrowroot slurry. It contributes a pleasant bite and a boost of omega‑3 fatty acids, though it may introduce a faint speckled appearance if not fully blended.
When experimenting with alternative thickeners, keep the following edge cases in mind:
- If using agar‑agar (1 tsp dissolved in ¼ cup hot liquid) instead of arrowroot, the final product will set more firmly and retain shape at room temperature – ideal for making popsicle molds.
- Gelatin (1 tsp bloom in cold water, then melt) provides a custard‑like snap but is unsuitable for vegans; substitute with a blend of carrageenan (¼ tsp) and xanthan gum (¼ tsp) for a comparable mouthfeel.
- Excessive nut‑based cream can cause the mixture to separate during freezing if the temperature fluctuates. Stabilize by adding a small amount of soy lecithin (½ tsp) during the blending stage.
Advanced Sweetening Strategies for Health‑Focused Palates
Traditional sweeteners such as maple syrup impart a warm caramel background, but many consumers now seek lower‑glycemic or calorie‑reduced options. Below is a menu of sweetening systems that can be calibrated to achieve the same level of perceived sweetness without sacrificing the citrus‑vanilla balance.
- Erythritol‑stevia blend – Combine ⅔ cup erythritol with ¼ tsp liquid stevia. The erythritol provides bulk and a sugar‑like crystal structure, while stevia supplies the lingering sweet finish. Dissolve the erythritol in the warm orange mixture before adding the stevia to avoid graininess.
- Date paste – Process pitted Medjool dates (½ cup) with ¼ cup warm water until smooth. Dates contribute fructose, fiber, and a caramel undertone that complements orange. Use ⅓ cup of date paste in place of maple syrup, then taste and adjust with a splash of lemon juice.
- Monk fruit extract – Pure monk fruit liquid is up to 250× sweeter than sugar, so only 1 tsp is needed for a ½‑cup sweetener equivalence. Because it lacks bulk, pair it with a bulking agent such as inulin (2 tbsp) to maintain texture.
- Yacon syrup – Low in calories and high in prebiotic fructooligosaccharides, yacon syrup adds a subtle earthy sweetness. Substitute ¼ cup of maple syrup with ¼ cup yacon syrup; the lower glycemic index makes it suitable for diabetic‑friendly versions.
Practical example: For a keto‑compatible batch, replace the ½ cup maple syrup with ⅓ cup erythritol‑stevia blend and add 2 tbsp powdered erythritol to the final mixture after chilling to avoid crystallization. The result stays under 2 g net carbs per serving while preserving the bright citrus character.
Scaling the Recipe for Large Gatherings and Commercial Production
Transitioning from a home‑size batch (≈6 cups) to a party‑size or even small‑scale commercial run requires careful attention to proportion, equipment capacity, and food‑safety protocols. The following framework helps you upscale without losing the signature texture.
- Batch calculation – Multiply each ingredient by the desired factor (e.g., 10× for a 60‑cup batch). Keep the fat‑to‑water ratio within 30‑35 % to ensure a soft‑serve consistency. For every 1 cup of full‑fat coconut milk, add 0.5 cup of a secondary fat (macadamia cream or avocado‑oil emulsion) to maintain balance.
- Industrial mixing – Use a stainless‑steel paddle mixer with a low‑speed setting to avoid incorporating excess air, which can cause large ice crystals. A mixing temperature of 70‑75°F (21‑24°C) is ideal before the pasteurization step.
- Pasteurization – Heat the combined base to 165°F (74°C) for 30 seconds, then rapidly chill to 40°F (4°C). This step eliminates potential pathogens and stabilizes the starches, especially when using alternative thickeners like agar‑agar.
- Freezing technology – For high‑volume output, a continuous‑flow blast freezer (‑30°F /‑34°C) reduces freeze time to under 20 minutes, preserving volatile orange oils. If a batch freezer is used, churn at 15 rpm for 25‑30 minutes, then transfer to a hardened steel storage bin for rapid hardening.
- Packaging and labeling – Portion the finished creamsicle into 4‑oz recyclable containers, leaving a ¼‑inch headspace to accommodate expansion. Include a “best‑by” date (14‑day shelf life) and a clear allergen statement, especially if nut‑based fats were employed.
Edge‑case considerations for commercial settings:
- High ambient humidity can cause condensation on the product surface, leading to ice crystals. Use a dehumidifier in the freezing area or apply a thin coating of coconut oil after the final freeze.
- If the batch includes fruit purées (e.g., berry‑infused versions), monitor pH; values below 3.5 increase the risk of microbial growth. Adjust with a food‑grade citric acid buffer to maintain pH 3.8‑4.2.
Creative Presentation and Pairing Ideas for a Memorable Summer Dessert
Even the most flawless creamsicle can become unforgettable when paired with complementary textures, colors, and flavors. Below are curated plating concepts that elevate the dairy‑free treat from a simple snack to a centerpiece.
- Layered Parfait – In a clear glass, alternate scoops of orange creamsicle with coconut‑lime granola and a drizzle of passion‑fruit coulis. The contrast of crunchy granola and tangy coulis highlights the creamy base.
- Pop‑in‑a‑Cone Mini‑Bites – Fill waffle cones with a small scoop of creamsicle, then dip the rim in melted dark chocolate (vegan) and roll in toasted almond slivers. Freeze for 15 minutes before serving for a handheld dessert.
- Summer Cocktail Fusion – Blend a chilled scoop of creamsicle with 1 oz bourbon, ½ oz orange liqueur, and a splash of club soda. Serve over crushed ice in a rocks glass, garnished with an orange twist. The dairy‑free base adds body without diluting the spirit.
- Savory‑Sweet Duo – Pair a small spoonful of creamsicle with a bite of spiced goat‑cheese (or a vegan cashew‑based cheese) on a crisp crostini. The salty tang accentuates the citrus sweetness, creating a sophisticated amuse‑bouche.
- Edible Flower Accents – Sprinkle dried lavender buds or rose petals over the top just before serving. The floral notes echo the citrus aromatics and add visual elegance.
When serving a crowd, consider a “creamsicle bar” where guests can choose from a palette of toppings: toasted coconut flakes, crushed pistachios, candied ginger, or a drizzle of hibiscus‑infused syrup. Provide small spoons and mini‑cones to encourage experimentation.
Special Dietary Adaptations: Keto, Paleo, and Allergen‑Free Variants
Modern dietary trends often demand precise macro‑nutrient profiles or the elimination of common allergens. Below are three targeted adaptations that retain the core orange‑vanilla experience while meeting strict criteria.
- Keto‑Friendly – Replace maple syrup with a blend of erythritol and monk fruit (as detailed earlier). Increase the fat content by adding 2 tbsp MCT oil or extra coconut cream. Keep total net carbs under 5 g per serving by using a low‑carb orange flavor concentrate (1 tbsp) instead of fresh juice.
- Paleo‑Compliant – Eliminate all processed starches. Substitute arrowroot with cassava flour (1 tbsp) and incorporate a small amount of honey (if not strict vegan) for sweetness. Use only nuts and seeds for thickening – for example, blend soaked sunflower seeds (½ cup) with water to create a nut‑free cream.
- Allergen‑Free (Nut‑ and Soy‑Free) – Opt for oat‑based cream (as described) and a seed‑based thickener such as ground flaxseed gel (2 tbsp flaxseed + 6 tbsp water). Ensure all sweeteners are free of cross‑contamination; certified gluten‑free maple syrup is a safe choice.
Edge cases to watch:
- When using MCT oil for keto, the mixture can become overly liquid at room temperature. Counterbalance with a higher proportion of solid fats (coconut butter) and a brief chilling period before the final freeze.
- Paleo versions that rely on honey may still contain trace pollen. For strict paleo, substitute with date syrup (low‑glycemic) and adjust the thickener to avoid a watery texture.
- Allergen‑free batches sometimes suffer from a thin mouthfeel because seed‑based creams lack the saturated fat of coconut. Adding a small amount of avocado oil (1 tbsp) restores richness without introducing nuts.
Environmental and Ethical Considerations When Making Dairy‑Free Creamsicles
Choosing a dairy‑free path often aligns with sustainability goals, but each ingredient carries its own ecological footprint. Understanding these nuances helps you make choices that truly benefit the planet.
- Coconut sourcing – Opt for certified organic, fair‑trade coconut milk. Look for brands that use a “closed‑loop” manufacturing process, where husk waste is repurposed as bio‑fuel or animal feed.
- Orange cultivation – Support growers who practice integrated pest management (IPM) and use drip irrigation, which reduces water consumption by up to 30 % compared with conventional methods.
- Packaging reduction – Purchase coconut milk in glass bottles or bulk cartons made from recycled paper. Transfer the liquid to reusable glass jars for storage, and use silicone lids to avoid single‑use plastic.
- Food waste minimization – The orange zest leftover from juicing can be dried and ground into a natural flavor powder, or added to homemade spice blends. Compost any remaining peel to enrich garden soil.
- Energy‑efficient freezing – When using a home freezer, set the temperature to the coldest sustainable setting and avoid opening the door frequently. For larger batches, a blast freezer that recirculates cold air uses less energy per pound of frozen product than a standard freezer.
By integrating these practices, you not only deliver a delicious dairy‑free treat but also contribute to a lower‑impact food system. Small changes—like selecting a sustainably harvested coconut brand or repurposing zest—compound over time, turning your summer dessert ritual into a model of conscious consumption.
FAQ – Your Most Common Questions Answered
1. Can I use frozen orange juice instead of fresh?
Yes, but fresh juice provides brighter flavor and natural pulp that enhances texture. If you use frozen, thaw it completely and give it a quick stir to reincorporate any separated water before adding to the base.
2. Is this recipe suitable for vegans?
Absolutely. All ingredients—coconut milk, maple syrup, arrowroot, and vanilla extract—are plant‑based. Just double‑check that any optional toppings (like chocolate chips) are also vegan.
3. How can I make this recipe lower in saturated fat?
Swap half of the coconut milk for unsweetened almond milk and add 1‑2 tbsp of a neutral oil (such as avocado oil) to maintain creaminess. The texture will be slightly lighter but still enjoyable.
4. What’s the best way to serve this for a party?
Pre‑scoop the creamsicle into individual ramekins, then garnish each with a thin orange slice, a sprig of mint, and a drizzle of toasted coconut. This presentation looks elegant and allows guests to customize their toppings.
5. Can I make this recipe ahead of time for a summer gathering?
Yes. Prepare the base up to step 4, then store it in the refrigerator for up to 24 hours. When you’re ready to serve, simply churn it in your ice cream maker or follow the no‑machine freezing method. This reduces prep time on the day of the event.
Related posts:
 Do you really need to refrigerate maple syrup? We asked an expert
 The Vegan Maple Syrup Question That’s Dividing the Internet
 The Slow Beauty Movement’s Secret Hydration Recipes
 Creative Vegan Zucchini Recipes You’ll Actually Crave
 Maple: The New Pumpkin Spice
 Simple Vegan Ice Cream Recipe
 Is Starbucks Almond Milk Healthy?
 The Coconut Pudding That Tastes Like Dessert But Isn’t