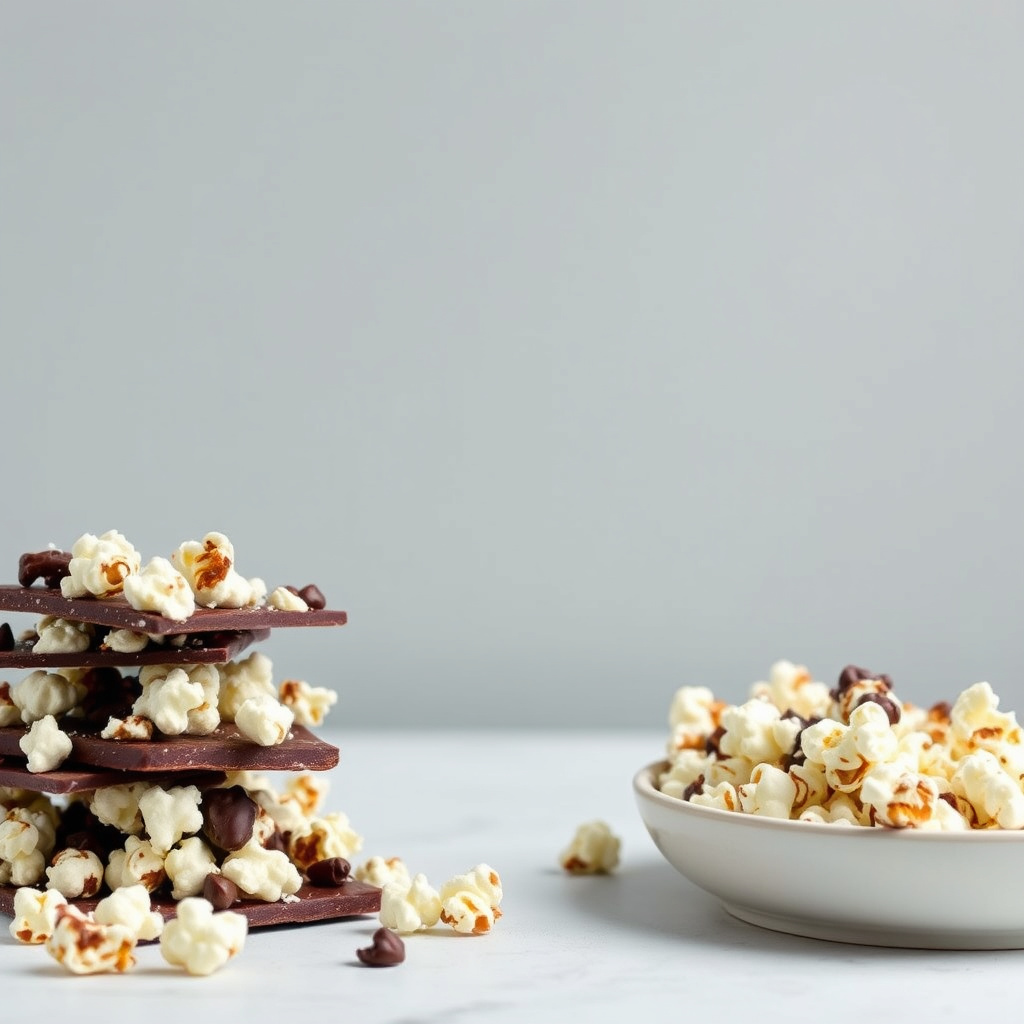
When a snack manages to feel indulgent and intelligent at the same time, it usually becomes a permanent resident in your kitchen. Dark chocolate popcorn bark is one of those rare creations. It looks like a tray of glossy chocolate bark, but every bite delivers the satisfying crunch of popcorn, the snap of high-quality dark chocolate, and whatever mix-ins your imagination can dream up. It is the kind of treat that earns a spot at movie night, a lunchbox surprise, a holiday platter, and even a casual weekend study session without ever feeling like a compromise.
What makes this snack especially appealing is how simple the method truly is. You do not need a candy thermometer, special equipment, or pastry training. You melt, you stir, you spread, and you chill. Yet the result is a bark that tastes like it came from a specialty shop. The real secret is choosing your ingredients with a little intention. A better chocolate, a better popcorn, and a thoughtful sprinkle on top will turn a five-minute process into something memorable.
This guide walks you through everything you need to know to make dark chocolate popcorn bark that is both smart and indulgent. You will learn the role each ingredient plays, the technique that keeps the chocolate glossy and crisp, the flavor combinations that genuinely work, and the storage tips that keep every piece tasting fresh. Along the way, you will find practical ideas for gifting, hosting, and adding a small nutritional boost without sacrificing the joy of the treat.
## Why Dark Chocolate and Popcorn Are a Brilliant Match
There is a real reason this combination works so well, and it goes beyond simple taste. Popcorn offers a light, airy crunch that contrasts with the dense, snappy texture of tempered chocolate. When you bite into a piece, the popcorn shatters gently while the chocolate breaks clean, giving your palate two different sensations in a single moment. The neutral flavor of popcorn also acts as a canvas, allowing the deep cocoa notes in dark chocolate to lead the way rather than fight against cloying sweetness.
From a smart-snack perspective, popcorn is one of the few whole-grain snacks most people already enjoy. Air-popped popcorn provides fiber and is naturally low in added sugar, which means you control the sweetness by how much chocolate and topping you add. Choosing dark chocolate, especially varieties with a higher cacao percentage, brings along the antioxidant compounds associated with cocoa, while also keeping the overall sugar content more modest than milk or white chocolate. That is why this bark feels indulgent without tipping into the territory of an everyday dessert overload.
## Choosing the Right Ingredients
Every element in this bark earns its place, so thoughtful choices make a real difference.
### The Chocolate
A good bar of dark chocolate is the star. Look for chocolate with a cacao percentage between 60 and 75 percent if you want richness without bitterness. Chocolate labeled as baking bars, couverture, or simply high-quality dark chocolate bars all work well. Avoid chocolate chips if you can, because they contain stabilizers that resist melting into a smooth, glossy finish. If you must use chips, add half a teaspoon of coconut oil per cup of chips to encourage a smoother melt.
### The Popcorn
Air-popped popcorn is the cleanest base. You can pop kernels in a stovetop pot with a small amount of neutral oil, use a hot air popper, or choose a plain, low-sodium pre-popped popcorn without butter or seasoning. The goal is to keep the popcorn neutral so it does not clash with the chocolate. Make sure to remove any unpopped kernels, as they can ruin the texture and present a hard, unpleasant bite.
### The Mix-Ins
This is where the bark becomes your own. Chopped toasted nuts add protein and crunch. Dried fruit contributes chew and tartness. A pinch of flaky salt pulls the chocolate flavor forward. Spices like cinnamon, cardamom, or smoked paprika add intrigue. A drizzle of nut butter creates visual interest and flavor depth. The mix-ins also allow you to tailor the bark to the season or the occasion without changing the core method.
## The Method: Step-by-Step
A successful bark comes down to a few small details.
Step one: line a baking sheet with parchment paper or a silicone mat. This prevents sticking and makes cleanup effortless.
Step two: pop about eight cups of popcorn and place it in a large bowl. Remove every unpopped kernel. Lightly salt the popcorn if desired, but keep the seasoning subtle.
Step three: chop the dark chocolate into small, even pieces so it melts smoothly. Place about two cups of chopped chocolate in a heatproof bowl.
Step four: melt the chocolate using a double boiler or a microwave in short bursts at half power, stirring between each interval. Stop when the chocolate is just melted and still warm. Avoid overheating, because chocolate loses its glossy snap when it gets too hot.
Step five: pour the melted chocolate over the popcorn. Use a spatula to gently fold everything together, working carefully so the popcorn does not crush.
Step six: spread the chocolate-covered popcorn onto the prepared sheet in an even layer about a half inch thick. Aim for a rustic shape with interesting edges, because bark is meant to look natural and handmade.
Step seven: sprinkle the top with your chosen mix-ins while the chocolate is still wet. Press gently so the toppings stick.
Step eight: chill the bark in the refrigerator for thirty to forty-five minutes, or until completely set. Break it into pieces with your hands for an organic look, or cut it with a sharp knife for cleaner edges.
## Flavor Combinations That Genuinely Work
A few well-tested pairings can guide your creativity.
### Sea Salt and Toasted Almond
The classic for a reason. The salt sharpens the dark chocolate, and the toasted almonds contribute warmth and texture. A light drizzle of olive oil over the top before chilling adds a savory, almost grown-up edge.
### Espresso and Hazelnut
Stir a small amount of finely ground espresso into the melted chocolate, then top with toasted chopped hazelnuts. The coffee intensifies the chocolate flavor and the hazelnuts echo the flavor of a beloved European spread.
### Pistachio and Dried Cherry
The green pistachios and ruby dried cherries create a festive color combination. The tartness of the cherries balances the richness of the chocolate, and the pistachios add a buttery crunch.
### Coconut and Almond with Lime Zest
Stir toasted shredded coconut into the popcorn and chocolate mixture, top with slivered almonds, and finish with a small amount of lime zest. The citrus lifts the entire bark and adds brightness.
### Smoked Salt and Pumpkin Seed
A fall favorite. The smoked salt adds depth, and roasted pumpkin seeds bring protein, color, and a subtle nutty flavor that pairs beautifully with dark chocolate.
## A Few Techniques That Improve Every Batch
Even with such a simple recipe, a handful of habits will produce better results every time.
First, let your melted chocolate cool for a minute before pouring it over the popcorn. Chocolate that is too hot can make the popcorn slightly soggy or cause the toppings to slide off.
Second, do not over-mix. Fold gently so the popcorn keeps its airy crunch. Overworking the mixture crushes the popcorn and creates a denser, less interesting bark.
Third, spread the bark in a single layer with some texture. A flat, compressed slab breaks into pieces that feel heavy. A loose, slightly uneven layer yields light, varied pieces that look more inviting.
Fourth, when adding mix-ins, think about color and shape. A sprinkle of bright dried fruit, a dusting of cocoa nibs, or a few curls of white chocolate on top can make the bark look like a gift without any extra effort.
Finally, if you live in a warm climate, store the bark in the refrigerator so the chocolate stays firm. If your home is cool and dry, storing it in an airtight container at room temperature preserves the chocolate’s snap and the popcorn’s crunch.
## Smart Indulgence: Nutritional Considerations
Treats earn their place in a balanced life when they are genuinely enjoyed, and this bark is designed to be savored slowly rather than eaten mindlessly. Because it is rich and textured, a small piece tends to feel satisfying, which naturally encourages portion awareness. Choosing a dark chocolate with a higher cacao percentage and adding nuts or seeds can increase the protein, fiber, and antioxidant content of each piece, making the snack feel a little more substantial.
If you want to push the nutritional value further, you can incorporate a tablespoon of ground flaxseed or chia seed into the chocolate before pouring, or sprinkle cacao nibs on top for an extra boost of flavor and crunch. None of these additions change the character of the bark. They simply round it out, the way a thoughtful side dish complements a main course.
For those with dietary considerations, this recipe adapts well. Use dairy-free dark chocolate for a vegan version. Choose certified gluten-free popcorn and toppings for a gluten-free treat. Swap the standard baking chocolate for sugar-free varieties if you want to keep the sugar content lower. The flexibility of the method is one of its quiet strengths.
## Serving and Gifting Ideas
Dark chocolate popcorn bark is a wonderful hostess gift because it looks beautiful without any packaging skills. Stack a few pieces in a clear cellophane bag, tie it with a simple ribbon, and add a small handwritten tag with the ingredients and a serving suggestion. It is also a thoughtful homemade holiday gift, especially when you make several batches with different toppings so the recipient gets a small variety.
For casual entertaining, set out a bowl of the bark alongside a cheese board or a dessert platter. The combination of sweet and salty makes it a natural partner for a glass of red wine, a hot cup of coffee, or a cold glass of milk. You can also crumble pieces of bark over vanilla ice cream for a quick dessert that feels special without any extra cooking.
If you love meal prep, this bark is a useful addition to your snack rotation. Break it into small portions and store them in individual containers for lunchboxes, travel snacks, or afternoon pick-me-ups. Because each piece is so satisfying, one or two pieces is usually enough, which means a single batch can last for a while.
## Storage and Make-Ahead Tips
Proper storage keeps the bark tasting fresh for up to two weeks. Place the pieces in an airtight container with sheets of parchment or wax paper between the layers to prevent sticking. Store the container in a cool, dry place away from direct sunlight, or in the refrigerator if your kitchen runs warm.
Avoid storing the bark near strong-smelling ingredients, because chocolate easily absorbs odors from the environment. If you live in a humid climate, refrigeration is your best friend. Just allow the bark to sit at room temperature for five minutes before serving so the chocolate softens slightly and the flavor opens up.
You can also freeze the bark for longer storage. Place the pieces in a single layer on a sheet pan to freeze them quickly, then transfer them to a freezer-safe bag or container. When you are ready to enjoy, let the bark thaw in the refrigerator for an hour or at room temperature for twenty minutes. The texture holds up beautifully, and the chocolate keeps its snap.
## Common Questions and Helpful Answers
### How do I keep the chocolate from turning dull or streaky?
Chocolate becomes dull or streaky when it is overheated, when moisture gets into it, or when it cools too slowly. Melt it gently at low heat, keep water completely away from the bowl, and let the bark set in the refrigerator rather than at room temperature. These three small habits produce a glossy, professional-looking finish every time.
### Can I use milk or white chocolate instead of dark chocolate?
You absolutely can, though the result will be sweeter and less complex. If you use milk or white chocolate, consider reducing the amount of added sweet mix-ins like dried fruit or candy pieces. A pinch of flaky salt becomes even more important, because it balances the extra sugar and keeps the bark from feeling one-note.
### What is the best way to pop popcorn for this recipe?
Air-popping produces the cleanest flavor and the lightest texture. If you pop on the stovetop, use a small amount of a neutral oil like coconut or grapeseed oil and avoid butter. If you use microwave popcorn, choose a plain variety without added butter or seasoning and remove any unpopped kernels before mixing.
### Can I add a sweet drizzle on top of the bark?
A drizzle of melted white chocolate, peanut butter, or a small amount of caramel can add a beautiful finishing touch. Wait until the dark chocolate layer has set, then drizzle the topping over the bark in thin lines. Let the drizzle harden before breaking the bark into pieces so the design stays clean.
### How do I know when the bark is ready to break into pieces?
The bark is ready when the chocolate is completely firm and no longer tacky to the touch. If you press the surface lightly, it should feel hard and snap rather than bend. Chilling for thirty to forty-five minutes usually does the job, though a particularly thick layer may need a bit longer. If the bark is difficult to break, it simply needs more time in the refrigerator.
Dark chocolate popcorn bark is one of those treats that makes the everyday feel a little more intentional. With a few simple ingredients and a calm, unhurried approach, you can create a snack that feels special enough for company and easy enough for a quiet evening at home. It rewards small details, invites creativity, and offers the rare pleasure of a treat that feels both deeply satisfying and genuinely smart.
Troubleshooting Common Melting and Setting Issues
When working with chocolate, temperature control is everything, and understanding the science behind the process can save you from common pitfalls. Chocolate contains cocoa butter, which has a narrow melting point range between 86°F and 90°F. When you melt chocolate, you want it to reach about 110°F for dark chocolate, then allow it to cool slightly to around 88°F before pouring. If the chocolate cools too much before setting, it may appear grainy or develop a whitish film called fat bloom. This occurs when cocoa butter separates from the solids, often due to temperature fluctuations during the setting process.
To prevent this, ensure your work surface is completely dry and at room temperature. Never add cold chocolate to warm chocolate, as this can shock the emulsion. If you notice your chocolate starting to seize (become grainy and lumpy), immediately remove it from heat and add a tablespoon of warm cream or a small piece of fresh chocolate to help re-emulsify it. Stir gently and continuously until smooth.
Advanced Flavor Pairing Strategies
Beyond the basic combinations, there are sophisticated flavor pairings that elevate this bark to another level. Consider incorporating umami elements like miso caramel, which adds depth and complexity. A small amount of white miso mixed into melted chocolate creates a savory-sweet balance that surprises the palate. Similarly, rosemary-infused chocolate can be made by simmering a sprig in cream, then combining it with chopped chocolate. The herbal notes pair beautifully with the popcorn’s neutrality.
Spiced chocolate variations can include a hint of cayenne for heat, cardamom for floral notes, or even a drop of vanilla extract with a pinch of sea salt. For seasonal adaptations, consider pumpkin spice in fall, peppermint extract for holidays, or balsamic vinegar reduction for summer berries. The key is using these additions sparingly—one to two teaspoons per batch is usually sufficient to make an impact without overwhelming the base flavors.
Equipment Alternatives and Kitchen Hacks
While a double boiler setup is ideal, you can achieve professional results with common kitchen items. A microwave-safe bowl works well if you use short 20-second intervals, stirring between each, and always use 50% power. For those without a stand mixer, a sturdy wooden spoon and patience will suffice for folding. Instead of parchment paper, a silicone baking mat provides excellent non-stick performance and can be washed and reused multiple times.
If you don’t have a baking sheet, any flat, heat-safe surface will work—a large plate, a pizza stone, or even a cooling rack set over a tray. For portion control, use a ruler to mark your baking sheet into even sections before adding the chocolate. This ensures consistent pieces and makes cleanup easier. A bench scraper or offset spatula helps with spreading and cutting, though a regular butter knife can work in a pinch.
Seasonal and Holiday Adaptations
This bark adapts beautifully to different seasons and celebrations. For Christmas, consider a peppermint version with crushed candy canes sprinkled on top, or a red-and-green variation using dried cranberries and pistachios. Valentine’s Day calls for heart-shaped pieces cut with cookie cutters, or a rose-petal and white chocolate swirl. Spring celebrations benefit from pastel-colored drizzle work—using melted white chocolate tinted with natural food coloring—and additions like candied violets or lemon zest.
Summer adaptations might include tropical flavors with toasted coconut, dried pineapple, and a hint of lime zest. For Halloween, create a spooky effect with black cocoa powder dusted on top, or use candy eyes and ghost-shaped sprinkles. Thanksgiving versions can incorporate spiced pecans and a drizzle of caramel, while New Year’s celebrations call for champagne-infused chocolate or edible gold leaf for that special touch.
Advanced Presentation Techniques
To elevate your bark from homemade treat to gift-worthy item, presentation matters. For professional-looking pieces, use a sharp chef’s knife dipped in hot water and wiped dry between cuts. This creates clean edges without cracking the chocolate. Arrange pieces on a white platter for maximum visual impact, or layer them in clear cellophane bags with different colored ribbons for gift-giving.
Consider creating height with a tiered stand or displaying on a slate board for rustic appeal. Photography tips include shooting against neutral backgrounds and using natural light from a window. For events, create a chocolate bark tower by stacking pieces in a circular pattern, or make individual bark squares tied with twine for easy grabbing. Edible decorations like gold leaf, crystallized flowers, or drizzled patterns with different colored chocolates can transform the appearance from casual snack to artisanal confection.
Make-Ahead and Freezer-Friendly Options
For busy schedules, this bark can be prepared well in advance. The chocolate actually improves with a day or two of aging, allowing the flavors to meld and develop complexity. Store prepared and cut pieces in airtight containers with parchment separation between layers. For longer storage, freeze individual portions in labeled freezer bags, removing them the night before to thaw in the refrigerator. When ready to serve, allow the pieces to come to room temperature for 15-20 minutes for optimal texture.
Batch preparation is ideal for parties—double or triple the recipe and freeze half for later use. When thawed, the texture remains excellent, though some toppings may benefit from a quick re-crisp in a low oven (200°F for 5 minutes) to restore crunch. For gifting, prepare several varieties and arrange them in a decorative wooden box with tissue paper between layers, creating a beautiful, thoughtful present that can be enjoyed over several weeks.
Related posts:
 Hu Kitchen’s New Milk Chocolate Adventure
 Hidden Health Risks of Microwave Popcorn
 Dark Chocolate Benefits for Memory
 The World’s First Avocado Chocolate Bar is Finally Here
 Healthiest Chocolate Guide
 Masala Popcorn Recipe: A Spicy Twist on a Classic Snack
 15 Healthy Dark Chocolates for Guilt-Free Indulgence
 The Best Popcorn Makers for Movie Night at Home