Introduction
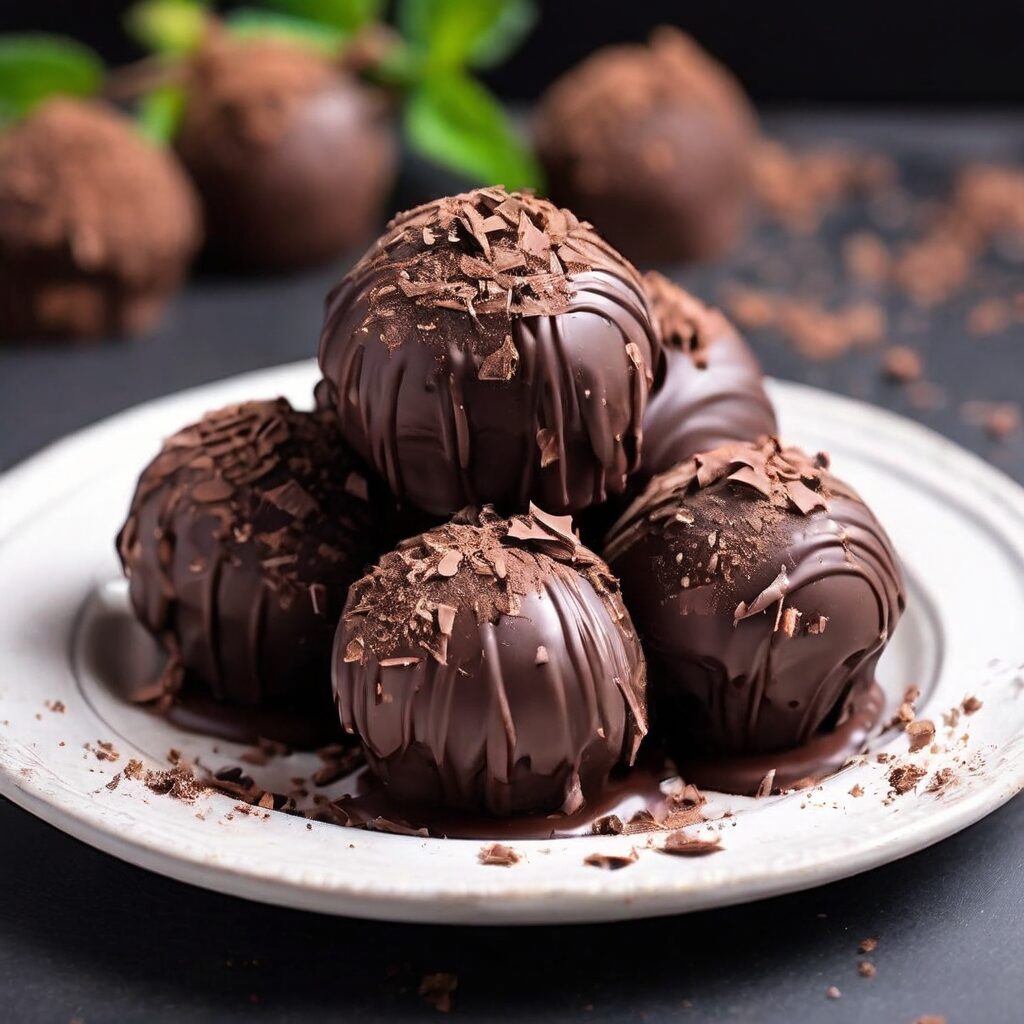
If you have a sweet tooth and a love for chocolate, there’s nothing more satisfying than indulging in homemade chocolate truffles. This decadent chocolate truffle recipe is perfect for any occasion, whether you’re hosting a dinner party, looking for a special gift, or simply craving a rich, chocolatey treat. Follow this guide to create the ultimate indulgent experience right in your kitchen.
Ingredients
- 8 oz high-quality dark chocolate (at least 70% cocoa)
- 1/2 cup heavy cream
- 1/4 cup unsalted butter
- 1/2 tsp vanilla extract
- Cocoa powder, finely chopped nuts, or desiccated coconut for coating
Instructions
- Prepare the Chocolate: Finely chop the dark chocolate and place it in a heatproof bowl.
- Heat the Cream: In a small saucepan, heat the heavy cream over medium heat until it just begins to simmer. Remove from heat immediately.
- Combine Ingredients: Pour the hot cream over the chopped chocolate. Let it sit for a minute to allow the chocolate to melt.
- Mix Until Smooth: Using a spatula, gently stir the mixture until all the chocolate has melted and you have a smooth ganache.
- Add Butter and Vanilla: Add the unsalted butter and vanilla extract to the ganache, stirring until the butter is completely melted and incorporated.
- Chill the Mixture: Cover the bowl with plastic wrap and refrigerate for at least 2 hours or until the ganache is firm enough to scoop.
- Form the Truffles: Using a small scoop or spoon, portion out the ganache and roll into balls. Place the truffles on a baking sheet lined with parchment paper.
- Coat the Truffles: Roll each truffle in cocoa powder, chopped nuts, or desiccated coconut to coat.
- Serve or Store: Enjoy the truffles immediately or store them in an airtight container in the refrigerator for up to two weeks.
Tips for Perfect Chocolate Truffles
- Use High-Quality Ingredients: The quality of chocolate you use will greatly impact the final product. Opt for high-quality dark chocolate with a high cocoa content.
- Temperature Control: Be careful not to overheat the cream. It should be hot but not boiling.
- Chill Properly: Ensure the ganache is sufficiently chilled before attempting to roll the truffles to avoid a sticky mess.
- Get Creative: Experiment with different coatings and flavors, such as adding a splash of liqueur to the ganache or using different types of nuts for coating.
The Molecular Structure of Perfect Ganache
To elevate a standard truffle to a professional-grade confection, one must understand that ganache is not merely a mixture, but a delicate emulsion of fat and water. In the standard recipe, the heavy cream provides the water and some fat, while the chocolate provides the cocoa butter and solids. When these are combined, the goal is to suspend the tiny fat globules within the watery liquid. If the emulsion breaks, the result is a grainy, oily mess rather than a silky, melt-in-the-mouth center. This usually happens if the cream is too hot or if the mixture is agitated too aggressively before the chocolate has sufficiently softened.
To ensure a stable emulsion, professional chocolatiers often use an immersion blender after the initial hand-stirring. By keeping the blades submerged to avoid incorporating air bubbles, you can create a microscopic bond between the fats and liquids that results in a much smoother texture. Furthermore, the ratio of chocolate to cream must be adjusted based on the cocoa percentage. A 70% dark chocolate requires a different ratio than a 50% dark chocolate because the higher cocoa butter content in the former will make the set much firmer. If you find your ganache is consistently too hard to scoop, increase the cream by 10%; if it is too soft, add more chopped chocolate during the melting phase.
Another factor in the molecular success of your truffle is the addition of glucose or invert sugar. While not in the basic recipe, adding a tablespoon of light corn syrup or honey can significantly improve the shelf life and texture. These sugars are hygroscopic, meaning they hold onto moisture, preventing the truffle from drying out and giving the ganache a luxurious, elastic quality that resists crystallization. This is particularly useful if you plan to keep your truffles for more than a few days, as it maintains that signature “fudgy” bite.
Advanced Infusion Methods for Complex Profiles
While vanilla extract is a classic flavoring, the real magic happens when you use the heavy cream as a vehicle for complex aromatics. The process of infusion allows you to pull delicate notes from whole spices, herbs, and teas without altering the moisture balance of the ganache. There are two primary methods: hot infusion and cold infusion. Hot infusion involves bringing the cream to a simmer, adding your aromatics (such as crushed cardamom pods, star anise, or Earl Grey tea leaves), and letting them steep for 15 to 30 minutes. You must then strain the cream and re-measure it, as some liquid will have evaporated or been absorbed by the ingredients.
Cold infusion is a gentler process, ideal for delicate herbs like fresh mint or basil. In this method, you bruise the herbs and let them sit in the cold cream in the refrigerator for 12 to 24 hours. This prevents the “cooked” taste that can sometimes accompany boiled herbs. For a modern twist, consider infusing the cream with toasted nuts or even browned butter. To do this, simmer the cream with toasted hazelnuts, then strain them out. The fat-soluble flavors of the nuts will remain in the cream, providing a deep, nutty undertone that complements the dark chocolate without the grittiness of actual nut pieces.
When working with alcohol-based infusions, timing is critical. Adding spirits like bourbon, rum, or Grand Marnier should be done at the very end of the mixing process, once the ganache has cooled to about 90°F (32°C). If added to boiling cream, the alcohol will evaporate, and the subtle floral or oaky notes of the liquor will be lost. Generally, you can replace up to 15% of the cream’s volume with a high-proof spirit without compromising the final set of the truffle. This adds a sophisticated warmth that lingers on the palate, perfectly balancing the bitterness of high-cocoa dark chocolate.
Technical Mastery of Tempering and Enrobing
While rolling truffles in cocoa powder is traditional, enrobing them in a tempered chocolate shell provides a satisfying snap and protects the ganache from oxidation. Tempering is the process of heating and cooling chocolate to specific temperatures to ensure the cocoa butter crystallizes into a stable form (Form V). Without tempering, the chocolate shell will be soft, dull, and prone to “bloom”—those unsightly white streaks caused by fat separating from the solids. To temper dark chocolate, melt it to 115°F (46°C), then cool it to 82°F (28°C) by adding “seed” chocolate (unmelted, tempered pieces), and finally reheat it to a working temperature of 88-90°F (31-32°C).
Once your ganache centers are rolled and chilled, they must be brought to a cool room temperature before dipping. If the centers are too cold, the tempered chocolate will set too quickly, often cracking as the ganache expands slightly. Use a specialized dipping fork or a plastic fork with the center tines removed to submerge each ball into the tempered chocolate. Lift it out, tap the fork against the side of the bowl to remove excess, and slide it onto parchment paper. This creates a thin, professional shell that shatters beautifully when bitten.
For a decorative touch, you can apply toppings to the enrobed truffles while the shell is still wet. A single flake of Maldon sea salt, a tiny piece of gold leaf, or a dusting of freeze-dried raspberry powder can signal the flavor profile inside. If you prefer a rustic look, wait for the shell to partially set, then roll the truffle between your palms (wearing latex gloves) to create a “spiky” or textured surface. This technique, often seen in high-end European chocolateries, adds visual interest and a unique mouthfeel that contrasts with the smooth interior.
Managing Moisture and Preventing Spoilage
One of the greatest challenges in homemade truffle production is managing the “water activity” within the ganache. Because ganache contains cream, it is a high-moisture environment where bacteria can theoretically grow over time. While the high sugar and fat content act as natural preservatives, certain steps can extend the shelf life from one week to several months. Professional recipes often include ingredients like sorbitol or invert sugar to bind the water molecules, making them unavailable for microbial growth. At home, ensuring your butter and cream are fresh and boiling the cream thoroughly (to kill any existing bacteria) is the first line of defense.
Condensation is another enemy of the truffle. When moving truffles from the refrigerator to a warm room, moisture from the air can condense on the surface of the chocolate. This leads to “sugar bloom,” where the sugar dissolves in the moisture and then recrystallizes into a grainy, white crust. To prevent this, always store truffles in an airtight container and, when removing them from the fridge, let the container sit unopened at room temperature for at least an hour. This allows the chocolates to acclimate slowly without coming into contact with humid air.
If you are gifting truffles and need them to remain shelf-stable at room temperature, consider using a “water ganache” or a high-percentage dark chocolate ganache with a lower cream ratio. Water ganache, made by emulsifying chocolate with a flavored liquid like fruit juice or coffee instead of cream, lacks the dairy proteins that spoil. While the texture is slightly different—cleaner and less creamy—the flavor of the chocolate is much more intense. This is a favorite technique among purists who want the chocolate’s terroir to be the star of the show.
Gourmet Textures and Inclusion Strategies
To move beyond the uniform softness of a standard truffle, consider incorporating different textures through inclusions. Inclusions are solid pieces added to the ganache after it has been emulsified but before it sets. Cocoa nibs are a popular choice, providing a bitter, nutty crunch that echoes the chocolate’s origin. For a more whimsical texture, “feuilletine”—thin, caramelized wafer flakes—can be folded in to provide a delicate crispness that doesn’t get soggy as quickly as traditional cookie crumbs.
Another advanced technique is the “double-layer” truffle. This involves piping a layer of fruit gelée or salted caramel into a chocolate shell before topping it with the ganache. For the home cook without professional molds, this can be achieved by flattening a small piece of ganache, placing a tiny dollop of firm caramel in the center, and then folding the ganache around it to trap the liquid center. When the truffle is bitten, the contrast between the firm outer shell, the creamy ganache, and the flowing center creates a multi-sensory experience.
The choice of salt also plays a vital role in texture and flavor perception. Instead of mixing fine table salt into the ganache, try using a coarse fleur de sel. The larger crystals won’t fully dissolve, providing occasional bursts of salinity that cut through the richness of the fats. This “intermittent reinforcement” of salt makes the chocolate taste sweeter and more complex. Similarly, adding finely ground espresso beans provides a slight grittiness that mimics the texture of stone-ground chocolate, adding a rustic, artisanal feel to your batch.
Plant-Based and Alternative Ganache Foundations
As dietary preferences evolve, mastering the vegan truffle has become essential for the modern host. The primary challenge in plant-based truffles is replacing the milk fats and proteins of heavy cream with an alternative that provides the same mouthfeel and stability. Full-fat coconut cream is the most common substitute, but it carries a distinct tropical flavor that may not suit every chocolate. For a more neutral profile, cashew cream—made by blending soaked raw cashews with a small amount of water until perfectly smooth—offers a high fat content and a luxurious thickness that closely mimics dairy.
Nut butters can also serve as the base for a “ganache-style” center. By mixing melted dark chocolate with almond butter or tahini, you create a truffle that is naturally dairy-free and packed with protein. The ratio here is typically 1:1, as the oils in the nut butter are already stable at room temperature. These truffles tend to be firmer and have a longer shelf life than dairy-based versions. For a fruit-forward vegan option, use a high-quality fruit purée (like raspberry or passion fruit) mixed with a small amount of glucose and melted chocolate. The acidity of the fruit brightens the chocolate, creating a refreshing alternative to the heavy, traditional truffle.
When making vegan truffles, be mindful of the chocolate’s ingredients. Many dark chocolates are naturally vegan, but some contain milk solids or are processed on shared equipment. Furthermore, the absence of dairy means the chocolate’s quality is even more apparent. This is the time to invest in single-origin bars with specific flavor notes like tobacco, red fruit, or jasmine. Without the masking effect of milk proteins, the nuances of the cocoa bean can truly shine, resulting in a sophisticated treat that appeals to all palates, regardless of dietary restrictions.
Aesthetic Finishing and Professional Presentation
The final step in the truffle-making journey is the visual presentation, which should reflect the labor and quality of the ingredients. For those who choose not to enrobe their truffles in a hard shell, the coating can be much more than just cocoa powder. Try using a “dusting” of matcha green tea powder for a vibrant contrast, or roll the truffles in crushed dehydrated hibiscus flowers for a tart, floral finish and a beautiful pink hue. If using nuts, toast them deeply to enhance their color and aroma before finely dicing them; pistachios, in particular, provide a stunning emerald green contrast against dark chocolate.
For enrobed truffles, professional chocolatiers use transfer sheets—thin plastic sheets printed with colored cocoa butter designs. When placed on a freshly dipped, wet truffle, the design transfers to the chocolate as it cools, resulting in intricate patterns that look factory-perfect. Alternatively, you can use a luster dust mixed with a drop of vodka to paint metallic stripes or splatters across the finished, set truffles. This “action painting” technique creates a modern, artistic look that is highly effective for gifts or dessert platters.
Packaging is the final frontier. Because truffles are sensitive to odors, they should be stored in boxes made from food-grade materials that don’t have a strong paper scent. If you are shipping them, use a sturdy outer box with plenty of cushioning and, if the weather is warm, include a gel ice pack wrapped in a paper towel to prevent the chocolates from melting or blooming. Each truffle should ideally sit in its own small paper cup (bonbon case), which prevents them from bumping into each other and losing their finish. Taking the time to present your truffles with this level of care ensures that the first impression is just as indulgent as the first bite.
FAQ
1. Can I use milk chocolate instead of dark chocolate?
Yes, you can use milk chocolate, but the truffles will be much sweeter. Adjust the amount of cream slightly to maintain the right consistency.
2. How do I store chocolate truffles?
Store chocolate truffles in an airtight container in the refrigerator. They can last up to two weeks when stored properly.
3. Can I freeze chocolate truffles?
Yes, you can freeze chocolate truffles. Place them in a single layer on a baking sheet to freeze, then transfer to an airtight container. They can be frozen for up to three months.
4. What if my ganache is too soft to roll?
If the ganache is too soft, try chilling it for a longer period. If it’s still too soft, you can mix in a bit more melted chocolate to firm it up.
5. Can I add different flavors to the truffles?
Absolutely! You can add a variety of flavors to your truffles, such as a splash of liqueur, a pinch of sea salt, or even a dash of chili powder for a spicy kick.
Conclusion
Creating your own chocolate truffles at home is not only a rewarding experience but also a delightful treat for any chocolate lover. With this easy-to-follow recipe, you can enjoy the rich, decadent flavor of homemade truffles whenever you desire. Experiment with different flavors and coatings to make each batch uniquely yours. Happy truffle-making!
Related posts:
 Chocolate Brain Truffles: A Delicious Way to Boost Cognitive Function
 Hu Kitchen’s New Milk Chocolate Adventure
 Dark Chocolate Benefits for Memory
 Healthy Homemade Peanut Butter Cup Recipe
 Easy Baileys Chocolate Truffles
 Easy Baileys Chocolate Truffles
 Recipe: Five Minute Protein Truffles
 Sweet Tooth Salvation: Sugar-Free Keto Dessert Bites That Actually Taste Amazing