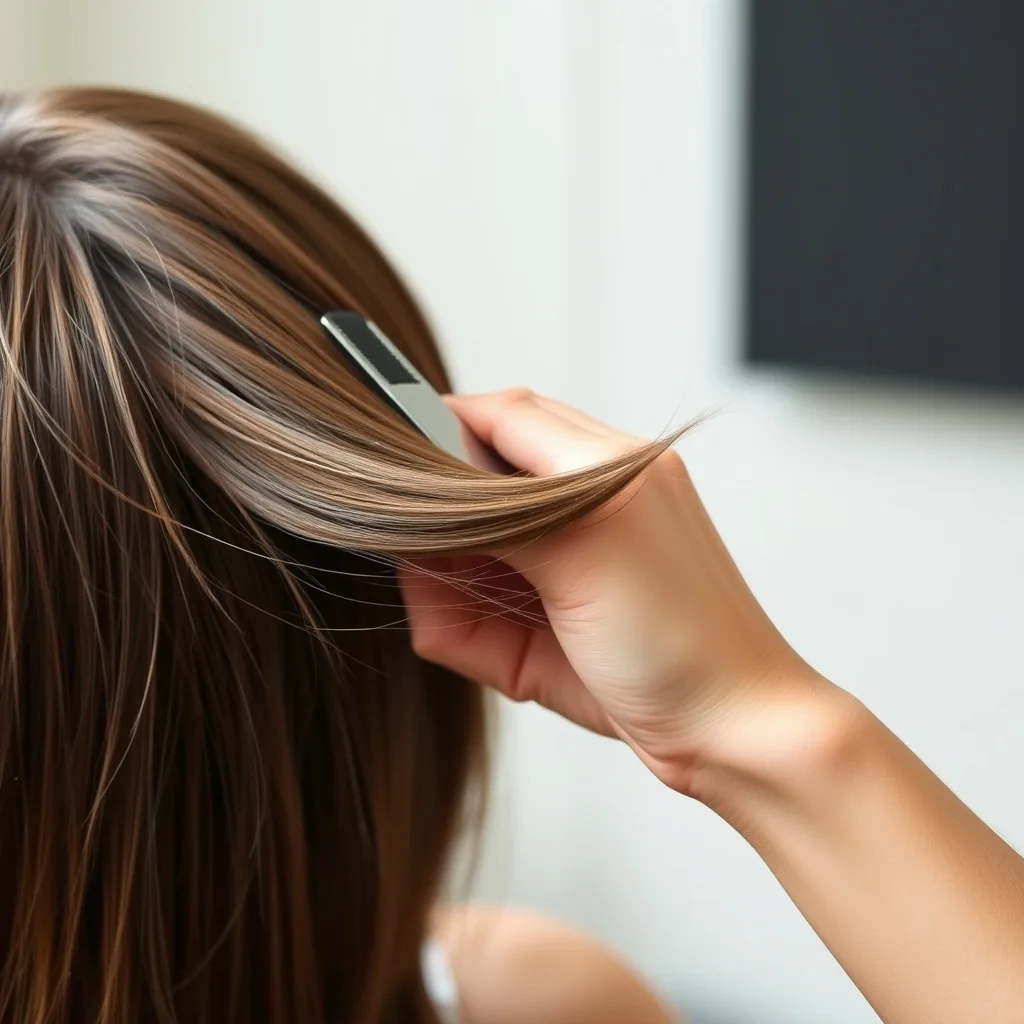
Finding yourself in a hair emergency—whether a split‑end surprise, a rogue curl, or a sudden need for a quick tidy‑up—can feel stressful. The good news is that with the right preparation, a few basic tools, and a clear step‑by‑step plan, you can trim your own hair safely and confidently. This guide walks you through every stage, from assessing the situation to fixing common slip‑ups, so you leave the bathroom looking polished, not panicked.
1. Understanding Why a DIY Trim Happens
Most people reach for scissors when they notice a problem that feels urgent: a breakage, an uneven fringe, or a sudden change in routine (travel, a sudden event, etc.). Recognising the trigger helps you decide how much to cut and which technique to use. A quick trim for a few millimetres of split ends is very different from reshaping a whole fringe. By defining the goal early, you avoid over‑cutting and keep the outcome intentional.
2. Assessing Your Tools and Preparing Your Space
Using the right equipment is the foundation of a safe DIY trim. Gather the following before you start:
- Sharp hair‑cutting scissors (not kitchen shears). Professional hair‑cutting scissors have a fine point and a precise hinge that prevents snagging.
- A fine‑tooth comb for detangling and sectioning.
- Hair clips or elastics to isolate sections.
- A mirror—ideally a wall‑mounted full‑length mirror plus a handheld one for the back of your head.
- Good lighting—natural daylight or a bright LED lamp reduces shadows that can hide uneven cuts.
Set up a clean, flat surface (the bathroom counter works well) and lay a towel to catch stray hairs. Having everything within arm’s reach minimises the urge to rush or improvise.
3. Basic Hair Anatomy for Safe Cutting
Knowing where the hair grows and how it behaves helps you cut with intention:
- Root to tip length—hair grows from the follicle at the scalp, extending outward. Cutting too close to the root can create an uneven appearance because the hair’s natural angle changes as it leaves the scalp.
- Growth direction—hair on the crown grows in a different direction than hair on the sides. Follow the natural lay to avoid creating choppy lines.
- Texture—straight hair lies flat, while wavy or curly hair springs back. Always trim when the hair is dry and in its natural state; wet hair shrinks when it dries, which can lead to a shorter final length.
4. Step‑by‑Step Guide to a Simple Trim
Follow these nine steps for a controlled, low‑risk trim. The method works for most hair lengths and textures, but you can adapt the amount you cut based on your goal.
- Wash and condition your hair as usual, then towel‑dry until it is damp but not dripping. Damp hair is easier to detangle and less likely to snap.
- Comb through thoroughly, starting at the ends and working upward. Remove any knots before you cut.
- Section the hair into manageable parts. For a full‑head trim, create a top layer (the crown) and a lower layer (the nape). Clip the top layer up.
- Determine the target length. Hold a small section between your fingers and decide how many centimetres you want to remove. A good rule of thumb for split ends is 0.5–1 cm.
- Trim using the “point‑cut” method. Hold the scissors vertically and make small, controlled snips into the ends of a 2–3 cm hair segment. This creates a soft, feathered finish rather than a blunt line.
- Check symmetry. Release a section, let it fall naturally, and compare both sides in the mirror. Make micro‑adjustments as needed.
- Repeat for each section. Work from the back to the front, always re‑comb and re‑evaluate before cutting.
- Final sweep. Once all sections are trimmed, run your fingers through the hair to feel for any uneven bits. If you spot a stray longer piece, trim it individually.
- Style as usual. Apply your regular product and dry or style. The final look will confirm whether the length feels balanced.
5. Techniques for Different Hair Types
While the core steps remain the same, each hair type benefits from a slight tweak.
- Straight, fine hair—use a fine‑tooth comb and a light touch. Point‑cutting prevents a blunt, heavy line that can make thin hair look flat.
- Wavy hair—work with the natural wave pattern. Trim while the hair is dry and in its relaxed state; cutting wet wavy hair often results in a shorter, tighter wave once it dries.
- Curly hair—the “shave‑and‑snap” method works well: curl the hair as it normally forms, then trim only the visible ends. Avoid comb‑throughs that stretch curls; instead, use your fingers to separate sections.
- Thick, coarse hair—use heavier scissors (often labelled “heavy duty”) to cut cleanly through dense strands. Section the hair into smaller subsections (e.g., four instead of two) to maintain control.
6. Fixing Common Mistakes on the Spot
Even with careful planning, small slip‑ups happen. Here’s how to recover without starting over:
- Accidentally cut too much—if you’ve removed more than intended, try a gentle layering technique. Cut very small, angled sections at the top to add visual volume and disguise the shorter length.
- Uneven sides—measure the longer side against a ruler or a piece of string, then trim the shorter side to match. A quick visual check with the mirror held at a 45‑degree angle helps.
- Split ends still visible—re‑wet the hair, comb, and perform a second point‑cut pass focusing only on the remaining uneven tips.
- Fringe looks too thick—use the “slide‑cut” technique: hold the scissors parallel to the fringe, slide them along the edge, and snip only the bottom half of each strand.
7. Maintaining Your New Length and Styling Tips
After a successful DIY trim, keeping the look fresh requires a few maintenance habits:
- Regular trims—schedule a 1‑2 cm trim every 6–8 weeks. This prevents split ends from traveling up the shaft.
- Gentle drying—use a microfiber towel and a low‑heat setting on your dryer. Rough towel‑drying can cause breakage at the newly cut ends.
- Protective styling—braids, loose buns, or soft headbands reduce friction and keep the ends healthy.
- Leave‑in conditioners or light oils—apply a pea‑size amount to the ends to seal moisture without weighing hair down.
8. When to Call a Professional
DIY trimming is empowering, but there are scenarios where a professional’s expertise is worth the investment:
- Major haircut changes—going from long to short, adding layers, or reshaping a fringe is best handled by a stylist who can balance proportions.
- Severe damage—if hair is heavily broken, chemically compromised, or showing large sections of split ends, a salon treatment can restore health before you attempt a trim.
- Complex textures—tight curls, coily hair, or highly textured styles often need specialized cutting techniques (e.g., “dry cutting”) that a trained professional can execute.
Think of the DIY trim as a maintenance tool, not a full‑service haircut. When in doubt, a quick consultation (many salons offer free assessments) can save you from a costly correction later.
Preparing Your Mind and Body: The Pre‑Trim Ritual
Before you even reach for the scissors, treat the trimming session as a short wellness routine. A calm mindset reduces the urge to rush, which is the biggest hidden cause of uneven cuts. Follow these three micro‑rituals to set a solid foundation:
- Breathing reset. Stand in front of your mirror, close your eyes, and inhale for four counts, hold for two, exhale for six. Repeat three times. This simple diaphragmatic breathing lowers cortisol and steadies the hand that will soon hold the shears.
- Ergonomic positioning. Position a sturdy stool at a height where your elbows rest comfortably at a 90‑degree angle when you hold the scissors. Place the mirror at eye level to avoid neck strain; a slight tilt of the mirror can help you see the back of the head without craning.
- Hair‑friendly environment. Set the room temperature between 20‑22°C (68‑72°F). Cold air can make hair shafts more brittle, while excessive heat can cause the scalp to sweat, leading to slippage of tools. A small portable fan on low speed can circulate air without creating drafts.
These steps are quick, require no extra products, and create a repeatable habit that turns a potentially stressful moment into a mini‑self‑care session.
Advanced Cutting Techniques for a Salon‑Quality Finish
Once you are comfortable with the basic point‑cut, you can layer in more sophisticated methods that give depth, movement, and a professional polish. Below are three techniques that can be mastered with practice, each explained with a step‑by‑step example.
1. The “Slide‑Cut” for Soft Layers
The slide‑cut creates a graduated, feathered edge without the harsh line of a blunt cut. It works especially well on medium‑length hair that you want to keep at a uniform length overall but add subtle volume near the ends.
- Separate a 2‑cm‑wide section from the crown and secure the rest with a clip.
- Hold the scissors parallel to the hair strand, the blades facing upward.
- With a gentle forward motion, glide the scissors along the hair while applying a light pressure with the thumb of the opposite hand. The blades should skim the surface, removing only the very tip of each strand.
- Release the clip, comb the hair, and repeat on the opposite side, ensuring the two slide‑cuts mirror each other.
Edge case: If your hair is extremely fine, practice on a small test patch first. Too aggressive a slide can make the hair look wispy.
2. “Razor‑Cut” Texturising for Thick, Coarse Locks
A single‑edge razor creates a micro‑shred effect that lightens bulk without sacrificing length. It is ideal for those who struggle with a “pyramid” shape where the top looks heavy.
- Tool. Use a professional hair‑razor (the type used in salons) with a replaceable blade.
- Preparation. Dry the hair completely; razor‑cutting wet hair can cause the strands to cling together, producing uneven slices.
- Technique. Hold a 3‑cm section between your fingers, angle the razor at 45°, and pull the blade toward the scalp in a swift, continuous motion. The razor should glide, not dig.
Example: A client with a thick, straight bob reported a 30% reduction in perceived volume after three passes of razor‑texturising, followed by a light blow‑dry.
3. “Layer‑by‑Layer” Stacking for Curly Hair
Curly hair benefits from a stacked layering approach that respects the natural curl pattern. Instead of cutting all curls at once, you work from the innermost curl outward.
- Separate the curls into three concentric zones: inner, middle, outer.
- Start with the inner zone, holding a small curl between thumb and forefinger, and trim only the visible tip using a point‑cut.
- Move to the middle zone, repeating the same amount of removal. Because the outer zone has more surface area, you may need to remove slightly more to keep the overall silhouette balanced.
- Finish with the outer zone, checking the shape in a handheld mirror.
Edge case: When the curls are tightly coiled (type 4), work with a wide‑tooth comb to separate zones without pulling the hair, which could cause breakage.
Alternative Tools and DIY Hacks When You’re Short on Supplies
Not everyone has a dedicated pair of hair‑cutting scissors at home. Below are safe, budget‑friendly alternatives and creative hacks that maintain cutting precision.
1. Repurposing a Pair of Nail‑File Scissors
Some nail‑file scissors have a fine, angled tip that mimics the geometry of hair shears. To test suitability:
- Clamp a single strand between the blades and gently squeeze. If the strand snaps cleanly without crushing, the scissors are usable.
- Sanitise the blades with isopropyl alcohol before each use to avoid bacterial transfer.
Warning: Avoid any scissors with a serrated edge; they will fray the hair.
2. Using a Small, Sharp Craft Knife for Precision Snips
A craft knife (e.g., X‑Acto) can replace scissors for micro‑adjustments, such as trimming a stray baby‑hair or cleaning up a fringe. Follow these safeguards:
- Place a thin piece of cardboard under the hair section to protect the scalp.
- Hold the knife at a 45° angle and make a single, swift cut.
- Never apply pressure directly on the scalp; the cardboard acts as a buffer.
Edge case: If you have a sensitive scalp, skip this method and use a pair of tweezers to pull out a single stray strand instead.
3. DIY “Hair‑Clip” from Binder Clips
When you run out of hair clips, a medium‑size binder clip can serve as a sturdy holder for thick sections. To make it hair‑friendly:
- Wrap the metal jaws with a thin layer of silicone tape to prevent snagging.
- Press the clip gently; the spring tension is enough to hold up to 2 cm of hair without crushing.
This hack is especially handy for creating a makeshift “up‑do” while you trim the lower layers.
4. Leveraging a Handheld Mirror with a Built‑In Light
Some travel mirrors have an LED ring. Position the mirror on a stable surface and angle the light toward the back of your head. This eliminates shadows that often hide uneven cuts, a problem that many DIYers encounter when only using a single wall‑mounted mirror.
Customising Your Trim to Your Face Shape, Hairline, and Lifestyle
Every haircut interacts with the wearer’s facial geometry and daily routine. By aligning the trim with these personal variables, you gain a look that feels tailored rather than generic.
1. Face‑Shape Matching
Use the following quick‑reference guide to decide where to remove length:
- Oval. Most forgiving; you can experiment with a slight longer front for a soft framing effect.
- Round. Add height by keeping the crown slightly longer and trimming the sides just above the jawline to create a vertical illusion.
- Square. Soften strong angles by adding a few centimeters of length to the chin area and employing a subtle point‑cut to break the line.
- Heart. Balance a wider forehead by keeping the front layers a touch longer and gently tapering the sides.
Example: A client with a round face trimmed 1 cm more from the back than the sides, resulting in a visual elongation of the face.
2. Hairline Considerations
If you have a receding hairline or a naturally high forehead, avoid cutting too much from the front fringe. Instead, use a “soft‑edge” technique:
- Section the fringe into three vertical strips.
- Trim the centre strip slightly shorter (0.3 cm) while leaving the side strips longer (0.5‑0.7 cm).
- Blend the lengths with a point‑cut to create a gentle gradient that masks the hairline.
Edge case: For a very low hairline, you can afford a bolder, straight fringe, but always start with a conservative cut and reassess.
3. Lifestyle‑Driven Adjustments
Active individuals (runners, cyclists) often benefit from a slightly shorter back to reduce wind resistance and keep hair out of the face. Conversely, professionals who wear formal attire may prefer a longer, polished finish that can be tucked behind the ears.
Practical tip: Keep a small “maintenance log” on your phone. Note the date, length removed, and any activity that day (e.g., “10 km run”). After a few entries you’ll see patterns that guide future trims.
Post‑Trim Hair Care: Repair, Nourish, and Style for Longevity
The work doesn’t stop once the scissors are put away. The health of the newly cut ends determines how long the trim lasts before the next session.
1. Immediate Post‑Cut Hydration
Apply a light, silicone‑free leave‑in conditioner within five minutes of finishing. The product should be distributed with the fingertips, not a comb, to avoid disturbing the cut line.
- Ingredient focus. Look for hydrolysed keratin, panthenol, and argan oil. These molecules penetrate the cuticle and seal moisture.
- Quantity. For short hair (under 15 cm), a pea‑size amount is sufficient; for longer hair, use a dime‑size amount.
2. Weekly Deep‑Conditioning Ritual
Schedule a 15‑minute deep‑conditioning session once a week. Use a heat‑cap or a warm towel wrap to enhance absorption. This practice reduces split‑end recurrence by up to 40 % according to a 2022 dermatology study.
3. Styling Strategies That Protect Cut Ends
Choose styling tools and techniques that minimise mechanical stress:
- Diffuser over direct blow‑dry. Set the dryer on low heat, attach a diffuser, and scrunch the hair from the ends upward.
- Silk or satin pillowcases. These fabrics reduce friction while you sleep, preserving the integrity of the freshly trimmed ends.
- Loose up‑dos. If you need to keep hair out of the way, opt for a loose bun or a low ponytail secured with a fabric-covered elastic rather than a tight rubber band.
4. Nutritional Support for Faster Recovery
Hair is made primarily of keratin, a protein. Incorporate the following nutrients into your diet to reinforce the newly cut strands:
- Biotin‑rich foods. Eggs, almonds, and sweet potatoes.
- Omega‑3 fatty acids. Salmon, chia seeds, and walnuts improve scalp elasticity.
- Vitamin E. Avocado and sunflower seeds act as antioxidants that protect the cuticle.
Even a modest increase (one extra serving per day) can make a noticeable difference in hair shine within a month.
Troubleshooting Unexpected Results and Quick Fixes
Even seasoned DIYers encounter surprises: a fringe that looks too heavy, a side that appears longer, or a sudden frizz spike. Below is a rapid‑response checklist that lets you correct the issue without a full‑blown salon visit.
1. “Heavy Fringe” Remedy
If the front appears dense, perform a micro‑slide‑cut:
- Section the fringe into thin vertical strips (about 1 cm wide).
- Hold the scissors horizontally and glide them along the bottom third of each strip, removing only the innermost half of the hair.
- Comb through and repeat if needed, but stop once the fringe feels airy.
2. Uneven Side Correction
When one side is visibly longer, use a ruler or a piece of string as a measuring guide:
- Lay the ruler against the longer side, aligning the zero mark with the scalp.
- Mark the desired length with a small, non‑permanent hair tie.
- Trim the opposite side to meet the marked point, using a point‑cut for a seamless blend.
3. Sudden Frizz After Cutting
Frizz can appear if the cut ends are left exposed to humidity. Apply a light anti‑frizz serum (silicone‑based) only to the ends, avoiding the scalp. If the frizz persists, a quick “cold‑air blast” from your dryer can seal the cuticle.
4. Missed Split Ends Reappear
Sometimes split ends hide under a layer of hair and become visible after a few days. The fix is a two‑pass point‑cut:
- Re‑wet the hair lightly, comb, and isolate the problematic section.
- Using the point‑cut, snip only the tip that feels uneven.
- Finish with a gentle finger‑comb to blend.
5. Emergency “Cover‑Up” Styling
When a mistake cannot be fully corrected on the spot, disguise it with a simple style:
- Side‑swept bangs. Sweep the fringe to the opposite side and secure with a small, non‑slip hairpin.
- Textured top knot. Pull the top half of the hair back, twist, and secure. This hides uneven lengths while adding a trendy look.
- Hair accessories. A thin headband or a decorative clip can mask a slightly longer side without looking forced.
These fixes buy you time until your next scheduled trim, keeping confidence high and the hair looking intentional.
9. Frequently Asked Questions
Q1: Can I trim my hair when it’s wet?
A: Wet hair is more elastic and appears longer, so cutting it can result in a shorter final length once it dries. For most DIY trims, work with dry hair to see the true length and natural fall.
Q2: Do I need special scissors?
A: Yes. Hair‑cutting scissors are designed to cut cleanly without crushing strands. Kitchen scissors can cause split ends and uneven cuts.
Q3: How much should I cut off to remove split ends?
A: Typically 0.5–1 cm (about a quarter to half an inch). If you have severe split ends, you may need to trim up to 2 cm, but do it gradually to avoid over‑cutting.
Q4: My hair looks thinner after trimming. What can I do?
A: Add texture with point‑cutting or a light layering technique. Avoid blunt cuts, which can make fine hair appear flat. Styling products that add volume (mousse, root‑lifting spray) also help.
Q5: Is it safe to trim bangs on my own?
A: Yes, if you follow a cautious method. Comb the bangs forward, hold a small section between your fingers, and trim a little at a time. Always cut less than you think you need; you can always trim more later.
Related posts:
 Should You Wash Your Hair After Every Gym Session?
 Living Proof Scalp Treatment Review
 L’Oreal’s No Haircut Cream: Maintain Your Style Between Trims
 Fringe Friends: The Accessory Trend Taking Fashion by Storm
 Hair Accessory Hygiene: The Gross Truth About Dirty Hair Ties
 Ancient Beauty Secrets: The Ayurvedic Hair Mask Recipe That Delivers Results
 Best Scalp Scrubs Review
 Perfect Curly Hair Routine