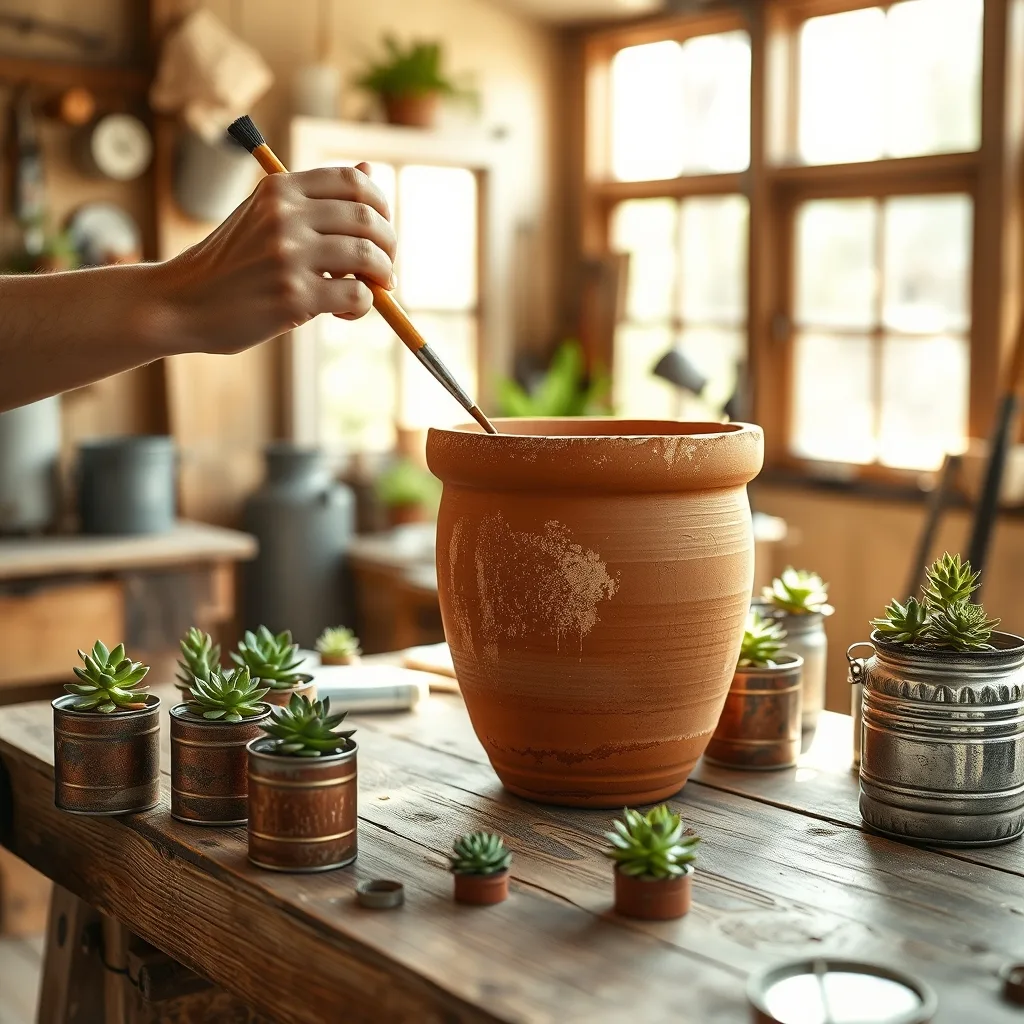
Reusing everyday objects as plant pots not only reduces waste but also adds a personal touch to your indoor garden. Whether you live in a compact apartment or have a spacious backyard, there are countless ways to turn discarded items into thriving homes for herbs, succulents, and flowering plants. This guide walks you through practical steps, material considerations, and creative designs so you can start your own DIY plant pot recycling projects with confidence.
Key takeaways
- Match plants to containers: use succulents for shallow jars and herbs for larger items like repurposed tin cans.
- Ensure plant health by cleaning items thoroughly, sanding sharp metal edges, and drilling drainage holes in the base.
- Line wooden crates and fabric pouches with landscape fabric or liners to prevent soil leakage and material rot.
- Create low-maintenance systems by adding cotton wicks or inverted bottle reservoirs to provide consistent moisture to your plants.
- Repurpose wine corks and bottle caps into micro-planters for seeds or tiny succulents by carving small soil cavities.
Assessing What Materials You Have
Before you dive into a specific project, take inventory of the items you regularly discard. Common candidates include plastic bottles, tin cans, glass jars, wooden crates, fabric scraps, and even old teacups. Evaluate each item for durability, size, and drainage potential. For example, a sturdy plastic bottle can hold a small herb, while a wide-mouthed glass jar works well for a larger foliage plant. Make a quick checklist:
- Material type (plastic, metal, glass, wood, fabric)
- Structural integrity (does it crack or warp?)
- Size and shape relative to the plant’s root system
- Ease of adding drainage holes
- Safety for indoor use (avoid toxic paints or coatings)
By matching the right container to the right plant, you minimize trial‑and‑error and set the stage for healthy growth.
Choosing the Right Plant for Recycled Containers
Not every plant thrives in a makeshift pot. Succulents, air plants, herbs, and small leafy greens are forgiving and require minimal soil depth. Here are three categories to consider:
- Succulents & Cacti: Need excellent drainage and shallow soil; ideal for glass jars with a drilled hole.
- Herbs (basil, mint, cilantro): Prefer moderate moisture and can tolerate slightly larger containers like repurposed tin cans.
- Air Plants (Tillandsia): Require no soil at all; they can be mounted on driftwood, shells, or even a piece of fabric.
Match the plant’s water and light requirements to the container’s material. For instance, metal cans heat up quickly in direct sun, which can stress moisture‑sensitive plants, so they are best placed in indirect light.
Transforming Plastic Bottles into Chic Pots
Plastic bottles are abundant and lightweight, making them a favorite for DIY planters. Follow these steps for a polished finish:
- Select the bottle: Choose a 500 ml to 1‑liter bottle for small herbs or succulents.
- Cut the bottle: Using a sharp utility knife, slice the bottle horizontally about one‑third from the bottom. The upper section becomes the planter; the lower can serve as a saucer.
- Drill drainage holes: Use a heated nail or drill bit to puncture 2–3 holes in the bottom.
- Decorate: Paint the exterior with acrylic paint, wrap with twine, or apply patterned tape for a custom look.
- Add soil and plant: Fill with a well‑draining cactus mix, press gently, and place your plant.
Tip: To prevent the bottle from tipping, embed a small rock or a piece of broken pottery at the base before adding soil.
Upcycling Tin Cans for Modern Minimalism
Tin cans offer a sleek, industrial aesthetic. They work well for herbs, small indoor vegetables, or as a base for a larger pot. Here’s how to prepare them:
- Clean thoroughly: Remove labels, wash with soap, and rinse well to eliminate any residue.
- Sand the edges: Use fine‑grain sandpaper to smooth sharp rims that could cut your fingers.
- Create drainage: Punch 3–4 holes in the bottom with a nail‑driven hammer.
- Optional liner: Insert a small plastic pot or a piece of burlap to keep soil from escaping.
- Finish with style: Spray paint in matte black, copper, or pastel shades. Add a decorative label or stencil for a personalized touch.
When arranging multiple cans, consider a tiered display on a wooden pallet for a vertical garden that maximizes floor space.
Repurposing Wooden Crates and Pallets
Wooden crates and pallet slats bring a rustic, natural vibe to indoor or balcony gardens. Follow these guidelines to ensure safety and durability:
- Inspect for splinters and rot: Replace any compromised boards.
- Sand the surface: Smooth rough edges with medium‑grit sandpaper.
- Seal the wood: Apply a non‑toxic, water‑based sealant to protect against moisture.
- Line with landscape fabric: Cut a piece to fit the bottom, then staple it in place. This prevents soil from leaking while allowing drainage.
- Arrange plants: Place a mix of trailing vines (e.g., pothos) on the sides and upright herbs in the center.
Crates can be stacked or leaned against a wall, creating a modular garden that can be reconfigured as your space changes.
Creative Uses for Old Teacups and Mugs
Vintage teacups, mugs, and even small saucers make charming mini‑planters for succulents or air plants. Their compact size is perfect for desk décor. Steps to convert them:
- Drill a tiny drainage hole: Use a rotary tool with a small drill bit; a single hole is sufficient for a succulent.
- Add a pebble layer: Place a thin layer of river stones at the bottom to improve drainage.
- Use lightweight soil: A blend of potting mix and perlite keeps the total weight low.
- Seal the exterior (optional): If the glaze is cracked, apply a clear, food‑safe sealant to prevent moisture seepage.
Group several cups on a shallow tray for a cohesive display. Rotate the arrangement seasonally to keep the look fresh.
Turning Fabric and Textile Waste into Soft Planters
Old shirts, denim, or canvas can be transformed into hanging or tabletop planters that add texture to any room. Here’s a simple method using a fabric pouch:
- Cut a square: Measure a 12‑inch square of sturdy fabric.
- Sew the edges: Fold the edges ¼‑inch inward and stitch a hem on three sides, leaving the top open.
- Insert a liner: Place a small plastic bag or biodegradable pot inside to hold soil.
- Fill and plant: Add a light soil mix, insert a small herb, and tie a decorative cord through the top for hanging.
Fabric planters are especially useful for trailing vines; the softness allows roots to expand without breaking the container.
Seasonal and Thematic DIY Pot Ideas
Changing the look of your plant pots with the seasons keeps your indoor garden lively. Consider these themed projects:
- Spring: Paint pastel‑colored eggshells or use reclaimed flower pots from garden centers.
- Summer: Convert bright‑colored beach bottles into tropical‑style planters, adding shells or sand as decorative accents.
- Autumn: Wrap tin cans in burlap, attach dried leaves, and use pumpkins as natural planters for herbs.
- Winter: Repurpose glass candle jars, add a string of fairy lights, and use evergreens or small poinsettias.
These seasonal updates are inexpensive and can be swapped out without discarding the underlying container, reinforcing the recycling loop.
Integrating Self‑Watering Systems into Recycled Planters
One of the most common frustrations for beginners is remembering to water plants on schedule. By embedding simple self‑watering mechanisms into your upcycled containers, you can dramatically extend the time between waterings while maintaining consistent moisture levels. The following methods work with a wide range of recycled vessels, from discarded wooden barrels to repurposed metal trays.
- Wicking Reservoirs: Cut a shallow groove along the interior wall of a container and line it with a strip of cotton or nylon rope. Place a water‑filled tray or shallow dish beneath the container so the wick can draw liquid upward through capillary action. This method is ideal for containers that lack a built‑in reservoir, such as old picture frames or reclaimed ceramic tiles.
- Plastic Bottle Reservoir Inserts: Take a clean 2‑liter soda bottle, remove its label, and cut the bottom off. Invert the bottle so the neck points upward and nest it inside the recycled pot, ensuring the neck remains above the soil line. Fill the bottle with water; the soil will absorb moisture through the bottle’s perforated neck. For containers with narrow openings (e.g., antique glass vases), drill a small hole at the bottle’s neck to allow excess water to escape, preventing waterlogging.
- DIY Soil Moisture Sensors: Low‑cost hygrometer probes can be glued to the interior side of a pot using waterproof adhesive. Connect the probe to a small battery‑powered LED or a Bluetooth‑enabled micro‑controller (like an ESP32). When the soil dries below a preset threshold, the LED flashes or a notification is sent to your phone. This approach works well with heavy‑walled objects such as reclaimed concrete planters, where drilling a drainage hole is undesirable.
Edge Cases: If you are using a porous material like reclaimed terracotta shards, the wicking system may become saturated too quickly. In that situation, line the interior with a thin, waterproof liner (e.g., a sheet of heavy‑duty polyethylene) before installing the wick. For containers that will be moved frequently, secure the reservoir with Velcro straps or silicone adhesive to prevent sloshing.
By combining a recycled container with one of these low‑tech watering solutions, you create a hybrid system that reduces maintenance, conserves water, and showcases the ingenuity of upcycling.
Turning Discarded Wine Corks and Bottle Caps into Miniature Planters
Wine corks and metal bottle caps are often overlooked in the recycling stream, yet they make charming micro‑planters for seed‑starting, succulents, or decorative air‑plant displays. Their small size forces you to think creatively about soil volume, drainage, and placement.
- Prepare the Cork: Soak the cork in warm water for 10 minutes to soften it. Using a sharp craft knife, cut a shallow dome out of the top, creating a cup‑shaped cavity roughly 1‑inch deep. Drill a single 2‑mm hole through the base using a drill press or a hand‑held rotary tool; this will act as the drainage outlet.
- Cap Conversion: For metal caps, first file the interior edges to remove sharp burrs. Punch a 3‑mm hole in the center of the cap using a small awl. Place a thin layer of sphagnum moss inside the cap to hold soil and prevent it from spilling through the drainage hole.
- Soil Mix: Because space is limited, use a lightweight seed‑starting mix blended with perlite at a 1:1 ratio. This ensures quick drainage and reduces the risk of root rot.
- Planting: Gently press a seed or a tiny succulent cutting into the soil. Water sparingly with a spray bottle; excess water will exit through the drainage hole and be collected on a saucer beneath the cork or cap.
- Display Options: Arrange corks and caps on a reclaimed wooden board, a repurposed picture frame, or a decorative metal mesh. Secure each piece with a dab of hot glue or a few pins, creating a living mosaic that can be hung on a wall or placed on a windowsill.
Special Considerations: Corks can absorb odors over time, especially if they have previously stored wine. To neutralize any lingering scent, rinse the corks with a solution of one part white vinegar to three parts water, then let them air‑dry completely before use. Metal caps may rust if left in a damp environment; apply a thin coat of clear, non‑toxic sealant to the interior after drilling to prolong their lifespan.
Building a Community‑Scale Vertical Garden from Reclaimed Materials
When you move beyond a single apartment balcony, the challenge shifts to creating a vertical garden that can serve a shared space—be it a community center, a school courtyard, or a rooftop terrace. Using reclaimed pallets, old window frames, and surplus bricks, you can construct a modular system that grows food, herbs, and pollinator‑friendly flowers while fostering neighborhood collaboration.
Design Framework
- Modular Shelf Units: Disassemble wooden pallets and re‑orient the slats to form shallow, horizontal shelves. Space the slats 6 inches apart to accommodate root depth for herbs and leafy greens. Secure the shelves to a sturdy frame built from reclaimed metal piping or repurposed ladder rungs.
- Window‑Frame Planter Walls: Remove the glass from old sash windows, leaving the wooden frame intact. Attach a waterproof liner (e.g., EPDM rubber sheet) to the interior, then fill the cavity with a high‑drainage soil mix. Mount the frames onto a vertical support using stainless steel brackets, creating a series of “window boxes” that catch rainwater and provide visual interest.
- Brick‑Stacked Hydroponic Towers: Stack reclaimed bricks with small gaps between them, inserting PVC pipe sections (4‑inch diameter) as vertical channels. Fill each channel with a growing medium such as coconut coir and run a low‑flow drip system that recirculates water. This hybrid approach blends traditional soil gardening with hydroponic efficiency.
Implementation Steps
- Survey the site for sunlight exposure, wind patterns, and load‑bearing capacity. Aim for at least 4–6 hours of direct sun for most edibles.
- Gather reclaimed materials: pallets, window frames, bricks, metal pipe, and any surplus irrigation components.
- Construct the frame on the ground, ensuring each module is level and securely fastened. Use reclaimed screws and bolts to maintain the upcycled ethos.
- Install a drip‑irrigation backbone using recycled garden hoses or repurposed beverage tubing. Connect the system to a rain‑water collection barrel fitted with a simple float valve for automated watering.
- Assign planting zones: herbs in the lower shelves (easy access), leafy greens in the middle, and flowering plants at the top to attract pollinators.
- Organize community volunteers for planting day, maintenance rotations, and harvest festivals.
Potential Pitfalls: Reclaimed wood may contain hidden nails or metal staples; run a magnet over the material to locate and remove them before assembly. Bricks can retain moisture, leading to mold; line the interior of brick stacks with a breathable fabric to promote air flow.
By leveraging discarded building components, you not only reduce waste but also create a resilient, shared food source that strengthens community bonds.
Eco‑Friendly Soil Alternatives and Nutrient Recycling for Upcycled Pots
Even the most beautifully repurposed container will falter without a suitable growing medium. Traditional potting mixes often contain peat, which is environmentally problematic. Below are sustainable soil alternatives that pair well with recycled containers, along with strategies for reusing nutrients on a closed‑loop basis.
- Coconut Coir Blend: Coir is a by‑product of the coconut industry and offers excellent water retention without the acidity of peat. Mix coir with composted leaf litter (1:1) and a handful of perlite for aeration. This blend works especially well in porous containers like reclaimed terracotta shards or wooden crates that allow excess water to escape.
- Compost‑Infused Vermiculite: Combine mature compost (home‑grown or sourced from a municipal composting program) with vermiculite at a 2:1 ratio. Vermiculite improves drainage and reduces compaction, making it suitable for metal cans that tend to retain heat.
- Bio‑Char Amendment: Add finely ground bio‑char (charcoal produced from agricultural waste) to any soil mix at a 10 % volume. Bio‑char acts like a sponge for nutrients, extending fertilizer effectiveness and lowering the frequency of feeding.
- Fish‑Emulsion Nutrient Recycling: Collect kitchen waste water from rinsing vegetables and blend it with a small amount of liquid fish emulsion. Dilute to a faint scent before watering your recycled pots. The nitrogen‑rich solution feeds fast‑growing herbs and leafy greens without the need for synthetic fertilizers.
- Egg‑Shell Soil Conditioner: Crushed, sterilized eggshells add calcium to the soil, which is beneficial for flowering plants. Sprinkle a thin layer of crushed shells on top of the soil in any container, then gently work it in with a small trowel.
Testing and Adjusting pH
Recycled containers made from metal or certain woods can influence soil pH over time. Use a simple pH test kit after the first watering cycle. If the pH drifts outside the 6.0–7.0 range for most indoor edibles, amend the mix with a small amount of garden lime (to raise pH) or elemental sulfur (to lower pH), applied sparingly to avoid shocking the plant.
Edge Cases: When using reclaimed concrete blocks as planters, the inherent alkalinity may push soil pH above 7.5. Counterbalance this by incorporating peat‑free acidic amendments such as pine needle mulch or a modest amount of sphagnum moss. Conversely, if you repurpose a painted metal bucket with a lingering acidic coating, add a thin layer of garden lime to neutralize excess acidity.
Using Recycled Concrete and Bricks for Durable Outdoor Planters
Concrete and bricks are among the most robust materials available for outdoor gardening, yet they are often discarded after construction projects. By reshaping these heavy elements, you can create long‑lasting planters that withstand weather extremes while adding a modern, industrial aesthetic.
- Harvesting and Cleaning: Break down surplus concrete slabs or bricks using a hammer and chisel. Remove any embedded rebar, metal mesh, or loose aggregate. Rinse thoroughly with a garden hose to eliminate dust and debris.
- Shaping the Form: For a classic rectangular planter, stack bricks with a mortar mix made from recycled sand and a small proportion of lime. Leave a ¼‑inch gap between bricks for drainage. For a more sculptural look, carve a shallow depression into a concrete slab using a rotary tool with a masonry bit.
- Integrating Drainage: Drill a series of ½‑inch holes across the bottom using a masonry drill. If the planter will sit directly on a patio, line the bottom with a layer of crushed gravel (2‑3 inches) before adding soil.
- Sealing (Optional): Apply a breathable, water‑based concrete sealer to the exterior to prevent moisture penetration that could cause freeze‑thaw cracking. Avoid sealants that create a completely impermeable barrier, as plants need some evaporation.
- Planting Strategy: Use a coarse, well‑draining mix such as the coconut coir blend described earlier. For deep‑rooted perennials, backfill the planter with a layer of larger aggregate (e.g., broken pottery shards) to promote root expansion.
- Mobility Solutions: Attach heavy‑duty caster wheels to the underside of a concrete slab using metal brackets and lag bolts. This enables you to reposition the planter for seasonal sunlight changes without sacrificing stability.
Special Cases: When repurposing bricks from a historic building, verify that the bricks are not lead‑glazed or contain hazardous pigments. If unsure, test a small chip for lead using a home test kit before incorporating it into a planter. For concrete pieces with embedded glass fragments, sand the interior surfaces to prevent sharp edges that could damage roots.
These concrete and brick planters are virtually maintenance‑free, making them ideal for public gardens, rooftop installations, or any setting where durability is paramount.
Pet‑Safe and Child‑Friendly Recycled Plant Containers
Homes with curious pets or small children demand extra caution when introducing plant containers. Certain recycled materials can pose choking hazards, toxic leaching, or sharp edges. The following guidelines help you select and modify upcycled pots to ensure a safe environment without compromising on style.
- Material Screening: Avoid containers that previously held chemicals, pesticides, or acidic cleaning agents. Opt for food‑grade plastics, untreated wood, or glazed ceramics that are labeled as lead‑free.
- Edge Treatment: Sand or file all cut edges on metal, glass, or plastic containers until they are smooth to the touch. For wooden crates, apply a non‑toxic, water‑based polyurethane to seal splinters.
- Size Considerations: Choose containers with openings too small for a child’s hand to reach the soil easily. For example, a recycled wine bottle with a narrow neck discourages digging.
- Secure Placement: Anchor heavy containers (e.g., concrete blocks or reclaimed metal drums) to the floor using adhesive strips or brackets. This prevents tipping if a pet bumps into them.
- Non‑Toxic Finishes: When painting or sealing, use paints certified as ASTM D-4236 (art‑suitable) or those labeled as “Zero VOC, non‑toxic.” Avoid spray paints that contain solvent fumes unless used in a well‑ventilated area and fully cured before bringing pets indoors.
- Pet‑Friendly Plant Selection: Pair your safe containers with non‑toxic plant species such as spider plants, Boston ferns, or cat‑mint. Keep known toxic plants (e.g., philodendrons, oleander) out of reach or in sealed containers.
DIY Safety Modifications
- For a repurposed metal tin can, line the interior with a silicone baking mat before adding soil. The mat provides a barrier that prevents soil from spilling and eliminates sharp edges.
- Transform a vintage glass bottle into a hanging planter by attaching a sturdy macramé cord. Before drilling the drainage hole, wrap the bottle’s neck with a thin rubber gasket to avoid glass cracks.
- Convert an old wooden drawer into a low‑profile planter box. Remove all hardware, sand the interior, and line it with a biodegradable pot liner. The drawer’s shallow depth keeps the soil surface away from curious paws.
Edge Cases: Some pets love to chew on soft fabrics. If you are using fabric planters, choose heavyweight canvas or denim and double‑stitch the seams. For households with birds, avoid using small, open‑ended containers that could become accidental perches near toxic soil mixes.
By thoughtfully selecting materials, treating surfaces, and pairing the right plants, you can enjoy the aesthetic benefits of recycled planters while keeping the most vulnerable members of your household safe.
Frequently Asked Questions
Q1: How do I ensure proper drainage in containers that weren’t originally designed for plants?
A: The key is to create at least one hole at the bottom of the container. If the material is thin (e.g., glass), use a diamond‑tipped drill bit and wear safety glasses. For thicker materials like metal or wood, a nail‑driven drill or a small awl works well. After drilling, add a layer of gravel or small stones before the soil to promote water flow.
Q2: Can I use any type of paint on recycled pots?
A: Choose paints labeled as non‑toxic, low‑VOC, or specifically formulated for indoor use. Acrylic latex paints are safe for most plastics and metals. If the pot will be outdoors, select a paint with UV resistance to prevent fading.
Q3: How often should I repot plants grown in DIY containers?
A: Most herbs and succulents need repotting every 6–12 months, depending on growth rate. Check for root crowding by gently removing the plant; if roots circle the container, it’s time to move to a slightly larger recycled pot or refresh the soil.
Q4: What are the best soil mixes for recycled containers?
A: A universal indoor mix works for many plants, but you can improve drainage by adding perlite (1 part perlite to 3 parts potting soil) for succulents, or coconut coir for herbs that retain moderate moisture. Avoid heavy garden soil, which can compact and hinder root development.
Q5: Are there any safety concerns with using recycled food‑grade containers?
A: Generally, containers that previously held food are safe, provided they are thoroughly cleaned and any residual chemicals are removed. Avoid reusing containers that once stored bleach, pesticides, or strong solvents. For metal cans, ensure the interior coating is intact; if it’s rusted or flaking, replace the can.