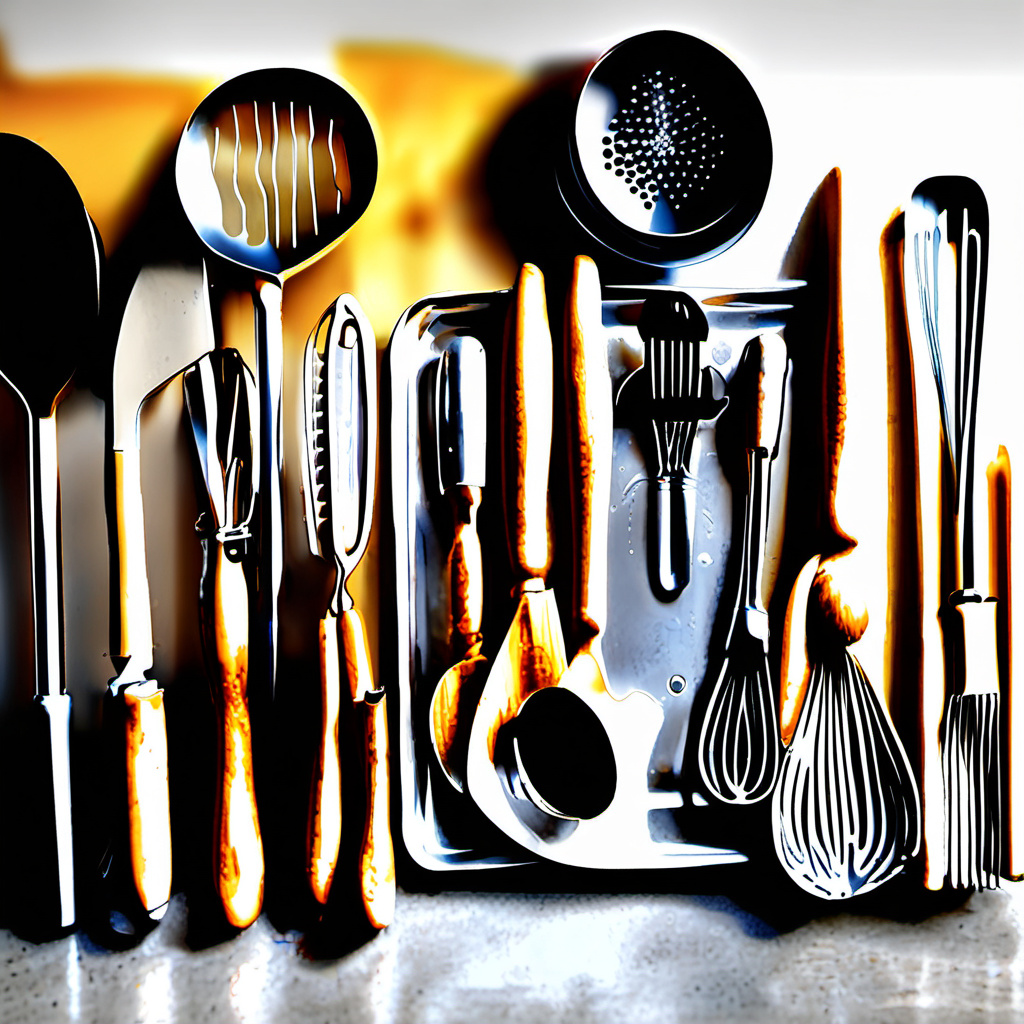
Stepping into the world of baking is often described as a blend of science and art. Unlike general cooking, where a pinch of this or a dash of that can often be adjusted on the fly, baking relies heavily on chemical reactions that require precision, patience, and the right equipment. Whether you are aiming to bake the perfect loaf of sourdough, a delicate sponge cake, or a batch of chewy chocolate chip cookies, your success is intrinsically linked to the tools you use. Having a well-equipped kitchen doesn’t mean you need every gadget on the market; rather, it means investing in high-quality, essential baking tools that provide consistency and ease of use.
Key takeaways
- Use a digital kitchen scale instead of measuring cups for dry ingredients to ensure consistent, accurate results.
- Prioritize stainless steel mixing bowls and seamless silicone spatulas to improve hygiene and ingredient incorporation.
- Choose light-colored aluminum bakeware to ensure even heat distribution and prevent delicate items from over-browning.
- Invest in a digital thermometer and oven thermometer to achieve precise temperatures for yeast activation and baking.
- Follow a phased purchasing approach to build your collection, prioritizing foundational tools before adding specialized equipment.
In this comprehensive guide, we will explore the foundational items every baker should own. We will delve into why specific materials matter, how to choose tools that last a lifetime, and the practical ways these items transform your baking experience. By the end of this article, you will have a clear roadmap for building a professional-grade baking kit that empowers you to tackle any recipe with confidence.
The Foundation: Measuring Tools for Precision
In baking, precision is not just a suggestion; it is a requirement. The difference between a moist cake and a dry one often comes down to a few grams of flour. Therefore, the most critical tools in your kitchen are those used for measurement.
Digital Kitchen Scale: If you only buy one tool from this list, make it a digital scale. Professional bakers almost exclusively use weight (grams or ounces) rather than volume (cups). This is because flour can be packed tightly or fluffed up, leading to variations of up to 20% in volume. A digital scale with a ‘tare’ function allows you to zero out the weight of your bowl and add ingredients sequentially, reducing cleanup and increasing accuracy.
Measuring Cups and Spoons: While scales are superior for dry ingredients, you still need a set of nested measuring cups for items like chocolate chips or nuts, and measuring spoons for small quantities like baking powder, salt, and extracts. Look for stainless steel sets with etched markings, as printed markings tend to rub off over time. For liquids, a clear glass measuring jug with a pour spout is essential. Glass allows you to check the meniscus at eye level, ensuring you have exactly one cup of milk or water.
Thermometers: Temperature is a measurement of energy, and it is vital in baking. An instant-read digital thermometer helps you determine if a loaf of bread is fully cooked in the center (usually 190-210°F) or if your liquid is the right temperature to bloom yeast without killing it. Additionally, an oven thermometer is a low-cost investment that reveals the true temperature of your oven, which often differs from the digital display.
Mixing and Prep Essentials
Once your ingredients are measured, they need to be combined effectively. The tools you use for mixing influence the aeration and texture of your final product.
Mixing Bowls: A set of varying sizes is necessary. Stainless steel bowls are the industry standard because they are lightweight, unbreakable, and non-reactive. Glass bowls are also excellent as they are microwave-safe, which is helpful for melting butter or chocolate. Avoid plastic bowls if possible, as they can retain oily residues that prevent egg whites from whipping into stiff peaks.
Silicone Spatulas: Often called ‘rubber’ spatulas, modern silicone versions are heat-resistant and incredibly versatile. Look for a seamless, one-piece design to prevent bacteria from growing in the joint between the handle and the head. These are essential for folding delicate ingredients and ensuring you scrape every last bit of batter out of the bowl.
Balloon Whisk: A sturdy stainless steel whisk is required for incorporating air into eggs and cream, and for blending dry ingredients to remove lumps. A whisk with a comfortable, ergonomic handle will save your wrist during long periods of mixing. For heavier batters, a classic wooden spoon remains a reliable choice for its strength and tradition.
Essential Bakeware: Pans and Sheets
The material and color of your bakeware significantly affect heat distribution. Dark, non-stick pans absorb more heat and can cause over-browning, while light-colored aluminum provides a more even, gentle bake.
Baking Sheets (Half-Sheet Pans): The workhorse of the kitchen, a heavy-duty rimmed aluminum half-sheet pan is perfect for cookies, roasting nuts, or even making sheet cakes. Look for ‘natural aluminum’ pans that won’t warp under high heat. Using these in conjunction with parchment paper or silicone baking mats ensures nothing sticks.
Cake Pans and Muffin Tins: For standard baking, two 9-inch round cake pans and a 12-cup muffin tin are the basics. Straight-sided cake pans result in professional-looking layers that are easier to frost. For bread and pound cakes, a standard 9×5 inch loaf pan is the go-to size. If you enjoy pies, a glass or ceramic pie dish is preferable as it helps the bottom crust crisp up more effectively than metal.
Springform Pan: If you plan on making cheesecakes or delicate tortes that cannot be inverted, a springform pan is non-negotiable. The removable sides allow you to present the cake beautifully without risking structural damage during removal.
Rolling and Shaping: Tools for Dough and Pastry
Working with dough requires tools that provide control and prevent sticking. This is where the tactile nature of baking really comes to the forefront.
Rolling Pin: There are two main styles: the American style with handles and a ball-bearing center, and the French style which is a simple tapered wooden dowel. Many professional bakers prefer the French rolling pin because it allows for better ‘feel’ of the dough’s thickness and is easier to pivot. Regardless of style, choose a heavy wood like maple or a marble pin for cold doughs like puff pastry.
Bench Scraper: This is a multi-purpose tool that every baker loves once they own one. It is a flat rectangular piece of stainless steel with a handle. It is used to divide dough, scrape flour off your work surface, and even smooth the sides of a frosted cake. Many come with ruler markings etched onto the blade, which is helpful for measuring the size of rolled-out dough.
Pastry Brush: Whether you are applying an egg wash for a golden crust or brushing flour off a loaf, a pastry brush is vital. Silicone brushes are easy to clean and dishwasher safe, but natural boar bristle brushes often provide a more even, delicate application for thin glazes.
Cooling and Finishing Touches
The baking process doesn’t end when the timer goes off. How a baked good cools and how it is decorated determines the final quality.
Wire Cooling Racks: Never leave your baked goods to cool in the pan (unless specified by the recipe). Steam trapped at the bottom will make your crusts soggy. A wire rack allows air to circulate around the entire item. Look for a ‘grid’ pattern rather than just parallel bars to prevent smaller cookies from sliding through.
Offset Spatula: Unlike a regular spatula, an offset spatula has a metal blade that is bent at an angle. This allows you to spread frosting or batter evenly without your knuckles getting in the way. A small offset spatula is perfect for detail work, while a large one is great for smoothing the tops of sheet cakes.
Sifter or Fine-Mesh Strainer: Sifting flour and cocoa powder removes lumps and aerates the ingredients, leading to a lighter crumb. A fine-mesh strainer is often more versatile than a traditional crank-style sifter, as it can also be used for straining fruit purees or dusting powdered sugar over a finished dessert.
Specialized Tools for Elevated Baking
As you progress, you might find that certain specialized tools make complex tasks significantly easier. These are the items that bridge the gap between home baking and professional pastry arts.
Pastry Bags and Tips: Even a simple set of stainless steel piping tips and reusable or disposable pastry bags can transform a plain cupcake into a work of art. A large open star tip and a plain round tip are the best starting points for beginners.
Kitchen Timer: While your phone or oven has a timer, having a dedicated loud, multi-event kitchen timer can be a lifesaver when you have multiple trays in the oven or dough rising on the counter. It prevents the ‘out of sight, out of mind’ errors that lead to burnt edges.
Parchment Paper: While technically a consumable rather than a tool, no baker should be without it. It prevents sticking, makes cleanup effortless, and can even be used to create DIY piping cones. High-quality parchment is grease-resistant and can often be reused for multiple batches of cookies.
Electric Helpers: Mixers and Blenders
While manual mixing is possible, electric tools save time and physical effort, especially for tasks like creaming butter and sugar or kneading bread dough.
Stand Mixer: The holy grail of baking equipment. A stand mixer with a paddle attachment, whisk, and dough hook allows for hands-free operation. This is essential for recipes that require long whipping times, such as meringues or brioche. While an investment, a high-quality stand mixer can last for decades.
Hand Mixer: If a stand mixer isn’t in the budget or you have limited counter space, a powerful hand mixer is a great alternative. It is perfect for quick tasks like whipping cream or mixing a single batch of brownies. Look for one with multiple speeds and a ‘slow start’ feature to prevent flour clouds.
Food Processor: While not strictly a ‘baking’ tool, a food processor is the best way to cut cold butter into flour for flaky pie crusts and biscuits. It ensures the butter stays cold and isn’t overworked by the warmth of your hands.
Organizing and Maintaining Your Baking Kit
Owning the tools is only half the battle; maintaining them ensures they perform correctly for years. Baking tools are often made of specialized materials that require specific care.
Care for Wood and Metal: Wooden rolling pins and spoons should never go in the dishwasher, as the heat and moisture will cause them to crack. Hand wash them and occasionally rub them with food-grade mineral oil. Similarly, high-quality aluminum pans should be hand washed to prevent the discoloration that occurs in the dishwasher.
Storage Solutions: Baking tools can be bulky. Use vertical dividers for baking sheets and muffin tins to prevent them from getting scratched in a stack. Transparent airtight containers for dry ingredients like flour and sugar not only keep your pantry organized but also protect your ingredients from moisture and pests. Labeling your containers with the ‘best by’ date and the weight of the contents can further streamline your process.
Building Your Kit on a Budget
You do not need to buy everything at once. Start with the essentials and expand as your interest grows. Prioritize quality over quantity.
Phase 1: The Basics. Start with a digital scale, one set of mixing bowls, two baking sheets, a silicone spatula, and a whisk. This allows you to bake almost any cookie, brownie, or simple cake.
Phase 2: Expansion. Add cake pans, a loaf pan, a rolling pin, and a hand mixer. Now you can tackle layer cakes, breads, and more complex pastries.
Phase 3: The Professional Touch. Invest in a stand mixer, an offset spatula, a thermometer, and specialized pans like a springform or tart pan. At this stage, you are equipped for almost any recipe found in advanced cookbooks.
Remember that many great tools can be found second-hand. Cast iron and heavy-duty glass bakeware are often available at thrift stores and will last a lifetime once cleaned. However, always buy your digital scale and thermometers new to ensure accuracy.
Masterful Bread Crafting: Specialized Fermentation and Scoring Tools
While the foundational tools mentioned previously will get a loaf into the oven, achieving the artisanal look and texture of a professional bakery requires a deeper dive into the mechanics of fermentation and crust development. For the serious bread baker, the transition from a standard mixing bowl to a dedicated proofing basket, or banneton, is a turning point. These baskets, typically made from natural rattan cane, serve two purposes: they provide structural support to high-hydration doughs during the final rise, and they wick away moisture from the dough’s surface. This creates a slightly drier skin that is easier to score and results in a superior crust. When using a banneton, the flour—ideally a mix of rice flour and all-purpose—gets trapped in the spiral ridges, leaving that iconic floury pattern on the finished loaf.
Once the dough is proofed, the ‘scoring’ process begins. This isn’t merely decorative; it is a functional necessity called ‘controlled expansion.’ Without an intentional cut, the bread will burst at its weakest point as the gases expand in the heat. A lame (pronounced ‘lahm’) is the tool for this job. It consists of a thin, surgical-grade stainless steel razor blade mounted on a handle. A curved lame is preferred for creating an ‘ear’—that crispy, raised flap of crust—because it allows the baker to cut at a shallow angle beneath the skin of the dough. A straight lame, conversely, is better for intricate, decorative wheat stalks or geometric patterns. For those just starting, a simple clean razor blade can work, but the ergonomic handle of a lame provides the safety and precision needed for deep, confident slashes.
For the mixing stage of heavy doughs, many find that a standard whisk or wooden spoon falls short. This is where the Danish dough whisk becomes indispensable. Its unique design—consisting of three concentric stainless steel loops of varying sizes—cuts through thick batters and shaggy doughs with minimal resistance. Unlike a balloon whisk, which often traps clumps of flour in its center, the open design of the Danish whisk incorporates ingredients rapidly without overworking the gluten or becoming clogged. It is particularly effective for ‘no-knead’ recipes where the goal is simply to hydrate the flour fully before the long fermentation begins.
Thermal Mass and Heat Transfer: Baking Stones, Steels, and Dutch Ovens
The environment inside a home oven is often the biggest hurdle to achieving professional results. Home ovens lose heat rapidly when the door is opened and often suffer from uneven heating elements. To counteract this, bakers use tools that provide ‘thermal mass.’ A baking stone, made of thick ceramic or cordierite, absorbs heat for an hour or more before the bread or pizza is loaded. This stored energy is transferred directly into the bottom of the dough, causing ‘oven spring’—the rapid rise that happens in the first few minutes of baking. However, for the ultimate crust, many are now turning to baking steels. Steel conducts heat much faster than stone, delivering a massive burst of energy that creates a charred, airy crust that a ceramic stone simply cannot replicate.
Another challenge is humidity. Professional ovens use steam injection to keep the surface of the bread moist, allowing it to expand fully before the crust sets. At home, the most effective tool to mimic this is a heavy-duty Dutch oven. By placing the dough inside a preheated cast-iron pot and covering it with a tight-fitting lid, you trap the moisture evaporating from the dough itself. This creates a miniature steam chamber. After the first 20 minutes of baking, the lid is removed to allow the steam to escape and the crust to brown and crisp. When selecting a Dutch oven for baking, look for one with a flat lid and a wide base, or better yet, a ‘combo cooker’ where the shallow lid acts as the base, making it easier to load the dough without burning your wrists on the high sides of a traditional pot.
Intricate Pastry and Tart Architecture
While a standard pie dish is excellent for rustic fruit pies, French-style tarts and delicate quiches require tools that allow for sharp angles and intricate fillings. A tart pan with a removable bottom is the standard here. These pans feature fluted edges that give the pastry a professional finish, and the drop-out bottom ensures you can depan the tart without the crust crumbling. For even more modern aesthetics, many pastry chefs have moved toward tart rings—perforated stainless steel circles that sit directly on a baking sheet lined with a silicone mat. The perforations allow steam to escape and heat to penetrate the sides of the crust directly, resulting in an incredibly crisp, evenly browned pastry shell that doesn’t shrink down the sides of the pan.
To achieve that perfectly flat, crisp tart base, ‘blind baking’ is a required technique. This involves pre-baking the crust before adding the filling. To prevent the dough from bubbling up or the sides from collapsing, you need pie weights. While many use dried beans or rice, dedicated ceramic or metal pie weights are a better investment because they conduct heat more efficiently. They ensure the bottom of the crust cooks at the same rate as the rest of the pastry. For the best results, line the raw pastry with a piece of crumpled parchment paper (crumpling makes it more pliable to fit into the corners) before filling it to the brim with weights. Removing the weights for the last five minutes of the blind bake allows the base to ‘dock’ and dry out completely, preventing the dreaded ‘soggy bottom’ once the wet filling is added.
Precision Decorating: The Professional Cake Station
Once the cake is baked and cooled, the transition from ‘home-made’ to ‘professional’ happens on the decorating bench. The most important tool in this phase is a heavy-duty revolving cake stand, or turntable. A high-quality turntable should have a weighted base (often cast iron) and a smooth ball-bearing swivel. This allows you to keep your spatula hand perfectly still while the cake rotates, creating a flawlessly smooth finish on the buttercream. Inexpensive plastic versions often stutter or wobble, which leads to ridges and uneven layers in your frosting.
Complementing the turntable is the bench scraper, which we previously discussed as a dough tool, but in the context of cake decorating, it is used for ‘smoothing.’ By holding a tall stainless steel scraper at a 45-degree angle against the side of the rotating cake, you can strip away excess frosting to reveal sharp, clean edges. For more advanced designs, such as ‘naked’ cakes or multi-toned watercolor effects, a set of acrylic cake disks can be used. These disks are slightly larger than your cake layers; you place one on top and one on bottom, using them as a guide for your scraper to ensure the cake is perfectly level and the frosting is of uniform thickness all the way around.
For those working with mousses, cheesecakes, or multi-layered entremets, acetate strips are a hidden secret of the pastry world. These clear plastic rolls are cut to size and lined inside a cake ring or springform pan. They allow you to build tall, delicate layers of cream and gelee that would otherwise stick to the metal. Once the cake is chilled and set, the metal ring is removed, and the acetate is peeled back to reveal perfectly clean, glass-smooth sides that require no additional frosting or masking.
Small-Scale Precision: Microplanes, Graters, and Zesters
Flavor in baking often comes from the smallest additions—citrus zest, fresh nutmeg, or a grating of high-quality chocolate. A standard box grater is often too coarse for these tasks, frequently catching the bitter white pith of a lemon or orange. A Microplane, or rasp-style grater, is the solution. Originally a woodworking tool, the Microplane features hundreds of tiny, razor-sharp teeth that shear off the flavorful zest while leaving the pith behind. Because the teeth are so sharp, they don’t bruise the fruit, meaning the essential oils—where all the flavor lives—stay in your batter rather than on the tool.
This tool is equally vital for whole spices. Pre-ground nutmeg or cinnamon loses its potency quickly because the surface area exposed to air is so high. By using a fine grater to process whole nutmeg or cinnamon sticks directly into your spice cake or custard, you introduce a depth of aroma that pre-packaged spices cannot match. Furthermore, a fine grater can be used to ‘clean up’ the edges of baked goods; if a cookie or a tart shell has a slightly burnt edge, a light pass with a Microplane can shave off the darkened portion without ruining the shape of the item, a trick used frequently in high-end pastry kitchens to ensure every piece is visually perfect.
Emulsions and Fluidity: Immersion Blenders and Squeeze Bottles
Advanced baking often involves liquids that need to be perfectly emulsified, such as fruit curds, ganaches, and mirror glazes. A standard whisk can incorporate too much air, creating bubbles that ruin the glossy finish of a glaze. An immersion blender (or stick blender) is the tool of choice here. When making a chocolate ganache, the immersion blender breaks down the fat globules into a stable emulsion, resulting in a silkier mouthfeel and a higher shine. When using it for glazes, the key is to keep the head of the blender fully submerged at an angle to avoid pulling air into the mixture, which would create unsightly bubbles on the finished cake.
For plating and precision filling, squeeze bottles are surprisingly useful. If you are filling dozens of tiny tartlets with lemon curd or dotting a plate with raspberry coulis, a squeeze bottle provides much more control than a spoon. They are also excellent for applying simple syrup to cake layers. A ‘soaker bottle’ with a perforated cap allows you to distribute moisture evenly across a sponge cake, ensuring no part of the cake is dry while preventing other parts from becoming waterlogged. This level of control is what separates a cake that merely tastes good from one that has the perfect, professional texture throughout.
Specialized Cookie and Confectionery Equipment
Consistency is the hallmark of a great baker, especially when it comes to cookies. If your cookies are different sizes, they will bake at different rates, leading to a tray where some are burnt and others are raw. Professional bakers use ‘dishers’ or spring-loaded cookie scoops. These are sized by number; for example, a #40 scoop holds about 1.5 tablespoons of dough, which is the standard size for a classic chocolate chip cookie. Using a scoop not only ensures even baking but also creates a uniform round shape that looks far more appealing than hand-rolled balls.
For those venturing into the world of candy making, such as caramels, marshmallows, or Italian meringue, a dedicated candy thermometer is required. While an instant-read thermometer is great for checking the internal temp of bread, a candy thermometer is designed to clip onto the side of a saucepan, allowing you to monitor the temperature continuously as it climbs through the various stages (soft ball, hard crack, etc.). Many of these thermometers have the specific candy stages marked directly on the glass or digital display, which is vital because a difference of just two or three degrees can be the difference between a soft, chewy caramel and a tooth-breaking hard candy.
Frequently Asked Questions
1. Can I use volume measurements instead of a scale?
While you can, it is the leading cause of baking failure. One cup of flour can weigh anywhere from 120g to 160g depending on how it was scooped. Using a scale ensures that you are following the recipe exactly as the developer intended, leading to consistent results every time.
2. Is there a difference between expensive and cheap baking sheets?
Yes. Cheap, thin baking sheets tend to warp in a hot oven, which causes uneven baking and can even spill oil or batter. Heavy-duty aluminum pans distribute heat more evenly and won’t buckle under high temperatures. They are a one-time purchase that pays for itself in better results.
3. Do I really need an oven thermometer if my oven is digital?
Most likely, yes. Many ovens are off by 25 to 50 degrees, and they often have ‘hot spots.’ An oven thermometer allows you to see the actual temperature inside, helping you adjust your settings so your cakes don’t burn on the outside while remaining raw in the middle.
4. What is the best material for mixing bowls?
Stainless steel is generally considered the best all-around choice. It is durable, doesn’t react with acidic ingredients (like lemon or vinegar), and can be used as a double boiler over simmering water. Glass is a close second for its visibility and microwave compatibility.
5. How do I prevent my cakes from sticking to the pan?
The most reliable method is to grease the pan with butter or shortening, then line the bottom with parchment paper. For intricate pans like Bundt pans, using a specialized ‘baking spray’ that contains flour is often more effective than traditional greasing and flouring by hand.
Related posts:
 Red Velvet Cake So Good You’ll Never Miss the Original
 Guilt-Free Cinnamon Roll Recipe
 Partake’s Pizza Crust Mix: A Gluten-Free, Allergen-Friendly Option
 Understanding Cookware Materials
 Vegan Pineapple Upside-Down Cake: A Delicious and Healthy Twist
 HexClad: Gordon Ramsay’s Choice
 Perfect Egg Frying Pan Guide
 High Heat and Nonstick Pans