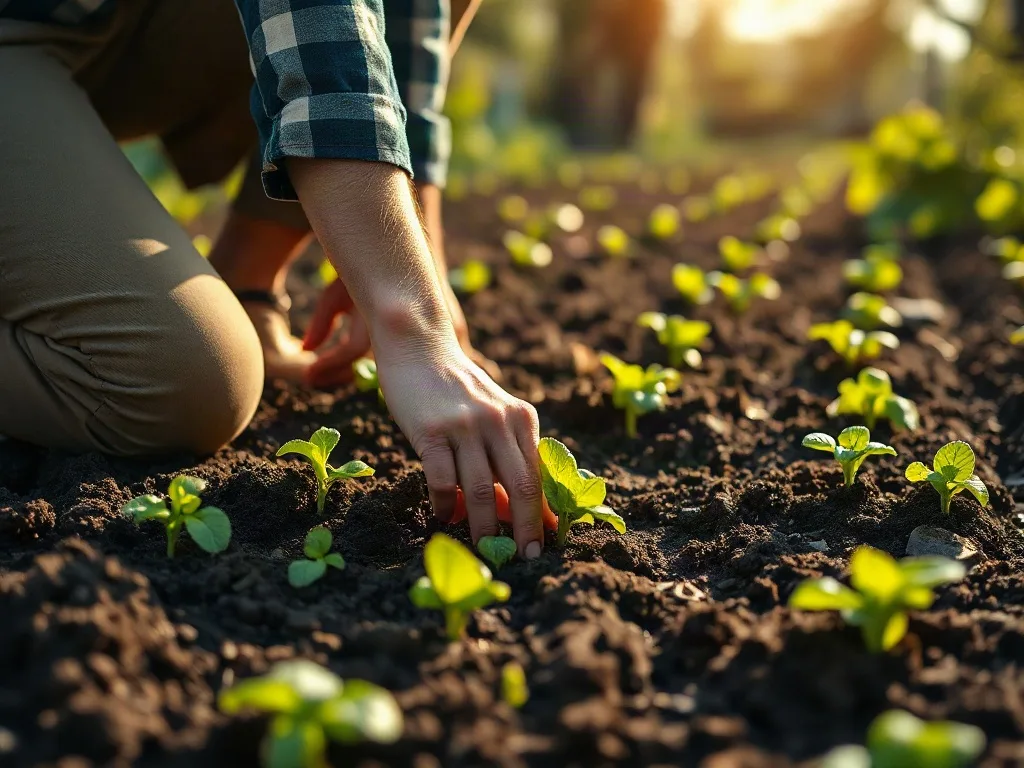
A thriving garden doesn’t happen by accident. Whether you’re growing vegetables, flowers, or a mix of both, garden health depends on understanding the interconnected systems that support plant life. From soil quality to pest management, every decision you make influences how well your plants grow and resist disease. This guide walks you through the essential practices that create and maintain a healthy garden ecosystem, helping you grow more resilient plants while working with nature rather than against it.
Key takeaways
- Water plants deeply and infrequently in the morning, targeting the root zone to encourage strong, drought-resistant root systems.
- Improve soil quality by adding organic compost and maintaining a 3:1 ratio of carbon-rich browns to nitrogen-rich greens.
- Use Integrated Pest Management by monitoring insects early, hand-picking pests, and applying least-toxic treatments like insecticidal soaps.
- Rotate plant families every three to four years to break pest cycles and prevent specific nutrient depletion in the soil.
- Sanitize pruning tools with rubbing alcohol and disinfect used pots to prevent the spread of fungal and bacterial diseases.
Understanding Your Soil Composition and Structure
Soil is the foundation of garden health, yet many gardeners overlook its complexity. Healthy soil contains minerals, organic matter, water, air, and millions of living organisms that work together to support plant growth. Before adding amendments or fertilizers, take time to understand what you’re working with.
Start by conducting a simple soil test. Home test kits can measure pH levels and basic nutrient content, while laboratory tests provide detailed analysis of nutrient levels, organic matter percentage, and soil texture. Most vegetables and flowers prefer slightly acidic to neutral soil (pH 6.0-7.0), though some plants like blueberries and azaleas thrive in more acidic conditions.
Soil structure matters as much as chemistry. Clay soils hold water and nutrients well but drain poorly and can become compacted. Sandy soils drain quickly but struggle to retain moisture and nutrients. Loamy soil, which balances sand, silt, and clay, is ideal for most plants. You can improve any soil type by regularly adding organic matter like compost, which improves drainage in clay soils and increases water retention in sandy soils.
Pay attention to soil compaction, especially in high-traffic areas. Compacted soil restricts root growth and reduces air circulation. Avoid walking on garden beds when possible, and consider using raised beds or designated pathways to protect soil structure. In existing beds, gently loosen compacted soil with a garden fork, being careful not to disrupt the soil layers or damage existing root systems.
Watering Wisely for Root Development
How you water matters more than how much. Deep, infrequent watering encourages plants to develop strong root systems that reach down into the soil, making them more drought-resistant and stable. Shallow, frequent watering creates surface roots that are vulnerable to heat stress and make plants dependent on constant irrigation.
Water early in the morning when possible. This timing allows foliage to dry before evening, reducing the risk of fungal diseases that thrive in prolonged moisture. Morning watering also means less water loss to evaporation compared to midday watering. If morning isn’t possible, early evening is your second-best option.
Direct water to the root zone rather than spraying foliage. Drip irrigation and soaker hoses are excellent options that deliver water precisely where it’s needed while keeping leaves dry. If using overhead sprinklers, run them long enough for water to penetrate 6-8 inches deep, then allow the soil to dry somewhat before watering again. For most gardens, this means watering once or twice per week rather than daily.
Learn to read your plants and soil. Stick your finger 2-3 inches into the soil near plant roots. If it feels dry at that depth, it’s time to water. Many plants show subtle signs of water stress before wilting—slightly duller leaf color or leaves that aren’t quite as perky in the morning. Catching these early signals prevents stress while avoiding overwatering, which can be just as harmful as underwatering.
Building Healthy Soil Through Composting
Compost is decomposed organic matter that feeds soil organisms, improves soil structure, and provides slow-release nutrients to plants. Creating your own compost turns kitchen scraps and yard waste into garden gold while reducing the waste you send to landfills.
A successful compost pile balances carbon-rich “brown” materials (dried leaves, straw, shredded paper) with nitrogen-rich “green” materials (fresh grass clippings, vegetable scraps, coffee grounds). Aim for roughly three parts brown to one part green. This balance provides the carbon and nitrogen that decomposer organisms need to break down organic matter efficiently.
Your compost pile also needs air and moisture. Turn the pile every few weeks with a pitchfork to introduce oxygen, which speeds decomposition and prevents anaerobic conditions that create unpleasant odors. The pile should feel like a wrung-out sponge—moist but not soggy. If it’s too dry, add water or more green materials. If it’s too wet or smelly, add brown materials and turn it more frequently.
Avoid composting diseased plants, weeds with seeds, meat, dairy, or pet waste, as these can create problems in your finished compost. When the material is dark, crumbly, and earthy-smelling with no recognizable original ingredients, it’s ready to use. This process typically takes three to six months, though hot composting methods can produce finished compost in as little as a month.
Implementing Integrated Pest Management
Healthy gardens will always have some pests, and that’s normal. The goal isn’t to eliminate every insect, but to keep pest populations at levels that don’t cause significant damage while protecting beneficial insects. Integrated Pest Management (IPM) is an approach that uses multiple strategies to manage pests with minimal environmental impact.
Start with prevention. Healthy, vigorous plants resist pest damage better than stressed plants. Proper spacing improves air circulation and reduces disease pressure. Choosing varieties bred for pest and disease resistance gives you a head start. Row covers protect vulnerable crops from many insect pests while allowing light and water through.
Monitor your garden regularly so you catch problems early when they’re easier to manage. Learn to identify common garden pests and their damage patterns. Many insects that look alarming are actually beneficial predators or pollinators. Hand-picking larger pests like caterpillars, beetles, and slugs is time-consuming but highly effective for small garden areas.
When intervention is needed, start with the least toxic options. Strong water sprays dislodge aphids and spider mites. Insecticidal soaps and horticultural oils control many soft-bodied pests with minimal impact on beneficial insects when applied carefully. Biological controls like Bacillus thuringiensis (Bt) target specific pests without harming other organisms. Reserve synthetic pesticides for situations where other methods have failed, and always follow label instructions precisely.
Practicing Smart Crop Rotation and Companion Planting
Where you plant matters. Crop rotation—changing what you grow in each location from year to year—breaks pest and disease cycles while managing soil nutrients. Many pests and diseases are plant-family-specific, so moving crops prevents them from building up in the soil.
Divide your garden into sections and rotate plant families through them on a three- to four-year cycle. For example, follow heavy-feeding crops like tomatoes and corn with soil-building legumes like beans and peas, then follow those with light-feeding crops like root vegetables. This sequence prevents nutrient depletion and gives soil time to recover between demanding crops.
Companion planting places compatible plants near each other for mutual benefit. Some combinations are based on solid science—tall crops like corn providing shade for lettuce, or nitrogen-fixing beans enriching soil for neighboring plants. Others, like using aromatic herbs to confuse pests, have mixed research support but many gardeners report success.
Focus on proven combinations first. Plant marigolds near tomatoes and peppers, as research suggests they may reduce certain nematode populations. Interplant carrots with onions to confuse carrot flies and onion flies. Grow basil near tomatoes for potential pest-deterrent effects while creating convenient harvesting. Avoid planting crops from the same family together, as they often compete for the same nutrients and attract the same pests.
Mulching for Moisture, Temperature, and Weed Control
Mulch is any material spread over soil to protect and improve it. A proper layer of mulch conserves moisture, moderates soil temperature, suppresses weeds, prevents erosion, and gradually adds organic matter to soil as it decomposes. It’s one of the simplest ways to improve garden health with minimal ongoing effort.
Organic mulches include wood chips, shredded bark, straw, dried grass clippings, and shredded leaves. Apply 2-4 inches around plants, keeping mulch a few inches away from plant stems and tree trunks to prevent moisture-related diseases and rot. Wood-based mulches last longer but tie up nitrogen as they decompose, so they work best around established perennials and shrubs rather than annual vegetables.
Straw and dried grass clippings decompose faster, adding nutrients to soil more quickly, making them excellent for vegetable gardens. Ensure grass clippings are completely dry before applying them, and avoid clippings from lawns recently treated with herbicides. Fresh grass clippings form a dense mat that blocks air and water.
Inorganic mulches like landscape fabric or plastic can be useful in specific situations, such as warming soil for heat-loving crops or providing long-term weed suppression in pathways. However, they don’t improve soil quality and can make it harder to add amendments or compost. Most gardens benefit most from organic mulches that feed the soil ecosystem while providing surface benefits.
Encouraging Beneficial Insects and Pollinators
Your garden should be habitat for helpful insects, not just a food source for pests. Beneficial insects include pollinators like bees and butterflies, predators like ladybugs and lacewings that eat pest insects, and parasitoids like certain wasps that lay eggs in pest insects. Creating a garden that supports these allies reduces your pest problems while supporting biodiversity.
Plant a diversity of flowers that bloom throughout the growing season. Many beneficial insects need nectar and pollen for part of their life cycle, even if they’re predators as adults. Small flowers with easy-to-access nectar, like alyssum, dill, fennel, and yarrow, attract a wide range of beneficial insects. Native wildflowers are particularly valuable for supporting native pollinators.
Provide habitat and overwintering sites. Leave some areas of your garden a little wild—a small brush pile, a patch of leaf litter, or some hollow plant stems left standing over winter give beneficial insects places to shelter and reproduce. Many native bees nest in bare soil or hollow stems rather than hives, so these messy corners serve an important purpose.
Avoid broad-spectrum insecticides, which kill beneficial insects along with pests. Even organic pesticides can harm helpful species when applied indiscriminately. When you must use pesticides, apply them in early morning or evening when pollinators are less active, spot-treat only affected plants, and choose the most selective product that will solve your problem.
Maintaining Tools and Garden Hygiene
Clean tools and good garden sanitation prevent the spread of diseases and extend the life of your equipment. These simple maintenance practices are often overlooked but make a significant difference in long-term garden health.
Sanitize pruning tools between plants, especially when working with plants showing disease symptoms. Wipe blades with rubbing alcohol or a 10% bleach solution to avoid transferring pathogens. This is particularly important when pruning fruit trees or roses, where fungal and bacterial diseases spread easily through cutting wounds.
Keep tools sharp and properly maintained. Sharp blades make clean cuts that heal faster and reduce plant stress. Dull tools crush plant tissue, creating larger wounds that are more susceptible to infection. Clean soil off tools after each use and oil metal parts periodically to prevent rust. Store tools in a dry location to extend their lifespan.
Practice good garden cleanup, particularly at season’s end. Remove diseased plant material and dispose of it in the trash rather than composting it, as home compost piles may not get hot enough to kill all pathogens. Clear fallen fruit that can harbor pests and diseases. However, don’t feel obligated to remove every dead leaf—some plant debris provides valuable habitat for beneficial insects and protects soil over winter.
Disinfect pots and seed trays before reuse, especially if previous plants showed disease symptoms. Wash containers with soapy water, then sanitize with a diluted bleach solution. Rinse thoroughly and allow to dry completely before using again. This simple step prevents damping-off and other soilborne diseases from affecting new seedlings.
Optimizing Nutrient Cycles Through Strategic Fertilization
While compost provides a foundation of organic matter, understanding how plants use specific nutrients allows you to address deficiencies strategically rather than applying generic fertilizers unnecessarily. Plants require macronutrients—nitrogen, phosphorus, and potassium—in relatively large quantities, along with secondary nutrients like calcium, magnesium, and sulfur, plus micronutrients such as iron, manganese, and zinc in trace amounts.
Nitrogen drives leafy growth and green color. Deficiency shows as yellowing of older leaves first, since plants move nitrogen from old growth to new. However, excessive nitrogen creates lush foliage at the expense of flowers and fruit, and makes plants more susceptible to disease and pest damage. Leafy crops like lettuce and spinach benefit from moderate nitrogen, while fruiting crops need less once they begin flowering.
Phosphorus supports root development, flowering, and fruiting. Purple-tinged leaves, especially on young plants, often indicate phosphorus deficiency, though cold soil temperatures can also cause this symptom by limiting phosphorus uptake even when soil levels are adequate. Phosphorus moves slowly through soil, so incorporate it into the root zone rather than applying it to the surface. Bone meal and rock phosphate are organic sources that release phosphorus gradually.
Potassium strengthens cell walls, improves drought and disease resistance, and enhances fruit quality. Deficiency appears as browning leaf edges, weak stems, and poor fruit development. Wood ash provides potassium but also raises soil pH, so use it cautiously in already alkaline soils. Greensand and kelp meal offer potassium without dramatically affecting pH.
Rather than following a rigid fertilization schedule, observe your plants and adjust feeding based on their growth stage and appearance. Fast-growing annuals like tomatoes and squash need more frequent feeding than slow-growing perennials. Container plants require more frequent fertilization since nutrients leach out with regular watering. Side-dress growing plants by sprinkling fertilizer in a band 4-6 inches from stems and watering it in, rather than piling it against plant bases where it can burn tender tissue.
Managing Microclimates for Extended Growing Seasons
Your garden contains multiple microclimates—small areas with temperature, moisture, or light conditions that differ from the surrounding environment. Learning to identify and utilize these microclimates lets you grow a wider variety of plants and extend your growing season at both ends.
South-facing walls absorb heat during the day and radiate it at night, creating warmer conditions that can protect tender plants from light frosts. Stone or brick walls are particularly effective heat reservoirs. Use these premium spots for heat-loving plants like peppers, eggplants, and basil, or for extending the season of tomatoes and other warm-season crops. Be aware that these areas may also dry out faster and require more frequent watering.
Low-lying areas collect cold air on still nights, creating frost pockets that can damage plants even when surrounding areas remain above freezing. Cold air flows downhill like water, so the bottom of a slope or a depression surrounded by higher ground creates a natural freezer. Avoid planting frost-sensitive crops in these areas, or plan to protect them with row covers on cold nights. Conversely, slopes and elevated areas often escape frost damage, giving you a longer growing window.
Shade patterns change throughout the season as the sun’s angle shifts. An area with dappled morning shade in spring may be in full blazing sun by midsummer. Map your garden’s light patterns across the season to make informed planting decisions. Morning sun with afternoon shade suits many plants better than the reverse, since morning light helps dry foliage while afternoon shade protects plants from the most intense heat.
Wind patterns affect both temperature and moisture. Windbreaks—hedges, fences, or structures that block or slow wind—create calmer conditions that reduce water loss from plants and soil while protecting delicate stems and leaves from physical damage. However, completely blocked areas with no air movement can promote fungal diseases. Aim for windbreaks that filter wind rather than creating a solid wall, which can cause turbulent downdrafts on the leeward side.
Recognizing and Correcting Nutrient Deficiency Symptoms
Plants display specific visual symptoms when lacking essential nutrients, and learning to read these signs lets you address problems before they seriously impact growth and yields. However, several factors can cause similar symptoms, so consider the whole picture before jumping to conclusions.
Chlorosis—yellowing of leaves while veins remain green—typically indicates iron deficiency, especially when it appears on new growth first. This is common in alkaline soils where iron is present but chemically unavailable to plants. Lowering soil pH helps, but chelated iron provides a faster temporary fix. Manganese and zinc deficiencies produce similar symptoms but are less common.
Interveinal chlorosis on older leaves, where yellowing occurs between leaf veins, often signals magnesium deficiency. This is particularly common in sandy soils and can be corrected with Epsom salt (magnesium sulfate) applied as a foliar spray or soil drench. Use one tablespoon per gallon of water for foliar application, spraying early morning or evening to avoid leaf burn.
Blossom end rot in tomatoes, peppers, and squash—where the fruit bottom turns brown and leathery—results from calcium deficiency at the developing fruit, usually caused by inconsistent watering rather than lack of soil calcium. The problem occurs when rapid growth periods alternate with water stress, preventing calcium transport to fruits. Maintain consistent soil moisture through mulching and regular watering rather than adding more calcium fertilizer.
Stunted growth with dark, purplish leaves may indicate phosphorus deficiency, but can also result from cold soil temperatures that limit phosphorus uptake. If symptoms appear in early spring and disappear as soil warms, temperature is the issue rather than nutrient deficiency. Phosphorus deficiency genuine problems are more common in high-pH soils or soils with excessive iron or aluminum that bind phosphorus.
Before treating suspected deficiencies with fertilizers or amendments, consider other possible causes. Overwatering, root damage, compacted soil, and root diseases can all interfere with nutrient uptake even when nutrients are present in adequate amounts. Address underlying cultural problems first, then reassess whether supplemental feeding is necessary.
Succession Planting and Intensive Growing Techniques
Maximizing garden productivity means thinking beyond single-season planting. Succession planting—making multiple sowings of the same crop at intervals—provides continuous harvests rather than a single overwhelming glut. Intensive techniques make efficient use of space while maintaining soil health.
For crops that mature quickly and decline rapidly, like lettuce, radishes, and arugula, sow small amounts every 10-14 days rather than planting an entire bed at once. This approach gives you fresh harvests throughout the season without waste. Stop succession planting about 6-8 weeks before typical hot weather for cool-season crops, then resume in late summer for fall harvests.
Plan for sequential use of the same space by different crops. Follow spring peas or lettuce with summer transplants like tomatoes or peppers. After harvesting garlic in midsummer, plant fall crops like broccoli, kale, or carrots in the same beds. This relay cropping keeps beds productive while giving soil diverse nutrient demands rather than repeatedly depleting the same elements.
Interplanting fast-maturing crops between slower-growing ones maximizes space efficiency. Radishes or lettuce planted between tomato or pepper transplants will mature and be harvested before the larger plants need the space. Bush beans can grow in the understory of corn, and sprawling squash can occupy ground between vertical crops like pole beans once beans are established and climbing.
Square foot gardening and intensive spacing work well when combined with rich soil and adequate water. Plants grown closer together than traditional spacing shade soil, reducing water loss and suppressing weeds. However, this approach requires excellent soil fertility and careful attention to air circulation. Provide adequate spacing for air movement to prevent disease, and be prepared to feed plants more frequently since they’re drawing nutrients from a smaller soil volume.
Building Resilience Through Seed Saving and Variety Selection
Growing plants adapted to your specific conditions creates a more resilient garden over time. Seed saving allows you to develop localized varieties while connecting to gardening traditions that span millennia. Careful variety selection from the start gives you plants better equipped to handle your particular challenges.
Start with open-pollinated varieties rather than hybrids when learning to save seeds. Open-pollinated plants produce offspring that closely resemble the parent plant, while hybrid seeds often result in unpredictable characteristics in the second generation. Heirloom varieties—open-pollinated varieties passed down through generations—often carry resilience traits selected over decades or centuries.
Some crops are easier for beginning seed savers than others. Tomatoes, peppers, beans, peas, and lettuce are self-pollinating and come true from saved seed with minimal isolation. Simply save seed from your best plants—those with excellent flavor, good disease resistance, and strong production. Squash, cucumbers, and melons require isolation from other varieties of the same species to prevent cross-pollination, making them more challenging.
When selecting commercial varieties, research disease resistance codes on seed packets and catalog descriptions. Letters like V, F, N, and T indicate resistance to specific diseases: verticillium wilt, fusarium wilt, nematodes, and tobacco mosaic virus. If certain diseases are prevalent in your area, choosing resistant varieties prevents problems before they start. However, don’t assume resistant means immune—provide good cultural conditions even with resistant varieties.
Day-length sensitivity matters for some crops. Short-day onions form bulbs when days reach 12-14 hours, while long-day varieties need 14-16 hours. Planting the wrong type for your latitude results in poor bulb formation. Similarly, some spinach and lettuce varieties are more bolt-resistant in hot weather, extending your harvest window. Catalog descriptions usually specify these characteristics, so choose varieties matched to your growing season and conditions.
Implementing No-Till and Minimal Disturbance Practices
Traditional tillage breaks up soil structure, destroys beneficial fungal networks, brings weed seeds to the surface, and can accelerate organic matter decomposition. No-till and minimal disturbance approaches work with soil ecology rather than against it, building soil health over time with less physical labor.
In no-till systems, soil structure is maintained by avoiding mechanical disturbance. Instead of turning soil, you build up organic matter on the surface through regular additions of compost and mulch. Soil organisms gradually incorporate this material, creating rich topsoil without manual tillage. Earthworms and other soil fauna create channels that improve drainage and aeration more effectively than mechanical tools.
Converting to no-till requires patience, as benefits accumulate over several seasons. Start by covering existing beds with 4-6 inches of compost or well-aged wood chips. Plant directly into this material, pulling back mulch to create planting pockets for seeds or transplants. Add more organic matter each season. In the first year, weed pressure may be significant as buried seeds germinate, but this decreases markedly in subsequent years as the seed bank becomes depleted.
For dense weedy areas or new garden spaces, sheet mulching (also called lasagna gardening) smothers existing vegetation without tillage. Mow or cut vegetation short, then layer cardboard or several sheets of newspaper over the area, overlapping edges to prevent gaps. Top with 4-6 inches of compost, then add a mulch layer. The cardboard suppresses weeds while decomposing over several months. You can plant immediately by creating holes through the cardboard layer for transplants, or wait a season for complete decomposition before planting.
Some minimal disturbance is acceptable in no-till systems. Broadforking—using a specialized tool to lift and slightly loosen soil without turning it—can address compaction while preserving soil layers and structure. Making narrow planting furrows or small holes for seeds and transplants doesn’t significantly disrupt soil ecology. The goal is to avoid wholesale turning and mixing of soil layers that disrupts the complex web of soil organisms.
Adapting to Climate Challenges and Weather Extremes
Increasingly variable weather patterns demand adaptive strategies that help gardens withstand both gradual changes and sudden extremes. Building resilience into your garden design and practices protects your investment of time and resources.
Water harvesting systems capture rainfall for later use while reducing runoff. Simple rain barrels collect water from downspouts, providing chlorine-free water ideal for gardens. Connect multiple barrels for increased capacity, and elevate them on sturdy platforms to create gravity-fed pressure for easier watering. In larger landscapes, swales—shallow ditches on contour—slow water movement, allowing it to infiltrate soil rather than running off.
Drought-stressed gardens benefit from strategies beyond just watering more. Deep mulching conserves existing soil moisture. Shade cloth suspended over sensitive crops reduces water demand during heat waves while preventing sun scald. Avoid fertilizing during drought, as this forces new growth that plants cannot support with limited water. Remove flowers and fruits from severely stressed plants to redirect energy toward survival rather than production.
Excessive rain creates its own challenges through waterlogging, nutrient leaching, and disease pressure. Raised beds improve drainage in chronically wet areas. Adding perlite or coarse sand to planting holes aids drainage for individual plants, though this doesn’t solve broader drainage issues. In severe cases, installing French drains or redirecting downspouts away from garden areas may be necessary. Choose disease-resistant varieties and maintain good air circulation to minimize fungal issues during wet periods.
Unexpected late or early frosts threaten plants at season transitions. Monitor extended forecasts and be prepared to protect vulnerable plants with row covers, blankets, or even cardboard boxes on cold nights. Water soil thoroughly before expected frost, as moist soil holds and releases more heat than dry soil. Remove covers once temperatures rise above freezing to prevent overheating. For young transplants, consider temporary cloches made from plastic bottles with the bottom cut off, which provide both frost protection and a warmer microclimate for establishment.
Heat waves stress plants through high temperatures and increased water demand. Provide temporary shade for cool-season crops trying to finish production in unexpected heat. Avoid transplanting or heavy fertilizing during extreme heat, as plants cannot establish roots or process nutrients efficiently under stress. Focus on keeping plants alive rather than productive during severe conditions, knowing they’ll resume growth when temperatures moderate.
Frequently Asked Questions
How often should I test my garden soil?
Test your soil every 2-3 years if your garden is established and performing well, or annually if you’re addressing specific problems like poor growth or ongoing nutrient deficiencies. Always test before starting a new garden bed so you can amend soil appropriately from the beginning. Test in fall or early spring when you have time to adjust pH or add amendments before planting season. If you’re experiencing unexplained plant problems, a soil test should be one of your first troubleshooting steps, as it can reveal deficiencies or toxicities that aren’t visible to the eye.
Can I use diseased plant material in compost?
It depends on your composting method and the type of disease. Hot composting that maintains temperatures of 140-160°F for several days can kill most plant pathogens, but this requires careful management and monitoring. Most home compost piles don’t consistently reach these temperatures. For safety, dispose of seriously diseased plant material in the trash rather than composting it. Mildly affected foliage from common issues like powdery mildew late in the season can usually go in compost, but avoid composting plants with severe fungal, bacterial, or viral diseases, or any plant material with pest eggs or larvae visible.
What’s the best time to water my garden in hot weather?
Early morning, ideally between 5 and 9 a.m., is the best time to water in hot weather. The air is cooler, so less water evaporates before reaching plant roots. Morning watering also allows foliage to dry quickly as the day warms, reducing the risk of fungal diseases. Plants can take up moisture throughout the day when they need it most. If morning watering isn’t possible, early evening is acceptable, but avoid watering so late that foliage stays wet overnight. Never water during the heat of midday in summer, as much of the water will evaporate and you risk leaf scorch if water droplets act as tiny magnifying glasses in intense sun.
How can I tell if I’m overwatering or underwatering my plants?
Both overwatering and underwatering can cause wilting, which confuses many gardeners. Check the soil before reacting—stick your finger 2-3 inches into the soil near the plant. If it’s dry, the plant needs water. If it’s wet or soggy, you’re overwatering. Overwatered plants often have yellow leaves, particularly lower leaves, and may develop soft, mushy stems or root rot. The soil may smell sour or unpleasant. Underwatered plants typically have dry, crispy leaf edges, and the entire plant may appear dull or grayish. Soil pulls away from the edges of containers when severely dry. Overwatering is actually more common and more dangerous than underwatering, as it deprives roots of oxygen and promotes root diseases.
Do I need to remove all insects from my garden?
No, and attempting to do so would harm your garden’s ecosystem. Most insects in your garden are either beneficial or neutral—only a small percentage are actually pests. Beneficial insects like ladybugs, lacewings, predatory wasps, and ground beetles eat pest insects and help keep populations in check. Pollinators are essential for fruit and vegetable production. Even some insects that nibble on plants don’t cause enough damage to warrant intervention. Focus on monitoring pest populations and intervening only when damage reaches unacceptable levels. A healthy garden with diverse plant species and habitat features will naturally maintain a balance between pests and beneficial insects, requiring minimal intervention from you.
Related posts:
 The 2018 Dirty Dozen List That Will Change How You Shop for Produce
 Rose Crystal Garden in NYC
 Tiny Green Therapy: How Mini Plants Are Revolutionizing the Workspace
 Vertical Garden Home Guide
 Overwintering Garden Pests: Prevention and Control
 Beginner-Friendly Fruits to Grow
 Beginner’s Guide to Composting
 Growing Peanuts at Home: A Fun and Rewarding Gardening Project