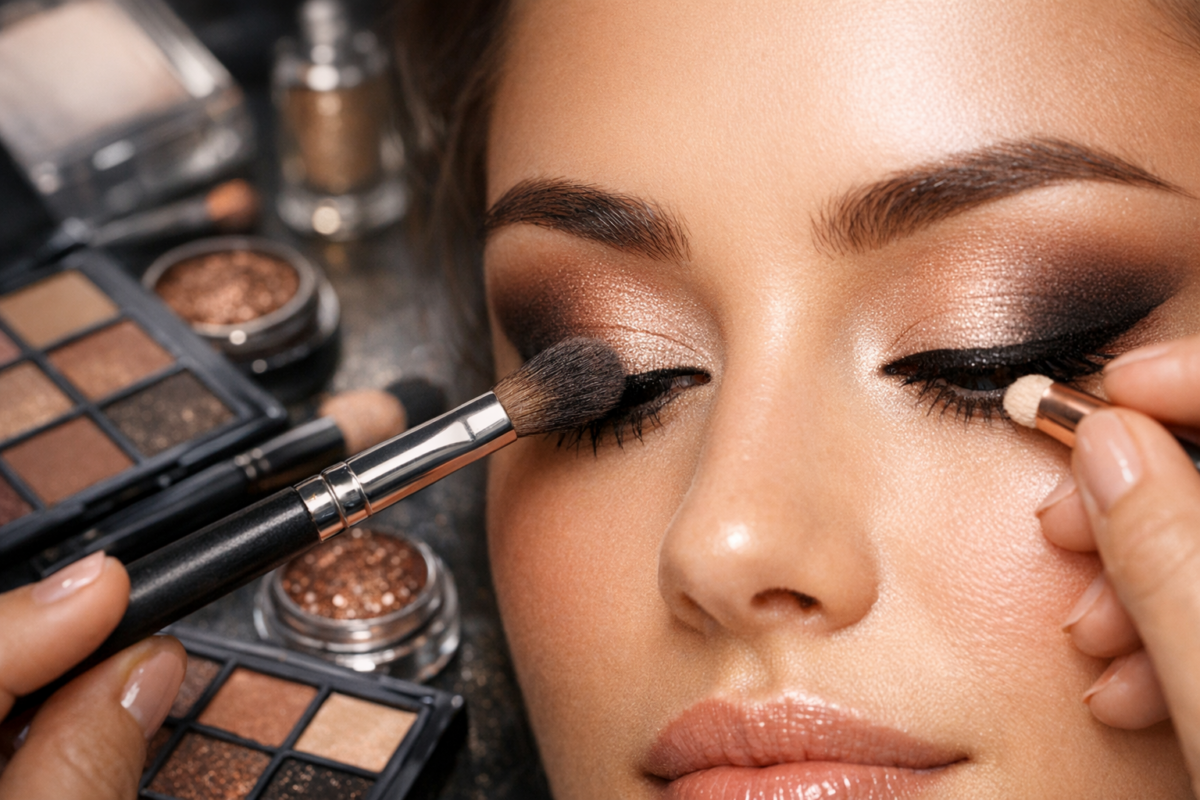
When the last thing you want is a smaiti of mismatched colors or a hard‑to‑blend line, a reliable method can change the entire makeup routine. The following guide walks you through a practical, step‑by‑step process that delivers smooth, professional results every time – regardless of skill level.
1. Understanding the Foundation – Prep and Primer
Before any pigment lands on your lids, the canvas matters. Start with a clean eye area. Use a gentle cleanser and pat dry. A thin layer of eye primer or a light wash of concealer creates a uniform base, preventing fallout and extending wear. If you have oily lids, apply a mattifying serum or a small amount of translucent powder to tame shine.
2. Palette Selection – Choosing the Right Color Family
Picking the right palette sets the tone. For everyday wear, go for neutral shades: taupe, bronze, and soft mauve. For evening looks, deeper hues such as plum, navy, and charcoal add drama libet. If you are experimenting, choose a palette that offers a spectrum – from a base shade to a transition color and a pop of highlight.
3. The Three‑Stage Application Technique
The core of the method is a three‑stage workflow that ensures depth, dimension, and a polished finish.
- Base Layer: Apply a single, even coat of the lightest color across the entire lid. This locks the pigment in place and creates a neutral backdrop.
- Transition Shade: Dab the mid‑tone shade just above the crease line. Use a fluffy brush or a fan‑shaped brush to roll the pigment in. The goal is a smooth gradient, not a stark line.
- Highlight & Depth: On the inner corner and brow bone, apply a bright or metallic shade to lift the eyes. For extra depth, add a darker color in the outer corner or lower lid, then blend with a clean brush.
4. Tools That Matter – Brushes vs Sponges
Tools influence texture and blending. A tapered brush works best for precise application in the crease, while a fluffy brush is ideal for diffusing pigment. A small flat brush creates sharp edges for a bold look. For a satin finish, a silicone sponge can push pigment into the skin, especially for matte palettes.
5. Edge Blending Mastery
After each layer, blend the edges until there is no visible line. Use a clean, dry brush and small, circular motions. If you notice fallout, lightly dust the lids with a translucent powder, then re‑blend. Consistency is key – the better the blend, the more natural the result.
6. Enhancing with Texture and Finish
- Matte: Finish with a matte powder or a setting spray unabashedly if the look demands a subtle sheen.
- Glitter: For sparkling accents, apply a glitter shade only in the inner corner or the lower lash line. Use a small brush to avoid clumping.
- Shimmer: Apply a reflective shade over the lid’s center to catch light.
7. Quick Fixes for Common Mistakes
Even the best routine can stumble. Here are three fast fixes.
- Heavy lines: Dab a small amount of concealer along the crease and blend.
- Patchy pigment: Apply a small dab of primer over the area before reapplying pigment.
- Smudged edges: Use a translucent powder to set the area and re‑blend.
8. Routine for Daily and Dramatic Looks
Adapt the base layer intensity to match the occasion. A light wash of a warm beige for work, a richer bronze for a night out, or a bold plum for a party. Keep the transition shade consistent to maintain cohesion. Finish daily with a subtle shimmer and a dramatic look with multiple layers and textural pops.
9. Maintenance & Cleanup
Clean brushes after each use with a gentle brush cleanser. Store palettes upright to prevent pigment shifting. Replace expired products after 12 months of opening. Use a small brush to apply a setting spray after the final layer to lock everything in place.
Tailoring Eyeshadow to Different Skin Tones and Undertones
When you look at the spectrum of eyeshadow shades on a shelf, it can feel overwhelming. The key to navigating this maze is understanding your personal undertones and how they interact with pigment. Start by performing a simple test: under natural daylight, place a few neutral swatches—pure white, warm beige, and cool ash—against your bare forearm or jawline. Observe which swatch blends seamlessly into your skin; that hue typically reflects your dominant undertone. If the warm beige disappears into your complexion while the cool ash stands out, you are likely warm toned. Conversely, if the ash merges while the beige remains distinct, you are cool toned. Olive or neutral undertones often require a more nuanced approach, combining both warm and cool elements to achieve harmony.
Once you have identified your undertone, the next step is to curate a palette that enhances rather than competes with your natural coloring. Warm‑toned individuals should gravitate toward golden, copper, bronze, and soft peach families. These shades echo the sun‑kissed quality of their skin and tend to make eyes pop with a gentle radiance. Cool‑toned skin, on the other hand, benefits from plum, blueberry, slate, and silver‑gray pigments that create a striking contrast and lend a sophisticated depth. For neutral or olive complexions, a hybrid palette works best: combine muted taupe and rose taupe as a base, intersperse them with subtle teal or sage for an earthy complexity, and add a metallic gold or rose gold accent to catch the light.
Testing eyeshadow in store can be misleading because lighting conditions vary widely. To replicate real‑world performance, apply a thin swipe of each candidate shade to the back of your hand and step outside on a sunny day. Notice how the pigment behaves under direct sunlight, near‑artificial indoor lighting, and under fluorescent office lights. Some colors appear dramatically different when exposed to UV light; metallic shades may shimmer excessively, while matte tones can appear washed out. This practical trial helps you avoid purchasing pigments that look perfect under store lights but fall flat in daily wear.
Beyond simple undertone matching, consider the overall color story you wish to tell. Seasonal color analysis offers a framework: winter palettes thrive on high contrast, featuring deep jewel tones and crisp metallics; spring palettes favor fresh pastels and soft corals; summer palettes lean toward muted blues, soft grays, and cool taupe; autumn palettes celebrate warm oranges, rich browns, and golden yellows. While these guidelines are helpful, they are not prescriptive. You can borrow elements from multiple seasons to create a custom blend that reflects your personality and lifestyle. For instance, a winter‑inspired deep plum can be softened with a spring‑like rose taupe to create a look suitable for both evening events and daytime meetings.
Storage and freshness also play a role in how well a shade complements your skin. Pigments that have hardened or dried out can appear ashy, especially on cooler undertones, while overly glossy formulations may highlight fine lines on mature skin. To preserve the integrity of your collection, keep each pan sealed when not in use and store palettes in a climate‑controlled environment. A simple rule of thumb: if the product has been open for more than twelve months, consider replacing it, as oxidation can shift the original hue.
Finally, the act of applying eyeshadow is a learning process. As you experiment with newly selected shades, pay attention to how each color interacts with your skin’s natural oil production. Some pigments may spread unevenly on oily lids, causing a muddied appearance. In such cases, a light dusting of translucent powder before applying the eyeshadow can create a matte barrier that stabilizes the color. Conversely, dry skin may benefit from a hydrating primer or a cream‑based eyeshadow base to prevent the powder from settling into fine lines. By fine‑tuning these preparatory steps, the chosen pigments will reveal their true potential, delivering a luminous finish that truly reflects your unique undertone.
Mastering Multi-Dimensional Layering Beyond Base‑Transition‑Highlight
While the classic three‑step method provides a solid foundation, truly dimensional eyeshadow looks often arise from layering multiple textures and finishes. Begin with a cream or gel eyeshadow as a base; these formulations contain conditioning agents that help pigment adhere and can act as a primer in themselves. Apply a thin, even coat using the fingertip or a small brush, then let it set for a few seconds. This creates a smooth canvas that can hold both matte and shimmer layers without creasing.
After the cream base has set, add a powder matte shade that matches the desired depth. Instead of simply sweeping it across the lid, use a stippling technique: lightly tap the brush onto the palette and then dot the pigment onto the lid, building intensity gradually. This method prevents the color from appearing flat and allows underlying tones to subtly show through.
Next, introduce a second texture—often a shimmer or metallic powder. For a more nuanced effect, apply the shimmer not as a solid band but as a diffused veil. Using a fluffy brush, sweep the pigment upward and outward, allowing the light‑reflecting particles to merge with the matte layer. The result is a gradient that catches the eye from every angle, creating depth that goes beyond simple highlight placement.
To push dimensionality further, incorporate a foil or iridescent shade that contains a reflective surface. These pigments can be applied with a light hand, as they tend to dominate if over‑used. Position the foil primarily on the brow bone or the inner corner, where it can catch ambient light without overwhelming the overall look. When combined with a softer shimmer underneath, the foil adds a third layer of visual interest.
Edge blending becomes crucial when layering multiple finishes. After each new layer, use a clean, slightly dampened blending brush to soften any harsh lines. The dampness helps the pigments meld without pulling away previously applied color. If you notice a chalky buildup, gently press a clean brush to lift excess powder, then re‑blend. This careful orchestration ensures each layer contributes to a cohesive, multidimensional effect.
Consider also the role of contrast in layering. Pairing a deep matte with a bright metallic can create a striking visual tension. For example, a charcoal matte applied to the outer V‑shape of the eye, blended toward the center, can be overlaid with a metallic rose gold that intensifies as it approaches the brow bone. The contrast not only adds depth but also directs the viewer’s focus, making the eyes appear more open and expressive.
Finally, the order of application matters. Always start with the lightest texture (cream), then progress to medium (matte powder), and finish with the most reflective (shimmer, metallic, or foil). This sequence allows heavier pigments to settle on top of lighter ones, reducing the risk of premature fading throughout the day. By mastering this layered approach, you can transform a simple eyeshadow routine into a sophisticated, multi‑dimensional masterpiece that stands up to long hours and varying lighting conditions.
Customizing for Unique Lid Geometry: Hooded, Deep‑Set, Monolid, and Beyond
Every eye shape presents its own set of challenges and opportunities. Understanding the anatomy of your lids allows you to adapt eyeshadow placement, blending, and technique to enhance natural contours rather than fight them. Hooded lids, characterized by excess skin that folds over the crease, often obscure the defined eyelid crease. To create the illusion of depth, apply a darker matte shade along the upper eyelid, extending slightly beyond the natural crease and blending upward toward the brow. This dark base creates a subtle shadowing effect that mimics the natural fold, making the eyes appear more open. Use a lighter, shimmery tone on the brow bone and a soft highlight on the inner corner to draw attention upward.
Deep‑set eyes, where the eyeball sits lower within the orbital bone, benefit from upward‑angled application. Start with a medium tone at the inner corner and gradually blend toward the outer corner, angling the color upward toward the brow. This upward sweep lifts the eye shape, counteracting the downward gaze. Adding a reflective shade on the brow bone can catch light from above, further opening the eye. Avoid placing dark color too close to the lower lash line, as this can deepen the recessed appearance.
Monolid eyes lack a visible crease, which can make it difficult to create dimension. The solution lies in building a pseudo‑crease using a combination of matte and shimmer shades. Apply a darker matte pigment to the eyelid, focusing on the outer third, then blend seamlessly toward the center. Next, apply a medium matte shade across the remaining two‑thirds, creating a subtle gradient that mimics a crease. Finish with a luminous shimmer on the brow bone to accentuate the lifted area. This technique not only defines the lid but also adds depth without relying on a natural crease.
For large, open eyes, the goal is often to refine rather than amplify. Use muted, neutral tones as the primary base—soft taupe or warm nude—to keep the look balanced. Add a modest amount of shimmer on the inner corner and brow bone for a gentle lift. Keep the outer V‑shape lighter to avoid overwhelming the natural openness, allowing the eyes to remain fresh and expressive.
Edge cases such as very oily lids or hooded lids with excess skin require additional preparation. A mattifying primer or a thin layer of translucent powder can help pigments adhere and prevent creasing throughout the day. For hooded lids, applying a waterproof or smudge‑resistant formula can keep the darker shade from migrating into the crease, preserving the intended contour.
Finally, consider the role of lighting in your application environment. Natural daylight reveals true color, while indoor lighting can cast cool or warm tones that alter perception. When applying eyeshadow for a specific occasion, simulate the lighting conditions you’ll encounter. If you’ll be in bright sunlight, opt for richer, deeper shades that hold up under strong light. For low‑light settings, a subtle shimmer or soft metallic can add just enough dimension without appearing overly bright.
By tailoring your technique to the unique geometry of your eyes, you transform potential limitations into creative opportunities. This personalized approach ensures that every eyeshadow look not only looks beautiful but also enhances the natural structure of your eyes, resulting in a polished, intentional appearance that works for you regardless of lid shape.
Integrating Eyeshadow with Brow, Contour, and Highlight for Cohesive Face Makeup
A harmonious face makeup routine rarely treats the eyes in isolation. Coordinating eyeshadow with brow definition, contour, and highlight creates a unified aesthetic that elevates the entire look. Begin by establishing a base for the brows. A well‑defined arch acts as a frame, guiding where eyeshadow should be placed. Use a brow pencil or powder that matches your hair color to fill in sparse areas and define the shape. Once the brows are set, select an eyeshadow palette that echoes at least one of the brow tones—often a warm taupe or ash brown—to create continuity.
Contouring can be a subtle ally when paired with eyeshadow. A cool matte shade such as deep plum or slate, applied along the outer edge of the eyelid and blended toward the crease, mimics natural shadowing that occurs in the eye socket. This technique not only adds depth but also reinforces the brow’s arch, making the eyes appear more pronounced. It’s essential to keep contour colors muted; overly dark tones can create a harsh line, especially when transitioning to the inner corner where highlight will be placed.
Highlight serves as the luminous counterpart to both brow and contour. A metallic or iridescent shade applied to the inner corner, brow bone, and tear duct area reflects light, giving the eyes an awake, refreshed appearance. Choose a highlight that complements the brow color—rose gold for warm undertones, silver for cool undertones. When the highlight aligns with the brow’s arch, it draws attention to the eyes’ central area, creating a balanced focal point.
Consider the interplay of temperature across the face. If you have chosen a warm brow powder with golden undertones, let those warm notes echo in the eyeshadow, perhaps through a soft copper or bronze shade along the outer lid. Conversely, a cool brow powder with ash undertones can be mirrored by a cool slate or mauve eyeshadow. This temperature matching ensures that the face reads as a cohesive whole, avoiding jarring contrasts that can make the makeup appear disjointed.
Another strategic integration is using eyeshadow to reinforce blush and lipstick tones. For a warm, sunset‑inspired look, incorporate orange‑based eyeshadows—such as terracotta or coral—along the lower lash line. This subtle hint of warmth can echo the natural flush of blush and a soft lip color, creating a seamless gradient from cheeks to eyes. Similarly, a cool berry‑based lipstick can be echoed by a plum or mauve eyeshadow placed on the outer V‑shape, tying the color story together.
Timing is also crucial. Apply brow products first, allowing them to set before moving to eyeshadow. This prevents smudging and ensures crisp lines. After eyeshadow, set the entire eye area with a light dusting of translucent powder or a setting spray, which also locks in contour and highlight, extending wear time.
Finally, evaluate the overall balance. Step back, preferably in natural daylight, and assess whether the eyes, brows, contour, and highlight work in concert. If the eyes appear washed out, increase the depth of the eyeshadow or intensify the brow definition. If the face looks too heavy, lighten the contour or reduce the amount of highlight. This iterative approach ensures that each element supports the others, resulting in a polished, cohesive makeup look that enhances your natural features.
Innovative Tools and DIY Alternatives for Unique Textures
While traditional brushes and sponges remain staples, expanding your toolkit with unconventional applicators can unlock new textural possibilities. The fingertip, for instance, generates a warm, skin‑temperature application that can melt cream eyeshadows into the lid, creating a seamless, airbrushed effect. Start by cleansing hands thoroughly, then press a small amount of cream pigment onto the back of the hand. Using the pad of the index finger, gently pat the pigment onto the eyelid, blending outward toward the brow. The natural oils in the skin help spread the formula, resulting in a luminous base that can serve as a modern alternative to primer.
Compressed powder palettes, often marketed as travel‑friendly, can also be repurposed for unique blending. The compact, pressed formulation tends to be more concentrated than loose powder, allowing for intense color payoff with minimal product. To apply, use a fluffy brush to sweep the pigment across the lid, then lightly tap a clean brush to set the color. The compressed nature reduces fallout, making it ideal for on‑the‑go touch‑ups.
DIY alternatives such as cotton swabs can be surprisingly effective for precision work. After applying a base shade, a clean cotton swab can be used to soften harsh lines, especially in the lower lash line or around the nose area. The absorbent fibers pick up excess powder without disturbing underlying layers, offering a controlled method of edge blending.
Another inventive tool is the dual‑ended brush, which combines a dense, tapered tip for crease definition with a wide, fluffy tip for diffusion. This versatility reduces the need for multiple brushes and can speed up the application process. When using the tapered end, apply the darkest shade in a precise, controlled motion, then switch to the fluffy side to blend the color upward, creating a seamless gradient.
For those who enjoy a more artistic approach, a small makeup sponge—often used for foundation—can be employed to create soft, diffused shadows. The sponge’s porous surface picks up a modest amount of powder, allowing for a gentle, stippling application that builds color gradually. This method is especially useful for creating a smoky effect without the harsh lines typical of brush blending.
Consider also the role of household items in a pinch. A clean, soft makeup brush can be used to gently sweep away excess glitter from the lid after application, preventing clumping. Meanwhile, a small, lint‑free makeup brush can be used to set the look with a light dusting of translucent powder, ensuring longevity.
Experimentation is key. Keep a journal of which tools work best with specific formulas and skin types. Note the intensity of color payoff, the ease of blending, and any potential irritation. Over time, you’ll develop a personalized toolkit that blends traditional and innovative methods, allowing you to achieve a wide range of textures and effects tailored to your unique style.
Seasonal and Environmental Adaptations for Longevity and Comfort
Makeup performance is not static; it fluctuates with the seasons and ambient conditions. During winter months, indoor heating can strip moisture from the skin, causing eyeshadow to appear chalky or to crease prematurely. To counteract this, apply a hydrating eye primer or a cream‑based eyeshadow base that contains glycerin or hyaluronic acid. These formulas create a moisture barrier, allowing pigments to adhere more firmly and reducing the likelihood of slippage throughout the day.
Summer presents its own set of challenges, primarily increased oil production due to heat and humidity. Opt for oil‑control primers or mattifying serums that target the eyelid area. A lightweight, translucent powder applied after the eyeshadow can act as a setting layer, absorbing excess sebum and preserving color integrity. Additionally, choosing formulations labeled as “long‑wear” or “smudge‑proof” can provide extra resilience against sweat and humidity.
Travel to high‑altitude locations often introduces more intense UV exposure, which can cause certain pigments—particularly metallic and iridescent shades—to oxidize faster. To protect these colors, apply a clear setting spray after the final eyeshadow layer. This not only shields the pigments from UV rays but also adds a protective seal that minimizes fading.
Environmental factors also influence the choice of tools. In extremely humid climates, synthetic brushes tend to retain more moisture, which can lead to streaky application if not cleaned promptly. Switching to natural bristle brushes may reduce moisture retention, though they might be less effective with cream formulations. Balancing brush types based on climate helps maintain consistent application quality.
Consider also the impact of seasonal fashion trends on eyeshadow selection. Winter collections often feature bold, saturated hues like deep emerald or rich burgundy. These intense colors can be overwhelming if not balanced with neutral skin tones. Pair a bold shade with a soft, warm neutral on the lid and a subtle shimmer on the brow bone to keep the look sophisticated rather than overpowering.
During spring, pastel tones such as soft lavender, mint, and peach become popular. These lighter pigments require careful placement to avoid looking washed out. Apply pastel shades on the lower lash line or as a wash across the inner half of the lid, then blend outward with a slightly deeper taupe to create depth. This technique ensures the pastel colors enhance rather than dominate the overall look.
Fall calls for warm, earthy tones—cinnamon, bronze, and terracotta. To maintain dimension, layer a matte bronze as the base, followed by a cream-based copper on the brow bone, and finish with a subtle shimmer on the inner corner. This combination captures the richness of the season while providing a balanced visual impact.
FAQ
- Q: How do I choose a primer suited for my skin type?
- A: If you have oily lids,mnopqrstuvwxyz choose a mattifying primer. For dry lids, a hydrating fuerza is preferable. For sensitive skin, opt for fragrance‑free formulas.
- Q: Can I skip the transition shade?
- A: Skipping it may result in a harsh line between colors. The transition shade acts as a bridge, creating a seamless gradient. For a minimal look, use the same color for base and transition but apply a slightly darker tone in the outer corner.
- Q: How do I prevent fallout when using metallic shades?
- A: Metallic pigments can be more prone to fallout. Apply a thin primer first and use a small amount of pigment. Blend immediately and set with a translucent powder.
- Q: Is it necessary to use a setting spray?
- A: A setting spray helps lock the product in place and extends wear, especially in humid conditions. If you prefer a matte finish, a dry setting powder works well.
- Q: What is the best way to blend in the lower lash line?
- A: Use a small, angled brush and apply a small gehol of transition shade. Blend with soft circular motions. If you desire more depth, add a darker shade in the outer gfx garantie and blend upward.
Related posts:
 Finally, Mascara That Won’t Turn You Into a Panda by Noon
 Huda Kattan’s $100 Beauty Haul
 Master the Art of DIY Brow Lamination at Home
 Foundation’s Impact on Skin
 Kosas Air Brow: A Game-Changer for Natural-Looking Brows
 Jenna Dewan’s Drugstore Secret for Perfect Eyebrows
 Eyebrow Extensions Are the New Lash Extensions
 Brush Stroke Genius: The Nail Art Technique Anyone Can Master