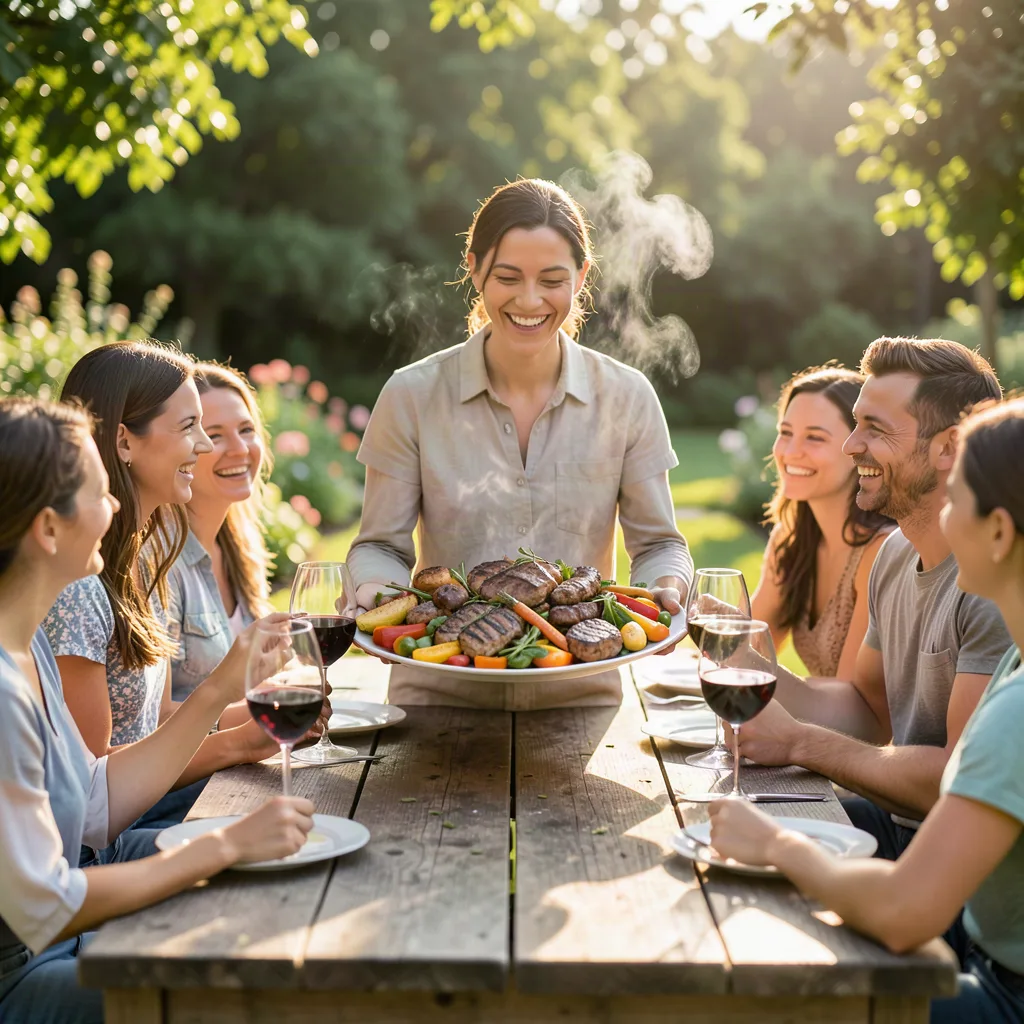
Hosting a large gathering can feel like a high‑stakes juggling act, but with the right plan you can serve a delicious spread without losing your sanity. This guide walks you through every stage – from early menu brainstorming to post‑event clean‑up – so you can focus on hospitality rather than frantic kitchen traffic.
Key takeaways
- Calculate guest counts with a 10% buffer and document dietary needs in a simple spreadsheet.
- Design a balanced, cohesive menu around one protein to minimize oven and stovetop congestion.
- Front-load preparation by chopping ingredients and pre-cooking components the day before the event.
- Utilize modular workstations and assign clear roles to helpers to keep the kitchen running smoothly.
- Create self-serve beverage stations to reduce the need for active bartending and keep guests satisfied.
Assessing the Event and Guest List
Before you open a cookbook, clarify the basic parameters of the occasion. Ask yourself:
- How many guests will be present? Include a small buffer for unexpected arrivals.
- What is the setting – indoor dining room, backyard picnic, or a potluck style?
- Are there dietary restrictions such as vegetarian, gluten‑free, or nut‑allergy concerns?
- What is the overall vibe – formal sit‑down, casual buffet, or interactive food stations?
Documenting these details on a simple spreadsheet helps you keep numbers straight and prevents over‑ or under‑preparing. For example, a party of 24 with a 10 % buffer means you should plan for roughly 26 servings of each main component.
Setting a Realistic Budget
Money often dictates the scale of a menu, so establish a clear budget early. Break the total amount into categories such as proteins, vegetables, starches, beverages, and disposables. Use average supermarket prices or a quick online price check to estimate per‑person costs. A practical rule of thumb for a balanced spread is to allocate about 40 % of the budget to protein, 30 % to vegetables and starches, and the remaining 30 % to extras and drinks. If your total budget is $500 for 30 guests, aim for roughly $13‑$14 per head.
Designing a Balanced Menu
A well‑structured menu reduces kitchen chaos and satisfies a variety of palates. Follow these steps:
- Choose a central theme. Whether it is Mediterranean, comfort food, or a seasonal harvest, a theme narrows ingredient choices and creates cohesion.
- Pick one protein focus. Cooking multiple proteins simultaneously can overwhelm limited oven or stovetop space. Opt for a single roast, a large batch of chili, or a plant‑based centerpiece.
- Add two complementary sides. Include a vegetable dish, a grain or starch, and a fresh salad. Aim for contrasting textures – crisp, creamy, and chewy.
- Plan a simple dessert. One make‑ahead sweet, such as a sheet‑pan fruit crumble, keeps the workload low.
- Include a beverage plan. Offer a non‑alcoholic base (sparkling water with citrus) and a limited selection of wine or beer to avoid over‑stocking.
Example menu for 30 guests:
- Herb‑roasted chicken thighs (protein)
- Lemon‑garlic quinoa (grain)
- Roasted seasonal vegetables with balsamic glaze (vegetable)
- Mixed greens salad with vinaigrette (salad)
- Apple‑cinnamon crumble served with vanilla yogurt (dessert)
- Infused water and a choice of red or white wine (beverages)
Streamlining Shopping and Ingredient Prep
Bulk purchasing and pre‑preparation are the cornerstones of efficiency.
- Make a master shopping list. Group items by store aisle or by the order you will visit each retailer. This reduces back‑and‑forth trips.
- Buy in bulk where possible. Large bags of rice, beans, or frozen vegetables often cost less per unit and store well.
- Prep ingredients the day before. Wash and chop vegetables, portion herbs, and measure spices into small containers. Store them in airtight containers to keep flavors fresh.
- Pre‑cook components that tolerate reheating. Cook quinoa, beans, or pasta a day ahead and refrigerate. Reheat gently with a splash of broth to restore moisture.
By front‑loading prep, the cooking day becomes a series of assembly steps rather than a frantic start‑to‑finish marathon.
Choosing Efficient Cooking Methods
When feeding many, the goal is to maximize oven and stovetop real estate while minimizing active cooking time.
- Roasting on sheet pans. A single sheet pan can hold dozens of chicken thighs, vegetables, or even a whole fish. Arrange items in a single layer for even browning.
- One‑pot meals. Dishes such as chili, jambalaya, or a hearty stew cook in a large stockpot, reducing the number of dishes to wash.
- Slow‑cooker or Instant Pot batches. These appliances keep food warm without constant attention, freeing you to focus on other tasks.
- Stovetop‑to‑oven transitions. Sear proteins on the stove, then finish cooking in the oven. This technique builds flavor while using both heat sources efficiently.
Plan the cooking sequence on paper: which items can share the same oven temperature, which need separate burners, and which can be prepared ahead and reheated.
Timing and Workflow on the Day
Develop a timeline that breaks the day into manageable blocks. A sample schedule for a 4‑hour prep window might look like this:
- 08:00 – Preheat ovens, set out equipment, and start the longest‑cooking item (e.g., a 2‑hour roast).
- 08:30 – Begin boiling water for quinoa and pasta; start sautéing aromatics for the stew.
- 09:00 – Load sheet‑pan vegetables onto a second oven rack; stir the stew and bring to a gentle simmer.
- 09:30 – Assemble salad components and keep dressing chilled.
- 10:00 – Check roast temperature, finish quinoa, and start reheating pre‑cooked grains.
- 10:30 – Plate desserts, arrange buffet tables, and do a final sweep of the kitchen.
Adjust times based on your specific oven capacity and the number of helpers you have. Enlist a friend or family member to handle simple tasks like stirring or setting the table.
Serving Strategies that Keep the Flow Smooth
How you present food can dramatically affect the guest experience and your stress level.
- Buffet style with clear zones. Place plates at the start, followed by salads, main dishes, sides, and finally desserts. This linear flow prevents bottlenecks.
- Pre‑portion hot dishes. Use serving trays with individual portions, allowing guests to grab a complete plate without queuing for multiple items.
- Keep hot foods hot, cold foods cold. Invest in a few chafing dishes or insulated carriers for hot items, and use ice baths for salads and desserts.
- Label dishes. Simple handwritten signs for vegetarian, gluten‑free, or nut‑free options help guests navigate safely.
Consider a “self‑serve drink station” with pre‑filled glasses, ice, and a selection of syrups. This reduces the need for a dedicated bartender and keeps guests hydrated.
Managing Leftovers and Reducing Waste
Even with careful planning, leftovers happen. Turn them into future meals and minimize waste.
- Pack leftovers promptly. Use reusable containers and label them with the date.
- Transform bulk proteins. Leftover roasted chicken can become a quick chicken salad, tacos, or a hearty soup.
- Repurpose vegetables. Roasted veg can be blended into a soup base or tossed into a frittata the next day.
- Donate excess non‑perishable items. If you purchased extra pantry staples, consider donating to a local food bank.
By planning for leftovers, you extend the value of your ingredients and demonstrate sustainable hospitality.
Essential Equipment and Kitchen Setup for Large‑Scale Cooking
When the guest count climbs into the dozens, the ordinary home‑kitchen layout quickly becomes a bottleneck. Investing a few hours in a strategic equipment audit before the event can turn a cramped countertop into a well‑orchestrated production line.
- Modular workstations. Set up three distinct zones: a prep zone (cutting boards, knives, bowls), a cooking zone (stovetop, ovens, large stockpots), and a assembly zone (platters, serving utensils, warming trays). Use rolling carts with lockable wheels so you can re‑configure the flow as the day progresses.
- High‑capacity appliances. A 6‑quart or larger Dutch oven, a commercial‑size sheet‑pan rack, and a 12‑quart stockpot can replace a dozen smaller pots. If you lack a large oven, consider borrowing a portable convection oven or renting a small catering‑grade range from a local party‑equipment shop.
- Temperature‑controlled storage. A couple of deep‑freeze bins (or a large chest freezer) let you keep pre‑cooked proteins, grains, and sauces at safe temperatures for up to 48 hours. Pair them with a digital thermometer so you can verify that foods stay below 40 °F (4 °C) until you need them.
- Heat‑distribution tools. Invest in a heavy‑gauge silicone baking mat, a set of silicone muffin cups, and a few silicone stretch lids. They prevent sticking, reduce the need for parchment paper, and keep lids snug on pots, preserving moisture without constant monitoring.
- Serving infrastructure. Chafing dishes with fuel canisters, insulated food carriers, and a set of sturdy buffet risers create visual height and keep food at safe serving temperatures. For outdoor events, a portable electric hot plate powered by a generator can keep sauces simmering without a stove.
Edge case example: Imagine a backyard summer soirée where the forecast calls for a sudden thunderstorm. By positioning the main cooking zone under a covered patio and routing power cords to a surge‑protected generator, you protect both equipment and food safety while maintaining the flow of service.
Before the event, run a “dry‑run” of the kitchen layout with an empty pot. Walk through the prep‑to‑plate sequence, noting any awkward reaches or traffic jams. Adjust the placement of carts, add a folding table if needed, and you’ll have a blueprint that turns chaos into choreography.
Building a Reliable Support Crew and Delegation Blueprint
Even the most seasoned home chef can only juggle a limited number of tasks simultaneously. A well‑structured crew turns the event into a collaborative production, freeing you to focus on quality control and guest interaction.
- Define clear roles. Assign titles such as Prep Lead, Heat Monitor, Plating Coordinator, and Clean‑up Captain. Write a one‑page cheat sheet that lists each person’s primary responsibilities, the tools they’ll need, and the time windows when they’ll be most active.
- Leverage skill levels. Not everyone needs to be a culinary expert. Simple tasks—like washing greens, refilling water stations, or moving trays—can be handled by teenagers or friends who are eager to help. Reserve the more technical duties (e.g., searing, deglazing) for the experienced cooks.
- Implement a communication system. A group chat on a messaging app (WhatsApp, Signal, or even a dedicated Slack channel) allows real‑time updates: “Roast is at 155 °F,” “Quinoa needs a splash of broth,” or “Dessert trays are ready for the buffet.” For noisy outdoor settings, consider walkie‑talkies with a single channel.
- Schedule shift hand‑offs. If the event spans more than four hours, rotate the Heat Monitor every 60‑90 minutes to prevent fatigue. Use a simple spreadsheet with time slots and names, printed and posted near the cooking zone.
- Provide contingency backups. Identify at least one “floating” helper who can jump in if someone calls out or a task overruns. This person should be comfortable with basic knife work and can assist with plating or moving dishes.
Practical scenario: For a 60‑person dinner, you might enlist four helpers: a college student to wash and store vegetables, a partner to manage the chafing dishes, a friend to assemble the salad stations, and a sibling to oversee the dessert warming tray. With each person aware of their hand‑off time, the kitchen never stalls, and you retain the mental bandwidth to taste, adjust seasoning, and greet guests.
Weather, Power, and Other Contingency Plans
Large gatherings rarely unfold exactly as imagined. A sudden rainstorm, an unexpected power outage, or a last‑minute venue change can jeopardize hours of preparation. Preparing for these variables ahead of time reduces panic and protects food safety.
- Backup power. Rent a small inverter generator (2–3 kW) that can handle one oven, a couple of hot plates, and a few lights. Test the generator a week before the event, ensuring the fuel tank is full and the outlet adapters match your appliances.
- Temperature‑controlled shelters. If the event is outdoors, rent a pop‑up canopy with sidewalls and a clear vinyl floor. This creates a micro‑climate that shields food from wind, rain, and insects while still allowing ventilation.
- Alternative cooking methods. Keep a portable propane grill or a large electric griddle as a fallback. For example, if the oven fails, you can finish a roast on a grill using indirect heat and a drip pan.
- Food‑safety buffers. Keep a stock of ice packs and insulated coolers. If power is lost, you can transfer perishable items into these containers to maintain safe temperatures for up to four hours.
- Plan B menus. Draft a simplified “emergency menu” that relies on no‑cook items: charcuterie boards, pre‑made dips, assorted breads, and fruit platters. This ensures you can still serve guests even if cooking appliances become unavailable.
Edge case illustration: During a summer garden party, a sudden thunderstorm knocks out the main power at 2 p.m. With a generator already positioned behind the patio, you plug in a 2‑burner electric hot plate, transfer the pre‑cooked stew from the stove to a chafing dish, and keep the roast warm in a low‑heat oven (still powered by the generator). Guests remain unaware of the hiccup, and the meal proceeds uninterrupted.
Elevating Beverages: DIY Stations and Pairings
While the main menu often steals the spotlight, a thoughtfully curated beverage program can turn a good gathering into a memorable experience. The goal is to provide variety, interactivity, and a touch of sophistication without overwhelming your prep schedule.
- Self‑serve cocktail or mocktail bar. Choose one signature drink that can be scaled in a large dispenser. For a summer crowd, a cucumber‑mint lemonade with optional vodka works well. Provide pre‑measured syrups, fresh herb sprigs, and a selection of citrus wedges so guests can customize their glass.
- Pairing stations. Align a small tasting board with each protein: a robust red wine for the roast, a crisp rosé for the quinoa, and a light sparkling water infused with rosemary for the vegetable medley. Include a brief card describing the flavor rationale—this adds a restaurant‑style narrative without extra labor.
- Non‑alcoholic focus. Offer a “hydration wall” consisting of three large dispensers: citrus‑infused water, a lightly sweetened hibiscus iced tea, and a sparkling ginger‑lime soda. Provide reusable glassware or biodegradable cups to reduce waste.
- Temperature control hacks. Use a large insulated beverage cooler (or a converted cooler with a lid) to keep drinks cold for hours. If you need to keep a batch of sangria chilled, submerge the dispenser in a bathtub of ice—just be sure the dispenser is waterproof.
- Kids’ corner. A separate station with flavored milk, fruit smoothies, and a small “soda‑pop” soda maker (e.g., a home carbonation system) keeps younger guests satisfied and prevents them from crowding the adult bar.
Example layout: In a rectangular dining hall, place the beverage stations at each end. The left side hosts the adult cocktail bar with a decorative tray of garnishes; the right side houses the kids’ corner and the hydration wall. This spatial separation reduces traffic jams and allows guests to gravitate naturally to the station that fits their preference.
Advanced Dietary Accommodations and Inclusive Menu Tweaks
Beyond the basic vegetarian or gluten‑free labels, modern gatherings often require nuanced considerations: low‑FODMAP, keto, halal, kosher, and allergy‑specific preparations. Addressing these needs proactively demonstrates hospitality and minimizes last‑minute kitchen stress.
- Ingredient segregation. Dedicate a separate cutting board, knife, and set of bowls for allergen‑free dishes. Store these tools in a clearly marked drawer or on a distinct countertop area to avoid cross‑contamination.
- Dual‑purpose sauces. Prepare a base sauce (e.g., a simple herb vinaigrette) in a large batch, then split it into two portions: one left untouched for vegans, the other enriched with honey or dairy for omnivores. This reduces duplicate cooking while still meeting dietary needs.
- Low‑carb grain alternatives. Offer cauliflower rice or shirataki noodles alongside traditional quinoa. They can be cooked in the same pot (sequentially) and kept warm in a low‑heat oven, allowing guests to choose their preferred carbohydrate level.
- Halal/kosher compliance. Source pre‑certified proteins (e.g., halal chicken thighs) from a trusted butcher. Keep them on a separate tray and label them clearly. If you’re unsure about certification, a simple “no pork, no shellfish” note can guide guests with similar restrictions.
- Low‑FODMAP options. Swap high‑fructan onions for the green parts of scallions or chives. Use garlic‑infused oil instead of fresh garlic. Offer a side of plain roasted carrots and a small bowl of lactose‑free yogurt as a topping for the quinoa.
Edge‑case illustration: A guest with a severe peanut allergy arrives unexpectedly. Because you have already set aside a peanut‑free prep station, you can quickly assemble a separate plate of the roasted chicken, quinoa, and vegetable medley, ensuring no cross‑contact. The guest feels cared for, and you avoid a potential health crisis.
When labeling dishes, go beyond “vegetarian” and use icons: a leaf for plant‑based, a wheat stalk with a line for gluten‑free, a drop of water for dairy‑free, and a lightning bolt for keto‑friendly. Small printed stickers placed on serving platters make the information instantly visible.
Post‑Event Follow‑Up: Feedback, Documentation, and Sustainable Practices
The work doesn’t end when the last plate is cleared. A systematic post‑event routine helps you capture lessons learned, thank guests, and reinforce sustainable habits for future gatherings.
- Guest feedback loop. Send a brief digital survey (Google Forms or a simple email) within 48 hours. Ask two quantitative questions (e.g., “Rate the overall food quality 1‑5”) and one open‑ended prompt (“What could we improve next time?”). Anonymity encourages honest input.
- Recipe documentation. Create a master spreadsheet that logs each dish, the exact quantities used, cooking times, and any adjustments made on the day of service. Over time, this becomes a personal “catering bible” that streamlines future planning.
- Leftover redistribution audit. Before discarding anything, take inventory of leftover containers. Offer sealed portions to guests as “take‑home” gifts, or arrange a pickup with a local shelter. Document the amount donated for personal records or tax‑deduction purposes.
- Cleaning efficiency recap. Note which cleaning tools saved the most time (e.g., a silicone scrub brush vs. traditional steel wool). Replace disposable liners with reusable silicone mats where possible, and schedule a deep‑clean of the oven and stovetop within a week to prevent lingering residue.
- Environmental impact summary. Calculate the approximate waste generated (e.g., number of single‑use plates, plastic cutlery, food waste weight). Set a goal to reduce that figure by 10 % for the next event, perhaps by swapping to compostable plates or increasing the proportion of reusable glassware.
Case study: After a 40‑person holiday dinner, the host logged that 12 pounds of leftover vegetables were repurposed into a soup for the following week, and 30 reusable plates were washed and stored for the next gathering. Guest feedback indicated a high satisfaction rating (4.8/5) and a request for a gluten‑free dessert, which the host added to the next event’s menu, illustrating how systematic follow‑up drives continuous improvement.
By treating the post‑event phase as an integral chapter of the overall hospitality story, you transform a single gathering into a learning cycle that refines efficiency, inclusivity, and sustainability for every future feast.
Frequently Asked Questions
What is the best way to estimate portion sizes for a mixed crowd?
Start with a baseline of 1 ½ servings per adult for main dishes and 1 serving per child. Add a 10 % buffer for unexpected guests. Use a kitchen scale for proteins to ensure you have roughly 6‑8 ounces per adult serving.
How can I keep food warm without drying it out?
Use low‑heat oven settings (around 200°F or 90°C) or chafing dishes with a small water pan. Cover trays with foil to trap moisture, and stir occasionally.
Are there quick alternatives to making a fresh salad for a large group?
Prepare a large batch of mixed greens the night before, store in a sealed container with a paper towel to absorb excess moisture. Dress the salad just before serving using a separate dressing bowl.
What should I do if a guest arrives later than expected?
Keep a small “reserve” plate of each hot item in a warming drawer or low oven. This allows you to serve latecomers without reheating the entire batch.
How can I make clean‑up easier after serving a big meal?
Line serving trays with parchment paper, use disposable but eco‑friendly plates, and assign a clean‑up crew to tackle one station at a time. Soaking pots and pans immediately after use reduces stubborn residue.
Related posts:
 The Meal Prep Master Class That Will Save You Hundreds Every Month
 Ultimate Summer Pool Party Planning
 15-Minute Dairy-Free Dinner Ideas
 Overcoming Dinner Party Anxiety When You’d Rather Stay Home
 Amy Schumer Marries Celebrity Chef
 Portion vs Serving Size Guide
 The Secret to Throwing Stress-Free Parties Every Time
 Etiquette Tips for Disinviting Wedding Guests