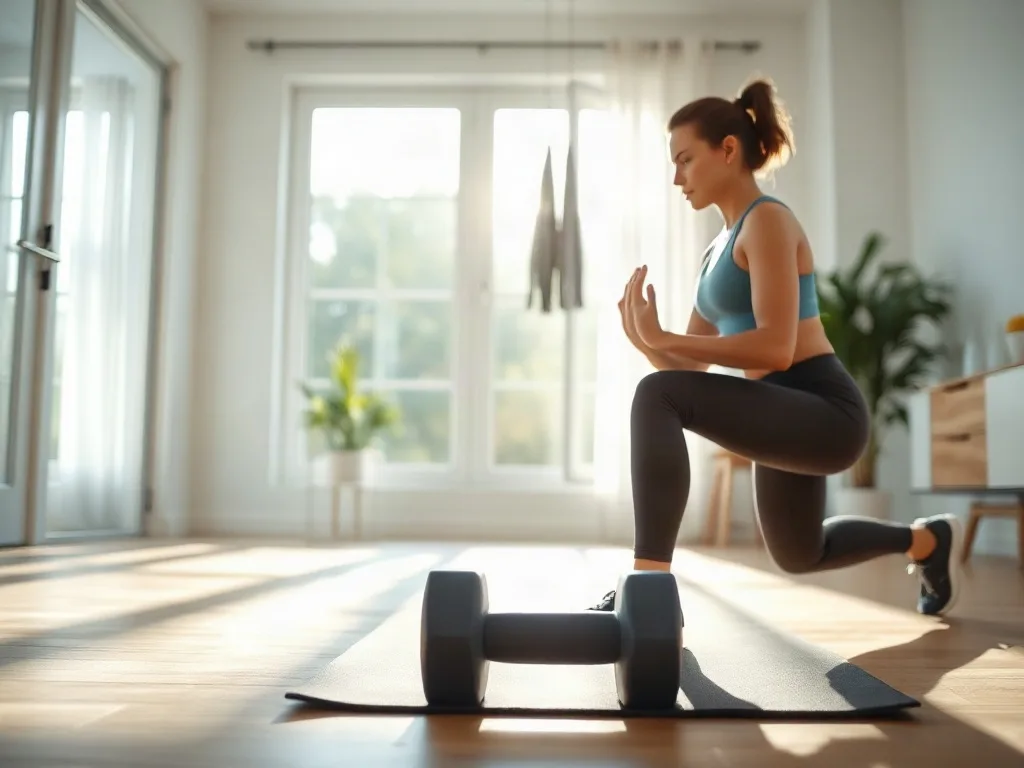
Working out at home can feel like a puzzle—how do you hit every major muscle group without a full‑size gym? The answer lies in thoughtfully designed full‑body workout routines that blend strength, cardio, and mobility. Below you’ll find a step‑by‑step guide to building effective sessions using minimal equipment, plus variations for beginners, intermediates, and those who want a quick sweat. Each routine is broken into clear blocks, with suggested sets, reps, and rest periods so you can track progress and stay motivated.
Key takeaways
- Train three non-consecutive days per week to allow for muscle recovery while maintaining consistency and functional strength.
- Use versatile tools like adjustable dumbbells and resistance bands, or create DIY gear like sandbags and PVC pipe barbells.
- Apply periodization models such as linear progression or undulating cycles to vary intensity and avoid fitness plateaus at home.
- Prioritize a 3:1 carbohydrate-to-protein ratio after workouts and consider supplements like creatine or magnesium to support recovery.
- Incorporate dynamic stretches and mobility work, such as hip flexor stretches and thoracic extensions, to prevent injury and stiffness.
Why Choose Full‑Body Workouts for Home Training
Full‑body workouts offer several practical advantages when your training space is limited:
- Time efficiency: You work every major muscle group in one session, reducing the need for multiple weekly splits.
- Balanced development: Hitting push, pull, lower‑body, and core movements in the same workout helps prevent muscular imbalances.
- Equipment flexibility: Many exercises rely only on body weight, a pair of dumbbells, or a resistance band, keeping costs low.
- Recovery friendliness: With proper programming you can train three times a week and still allow adequate rest for each muscle group.
Because each session targets the whole body, you’ll also see a boost in daily functional strength—lifting groceries, playing with kids, or climbing stairs becomes easier.
Essential Equipment for a Home Full‑Body Routine
You don’t need a full rack of machines, but a few versatile tools make the workouts smoother and allow progression.
- Dumbbells: Adjustable sets from 5 lb to 30 lb cover most exercises. If space is tight, a single adjustable pair works well.
- Resistance bands: Light, medium, and heavy bands provide variable tension for rows, presses, and leg work.
- Yoga mat: Offers cushioning for floor work and a defined space for planks and stretching.
- Sturdy chair or bench: Useful for step‑ups, triceps dips, and elevated push‑ups.
- Timer or phone app: To keep track of intervals and rest periods.
If you lack any of these items, you can substitute household objects—water bottles for light dumbbells, a backpack filled with books for added weight, or a towel for sliding lunges.
Designing Your Weekly Schedule
Consistency is the backbone of any fitness plan. For most adults, three non‑consecutive days per week (e.g., Monday, Wednesday, Friday) strike a good balance between stimulus and recovery. Here’s a simple template:
- Warm‑up (5‑10 minutes): Light cardio (jumping jacks, high knees) followed by dynamic stretches (leg swings, arm circles).
- Main circuit (30‑35 minutes): Perform the full‑body routine described in the sections below. Rest 60‑90 seconds between sets.
- Cool‑down (5‑10 minutes): Static stretching focusing on the muscles you just trained.
Adjust the total volume (sets × reps) based on your fitness level. Beginners might start with 2 sets per exercise, while more advanced trainees can aim for 4‑5 sets.
Beginner Full‑Body Routine (No Equipment)
This routine requires only body weight and a mat. Perform each exercise for the prescribed reps, then move to the next. After completing the circuit, rest 90 seconds and repeat 2‑3 times.
- Squat to Chair – 12‑15 reps
- Incline Push‑up (hands on chair) – 10‑12 reps
- Glute Bridge – 15‑20 reps
- Bent‑Knee Superman – 12‑15 reps per side
- Standing Calf Raise – 15‑20 reps
- Plank – hold 30‑45 seconds
Key cues:
- Keep knees tracking over toes during squats.
- Maintain a straight line from head to heels in the plank.
- Drive through heels on glute bridges to engage the posterior chain.
Progression ideas: add a second chair for elevated feet on push‑ups, or hold a water bottle for added resistance on calf raises.
Intermediate Full‑Body Routine (Dumbbells & Bands)
This circuit introduces external resistance while preserving the full‑body focus. Perform 3‑4 rounds, resting 60 seconds between rounds.
- Dumbbell Goblet Squat – 10‑12 reps (hold a dumbbell close to chest)
- Band‑Assisted Row – 12‑15 reps (anchor band at door, pull toward torso)
- Standing Overhead Press – 8‑10 reps (dumbbells or bands)
- Reverse Lunge with Twist – 10 reps each leg (hold a light dumbbell, rotate torso toward front leg)
- Single‑Leg Romanian Deadlift – 10 reps each leg (light dumbbell for balance)
- Russian Twist – 20 reps total (body weight or light weight)
Form tips:
- During goblet squats, sit back into the hips and keep chest lifted.
- Row elbows stay close to the body; squeeze shoulder blades together.
- Press overhead with a neutral spine; avoid arching the lower back.
To increase difficulty, raise the weight by 5 lb increments or use a heavier band. For a cardio boost, add 30 seconds of mountain climbers between each exercise.
Advanced Full‑Body Routine (Supersets & Plyometrics)
Designed for those who already handle moderate loads and want a metabolic challenge. This workout uses supersets (two exercises back‑to‑back) and includes plyometric moves to raise heart rate.
- Superset A
- Barbell/Dumbbell Front Squat – 8 reps
- Push‑up to Shoulder Tap – 12 reps (alternating taps)
- Superset B
- Single‑Arm Dumbbell Row – 10 reps each side
- Jumping Split Squat – 10 reps each leg
- Superset C
- Arnold Press – 8‑10 reps
- Burpee with Tuck Jump – 8 reps
- Core Finisher
- Hanging Knee Raise (use a sturdy pull‑up bar or a door‑mounted strap) – 12 reps
- Side Plank – 45 seconds each side
Rest 90 seconds after each superset block. Aim for 3‑4 blocks total. Keep the movement tempo controlled for strength (2‑0‑2) and explosive for plyometric parts.
Progression strategies:
- Increase weight by 2‑5 lb each week if you can maintain technique.
- Reduce rest intervals by 15 seconds to heighten conditioning.
- Add a weighted vest for extra load during jumps.
Integrating Mobility and Flexibility
Full‑body strength sessions can tighten muscles, especially when performed frequently. Including dedicated mobility work protects joints and improves performance.
- Hip Flexor Stretch – 30 seconds each side (kneeling lunge, gently push hips forward).
- Thoracic Extension on Foam Roller – 1‑minute rolling, pause on tight spots.
- Shoulder Dislocates with Band – 12‑15 slow reps, keep tension light.
- Ankle Dorsiflexion Stretch – 30 seconds each foot (lean against a wall, keep heel down).
Perform these moves after the cool‑down or on rest days as a short 10‑minute routine. Consistency will help maintain range of motion and reduce soreness.
Tracking Progress and Staying Motivated
Without a gym’s visual cues, it’s easy to lose track of improvement. Use these simple tools:
- Workout Log: Write down date, sets, reps, and weight used for each exercise. A notebook or phone app works.
- Performance Benchmarks: Every 4‑6 weeks, test a baseline movement—e.g., max push‑ups in 60 seconds or a timed 1‑km run. Compare results.
- Video Review: Record yourself once a month. Watching your form helps spot drift and celebrate technique gains.
- Goal Setting: Set specific, measurable goals (“Add 5 lb to goblet squat in 8 weeks”). Break them into weekly micro‑goals.
Reward yourself for hitting milestones—new workout clothes, a massage, or a favorite healthy meal. The psychological boost reinforces the habit loop.
Periodizing Full‑Body Sessions for Home Success
Even when you train in a living‑room, the principle of periodization still applies. By deliberately varying volume, intensity, and exercise selection across weeks, you keep the nervous system guessing and avoid the dreaded plateau. Below are three common models that translate well to a home environment, followed by a sample four‑week template you can copy‑paste into a notebook or phone app.
1. Linear Progression
In a linear scheme the load rises week after week while the total number of repetitions stays relatively constant. For a home full‑body routine you might start with 3 sets of 12 reps at a moderate weight, then shift to 3 × 10 with a heavier dumbbell, and finally 3 × 8 with an even heavier load. The key is to increase the weight by the smallest possible increment (2‑5 lb for dumbbells, the next band level for resistance bands) once you can complete the prescribed reps with perfect form.
2. Undulating (Daily‑Undulating) Model
Undulating periodization swaps the stimulus from day to day instead of week to week. On Monday you could focus on strength (4 × 5 heavy), Wednesday on hypertrophy (3 × 12 moderate), and Friday on power (3 × 8 with an explosive tempo). This approach is especially handy when you only have three training days because each session feels fresh, and you still hit a broad spectrum of adaptations.
3. Block Periodization
Block training clusters the same quality for a short block (e.g., 2‑3 weeks) before transitioning to the next focus. A typical home block might look like:
- Block A – Strength Base: 4‑6 × 4 heavy dumbbell squats, rows, and presses.
- Block B – Muscle Endurance: 3 × 15‑20 body‑weight circuits with short rests.
- Block C – Power & Conditioning: 5‑8 × 3 plyometric jumps, kettlebell swings (or a homemade sandbag), and sprint‑in‑place intervals.
After each block, take a deload week (reduce volume by 30‑40 %) to let connective tissue recover.
Sample Four‑Week Undulating Plan
| Day | Focus | Exercises (sets × reps) |
|---|---|---|
| Monday | Strength | Goblet Squat 4 × 5, Bent‑Over Row 4 × 5, Overhead Press 4 × 5, Plank 3 × 45 s |
| Wednesday | Hypertrophy | Reverse Lunge 3 × 12, Band Pull‑Apart 3 × 15, Push‑up 3 × 12, Russian Twist 3 × 20 |
| Friday | Power | Jump Squat 5 × 3, Band‑Assisted Chest Press 5 × 3, Single‑Leg Deadlift 5 × 3, Mountain Climbers 4 × 30 s |
Repeat the cycle for four weeks, adding 2‑5 lb to the goblet squat each strength day once you can finish all reps cleanly. The undulating rhythm gives you a strength stimulus, a size stimulus, and a metabolic stimulus all within the same week, maximizing the limited time you have at home.
Designing a Compact Home Gym and DIY Gear
Space constraints are the most common excuse for skipping workouts, yet a well‑planned corner can hold everything you need for a complete full‑body session. Below is a step‑by‑step checklist that turns a 6‑foot by 6‑foot area into a versatile training hub, followed by three DIY equipment ideas that cost less than $30 each.
Space‑Saving Layout
- Define a Zone: Mark the perimeter with a rug or floor‑level tape. This visual cue prevents furniture from drifting into your workout space.
- Vertical Storage: Install a wall‑mounted pegboard to hang resistance bands, jump ropes, and a lightweight kettlebell (or a homemade sandbag). Pegboards also double as a place to hang a small whiteboard for tracking sets.
- Multipurpose Furniture: Use a sturdy ottoman or storage bench that can serve as a step‑up platform, a dip seat, or a place to stash dumbbells when not in use.
- Fold‑Away Cardio: A compact jump rope or a foldable mini‑stepper can be stored under the bench when you’re done with the cardio portion.
- Lighting & Mirrors: Good lighting reduces eye strain, and a full‑length mirror lets you self‑correct form without a trainer.
DIY Equipment Projects
- Sandbag: Fill a sturdy duffel bag with a mix of old clothes, a few sand‑filled zip‑lock bags, and a 5‑lb weight plate. Seal with duct tape. Adjust the load by adding or removing items.
- PVC Pipe Barbell: Connect two 5‑foot PVC pipes with a central coupling, then insert a 2‑inch steel pipe (or a heavy broomstick) through the middle to create a makeshift bar. Use water bottles or canned goods as plates, secured with zip ties.
- Resistance Band Anchor: Loop a heavy‑duty band around a sturdy door knob, then secure the other end to a wall‑mounted hook. This creates a low‑cost row or chest‑press anchor without drilling into the door frame.
All three projects can be assembled in under an hour with tools you likely already own (duct tape, a drill, and a pair of scissors). The benefit is two‑fold: you save money and you gain the flexibility to move the gear around as needed.
Maintenance Tips
Regularly inspect DIY gear for wear—especially the seams on sandbags and the integrity of PVC joints. Replace any frayed bands before they snap, and keep a small toolbox nearby for quick repairs. A well‑maintained setup reduces the mental friction of starting a workout.
Fueling Your Home Workouts: Nutrition Strategies and Simple Supplements
Even the most meticulously programmed routine stalls without proper nutrition. The home setting gives you control over meal timing, portion size, and ingredient quality, which can be leveraged to accelerate recovery and improve performance.
Macro Timing for Full‑Body Sessions
- Pre‑Workout (30‑60 minutes prior): Aim for 20‑30 g of easily digestible carbs (e.g., a banana, a slice of whole‑grain toast with honey) combined with 5‑10 g of protein (Greek yogurt, a scoop of whey). This fuels glycogen stores and primes muscle protein synthesis.
- During the Session: If your workout exceeds 60 minutes, sip a low‑calorie electrolyte drink or a half‑cup of coconut water to sustain hydration and sodium balance.
- Post‑Workout (within 45 minutes): Prioritize a 3:1 carbohydrate‑to‑protein ratio. A quick shake made with 1 cup of milk, a scoop of whey, and a handful of frozen berries fits the bill. For those who prefer whole foods, try a turkey wrap with a whole‑grain tortilla and a side of fruit.
Budget‑Friendly Protein Sources
If buying whey feels expensive, consider these alternatives that are equally effective for muscle repair:
- Cottage Cheese: 14 g of protein per half‑cup; can be mixed with pineapple for flavor.
- Eggs: One large egg provides 6 g of protein; hard‑boil a batch for quick snacking.
- Lentils & Beans: 9 g of protein per half‑cup cooked; pair with brown rice for a complete amino‑acid profile.
- Peanut Butter: 8 g of protein per 2 tbsp; spread on whole‑grain crackers for a portable snack.
Targeted Supplements for Home Athletes
- Creatine Monohydrate: 3‑5 g daily, mixed in water or juice. Creatine improves strength and ATP regeneration, which translates to more reps on dumbbell rows or goblet squats.
- Vitamin D3: Especially important for those who train indoors year‑round. A 1,000‑2,000 IU dose supports bone health and immune function.
- Omega‑3 Fish Oil: 1‑2 g per day reduces inflammation, aiding recovery after plyometric blocks.
- Magnesium: 300‑400 mg before bed can improve sleep quality, which is crucial for muscle repair.
Hydration Hacks
Place a reusable water bottle within arm’s reach during each session. Add a pinch of sea salt or a squeeze of lemon to make the water more palatable and to replace electrolytes lost through sweat. Aim for at least 0.5 L of fluid per hour of moderate‑intensity work.
Advanced Mobility, Prehab, and Injury‑Proofing Tactics
Beyond the basic stretches listed in the original article, a comprehensive injury‑prevention plan incorporates dynamic joint activation, eccentric loading, and myofascial release. These elements not only protect you from overuse injuries but also enhance movement efficiency.
Dynamic Joint Activation
Before you even start the first set, perform a 3‑minute activation circuit that targets the shoulders, hips, and ankles—areas that bear the brunt of full‑body work.
- Scapular Wall Slides – 10 reps. Stand with back against a wall, slide arms up and down while keeping elbows and wrists in contact.
- Hip CARs (Controlled Articular Rotations) – 5 reps each direction per leg. Stand on one leg, move the opposite knee in a controlled circular pattern to mobilize the hip socket.
- Ankle Dorsiflexion Pulses – 15 reps each foot. Kneel with the front foot flat, gently push the knee forward while keeping the heel down.
These movements prime the nervous system and increase range of motion without the static “hold” feeling of traditional stretches.
Eccentric Emphasis for Tendon Strength
Adding a 3‑second lowering phase to key lifts (e.g., goblet squat, dumbbell row, push‑up) places greater stress on the connective tissue, making it more resilient. For a home routine, try the “slow‑down” protocol:
- Perform the concentric (lifting) phase at normal speed.
- Count to three as you lower the weight or body.
- Pause for one second at the bottom, then repeat.
Start with 2 × 8 reps and gradually progress to 3 × 10 as the muscles adapt.
Myofascial Release with Everyday Tools
Foam rollers are great, but if you don’t own one, a tennis ball, a frozen water bottle, or even a rolling pin can serve the same purpose. Target the following areas after each workout:
- Upper Trapezius – Place a tennis ball between the shoulder and neck, roll gently for 30‑45 seconds.
- Gluteus Medius – Use a frozen water bottle to roll the outer hip; the cold adds a mild anti‑inflammatory effect.
- Thoracic Spine – Lie on a rolling pin placed horizontally under the upper back, roll side‑to‑side for 1‑minute.
Recovery‑Focused Cool‑Down
Instead of a generic static stretch, integrate a “mobility‑recovery combo”: perform a 30‑second stretch followed immediately by a 30‑second active range‑of‑motion drill. Example: after a hamstring stretch, transition to a standing leg swing for 10 reps per side. This pattern restores length while re‑engaging the muscle fibers, leading to less soreness.
Tech‑Enabled Tracking: Apps, Wearables, and Data‑Driven Adjustments
Modern smartphones and inexpensive wearables can turn a simple notebook into a powerful analytics platform. Below are the most practical tools for a home full‑body practitioner, plus a step‑by‑step guide to interpreting the data.
Choosing the Right App
- StrongLifts 5×5 (Free): Ideal for linear progression; it auto‑calculates weight increments and logs sets.
- Fitbod (Subscription): Generates custom full‑body circuits based on equipment you own and tracks volume across muscle groups.
- JEFIT (Free with premium): Offers a large exercise library and the ability to export CSV files for deeper analysis.
Pick one that syncs with your wearable so you can capture heart‑rate data without manual entry.
Wearable Metrics That Matter
- Heart‑Rate Zones: Aim to spend 20‑30 % of the session in Zone 3 (moderate intensity, 70‑80 % of max HR) for optimal cardiovascular stimulus.
- RPE (Rate of Perceived Exertion): After each set, rate effort on a 1‑10 scale. Over time, you’ll notice a shift—what used to be an 8 becomes a 6, indicating adaptation.
- Training Load: Many wearables calculate a “Training Stress Score” (TSS) by combining duration and intensity. Keep weekly TSS between 150‑250 for steady progress without overtraining.
Spreadsheet Template for Home Athletes
Download a simple Google Sheet (or create your own) with columns for:
- Date
- Exercise
- Weight Used
- Sets × Reps
- RPE
- Heart‑Rate Avg.
- Notes (e.g., “knee felt tight”)
At the end of each month, use the sheet’s pivot table feature to calculate total volume per muscle group. If the volume for the lower body spikes while the upper stays flat, you know it’s time to add an extra push‑up variation or swap a leg‑heavy superset for a balanced one.
Data‑Driven Adjustments
When your average RPE for a given lift consistently drops below 6, increase the load by the smallest increment. Conversely, if your heart‑rate stays above Zone 4 for more than 10 minutes in a 30‑minute session, consider adding an extra rest minute or swapping a plyometric move for a slower tempo.
Remember, the goal of technology is to provide feedback, not to become a distraction. Set a 5‑minute window after each workout to review the numbers, make one concrete adjustment, and then move on.
Adapting Full‑Body Routines for Different Life Stages and Abilities
One size does not fit all. Whether you’re caring for aging parents, expecting a child, or coaching a teenager, the core principles of a full‑body workout remain, but the execution must respect physiological nuances.
Older Adults (60+)
- Prioritize Joint Safety: Replace high‑impact jumps with low‑impact power moves like medicine‑ball throws (or a light sandbag) performed from a seated position.
- Emphasize Balance: Add single‑leg stands while holding a light dumbbell, progressing to a slight heel raise once stability improves.
- Volume Management: Keep total weekly sets under 60 to avoid excessive muscular fatigue; 2‑3 sets per exercise are sufficient.
- Recovery Emphasis: Include a 10‑minute mobility circuit on off‑days focusing on hip flexors, thoracic spine, and ankle dorsiflexion.
Pregnant Individuals (Second & Third Trimester)
- Core Modification: Switch traditional planks for bird‑dog holds or side‑lying hip abductions to protect the growing abdomen.
- Upper‑Body Emphasis: Light dumbbell presses, seated rows, and wall angels maintain posture without stressing the pelvic floor.
- Lower‑Body Adjustments: Replace deep squats with box squats (using a sturdy chair) to limit hip flexion depth.
- Breathing Technique: Practice diaphragmatic breathing during each set to maintain intra‑abdominal pressure safely.
Youth & Teen Athletes (13‑18)
- Movement Quality Over Load: Focus on mastering the squat, hinge, and push patterns with body weight before adding resistance.
- Playful Integration: Turn the circuit into a timed “fitness game” where each station earns points; this keeps motivation high.
- Growth Plate Considerations: Avoid heavy axial loading (e.g., heavy barbell back squats) until the athlete has demonstrated proper technique and has clearance from a pediatric sports physician.
Rehabilitation & Post‑Injury
For anyone returning from an injury, start each session with a “prehab” block that isolates the vulnerable area. Example for a shoulder rotator‑cuff rehab:
- Scapular Retraction with Band – 2 × 15
- External Rotation with Light Dumbbell – 2 × 12 each side
- Wall Angels – 2 × 10
Only after completing the prehab block should you move into the main full‑body circuit, reducing the load on the injured side by 30‑40 % for the first two weeks.
By tailoring exercise selection, load, and volume to the specific needs of each demographic, you preserve the efficiency of a full‑body routine while honoring individual health constraints.
FAQ
Can I do a full‑body workout every day?
While daily movement is beneficial, full‑body strength sessions stress the same muscle groups and need recovery. For most people, 3‑4 sessions per week with at least one rest or active‑recovery day is optimal. Light cardio, yoga, or mobility work can fill the off‑days.
What if I have limited space, like a studio apartment?
Choose exercises that stay within a 4‑foot square. Body‑weight moves, dumbbell presses on the floor, and band rows anchored to a doorframe fit well. Store equipment vertically (e.g., a wall‑mounted rack) to keep the floor clear.
How much weight should I start with for dumbbell exercises?
Begin with a weight that lets you complete the target reps while maintaining good form. For most beginners, 8‑12 lb dumbbells work for upper‑body presses, and 12‑20 lb for lower‑body moves. If you can’t control the weight through the full range, drop down a size.
Is cardio necessary in a full‑body strength routine?
Cardiovascular health is important, but you can incorporate it in several ways: short high‑intensity intervals between sets, a brisk 10‑minute walk on rest days, or a dedicated cardio session on non‑strength days. The goal is to keep the heart rate elevated a few times per week.
How do I avoid plateaus as I get stronger?
Progressive overload is key. Increase weight, add a set, or shorten rest periods every 2‑3 weeks. Rotating exercise variations (e.g., swapping standard squats for sumo squats) also challenges muscles from new angles, reducing adaptation.
Related posts:
 Band Together: Transform Your Core With Just One Simple Tool
 This Full-Body Resistance Band Workout Will Transform Your Home Gym
 Resistance Band Glute Workouts
 15-Minute No-Equipment HIIT
 Get Stronger with Charlee Atkins
 Six Powerful Toning Moves from Jenna Dewan
 Understanding Gym Equipment
 PHA Bodyweight Workout: Efficient Fitness Anywhere, Anytime