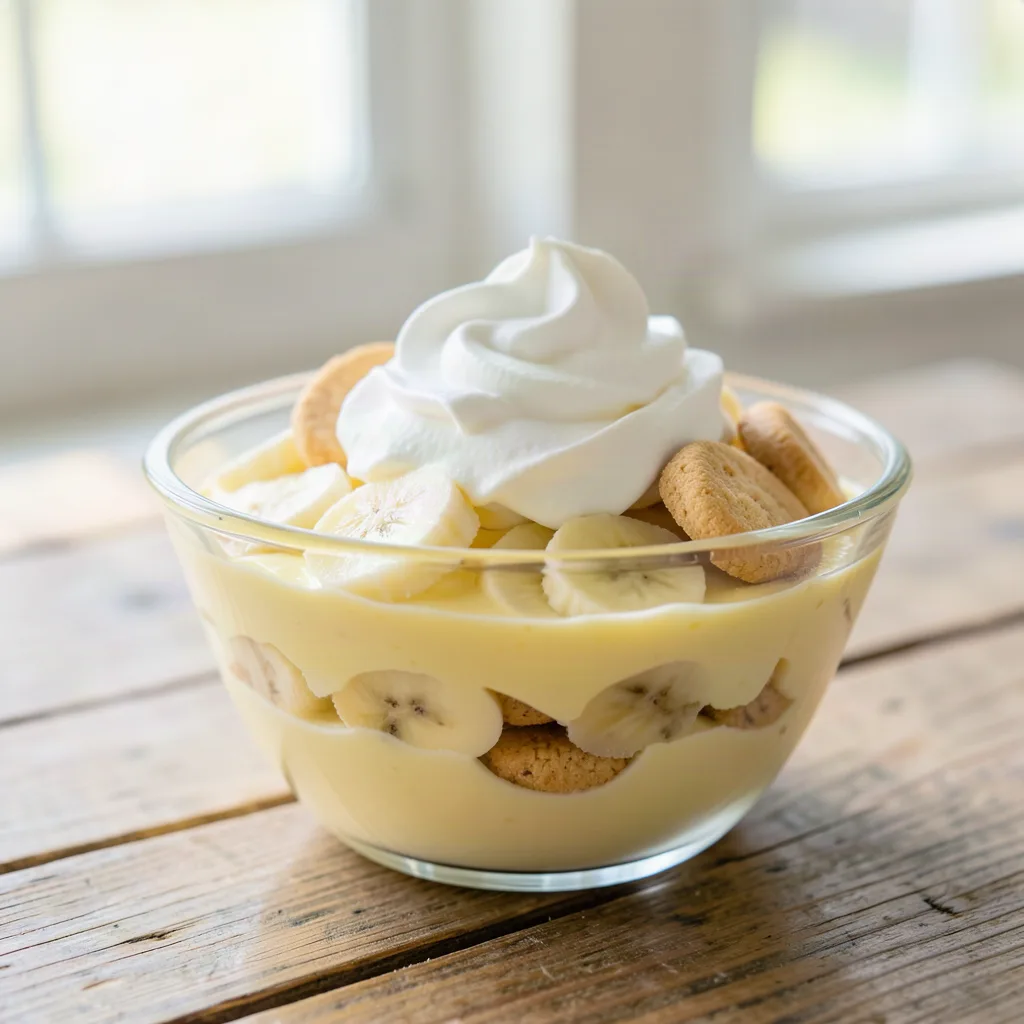
Banana pudding is a quintessential comfort food, often associated with potlucks, family gatherings, and childhood nostalgia. For those navigating a gluten-free lifestyle, however, this classic dessert can be a source of frustration. Traditional recipes rely heavily on wheat-based vanilla wafers, which act as the structural foundation for the dish. Fortunately, with a few thoughtful substitutions, you can recreate the creamy, layered decadence of a traditional banana pudding without the gluten. This guide provides a reliable, scratch-made recipe and essential tips for achieving the perfect texture and flavor profile.
The Anatomy of a Perfect Gluten-Free Banana Pudding
To understand how to make a gluten-free banana pudding, you must first break down its components. The dish consists of four primary elements: a rich vanilla custard, fresh banana slices, a crunchy cookie layer, and a whipped topping. In a gluten-free version, the custard is naturally safe as long as you use cornstarch or arrowroot powder as a thickener rather than wheat flour. The challenge lies in the cookies. Many store-bought gluten-free vanilla wafers are available today, but their absorbency differs from traditional flour-based cookies. Understanding this allows you to adjust your assembly technique to ensure the pudding doesn’t become overly soggy or remain too dry.
Sourcing and Selecting Gluten-Free Vanilla Wafers
The quality of your cookie layer will define the final experience. When shopping, look for certified gluten-free labels to avoid cross-contamination. If you cannot find store-bought wafers, you can easily bake a batch using a simple almond flour or gluten-free all-purpose blend. If you opt for store-bought, look for brands that have a crisp, dense texture. These hold up better when introduced to the moisture of the custard. If your cookies are particularly thin or airy, consider layering them immediately before serving rather than letting the pudding sit overnight, as they will soften much faster than traditional wheat wafers.
Crafting the Homemade Vanilla Custard
The heart of any good banana pudding is the custard. Avoid boxed instant mixes if possible, as they can sometimes contain hidden gluten stabilizers. A homemade custard is simple to make and yields a far superior flavor. You will need high-quality whole milk or a dairy-free alternative like unsweetened cashew milk, egg yolks, sugar, cornstarch, and a splash of pure vanilla extract. Whisk your sugar and cornstarch together before adding the milk to prevent clumping. Temper the egg yolks by adding a small amount of the hot milk mixture to them before incorporating them into the main pot. This ensures a silky-smooth consistency without the risk of scrambling your eggs.
The Role of Fresh Fruit and Ripeness
Bananas are the star ingredient, but their state of ripeness matters significantly. You want bananas that are yellow with just a few brown freckles. If they are too green, they will lack sweetness and have a starchy texture. If they are overly brown or mushy, they will release too much moisture into your pudding, potentially turning the dish into a liquid mess. Slice your bananas into uniform coins about one-quarter inch thick. To prevent oxidation—the browning of the fruit—you can lightly toss the slices in a tiny amount of lemon juice, though many find that the contact with the custard is enough to keep them fresh for the duration of the serving.
Layering Techniques for Structural Integrity
Assembly is where the magic happens. Start with a thin layer of custard at the bottom of your glass dish to prevent the bottom layer of cookies from sticking. Follow with a layer of cookies, then a layer of banana slices, and finally a generous portion of custard. Repeat these layers until you reach the top of your dish. By ensuring that every banana slice is fully covered by custard, you seal the fruit, which helps preserve its texture and prevents it from turning brown. If you are preparing this for a special occasion, consider using a clear glass trifle bowl to showcase the beautiful, distinct layers.
Achieving the Perfect Whipped Topping
While some recipes call for meringue, a stabilized whipped cream is often more approachable and provides a lighter finish. To make a stable whipped cream that won’t deflate, chill your mixing bowl in the freezer for twenty minutes before you begin. Use cold heavy whipping cream and a small amount of powdered sugar. If you need a dairy-free option, chilled full-fat coconut cream works exceptionally well; just ensure you only use the thick white solid from the can. Whip until stiff peaks form, then gently fold in a teaspoon of vanilla bean paste for an elevated visual and flavor profile.
The Art of the Rest Period
Patience is a necessary ingredient in banana pudding. While it is tempting to dive in immediately, the pudding requires at least four hours—ideally overnight—in the refrigerator to reach its peak. During this time, the cookies absorb a small amount of moisture from the custard, transforming into a cake-like consistency that is the hallmark of a classic banana pudding. If you prefer a crunchier cookie, wait to add the cookie layer until two hours before serving. However, for the authentic “melt-in-your-mouth” experience, the overnight rest is non-negotiable.
Customizing Your Gluten-Free Banana Pudding
Once you have mastered the base recipe, you can experiment with variations. Add a layer of toasted pecans or walnuts for a nutty crunch that pairs beautifully with the banana. For a decadent twist, drizzle a salted caramel sauce between the layers. If you want to lean into the tropical profile, sprinkle toasted coconut flakes on top of the whipped cream. These small additions add complexity and texture while remaining entirely gluten-free, allowing you to tailor the dessert to your personal preferences or the theme of your event.
Troubleshooting Common Custard Textures
Even with a perfect recipe, the chemistry of starch-thickened custards can be temperamental. If you find your custard has a “weeping” or syrupy consistency after refrigeration, it is often due to over-whisking after the starch has gelled or failing to cook the custard to the proper temperature. Always use a heavy-bottomed saucepan to distribute heat evenly; thin pans create hot spots that cause the eggs to curdle before the cornstarch has fully activated. If you suspect your custard is too thin, you can rescue it by creating a “slurry”—mix one tablespoon of cornstarch with two tablespoons of cold milk or water—and slowly whisking it into the hot custard over low heat until it thickens. Be sure to cook for at least one additional minute to remove the raw, chalky taste of the starch.
The Science of Starch Selection: Cornstarch vs. Arrowroot
While cornstarch is the standard, many gluten-free bakers prefer arrowroot powder for a more translucent, glossy finish. Arrowroot is a fantastic thickener because it remains stable even when chilled, unlike some wheat-based thickeners that can become rubbery. However, arrowroot does not handle high heat as well as cornstarch and can break down if boiled vigorously for too long. If you use arrowroot, add it toward the end of the cooking process, dissolved in a cold liquid, and remove the custard from the heat the moment it reaches the desired thickness. For those with corn allergies, tapioca starch is a viable alternative, though it creates a slightly more “stringy” or elastic mouthfeel, which can be mitigated by using a lower ratio of starch to liquid.
Elevating the Flavor Profile with Infusions
The vanilla base is a blank canvas for sophisticated flavor profiles. To move beyond basic vanilla, consider steeping your milk with aromatics before starting the custard. Gently heat your milk with a split vanilla bean, a strip of orange zest, or even a few bruised cardamom pods for twenty minutes, then strain the solids out before tempering your egg yolks. This infuses the custard with a multi-layered depth that complements the sweetness of the bananas. For a warmer, autumnal variation, add a pinch of freshly grated nutmeg or a tiny drop of almond extract. These subtle additions make the dessert feel professional and artisanal without requiring complex culinary techniques.
Managing Moisture: The Barrier Method
One of the most persistent issues in gluten-free banana pudding is the rapid softening of the cookie layer. If you are preparing the dish for an event where it must sit out for a while, consider the “barrier method.” Before placing your gluten-free wafers into the pudding, you can lightly coat them in a thin layer of melted white chocolate or coconut butter. Once set, this creates a moisture-resistant seal that keeps the cookies crisp for much longer. Alternatively, place a thin layer of finely crushed toasted almonds or macadamia nuts between the custard and the cookie layer; the fat content in the nuts acts as a buffer against the moisture of the custard, preserving the structural integrity of your gluten-free wafers.
Advanced Whipping Techniques for Dairy-Free Toppings
Achieving a stable, professional whipped topping with dairy-free alternatives requires more than just high-fat coconut cream. To prevent your topping from melting into the pudding, incorporate a stabilizer. A small amount of xanthan gum (about 1/8 teaspoon per cup of cream) or a tablespoon of instant vanilla pudding mix (certified gluten-free) can provide the internal structure necessary for long-term refrigeration. When whipping, use a balloon whisk at a medium speed rather than high; this incorporates smaller, more uniform air bubbles that are less likely to collapse. If you are using coconut cream, ensure the cans are chilled for at least 24 hours. If the cream still feels soft, place the mixing bowl in the refrigerator for ten minutes between intervals of whipping to keep the fats firm.
Presentation: Beyond the Trifle Bowl
While a large trifle bowl is traditional, individual serving vessels offer a more elegant solution for modern gatherings. Using small mason jars, clear glass ramekins, or vintage teacups allows you to control the portion size and prevents the “slumping” that often occurs when a large dish is scooped into. Individual servings also allow you to customize toppings for each guest—such as adding a dollop of salted caramel to one and toasted coconut to another. For a high-end look, use a piping bag with a large star tip to apply the whipped cream in beautiful rosettes. This not only looks professional but also ensures that the topping is evenly distributed, meaning every spoonful gets the perfect ratio of airy cream to dense, banana-filled custard.
Handling Ingredient Variations for Dietary Needs
When swapping ingredients in this dessert, keep an eye on the sugar content of your substitutes. Many gluten-free vanilla wafers are made with rice flour or sorghum flour, which have different sweetness profiles than wheat. If you find your cookies are exceptionally sweet, reduce the sugar in your custard by about 10% to ensure the overall dessert remains balanced. If you are using a sugar alternative, such as monk fruit or erythritol, be aware that these can sometimes leave a cooling sensation on the palate. To mask this, increase the amount of vanilla extract or add a tiny pinch of sea salt, which helps round out the flavor and suppresses the artificial aftertaste common in many sugar-free granulated sweeteners.
Frequently Asked Questions
1. Can I make this recipe dairy-free? Yes, you can substitute the milk in the custard with unsweetened cashew or almond milk and use coconut cream or a plant-based whipped topping. Ensure your butter substitute is also dairy-free if the recipe calls for it.
2. Why did my custard turn out runny? This usually happens if the custard was not cooked long enough to activate the cornstarch. Ensure the mixture reaches a gentle boil and thickens significantly before removing it from the heat. Remember that it will thicken further as it cools.
3. How long will this pudding stay fresh in the refrigerator? Because of the fresh fruit, this dessert is best consumed within 48 hours. After two days, the bananas may begin to soften significantly and release excess liquid, which can compromise the texture of the cookies.
4. Can I use a different type of cookie if I can’t find vanilla wafers? Absolutely. Gluten-free shortbread cookies or even gluten-free graham crackers work perfectly. The key is choosing a cookie that is relatively neutral in flavor so it doesn’t overpower the delicate banana and vanilla notes.
5. Is it safe to freeze the leftovers? It is generally not recommended to freeze banana pudding. The custard and the whipped cream do not hold up well to the freezing and thawing process, and the bananas will turn mushy and lose their structural integrity once defrosted.