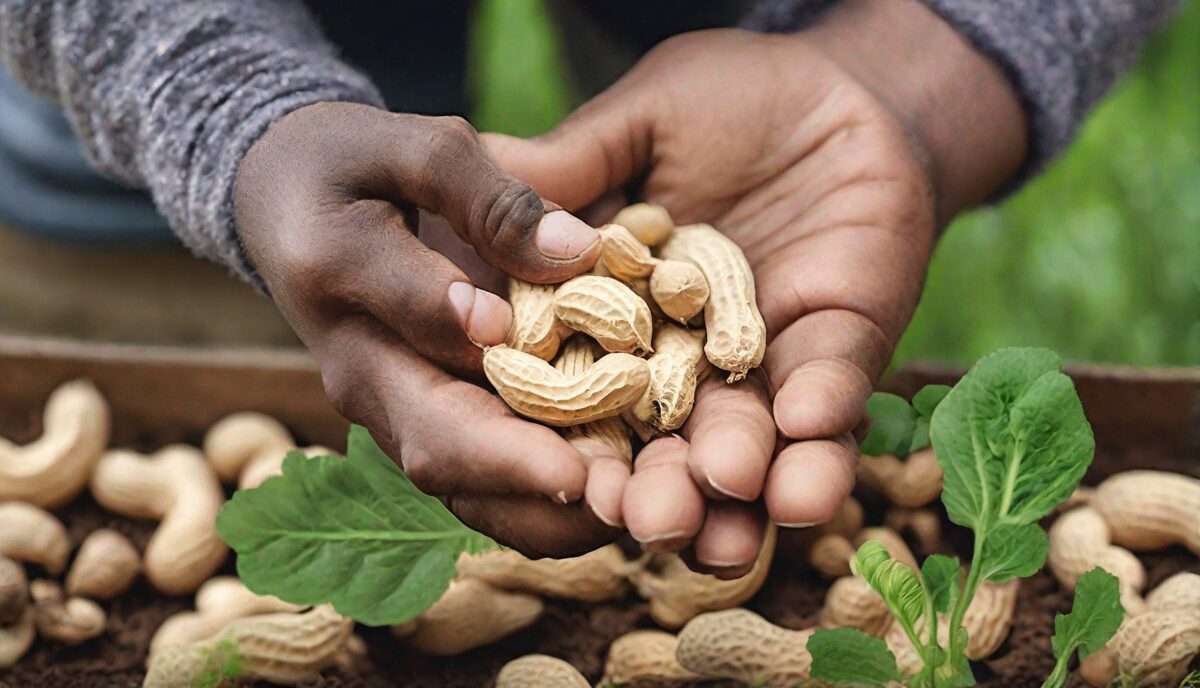
Introduction to Peanut Gardening
Growing peanuts at home is not only a fun and rewarding gardening project but also a way to enjoy fresh, home-grown peanuts. This guide will walk you through the steps of planting, nurturing, and harvesting peanuts in your own backyard.
Understanding Peanut Plants
Peanut plants are unique because they are legumes, not nuts, and they grow underground. They thrive in warm climates with plenty of sunlight. Understanding the basic needs of peanut plants is crucial for a successful harvest.
Choosing the Right Peanut Variety
There are several varieties of peanuts, including Runner, Virginia, Spanish, and Valencia. Each has its own growth characteristics and flavor profile. Choose a variety that suits your climate and soil conditions.
Preparing the Soil
Peanuts require well-drained, sandy soil with a pH between 5.8 and 6.2. Before planting, work organic matter into the soil to improve its fertility and texture. Ensure the soil is loose to allow peanut pods to develop underground.
Planting Peanuts
Plant peanut seeds after the last frost when the soil temperature is at least 65°F (18°C). Space the seeds 1-2 inches deep and 6-8 inches apart. Water the seeds thoroughly after planting.
Caring for Peanut Plants
- Watering: Keep the soil consistently moist, especially during flowering and pod development.
- Fertilizing: Use a balanced fertilizer and avoid excessive nitrogen, which can hinder pod development.
- Weeding: Keep the area around the plants weed-free to reduce competition for nutrients and water.
Harvesting Peanuts
Peanuts are ready to harvest when the leaves turn yellow, usually 120-150 days after planting. Carefully dig up the plants and shake off the soil. Allow the peanuts to dry for a few days before removing them from the plants.
Storing and Using Home-Grown Peanuts
After harvesting, peanuts need to be dried and cured properly. Store them in a cool, dry place to prevent mold. Home-grown peanuts can be roasted, boiled, or used in various recipes.
Optimizing Soil Chemistry and the Critical Role of Calcium
While the basic requirement for sandy, well-drained soil is well-known, the specific chemical composition of that soil determines whether you harvest plump, oil-rich nuts or empty shells, often referred to as “pops.” The most critical nutrient for peanut development is calcium. Unlike many other crops that absorb nutrients primarily through their root systems, peanuts absorb calcium directly through the developing pod’s hull. If the soil surrounding the pods is deficient in calcium, the kernels will fail to develop, even if the plant itself looks lush and green above ground.
To prevent this, many experienced growers apply gypsum (calcium sulfate) at the beginning of the flowering stage. Gypsum is preferred over lime because it provides calcium without significantly altering the soil’s pH, which should ideally remain in the 5.8 to 6.2 range. Apply about 1 to 2 pounds of gypsum per 100 square feet directly over the pegging zone—the area immediately surrounding the base of the plant. This ensures that as the “pegs” (the stalks that grow from the flowers) enter the soil, they are immediately immersed in a calcium-rich environment.
In addition to calcium, peanuts are sensitive to salt buildup. If you are growing in an area with high salinity or using softened water, you may notice leaf tip burn or stunted growth. To mitigate this, ensure deep watering sessions that leach excess salts below the root zone. Furthermore, while peanuts are legumes and fix their own nitrogen via symbiotic Rhizobium bacteria, they may require a specialized inoculant if peanuts haven’t been grown in that specific patch of soil within the last three to five years. Applying a commercial peanut inoculant at planting time ensures the roots develop the nodules necessary for nitrogen fixation, reducing the need for external nitrogen fertilizers which, as previously noted, can actually suppress pod yield in favor of excessive foliage.
The Phenomenon of Pegging: Navigating the Reproductive Phase
One of the most fascinating aspects of peanut biology is the transition from flowering to “pegging.” Approximately 30 to 40 days after emergence, the plant will begin to produce small, yellow, pea-like flowers. These flowers are self-pollinating and typically last only a day. Once pollination is complete, the flower withers, and a small, green, bud-like structure called a “peg” (botanically known as a gynophore) begins to grow downward from the leaf axil. This peg is negatively phototropic, meaning it grows away from light and toward the earth.
During this phase, it is vital to avoid disturbing the soil with heavy tools. If the soil surface is too hard or compacted, the peg will be unable to penetrate the ground, and the potential peanut will wither and die. If you notice the soil has crusted over due to heavy rain, very gently use a hand rake to break the surface tension, being careful not to strike the plant’s base. Once the peg reaches a depth of about 1 to 2 inches, it turns horizontal and begins the transformation into a peanut pod.
Management during the pegging stage involves a delicate balance of moisture. The soil must be soft enough for the pegs to enter, but not so saturated that it becomes anaerobic, which can rot the tender gynophores. A light layer of fine-textured mulch, such as clean straw or pine needles, can help maintain this surface moisture. However, avoid using heavy wood chips or large bark, as these can create a physical barrier that the pegs cannot navigate. If you are growing the ‘Virginia’ or ‘Runner’ varieties, which have a more spreading growth habit, ensure the entire radius around the plant is kept clear of obstructions to maximize the number of successful peg insertions.
Strategic Pest Mitigation and Disease Prevention
Peanuts face a unique set of challenges from pests both above and below the soil line. Above ground, the most common culprits are squirrels, chipmunks, and crows, which are remarkably adept at identifying exactly when the nuts are nearing maturity. To protect your crop, consider installing a physical barrier such as a hardware cloth cage or a weighted bird net. For larger garden plots, motion-activated sprinklers can be an effective deterrent. It is also wise to keep the area around your peanut patch clear of tall weeds, which provide cover for rodents.
Below the soil, wireworms and root-knot nematodes can cause significant damage. Wireworms tunnel into the developing pods, introducing soil-borne pathogens that lead to rot. To manage these, practice strict crop rotation and ensure the soil is rich in beneficial microbial life. Root-knot nematodes cause distinctive galls on the roots and pods, leading to yellowing and stunted growth. If you suspect a nematode infestation, planting a cover crop of French Marigolds (Tagetes patula) in the off-season can help reduce their populations naturally.
Fungal diseases like Early Leaf Spot (Cercospora arachidicola) and Late Leaf Spot (Cercosporidium personatum) manifest as brown or black spots on the foliage, eventually causing premature leaf drop. To minimize the risk, always water at the base of the plant rather than from overhead to keep the leaves dry. If humidity is high and spots appear, an organic fungicide containing copper or sulfur can be used. White Mold (Sclerotium rolfsii) is another serious concern, appearing as a white, cottony growth at the soil line during hot, humid weather. Improving airflow by proper spacing and avoiding excessive organic mulch directly against the stems can help prevent this devastating rot.
Advanced Cultivation Methods: Containers, Raised Beds, and Short-Season Strategies
For gardeners in northern climates or those with heavy clay soil, traditional in-ground planting may be challenging. However, peanuts are surprisingly adaptable to container gardening and raised beds. When using containers, choose a pot that is at least 12 inches deep and 18 inches wide to allow for the spreading of the pegs. A 5-gallon bucket with multiple drainage holes is an excellent, low-cost option. Use a high-quality, soil-less potting mix amended with 20% coarse sand to ensure the light, airy texture that peanuts crave.
In shorter growing seasons (Zones 5-6), the primary hurdle is the soil temperature. You can get a head start by starting seeds indoors 3 to 4 weeks before the last frost. Use biodegradable peat or paper pots, as peanut roots are extremely sensitive to transplant shock; the entire pot should be buried to avoid disturbing the root ball. Additionally, using black plastic mulch to pre-warm the soil can significantly accelerate early growth. Cut slits in the plastic for the plants, but be prepared to remove the plastic once flowering begins so the pegs can reach the soil.
Raised beds offer the advantage of superior drainage and easier soil manipulation. In a raised bed, you can create a “custom” soil profile by mixing topsoil, sand, and well-rotted compost. This environment allows for the ‘Valencia’ variety to thrive particularly well. Valencias are known for their shorter maturation cycle (around 100-110 days) and their habit of producing three or more small, sweet kernels per pod. They also tend to grow more upright than Runner types, making them ideal for the limited footprint of a raised bed or a large container.
Companion Planting and Long-Term Soil Health Management
Integrating peanuts into a larger garden ecosystem requires an understanding of their botanical relationships. As nitrogen-fixers, peanuts are excellent neighbors for nitrogen-hungry crops like corn or brassicas in a sequential rotation. However, avoid planting peanuts in the same soil where other legumes (like beans or peas) or solanaceous plants (like tomatoes, peppers, or potatoes) were grown the previous year. This is because they share susceptibility to certain soil-borne fungi and nematodes, which can build up to dangerous levels in the soil.
Good companions for peanuts include cucumbers and squash, which can utilize the vertical space or sprawl around the peanut plants, provided they don’t shade them out entirely. Peanuts require full sun, so any companion must be low-growing. Some gardeners find success interplanting peanuts with radishes; the radishes are harvested long before the peanut pegs begin to seek the soil, and their harvest naturally loosens the ground for the incoming peanuts.
After the harvest, do not simply leave the soil bare. The peanut plant’s remains, excluding any diseased material, can be tilled back into the soil or added to a compost pile. Because the peanut plant has spent the season pulling nitrogen from the air and storing it in its roots, the post-harvest soil is often more fertile than it was at the start of the season. Following your peanut crop with a heavy feeder like garlic or onions in the fall can take full advantage of this natural fertilization. This cycle of “giving and taking” from the soil is the hallmark of a sustainable home garden.
The Art and Science of Post-Harvest Curing and Processing
The transition from a freshly dug plant to a shelf-stable snack is a process of controlled dehydration known as curing. When you first pull the plants, the kernels contain about 35% to 50% moisture. To store them safely without the risk of mold or aflatoxin (a toxic substance produced by certain molds), this moisture content must be reduced to around 10%. The initial phase involves leaving the plants on the soil surface in the sun for 2 to 3 days. Position the plants with the pods facing upward and the foliage downward to protect the nuts from direct sun-scald while allowing the wind to wick away moisture.
If rain is forecasted, move the plants to a sheltered, high-airflow area like a porch, garage, or barn. You can hang the bunches from rafters or spread them out on wire mesh screens. Avoid piling the plants deeply, as this traps moisture and encourages rot. This secondary curing phase can take anywhere from 2 to 4 weeks depending on the ambient humidity. You will know they are properly cured when the shells feel brittle and the kernels rattle inside when shaken. At this point, the skins of the kernels should be paper-thin and easy to rub off.
Once cured, you can decide between roasting or boiling. Boiling is a Southern tradition typically reserved for “green” or freshly dug peanuts, but cured peanuts can also be boiled if soaked overnight first. For roasting, preheat your oven to 350°F (175°C). Spread the unshelled peanuts in a single layer on a baking sheet. Roast for 20 to 25 minutes, tossing them halfway through. If you prefer shelled roasted peanuts, reduce the time to 15 to 20 minutes. The peanuts will continue to cook slightly after being removed from the oven, so pull them out just as they begin to smell fragrant and take on a very light golden hue. Over-roasting happens quickly and results in a bitter flavor.
Troubleshooting Developmental Issues and Seed Preservation
Even with careful attention, peanut plants can sometimes exhibit signs of distress. Yellowing leaves (chlorosis) can indicate a few different issues. If the veins remain green while the rest of the leaf turns yellow, it is likely an iron deficiency, often caused by soil that is too alkaline. If the entire leaf is pale, the plant may be struggling with nitrogen fixation, perhaps due to waterlogged soil or a lack of proper bacteria. Check the roots; if you see small, pinkish nodules, the plant is fixing nitrogen correctly. If the nodules are white or absent, the fixation process is failing.
Another common issue is “blind” pods—pods that look full but contain shriveled, underdeveloped seeds. This is often a symptom of late-season drought. While peanuts are relatively drought-tolerant, they require consistent moisture during the final 30 days of pod filling. If the soil becomes bone-dry during this window, the plant will sacrifice the seeds to survive. Conversely, if you notice the seeds are sprouting inside the shells while still in the ground, you have waited too long to harvest, or the soil has remained excessively wet during the maturation phase, triggering premature germination.
FAQ
1. Can I grow peanuts indoors?
Yes, peanuts can be grown indoors in containers with sufficient light and warmth.
2. How long does it take to grow peanuts?
It typically takes 120-150 days for peanuts to reach maturity, depending on the variety and growing conditions.
3. Do peanut plants need full sun?
Yes, peanut plants require full sun for at least 6-8 hours a day to thrive.
4. Can I use store-bought peanuts for planting?
Store-bought peanuts are often roasted or treated and may not sprout. Use raw, untreated peanuts from a garden center for planting.
5. How do I know when peanuts are ready to harvest?
Peanuts are ready to harvest when the leaves turn yellow and the pods have filled out. Dig up a few pods to check if they are mature.
Related posts:
 Healthy Homemade Peanut Butter Cup Recipe
 Beginner’s Guide to Composting
 Beginner-Friendly Fruits to Grow
 Is Peanut Butter Actually a Healthy Snack?
 Growing Sweet Potatoes: A Beginner’s Guide to a Delicious Harvest
 How to Propagate Succulents
 Frozen Yogurt Revolution: Meet the Keurig Inventor’s Cool New Creation
 The Best Vegan Sources of Calcium That Aren’t Dairy