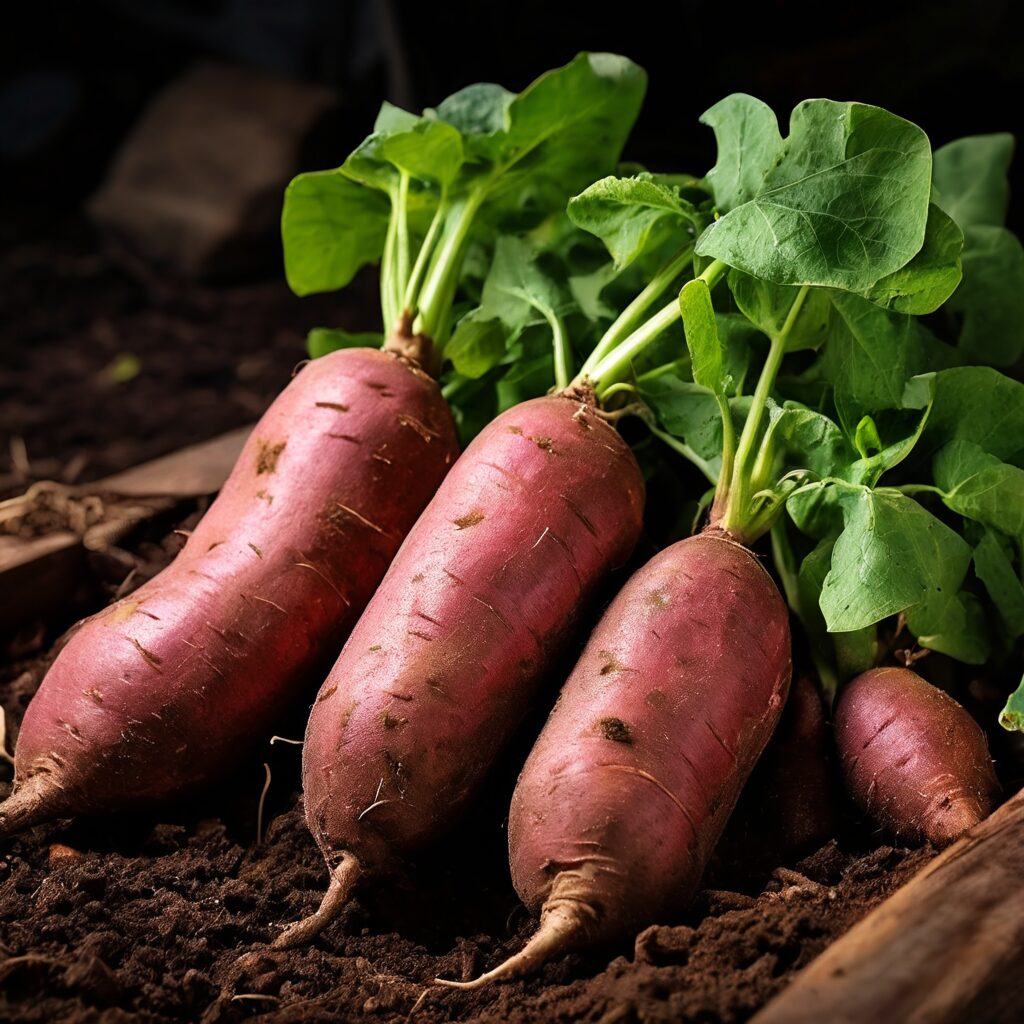
Introduction to Growing Sweet Potatoes
Sweet potatoes are a nutritious and versatile crop that can be grown in a variety of climates. Whether you’re a seasoned gardener or a beginner, growing sweet potatoes can be a rewarding experience. This guide will walk you through the basics of planting, growing, and harvesting sweet potatoes, ensuring a bountiful and delicious harvest.
Key takeaways
- Prepare well-drained, sandy loam soil with organic matter and maintain a pH between 5.8 and 6.2 for optimal tuber development.
- Use slips or stem cuttings to start your crop, planting them deep enough to cover roots and half the stem for stability.
- Apply consistent moisture during the establishment and bulking phases, but reduce watering near harvest to prevent growth cracking.
- Cure harvested tubers at 85°F with high humidity for 7-10 days to improve flavor, seal wounds, and ensure long-term shelf life.
- Avoid refrigerating raw sweet potatoes, as temperatures below 50°F can cause chilling injury and ruin their texture.
Choosing the Right Variety
Before you start planting, it’s important to choose the right variety of sweet potatoes for your region and taste preferences. Some popular varieties include Beauregard, Jewel, and Garnet. Consider factors such as climate, soil type, and desired flavor profile when selecting your sweet potato variety.
Preparing the Soil
Sweet potatoes thrive in well-drained, sandy loam soil with a pH between 5.8 and 6.2. To prepare your soil:
- Remove any weeds, rocks, and debris from the planting area.
- Work the soil to a depth of 8-12 inches to ensure good root development.
- Incorporate organic matter, such as compost or well-rotted manure, to improve soil fertility and drainage.
Planting Sweet Potatoes
Sweet potatoes are typically grown from slips, which are sprouts that grow from mature sweet potatoes. Follow these steps to plant your sweet potatoes:
- Start slips about 6-8 weeks before your last frost date by placing a sweet potato in water or moist sand.
- Once the slips are 6-12 inches long, carefully remove them from the sweet potato.
- Plant the slips 12-18 inches apart in rows that are 3-4 feet apart.
- Ensure the slips are planted deep enough to cover the roots and at least half of the stem.
Caring for Your Sweet Potato Plants
Proper care is essential for a successful sweet potato harvest. Here are some tips to keep your plants healthy:
- Watering: Sweet potatoes need consistent moisture, especially during the first few weeks after planting and during the formation of tubers. Water deeply once a week, ensuring the soil remains moist but not waterlogged.
- Mulching: Apply a layer of mulch around your plants to help retain soil moisture, suppress weeds, and regulate soil temperature.
- Fertilizing: Use a balanced fertilizer or one high in potassium to promote tuber development. Avoid high-nitrogen fertilizers, as they can lead to excessive vine growth at the expense of tubers.
Harvesting and Storing Sweet Potatoes
Sweet potatoes are typically ready to harvest 90-120 days after planting, depending on the variety. To harvest:
- Carefully loosen the soil around the plants with a garden fork.
- Gently lift the plants and remove the tubers, being careful not to damage them.
- Allow the sweet potatoes to cure in a warm, humid environment (85°F and 85% humidity) for 7-10 days to improve their flavor and shelf life.
- After curing, store the sweet potatoes in a cool, dry place (55-60°F) with good ventilation.
Advanced Slip Propagation and Genetic Selection Techniques
While the basic method of placing a sweet potato in a jar of water is a popular starting point for hobbyists, serious growers often employ the “soil bed propagation” method to produce a higher volume of vigorous, disease-free slips. This involves placing seed tubers horizontally in a shallow tray filled with pasteurized potting mix or vermiculite, covering them with roughly two inches of substrate. By maintaining a consistent soil temperature of 80°F (27°C) using a seedling heat mat, you can trigger a more uniform emergence of sprouts. This method is superior because it encourages the development of a robust secondary root system on the slip itself before it is even detached from the mother tuber, leading to a much lower transplant shock when they finally hit the garden soil.
When selecting your “mother tubers” for propagation, do not simply grab the largest potato from the bin. Instead, look for medium-sized, smooth-skinned tubers that are free from any signs of scurf or black rot. If you are using grocery store potatoes, be aware that many are treated with chlorpropham, a sprout inhibitor. To bypass this, look for tubers labeled as organic, or better yet, source certified disease-free seed stock from a reputable nursery. One professional tip is to perform a “single-node cutting” if you are short on slips. If a single slip grows exceptionally long (over 12 inches), you can cut it into several 4-inch segments, ensuring each segment has at least two leaf nodes. Place these cuttings in a glass of water for three to five days, and they will develop their own roots, effectively tripling your planting stock from a single sprout.
Optimizing Heat and Sunlight in Northern or Marginal Climates
Sweet potatoes are tropical perennials that demand a high accumulation of Growing Degree Days (GDD) to bulk up their tubers. For gardeners in USDA Zones 5 or 6, the challenge isn’t just the length of the frost-free season, but the intensity of the soil heat. To bridge this gap, the use of black plastic mulch or infrared-transmitting (IRT) film is highly recommended. These materials should be laid down at least two weeks before planting to pre-warm the soil. The film traps solar radiation, raising the soil temperature by as much as 10°F compared to bare ground. When planting your slips through the plastic, ensure the hole is tightly sealed around the stem to prevent hot air from escaping and scorching the delicate young foliage.
In addition to soil warming, consider the use of low tunnels or row covers during the first 30 days of growth. While sweet potatoes are heat-lovers, they can be sensitive to the drying winds of late spring. A floating row cover provides a humid, still micro-climate that encourages rapid vine elongation. However, once the daytime temperatures consistently exceed 85°F, these covers must be removed to prevent heat stress, which can paradoxically slow down tuber development. If you are dealing with a particularly short season, focus on “short-season” cultivars like ‘Bush Porto Rico’ or ‘Georgia Jet,’ which are bred to reach maturity in as little as 90 days, rather than the 120 days required by heirloom vining types.
Strategic Companion Planting and Integrated Pest Management
Managing the ecosystem around your sweet potato patch can significantly reduce the pressure from common pests like the sweet potato weevil (Cylas formicarius) and various flea beetles. Companion planting is a functional tool here; for instance, interplanting with summer savory or thyme can help mask the scent of the sweet potato vines from searching weevils. Furthermore, planting nasturtiums nearby acts as a “trap crop” for aphids, which can sometimes transmit viral diseases to the sweet potato crop. Avoid planting sweet potatoes near other morning glory family members (Convolvulaceae), as they share many of the same pathogens and pests.
For soil-borne pests like wireworms and root-knot nematodes, biological control is often more effective than chemical intervention in a home garden setting. Applying beneficial nematodes (specifically Steinernema feltiae or Heterorhabditis bacteriophora) to the soil at the time of planting can drastically reduce wireworm populations. These microscopic organisms hunt down larvae in the soil before they can bore into your developing tubers. Additionally, maintaining a strict four-year crop rotation schedule—avoiding any area where potatoes, tomatoes, or peppers were recently grown—is essential to breaking the life cycles of Fusarium wilt and other fungal pathogens that can persist in the soil for years.
Water Management and Preventing Physiological Disorders
While sweet potatoes are relatively drought-tolerant once established, their moisture needs fluctuate significantly throughout their life cycle. The first 40 days are the “establishment phase,” where consistent moisture is critical for the slips to develop the adventitious roots that will eventually become the tubers. If the soil dries out too much during this window, the plant may produce a large number of thin, stringy roots rather than the thick, fleshy tubers desired. The middle phase (days 40-80) is the “bulking phase,” where the plant requires deep, less frequent watering to encourage the roots to grow deep into the soil profile.
One of the most common issues for home growers is “growth cracking.” This occurs when a period of intense drought is followed by heavy rain or over-watering near the end of the season. The inner flesh of the tuber expands faster than the skin can grow, resulting in deep, unsightly fissures. To prevent this, aim for a consistent one inch of water per week, and gradually reduce watering as you approach the 100-day mark. If a heavy rainstorm is forecasted right before harvest, it is often better to harvest slightly early than to risk the entire crop splitting. Another physiological disorder to watch for is “internal cork,” often caused by viral infections or extreme temperature fluctuations during storage; maintaining steady soil moisture helps keep the plant’s immune system robust enough to suppress these latent issues.
Space Optimization through Vertical Training and Trellising
For gardeners with limited square footage, the sprawling nature of sweet potato vines—which can easily reach 10 to 15 feet in length—can be a major deterrent. However, sweet potatoes can be successfully grown vertically using a sturdy trellis or cattle panel system. Unlike pole beans, sweet potatoes do not have natural tendrils to grip a support, so they must be manually woven through the mesh or tied loosely with garden twine as they grow. Vertical growth not only saves space but also significantly improves air circulation around the foliage, which is the best defense against fungal leaf spot diseases like Cercospora.
An important trade-off to consider with trellising is that sweet potato vines naturally like to “peg” or root at the nodes as they crawl along the ground. These secondary rooting points can actually contribute to the overall yield by providing the plant with more nutrient uptake points. When you lift the vines onto a trellis, you eliminate these secondary roots. To compensate for this, ensure the main planting hole is heavily amended with high-quality compost and that the primary root system is never allowed to dry out. If you choose to let them crawl, be wary of allowing them to root too aggressively in the paths, as this can lead to a large harvest of very small, unusable “fingerling” potatoes at every node rather than focusing the plant’s energy on the main central cluster.
The Biochemistry of Curing and Long-Term Preservation
The process of curing is not merely about drying the skin; it is a vital biochemical transformation. When first harvested, sweet potatoes are high in starch and relatively low in sugar. During the curing process, an enzyme called amylase breaks down these complex starches into maltose and other simple sugars, which gives the sweet potato its characteristic flavor and moist texture. Furthermore, curing triggers the development of a “suberin” layer—a waxy, cork-like substance that seals small nicks and cuts sustained during harvest. This “wound healing” is what allows sweet potatoes to stay fresh for up to a year.
To achieve the ideal curing conditions (85°F and 85% humidity) without a professional greenhouse, you can use a small, unheated room or a large closet. Place the tubers in single layers in perforated plastic crates or cardboard boxes. To maintain the necessary humidity, place a space heater on a low setting and a humidifier in the room, or simply drape damp towels over the boxes, ensuring they don’t touch the potatoes. Use a digital hygrometer to monitor the environment. After 10 days, you can perform the “scratch test”: gently rub the skin of one tuber with your thumb. If the skin is tough and does not rub off, the curing is complete. Move them immediately to a cooler location (55-60°F). Never refrigerate raw sweet potatoes, as temperatures below 50°F cause “chilling injury,” which leads to a hard, bitter core and rapid rotting.
Selecting Seed Tubers for Year-to-Year Sustainability
If you plan on growing sweet potatoes every year, you can develop a “landrace” strain that is specifically adapted to your local soil and climate by practicing careful seed selection. At harvest time, do not just toss all the tubers into one pile. Instead, evaluate each “hill” (the cluster of potatoes from a single slip) individually. Look for the hill that has the highest total weight and the most uniform shape, rather than just the single largest potato. The largest potatoes often come from plants that had more space or less competition, but the hill with five or six medium-sized, perfectly shaped tubers represents the best genetics for overall productivity.
FAQ
1. How long does it take to grow sweet potatoes?
Sweet potatoes typically take 90-120 days to mature, depending on the variety.
2. Can I grow sweet potatoes in containers?
Yes, sweet potatoes can be grown in containers. Choose a large container with good drainage and use a well-draining potting mix. Ensure adequate space for the roots to develop.
3. What pests and diseases affect sweet potatoes?
Common pests include wireworms, root-knot nematodes, and sweet potato weevils. Diseases such as fusarium wilt and root rot can also affect sweet potatoes. Implementing crop rotation and using resistant varieties can help manage these issues.
4. Do sweet potatoes need full sun?
Yes, sweet potatoes thrive in full sun and require at least 6-8 hours of direct sunlight daily.
5. How do I know when to harvest sweet potatoes?
Sweet potatoes are ready to harvest when the leaves start to yellow and die back. Check the size of the tubers by gently digging around the base of the plant before harvesting the entire crop.
Related posts:
 Essential Tips for Better Garden Health
 Surprising Sweet Potato Dishes
 How to Propagate Succulents
 Growing Peanuts at Home: A Fun and Rewarding Gardening Project
 Sweet Potatoes: All-Day Recipes
 Beginner-Friendly Fruits to Grow
 Your Guide to Perfect Fall Baked Sweet Potatoes Every Time
 Yams vs Sweet Potatoes: Key Differences