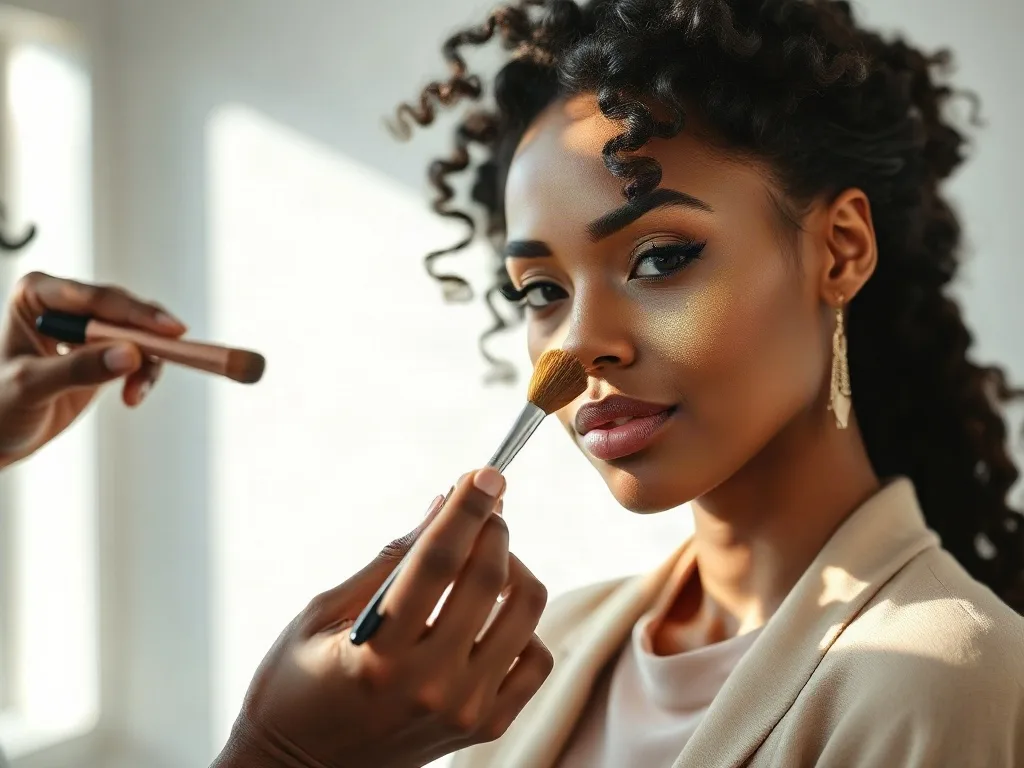
Highlighter has become a staple in modern makeup routines, transforming faces with a luminous glow that catches light beautifully. Whether you’re aiming for a subtle shimmer or a bold, eye-catching gleam, mastering the art of highlighter application elevates your entire makeup look. Many people struggle with highlighter because they either apply too much, choose the wrong shade for their skin tone, or don’t know the best techniques to create that coveted professional finish. This guide breaks down everything you need to know about using highlighter like a makeup artist, from selecting the right product to perfecting your application technique.
Key takeaways
- Choose formulas based on skin type: powders for oily skin and creams or liquids for dry or mature complexions.
- Apply highlighter to high points like cheekbones, brow bones, and the cupid's bow to enhance natural facial features.
- Use light, feathering strokes or a damp sponge to blend edges thoroughly for a seamless, streak-free luminous finish.
- Layer cream and powder formulas or mix shades to create custom dimension that complements your specific skin undertone.
Understanding Different Highlighter Formulas
Highlighters come in several formulas, each with distinct characteristics that affect how they look on skin. Powder highlighters are lightweight and blendable, making them ideal for oily or combination skin types. They apply smoothly with a brush and offer buildable coverage, allowing you to control the intensity of the glow. Liquid and cream highlighters provide a more skin-like finish and are particularly flattering on dry or mature skin. These formulas meld seamlessly with foundation and create a natural, dewy appearance that looks like it’s coming from within the skin.
Stick highlighters offer convenience and precision, perfect for on-the-go touch-ups or targeted application. They deliver concentrated pigment and can be blended with fingertips for a diffused effect. Highlighter palettes combine multiple shades, giving you flexibility to mix and match depending on your undertones and the look you’re creating. Understanding your skin type and preferences helps you choose the right formula. For beginners, powder highlighters are forgiving and easy to blend, while cream formulas offer a more luxe, dimensional finish for those comfortable with blending.
Choosing the Right Shade for Your Skin Tone
The most common highlighter mistake is selecting a shade that doesn’t complement your skin’s undertones. Highlighter should enhance your natural glow, not clash with your complexion. For warm undertones, peachy, golden, and champagne highlighters create a harmonious, flattering effect. These shades work beautifully on deeper skin tones as well, providing visible luminosity without appearing ashy. Cool undertones pair best with icy silvers, pinks, and champagne shades that enhance natural radiance without looking out of place.
Neutral undertones have the advantage of working well with most highlighter shades. For the deepest skin tones, warm bronze and gold highlighters offer stunning dimension and glow. Mid-tone skin typically shines with warm golds, peachy tones, or soft pinks. Consider the lighting where you’ll spend most of your time. If you’re frequently in natural daylight, test your highlighter outdoors before purchasing. If you’re mostly indoors under artificial lighting, the shade might appear different than it does in the store. Many makeup artists keep multiple highlighter shades to create custom blends that perfectly match individual clients’ undertones.
Identifying the Best Application Areas
Professional makeup artists apply highlighter strategically to enhance facial features and create dimension. The most common placement is on the tops of cheekbones, applied from the inner corner of the eye toward the temple. This placement catches light naturally and creates an instant lift to the face. The bridge of the nose, inner corners of the eyes, and the cupid’s bow receive highlighter to enhance these delicate features and create a luminous focal point.
The brow bone directly above the arch of your eyebrow receives a subtle sweep of highlighter to lift and open the eye area. Many artists also apply a touch of highlighter to the center of the forehead, blending it outward to avoid obvious stripes. The inner corners of the eyes benefit from a tiny amount of highlighter to brighten and make eyes appear larger. Some artists place highlighter on the tip of the chin to create balance and definition. The key is applying highlighter where light naturally hits your face and where you want to draw attention. Less is always more—you can build intensity gradually, but removing excess highlighter is difficult.
Mastering Application Techniques
The brush you use significantly impacts how your highlighter looks. Fluffy, tapered brushes work well for powder highlighters, blending the product seamlessly into the skin. Smaller, more precise brushes allow for targeted application on specific areas like the inner eye corner or cupid’s bow. Many artists prefer angled brushes for cheekbone application, following the natural contour of the face. When applying powder highlighter, use light, feathering strokes rather than heavy pressure. Multiple light layers build a more natural glow than one heavy application.
For cream and liquid highlighters, fingertip application often yields the best results. Gently tap the product onto the skin and blend with your finger, which naturally warms the formula and helps it meld with your complexion. This technique prevents over-blending and maintains the product’s luminous quality. When using stick highlighters, lightly swipe across the desired area and blend with a brush or sponge. The key to professional-looking highlighter is building it gradually and ensuring it looks intentional rather than accidentally streaky. Practice in natural light to see how your technique translates in real-world conditions.
Creating Dimension with Layering
Professional makeup artists often layer multiple highlighter formulas or shades to create dimension and depth. A cream or liquid base layer provides a subtle, skin-like glow, while a powder highlighter on top adds visible luminosity and dimension. This combination creates a more sophisticated, multidimensional finish than a single product alone. Mixing warm and cool-toned highlighters in adjacent areas creates subtle visual movement and prevents the flat, one-note appearance that amateur applications sometimes have.
Layering different intensities achieves a more natural transition from highlighted to non-highlighted areas. Start with a muted version of your chosen shade in the transitional areas, then apply the more intense highlighter to the main focal points. This gradient approach looks polished and professional. Some artists use a finely-milled powder as a final layer to set cream highlighter and add extra dimension. Experimenting with layering techniques helps you discover the combinations that work best for your preferences and skin type.
Blending Highlighter Seamlessly
Blending is what separates a professional highlighter application from an obvious, unblended stripe. After applying your highlighter, use a clean, fluffy brush to gently blend the edges where the highlighted area meets your skin. This diffuses any harsh lines and creates a natural gradient of light. The transition should be seamless, with no visible edges or demarcation lines. Use circular motions and feather the product outward to ensure smooth blending.
A damp beauty sponge works wonderfully for blending cream and liquid highlighters. Press and bounce the sponge gently over the highlighted areas to ensure the product is evenly distributed and well-integrated with your complexion. For powder highlighters, a large, fluffy blending brush prevents any patchiness or uneven application. Blending takes practice, but it’s essential for achieving that coveted professional glow. Many beginners make the mistake of skipping the blending step, which results in highlighting that looks more like a mistake than intentional makeup.
Adjusting Highlighter for Different Makeup Looks
The intensity and placement of highlighter should adapt to your overall makeup look. For a natural, everyday look, use less highlighter and place it only on the high points of the face—cheekbones, brow bone, and inner eye corners. This creates a subtle glow that enhances your natural features without appearing dramatic. For a glowy, dewy look, increase the amount of highlighter slightly and apply cream formulas that blend seamlessly with foundation for an all-over luminosity.
Editorial and dramatic looks benefit from bolder highlighter placement and more intense, visible shine. Apply highlighter more liberally and consider using multiple shades to create dimension and movement. For evening or special occasion makeup, combination-textured highlighters create a sophisticated, multidimensional glow that photographs beautifully. Festival or artistic looks can push boundaries with holographic or colorful highlighters placed on unconventional areas. Always consider the setting, lighting, and the overall aesthetic you’re creating when deciding how much highlighter to use and where to place it.
Fixing Common Highlighter Mistakes
Applying too much highlighter is the most frequent error, creating an overly shiny appearance that looks unnatural. Remember that you can always add more, but removing excess is challenging. Start with a small amount and build gradually. Applying highlighter to areas that don’t catch light naturally, like the apples of the cheeks or lower face, creates an unflattering appearance. Stick to areas where light naturally hits—cheekbones, brow bone, and facial high points. Using a highlighter shade that’s too warm or too cool for your undertones makes your complexion appear off or ashy. Always test new shades in natural light before committing to full-face application.
Failing to blend properly leaves obvious, unblended patches that look more like a makeup mishap than intentional highlighting. Invest time in seamless blending to achieve a polished finish. Not setting cream or liquid highlighters allows them to move throughout the day, potentially migrating into creases or creating uneven patches. A light powder set over cream highlighters keeps them in place. Using old or expired products affects the finish and can cause uneven application. Quality matters—investing in reputable brands often provides better pigment, smoother blending, and longer-lasting wear than budget alternatives.
Professional Tips and Tricks from Makeup Artists
Many professional makeup artists use white or champagne eyeshadow as a budget-friendly highlighter alternative, particularly for emergency touch-ups or travel. Setting spray applied after highlighter helps lock everything in place and can intensify the glow. Some artists mix highlighter with foundation to create a subtle all-over luminosity instead of concentrated spots. Using a highlighting palette with multiple shades allows you to customize your glow by mixing shades that perfectly match your undertones.
Photography and videography lighting significantly impacts how highlighter appears on camera. When preparing makeup for video or photos, use slightly less highlighter than you would in person, as camera flashes and lighting can amplify the shine. For in-person events, you may want to apply more highlighter than feels natural because the glow translates differently to the human eye than to camera lenses. Testing your highlighter application in the actual lighting conditions where you’ll be photographed or seen helps you get the intensity right.
Understanding Undertone Variations and Custom Shade Matching
While the existing article covers basic undertone matching, the reality of selecting highlighter is far more nuanced. Many people have mixed undertones—warm in some areas and cool in others—which complicates the one-shade-fits-all approach. A professional makeup artist’s strategy involves identifying your primary undertone while acknowledging secondary undertones that may exist on different parts of your face. For instance, you might have warm undertones on your cheekbones but cooler undertones around your eyes, requiring a blended or transitional highlighter shade.
The concept of “depth” versus “undertone” deserves deeper exploration. Two people with identical warm undertones may need completely different highlighter shades depending on whether their skin is very deep, medium, or fair. A warm bronze highlighter that looks absolutely stunning on deep skin might appear muddy on fair warm-toned skin, while a champagne shade that works beautifully on fair skin could disappear entirely on deep skin. Professional artists often spend time creating custom highlighter blends by mixing two or three shades together, adjusting ratios until they achieve the perfect match. This technique, while requiring more effort initially, results in a uniquely flattering glow that off-the-shelf single shades rarely achieve. Testing highlighters on your jawline rather than your hand provides a more accurate representation of how the shade will appear on your face, since jawline skin tone typically matches facial complexion better than hand skin.
Seasonal undertone shifts present another consideration many makeup enthusiasts overlook. Your skin tone and undertone can shift subtly with sun exposure, tanning, or seasonal changes in climate and humidity. A champagne highlighter that was perfect in winter might appear too cool once you’ve developed a summer tan. Maintaining multiple highlighter shades in your collection allows you to adapt to these natural variations without requiring a complete overhaul of your makeup routine. Professional makeup artists who work with clients year-round often keep expanded highlighter collections specifically to account for these seasonal fluctuations.
Strategic Highlighting for Face Mapping and Corrective Application
Beyond the standard cheekbone-and-brow-bone placement, advanced highlighter techniques involve understanding facial geometry and using strategic placement to create illusions of different face shapes. Face mapping, a technique borrowed from contouring, applies equally to highlighter placement. Understanding where your face is widest, narrowest, longest, or shortest allows you to use highlighter as a subtle corrective tool that draws attention to areas you want to emphasize while creating balance across your entire face.
For round faces, placing highlighter on the outer edges of cheekbones rather than the apples creates the illusion of more definition and length. Conversely, square faces benefit from highlighter placed slightly lower on cheekbones and blended downward, softening the angular jaw structure. Oval faces, considered the most versatile, can carry traditional high-cheekbone placement beautifully. Rectangular or oblong faces benefit from highlighter placement that’s slightly wider and more spread out, creating the optical illusion of width. Heart-shaped faces often look best with highlighter concentrated on the upper face—brow bone and inner eyes—drawing attention upward and away from a wider jawline. These advanced techniques go beyond simply “highlighting where light naturally hits” and instead use strategically placed luminosity to reshape and rebalance facial proportions.
Texture and skin concerns also influence professional placement strategies. Someone with prominent pores might use less highlighter in areas where pores are most visible, concentrating glow on smoother facial areas. Those with acne scars or surface irregularities can strategically place highlighter to draw the eye away from these areas toward more favorable facial features. A skilled makeup artist reads the individual face and customizes placement accordingly, understanding that a one-size-fits-all approach rarely produces optimal results.
Combining Highlighter with Contouring for Sculptural Definition
The most polished makeup applications combine highlighter with contouring in a cohesive strategy rather than treating them as separate techniques. When highlighter and contour work together intentionally, they create a sculpted, three-dimensional appearance far more sophisticated than either technique alone. The relationship between where you place shadow and where you place light determines the overall impact of your makeup.
Professional artists often apply contour first, establishing the shadow structure of the face, then strategically place highlighter to create dimension alongside those shadows. This layered approach creates visual depth and prevents the flat, painted appearance that can result from heavy single-technique application. For example, if you’re contouring along the hollows of your cheeks to create definition, placing highlighter on the high points directly adjacent to that shadow creates a striking contrast that amplifies the sculpting effect. Similarly, contouring the sides of the nose and highlighting the bridge creates a slimming illusion, while highlighting the tip of the nose and contouring the sides creates widening. Understanding these relationships allows you to use highlighter as an architectural tool rather than simply a shine applicator.
Highlighter placement can also soften or enhance contour effects. A strong contour can appear harsh if not balanced with strategic highlighting. Blending a subtle highlighter shade in the transition zone between contoured and non-contoured areas creates a smoother gradient and more believable three-dimensional effect. Many beginners apply contour and highlighter without considering how these elements interact, resulting in makeup that reads as “heavy makeup” rather than skillfully sculpted. The most imperceptible professional applications achieve dimension through the careful orchestration of shadow and light rather than heavy-handed application of either technique.
Advanced Blending Methods and Tool Selection for Different Formulas
While the existing article mentions basic blending, professional-level blending involves understanding how different tools interact with various highlighter formulas and skin types. The specific brush or applicator you choose dramatically affects the final result, yet many makeup users cycle through their entire brush collection without understanding which tools work best with which products.
Powder highlighters benefit from different brush types depending on your desired effect. Fluffy, domed brushes create a diffused, soft-focus glow ideal for everyday wear. Smaller, tapered brushes allow concentrated application on specific areas with less diffusion. Some artists prefer stippling brushes—short, dense bristles that create a bouncy, multidimensional effect without over-blending. Precision fan brushes work beautifully for highlighter on the inner eye corners and cupid’s bow, areas where controlled application matters most. For cream and liquid highlighters, synthetic brushes often work better than natural hair, as natural bristles can absorb the product, wasting expensive formulas and resulting in patchy application. Beauty sponges, particularly damp ones, create seamless blending with cream products, though they require thorough cleaning afterward to prevent product buildup that affects future applications.
The angle at which you hold your brush, the pressure you apply, and the direction of your strokes all influence blending results. Feathering highlighter outward in the direction of facial hair growth or skin texture creates natural-looking blending, while working against these patterns can create obvious, artificial-looking stripes. Many professional artists use multiple passes with minimal pressure rather than heavy single strokes, building coverage and blend quality gradually. For cream highlighters on larger areas, fingertip application with a stippling or pressing motion often outperforms brush application, as fingertips provide gentle pressure that encourages product to adhere to skin rather than being dragged and displaced by brush movement. Understanding your specific tools and how they interact with your chosen formula elevates blending from a mechanical step to a nuanced technique that significantly impacts final results.
Color Theory and Undertone Correction Through Strategic Highlighter Placement
Advanced makeup artists leverage color theory principles to use highlighter for subtle skin tone correction and enhancement. While most people think of highlighter as purely a luminosity tool, it can also be strategically used to influence how surrounding skin tones appear. This technique, while subtle, creates a polished finish that appears effortlessly glowing rather than obviously highlighted.
Placing warm-toned highlighter near areas with redness or uneven tone can neutralize the appearance of those concerns by drawing the eye to luminous, flattering areas instead. Cool-toned highlighters placed near areas you want to appear more awake and bright create a subtle lifting effect through color contrast. Some artists use this principle inversely—placing highlighter in cooler tones on warm-toned skin to create visual balance and sophistication. These applications require understanding color relationships and how adjacent colors influence each other’s appearance. A champagne highlighter, for instance, can appear warm or cool depending on the undertone of surrounding skin and makeup, the lighting conditions, and what colors sit adjacent to it. This is why testing highlighter in your actual lighting conditions with your actual foundation and blush proves more reliable than in-store swatches under fluorescent lighting.
The principle of color correction extends to addressing specific skin concerns through highlighter placement strategy. Someone with an uneven skin tone might concentrate highlighter on areas of better complexion to draw attention there, rather than applying it equally across the face. This selective placement, while not obvious to casual observation, guides the eye toward the most flattering aspects of someone’s complexion. Makeup artists working with clients for photography sessions often employ this strategy extensively, understanding that camera lenses perceive and emphasize certain areas differently than the human eye. Strategic highlighter placement can literally reshape how someone appears in photographs by controlling where light falls and therefore where the viewer’s attention naturally focuses.
Highlighter Intensity Adjustment for Various Photography and Lighting Conditions
Understanding how different lighting conditions affect highlighter appearance is essential for creating makeup that looks consistently flattering across varied environments. Natural daylight, artificial indoor lighting, warm incandescent bulbs, cool fluorescent lights, and camera flash all render highlighter differently. A professional makeup artist calibrates highlighter intensity specifically for the lighting conditions where the makeup will be seen or photographed.
In natural daylight, highlighter appears softer and more diffused than under artificial lighting. Outdoor settings typically require slightly less product than indoor applications since the sun naturally illuminates the face and amplifies any luminosity products. When makeup will be worn primarily indoors under office or home lighting, slightly more intense highlighter often translates better because artificial light doesn’t provide the natural radiance that sunlight does. For flash photography, the situation reverses—camera flash amplifies and concentrates light, making highlighter appear dramatically more intense than it does to the naked eye. Professional photographers and makeup artists preparing for flash photography often recommend using 25-50% less highlighter than you would for in-person wear, preventing the overexposed, blown-out appearance that results when too-intense highlighter meets camera flash.
Video and streaming present unique challenges since lighting is often highly controlled and can vary dramatically depending on camera position, angle, and setup. Makeup created under one set of studio lighting might look completely different when filmed under different lighting conditions. Professionals who regularly appear on camera often maintain multiple highlighter formulations and intensities, selecting appropriate products based on the specific lighting setup for that day’s shoot. The same person might use subtle powder highlighter for daytime outdoor appearances but switch to a more intense formula for evening indoor events or controlled studio photography. Understanding these nuances prevents the disappointment of carefully applied makeup looking either too subtle or aggressively overdone depending on the actual lighting conditions encountered.
Customizing Highlighter Application for Diverse Skin Textures and Conditions
Beyond skin type (oily, dry, combination, sensitive), individual skin texture varies dramatically, and successful highlighter application requires adapting technique to these texture variations. Textured skin with visible pores, bumps, or surface irregularities requires a different approach than smooth, refined skin. Attempting to apply the same amount of powdered highlighter to textured versus smooth skin creates vastly different results—the powder catches on texture and becomes more visible on textured skin, while appearing sheer and natural on smooth skin.
Someone with visible pores benefits from using finely-milled powdered highlighters specifically designed for blending into skin texture without amplifying imperfections. Cream or liquid highlighters often work better on textured skin since they meld with skin rather than sitting on surface texture. Application technique also adjusts—instead of sweeping strokes, stippling or pressing motions work better, ensuring the product sits in grooves and texture naturally rather than being dragged across the surface. Those with very smooth, refined skin can use any highlighter formula successfully, but even they benefit from understanding how their specific texture interacts with products.
Skin conditions like active acne, rosacea, or dermatitis require considerate highlighter placement and formula selection. Active breakouts benefit from minimal highlighter placement in affected areas—concentrating glow on clear areas of the face rather than broadcasting shine where skin is compromised. Rosacea-prone individuals often need to avoid highlighter in areas where rosacea is most active since luminous products can emphasize redness. Finely-milled, blendable powders work better for sensitive skin conditions than sparkly formulas or highly pigmented shimmers that sit on skin surface. Formula pH and ingredients matter considerably for reactive skin—some people tolerate certain brands beautifully while experiencing irritation from others, necessitating personal experimentation rather than generic recommendations. Dehydrated skin versus genuinely dry skin also influences highlighter selection and application, as dehydrated skin often benefits from hydrating cream formulas while naturally dry skin needs formulas that won’t exacerbate flaking or emphasize dry patches.
Frequently Asked Questions
Q: Can I use highlighter if I have oily skin?
A: Yes, you can use highlighter on oily skin, but formula selection is crucial. Powder highlighters work best for oily skin types because they won’t add additional moisture. Look for long-wearing, matte-finish powders that won’t contribute to excess shine. Apply less than you would on other skin types, and consider using a mattifying primer on oily areas before applying highlighter. Throughout the day, use blotting papers instead of reapplying highlighter to maintain a fresh appearance without additional shine.
Q: How do I choose between multiple highlighter brands?
A: Consider your skin type, undertones, and budget when selecting a brand. Test products in natural light before purchasing, and read reviews from people with similar skin tones. High-end brands often offer superior pigmentation and blending capabilities, but many mid-range and drugstore options perform excellently. The best highlighter is one you’ll actually use regularly, so don’t feel pressured to buy expensive products if budget alternatives meet your needs and work well with your complexion.
Q: Can I wear highlighter without foundation?
A: Absolutely. Highlighter can be applied over moisturizer or primer alone for a fresh, minimal makeup look. Cream and liquid highlighters work best for this approach since they blend more seamlessly with bare skin than powder formulas. Start with a very small amount and build gradually, as highlighter shows up more noticeably on unprimed skin. This technique creates a natural, luminous appearance perfect for casual outings or when you want a lighter makeup application.
Q: How can I make my highlighter last all day?
A: Use a primer before applying foundation to create a smooth base that helps all makeup adhere better. Apply cream or liquid highlighter before powder for longer-lasting wear, and set with a light powder if needed. A setting spray locks everything in place and prevents migration throughout the day. Avoid touching your face unnecessarily, and carry blotting papers and a small brush for touch-ups instead of reapplying full-face makeup.
Q: Is highlighter appropriate for mature or aging skin?
A: Yes, when applied correctly, highlighter can be incredibly flattering on mature skin. Cream and liquid formulas work better than powder on aging skin because they blend seamlessly and won’t settle into fine lines or texture. Apply highlighter only to the high points of your face, and avoid areas with pronounced wrinkles. Subtle, luminous highlighters that enhance natural glow are more flattering than overly shiny or sparkly options on mature skin. Focus on placement that lifts and brightens rather than draws attention to areas where you have concerns.
Related posts:
 Freck Slimelight Highlighter: The Secret to a Dewy, Luminous Glow
 Skin Glazing Is the Dewy Glow Trend Taking Over Beauty
 The Makeup Tricks That Will Change Your Entire Face
 L’Oreal Lab Test: Does This Drugstore BB Cream Really Deliver?
 Foundation’s Impact on Skin
 Why Beauty Experts Are Using Eye Cream on Their Entire Face
 Proper Order of Skincare Application
 Christina Aguilera Goes Makeup-Free