
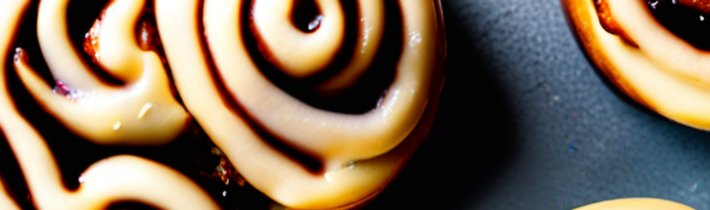
Cinnamon rolls hold a special place in many hearts—warm, comforting, and deeply satisfying. Yet for those watching their nutrition, traditional recipes can feel like an indulgence that comes with a side of regret. This guilt-free cinnamon roll recipe changes that narrative entirely. By thoughtfully swapping ingredients and using smarter techniques, you can enjoy these beloved treats without compromising your wellness goals. The result is a tender, flavorful roll that delivers all the satisfaction with none of the nutritional guilt.
What makes this recipe truly special is its balance. Rather than relying on deprivation or artificial substitutes, it uses whole food ingredients that nourish your body while creating genuine flavor and texture. Whether you’re managing your weight, reducing refined sugar, or simply seeking healthier versions of comfort foods, these cinnamon rolls prove that mindful eating doesn’t mean sacrificing joy.
Why Traditional Cinnamon Rolls Can Derail Your Health Goals
Understanding what makes conventional cinnamon rolls challenging for health-conscious eaters helps explain why this recipe takes a different approach. A typical bakery cinnamon roll can contain 800-1,200 calories, with 40-60 grams of sugar and substantial amounts of refined flour, butter, and cream cheese frosting. These ingredients spike blood sugar rapidly, leading to energy crashes and increased cravings later in the day.
Refined white flour lacks the fiber and nutrients found in whole grains, causing rapid digestion and leaving you hungry shortly after eating. The combination of high sugar and fat content triggers reward centers in the brain, making these treats genuinely addictive. Additionally, the heavy frosting typically adds hundreds of empty calories without significant nutritional benefit.
For anyone managing diabetes, PCOS, or insulin resistance, traditional cinnamon rolls create problematic blood sugar fluctuations. The inflammatory response from refined ingredients can also aggravate digestive issues, joint pain, and skin conditions. This doesn’t mean you must avoid cinnamon rolls forever—it simply means reimagining them with better ingredients and smarter proportions.
The Foundation: Choosing the Right Flour
The flour you select dramatically impacts both nutrition and texture. For this guilt-free recipe, white whole wheat flour provides an excellent foundation. Unlike regular whole wheat flour, which can create dense, heavy baked goods, white whole wheat comes from a lighter variety of wheat berry. It offers comparable fiber and nutrients while producing tender results that closely mimic all-purpose flour.
Each cup of white whole wheat flour contains approximately 4 grams of fiber compared to less than 1 gram in refined flour. This fiber slows digestion, stabilizes blood sugar, and promotes lasting fullness. The flour also provides B vitamins, iron, and magnesium—nutrients stripped away during the refining process.
If you prefer a gluten-free option, a combination of oat flour and almond flour works beautifully. Use a 2:1 ratio of oat flour to almond flour, adding a tablespoon of ground flaxseed for binding. This combination creates tender rolls with healthy fats and protein. For those managing celiac disease or severe gluten sensitivity, ensure your oats are certified gluten-free, as conventional oats are often cross-contaminated during processing.
Whichever flour you choose, resist the temptation to pack it into your measuring cup. Spoon it lightly and level it off to avoid dense, heavy rolls. Too much flour is one of the most common reasons homemade rolls turn out tough rather than tender.
Sweetening Without the Sugar Crash
Traditional cinnamon roll recipes can contain over half a cup of refined sugar in the dough alone, not counting the filling or frosting. This recipe reduces total sugar substantially while maintaining satisfying sweetness through strategic ingredient choices.
For the dough, use pure maple syrup or raw honey. These natural sweeteners provide trace minerals and have a lower glycemic impact than white sugar. They also add moisture, creating tender crumb without excessive fat. Three tablespoons of maple syrup in the dough provides gentle sweetness that complements rather than overwhelms the cinnamon.
The filling combines coconut sugar with cinnamon. Coconut sugar contains small amounts of fiber and minerals, and it caramelizes beautifully when the rolls bake. Its subtle caramel notes enhance the overall flavor profile. You’ll need only one-third cup for the entire batch, distributed across 12 rolls—significantly less than traditional recipes.
For the topping, a simple glaze made from Greek yogurt, vanilla, and a touch of maple syrup replaces heavy cream cheese frosting. This approach cuts calories and sugar dramatically while adding protein. The tangy yogurt balances the sweetness perfectly, and the drizzle looks just as appealing as traditional frosting.
If you follow a low-carb or ketogenic approach, you can substitute monk fruit sweetener or erythritol for the coconut sugar in the filling. However, note that these alternatives don’t caramelize the same way, so your filling will be drier. Adding an extra tablespoon of melted coconut oil to the filling compensates for this difference.
Healthy Fats That Enhance Flavor and Texture
Butter is traditionally what makes cinnamon rolls rich and tender, but it also adds substantial saturated fat and calories. This recipe uses coconut oil instead, creating equally tender rolls with a different nutritional profile. Coconut oil contains medium-chain triglycerides (MCTs), which your body metabolizes differently than long-chain fats, potentially supporting metabolism.
For the dough, use three tablespoons of melted coconut oil. Choose refined coconut oil if you prefer no coconut flavor, or virgin coconut oil if you enjoy a subtle tropical note. The oil must be melted but not hot when you add it to the dough, as excessive heat can kill the yeast.
In the filling, two tablespoons of melted coconut oil help the cinnamon-sugar mixture spread evenly and create those beautiful swirls. Some recipes use clarified butter (ghee) here if you tolerate dairy well and prefer its flavor. Ghee provides the buttery taste without the milk solids that cause issues for some people.
For an even lighter version, substitute half the coconut oil in the dough with unsweetened applesauce. This reduces fat while adding moisture and a hint of natural sweetness. The texture will be slightly more cake-like but still delicious and satisfying.
The Complete Guilt-Free Cinnamon Roll Recipe
Dough Ingredients: 2¾ cups white whole wheat flour, 1 packet instant yeast (2¼ teaspoons), ¾ cup warm unsweetened almond milk (110°F), 3 tablespoons maple syrup, 3 tablespoons melted coconut oil, 1 large egg, ½ teaspoon sea salt, 1 teaspoon vanilla extract.
Filling Ingredients: ⅓ cup coconut sugar, 2 tablespoons ground cinnamon, 2 tablespoons melted coconut oil, ¼ teaspoon nutmeg (optional).
Topping Ingredients: ½ cup plain Greek yogurt, 2 tablespoons maple syrup, 1 teaspoon vanilla extract, 1-2 tablespoons unsweetened almond milk to thin.
Instructions: Begin by warming the almond milk to approximately 110°F—warm to the touch but not hot. Combine it with the maple syrup and yeast in a large bowl, whisking gently. Let this mixture rest for 5 minutes until it becomes foamy, indicating the yeast is active.
Add the melted coconut oil, egg, vanilla, and salt to the yeast mixture, whisking until smooth. Add 2 cups of flour and stir with a wooden spoon until combined. Gradually add the remaining flour, stirring until a soft dough forms. The dough should be slightly sticky but manageable. If it’s excessively wet, add flour one tablespoon at a time.
Turn the dough onto a lightly floured surface and knead for 5-7 minutes until smooth and elastic. You can also use a stand mixer with a dough hook for 4-5 minutes on medium speed. Place the dough in a lightly oiled bowl, cover with a clean kitchen towel, and let it rise in a warm spot for 60-75 minutes until doubled.
While the dough rises, prepare your filling by mixing the coconut sugar, cinnamon, and nutmeg in a small bowl. Line a 9×13-inch baking dish with parchment paper or lightly grease it with coconut oil.
Once risen, punch down the dough and turn it onto a floured surface. Roll it into a 12×18-inch rectangle, keeping the thickness even. Brush the surface with the melted coconut oil for the filling, leaving a half-inch border on one long edge. Sprinkle the cinnamon-sugar mixture evenly over the oil.
Starting from the long edge opposite the border, tightly roll the dough into a log. Pinch the seam to seal. Using a sharp knife or unflavored dental floss, cut the log into 12 equal pieces. Arrange them cut-side up in the prepared baking dish, leaving small gaps between rolls.
Cover the dish and let the rolls rise for 30-40 minutes until puffy and nearly touching. Meanwhile, preheat your oven to 350°F. Bake the rolls for 22-26 minutes until golden brown and cooked through. The internal temperature should reach 190°F if you’re using an instant-read thermometer.
While the rolls bake, whisk together the Greek yogurt, maple syrup, and vanilla for the topping. Add almond milk gradually until you achieve a drizzleable consistency. Once the rolls emerge from the oven, let them cool for 5-10 minutes, then drizzle with the topping. Serve warm for the best experience.
Customization Options for Different Dietary Needs
This base recipe adapts easily to various dietary preferences and restrictions. For vegan cinnamon rolls, replace the egg with a flax egg (1 tablespoon ground flaxseed mixed with 3 tablespoons water, left to gel for 5 minutes). Use plant-based yogurt for the topping—coconut yogurt works particularly well, though it’s thinner than Greek yogurt.
If you’re following a dairy-free diet, this recipe already qualifies, as it contains no milk, butter, or cream cheese. Simply ensure your chocolate chips or any add-ins are also dairy-free if you decide to include them.
For added protein, incorporate 2-3 tablespoons of vanilla protein powder into the dough, reducing the flour by the same amount. This creates a more filling breakfast option that helps stabilize blood sugar throughout the morning. Choose an unflavored or vanilla plant-based protein to avoid artificial sweeteners.
Apple cinnamon rolls work beautifully with this recipe. Add one cup of finely diced apple (peeled and tossed with lemon juice) to the filling alongside the cinnamon sugar. The fruit adds natural sweetness, moisture, and additional fiber. Pear works equally well and provides a delicate flavor that complements the cinnamon.
For chocolate lovers, sprinkle two tablespoons of dark chocolate chips or cacao nibs over the filling before rolling. Choose chocolate with at least 70% cacao to minimize added sugar while maximizing antioxidant benefits.
Storage, Reheating, and Make-Ahead Strategies
These guilt-free cinnamon rolls stay fresh at room temperature for up to two days when stored in an airtight container. For longer storage, refrigerate them for up to five days. The rolls will firm up in the refrigerator, so reheating is essential for restoring their soft texture.
To reheat, wrap individual rolls in a damp paper towel and microwave for 20-30 seconds. This method reintroduces moisture and softness. For multiple rolls, arrange them in a baking dish, cover with foil, and warm in a 300°F oven for 10-12 minutes. Add a tablespoon of water to the dish before covering to create steam.
For make-ahead convenience, prepare the rolls through the cutting and arranging step, then cover tightly and refrigerate overnight instead of completing the second rise. In the morning, remove the dish from the refrigerator and let it sit at room temperature for 30-45 minutes while the oven preheats. The rolls will complete their rise and be ready to bake. This overnight method actually improves flavor as the dough develops more complex notes.
These rolls also freeze exceptionally well. Bake them completely, cool thoroughly, then wrap individually in plastic wrap and place in a freezer-safe container. They’ll keep for up to three months. Thaw overnight in the refrigerator or at room temperature for 2-3 hours, then reheat as described above. Add the yogurt topping after reheating rather than before freezing.
For ultimate convenience, freeze the unbaked, shaped rolls. Arrange them in a freezer-safe baking dish, freeze until solid, then transfer to a freezer bag. When ready to bake, arrange the frozen rolls in a greased dish, cover, and let them thaw and rise at room temperature for 3-4 hours, then bake as directed. This approach gives you fresh-baked cinnamon rolls with minimal morning effort.
Nutritional Benefits and Mindful Enjoyment
Each of these guilt-free cinnamon rolls contains approximately 180-200 calories, compared to 400-600 for traditional versions. They provide 4-5 grams of fiber, 5-6 grams of protein, and significantly less sugar—roughly 8-10 grams per roll versus 25-40 grams in conventional recipes.
The whole grain flour supports digestive health and provides sustained energy. The moderate protein content from the egg and Greek yogurt topping helps prevent blood sugar spikes and promotes satiety. Cinnamon itself offers health benefits, including anti-inflammatory properties and potential blood sugar regulation support.
However, nutritional improvements don’t mean these rolls should become daily staples. Even healthier versions of treats remain treats. Enjoy them as part of a balanced approach to eating, perhaps as a weekend breakfast or special occasion indulgence. This mindset prevents the all-or-nothing thinking that often undermines wellness goals.
Practice mindful eating when enjoying these rolls. Sit down without distractions, eat slowly, and notice the flavors and textures. This approach increases satisfaction and helps you recognize genuine fullness cues. One warm, mindfully savored cinnamon roll often satisfies more completely than three eaten hastily or while distracted.
Consider what you’re pairing these rolls with as well. Balance them with protein-rich foods like eggs or Greek yogurt (in addition to the topping) and fresh fruit for a complete breakfast that provides varied nutrients and sustained energy.
Mastering Dough Consistency: Troubleshooting Common Texture Issues
Achieving the perfect dough consistency separates good cinnamon rolls from extraordinary ones, yet it remains one of the most challenging aspects for home bakers. The dough should feel tacky to the touch but not stick persistently to your hands. When you press a finger into properly hydrated dough, it should leave an impression that slowly springs back about halfway. This texture indicates sufficient gluten development and proper moisture balance.
Environmental factors dramatically affect dough behavior. In humid climates, flour absorbs moisture from the air, requiring less liquid in your recipe. Conversely, dry climates or winter heating systems create flour that demands additional hydration. Start by holding back two tablespoons of flour from the total amount, adding it only if the dough remains unmanageably sticky after five minutes of kneading. This approach prevents the most common mistake: adding too much flour, which creates dense, dry rolls.
The type of measuring method also impacts results. If you scoop flour directly from the bag with your measuring cup, you can pack in 25-30% more flour than the recipe intends. This excess creates tough, heavy rolls that never achieve that coveted tender crumb. Instead, fluff the flour in its container, spoon it into your measuring cup without packing, and level it with a straight edge. This technique ensures accuracy and consistency across batches.
Temperature affects dough handling as well. Warm hands can make dough feel stickier than it actually is, while cold hands might lead you to add unnecessary flour. If the dough feels excessively tacky, let it rest for five minutes before deciding whether to add more flour. During this rest period, the flour continues absorbing liquid, often resolving what seemed like a moisture problem. Additionally, coating your hands lightly with oil rather than flour when handling the dough prevents sticking without altering the dough’s hydration ratio.
For those struggling with kneading, the windowpane test provides reliable feedback on gluten development. Tear off a small piece of dough and gently stretch it between your fingers. Properly kneaded dough will stretch thin enough to see light through it without tearing immediately. If it tears easily, continue kneading for another 2-3 minutes. This gluten network creates the structure that allows rolls to rise properly and maintain their tender, pull-apart texture after baking.
Advanced Flavor Development Through Fermentation Techniques
While the basic recipe produces delicious results, extended fermentation significantly enhances flavor complexity and digestibility. Cold fermentation in particular develops nuanced flavors impossible to achieve with quick rises. After the initial mixing and kneading, place the dough in the refrigerator for 12-24 hours instead of letting it rise at room temperature. This slow, cold rise allows enzymes to break down complex carbohydrates and develop deeper, more sophisticated flavors.
The extended fermentation also makes whole wheat flour easier to digest. Phytic acid, which can interfere with mineral absorption, breaks down during longer fermentation periods. People who typically experience digestive discomfort with whole grains often tolerate slow-fermented versions significantly better. The process also reduces the overall glycemic impact, as some of the starches convert to more easily digested forms.
When using cold fermentation, remove the dough from the refrigerator and let it sit at room temperature for 45-60 minutes before rolling and shaping. The dough needs to warm slightly for easier handling and to reactivate the yeast. After shaping the rolls, they’ll require a longer second rise—typically 45-60 minutes instead of 30-40 minutes—since they’re starting from a cooler temperature.
For even more complex flavors, try incorporating a preferment or starter. Mix one cup of the flour with half the liquid and a pinch of the yeast 4-8 hours before making the full dough. This mixture, called a poolish, ferments and develops flavor compounds, then gets incorporated into the final dough along with remaining ingredients. The resulting rolls have a subtle tanginess and depth that enhances rather than masks the cinnamon filling.
Tangzhong, a technique borrowed from Asian baking, offers another dimension of improvement. Cook three tablespoons of flour with half a cup of water or milk until it forms a thick paste, then cool it completely before adding to your dough. This cooked flour starter creates exceptionally soft, moist rolls that stay fresh longer. The gelatinized starches hold moisture more effectively, resulting in rolls that remain tender for days without becoming dry or crumbly. Reduce the total flour in the recipe by three tablespoons when using tangzhong to maintain proper dough consistency.
Strategic Ingredient Swaps for Specific Health Conditions
Different health conditions require targeted modifications beyond general healthy eating principles. For those managing diabetes or prediabetes, replacing half the whole wheat flour with almond flour dramatically lowers the carbohydrate content while adding healthy fats and protein. This modification reduces the carbohydrate content per roll from approximately 28-30 grams to 18-20 grams, creating a gentler impact on blood glucose. The rolls will be slightly denser and more fragile, so handle them gently when cutting and transferring to the baking dish.
People with inflammatory conditions like arthritis or autoimmune disorders may benefit from using cassava flour instead of wheat-based options. Cassava flour is grain-free and generally well-tolerated by those following autoimmune protocol diets. However, it absorbs significantly more liquid than wheat flour, requiring approximately 25% less flour or 25% more liquid than the recipe specifies. Start with two cups of cassava flour and add more only if necessary, as the dough will feel different—smoother and less elastic—than traditional yeast dough.
For individuals focusing on gut health or following low-FODMAP protocols, the fermentation techniques mentioned earlier become especially important. The extended rise time allows yeast and bacteria to break down fructans, the wheat compounds that trigger digestive distress in sensitive individuals. Additionally, replacing the honey or maple syrup with rice malt syrup provides sweetness without high-FODMAP sugars. Rice malt syrup has a milder flavor, so you might want to increase the vanilla extract to three-quarter teaspoon to compensate.
Those managing cardiovascular health or high cholesterol should consider using flaxseed meal as a partial flour replacement. Substitute one-quarter cup of the flour with ground flaxseed, which adds omega-3 fatty acids and soluble fiber that supports heart health. The flax also provides a subtle nutty flavor that complements cinnamon beautifully. Ensure you’re using ground flaxseed rather than whole seeds, as whole flaxseeds pass through the digestive system undigested, providing none of their nutritional benefits.
For people with histamine intolerance, several modifications help reduce histamine content. Use fresh yeast instead of dried if possible, as dried yeast contains higher histamine levels. Minimize fermentation time by using the quick-rise method rather than overnight options, and consume the rolls fresh rather than storing them, as histamine levels increase in foods as they age. Replace cinnamon with cardamom if cinnamon triggers symptoms, as some individuals with histamine issues react to cinnamon specifically.
The Science of Perfect Rolling and Shaping
The rolling and shaping process determines whether your cinnamon rolls bake into distinct, beautiful spirals or merge into a unified mass. Start by rolling the dough on a surface very lightly dusted with flour—excess flour between layers prevents the roll from sealing properly and can create dry pockets. Roll from the center outward, rotating the dough a quarter turn every few passes to maintain even thickness. Uneven rolling creates rolls that bake inconsistently, with some overdone and others underbaked.
The target rectangle dimensions of 12×18 inches aren’t arbitrary. This size creates rolls with optimal spiral structure—enough layers to create visual appeal without becoming so tight they’re difficult to eat or so loose they unravel during baking. If your dough keeps springing back when rolling, it means the gluten is too tight. Cover the dough and let it rest for 10 minutes, allowing the gluten to relax, then continue rolling. Fighting against resistant dough only frustrates you and toughens the final product.
When spreading the filling, leave that half-inch border on one long edge completely clean. This border becomes your sealing edge, and any filling present will prevent proper adhesion. Many bakers fail to leave adequate space, then struggle with rolls that unravel during slicing or baking. Brush this border lightly with water just before rolling to enhance the seal if you’re concerned about the roll staying closed.
The rolling technique itself matters enormously. Roll tightly enough to create definition between layers, but not so aggressively that you squeeze out the filling or create a dense, compressed roll. Apply even, gentle pressure as you roll, using your fingertips rather than your palms. Your hands should guide and shape rather than compress. After rolling, pinch the seam firmly to seal, then position the log seam-side down before cutting to prevent it from unrolling.
Cutting deserves its own attention. A serrated knife works, but sawing motion can compress and distort the rolls. Unflavored dental floss or thread provides superior results. Slide it under the log, cross the ends over the top, and pull firmly in opposite directions. This method slices cleanly through without compression, maintaining perfect circular shapes. Make your first cut exactly in the center, then cut each half in half, continuing until you have twelve equal pieces. Uniform size ensures even baking—smaller rolls overcook while larger ones remain underdone.
Arrange the rolls with intentional spacing. They should be close enough to support each other during the second rise and baking but not touching initially. As they rise and bake, they’ll expand and touch, creating those soft, pull-apart sides while maintaining distinct tops. Placing them too far apart results in rolls that spread outward rather than upward, losing height and creating drier edges. Too close together, and they merge into an indistinguishable mass with pale, doughy sides.
Elevating Presentation and Serving Strategies
Visual appeal significantly impacts perceived taste and satisfaction. A beautifully presented cinnamon roll triggers positive anticipation that enhances the eating experience. The yogurt glaze offers opportunities for artistic presentation. Drizzle it in a zigzag pattern across the rolls while they’re still slightly warm, allowing it to sink into crevices and pool around edges. Alternatively, serve the glaze on the side in a small bowl, letting diners control the amount they want and avoid soggy bottoms if serving isn’t immediate.
Garnish options extend beyond basic glaze. Toasted chopped pecans or walnuts sprinkled over the glaze add textural contrast and healthy fats. A light dusting of additional cinnamon through a fine-mesh sieve creates visual drama. For special occasions, add a few fresh berries alongside each roll—the fruit’s brightness contrasts beautifully with the warm brown tones of the rolls and adds refreshing acidity that cuts through richness.
Temperature dramatically affects texture perception and flavor release. Serve these rolls warm but not straight from the oven. Rolls need 5-10 minutes of cooling time for the internal structure to set. Served too hot, they fall apart and taste gummy. At the ideal warm temperature, the rolls hold together perfectly while the fats remain soft and the spices release their full aromatic potential. If the rolls have cooled completely, the reheating methods mentioned earlier restore this optimal serving temperature.
Consider creative serving vessels for different occasions. Individual rolls on small plates work for formal brunches, while the whole pan placed on the table with a serving spatula creates a casual, family-style experience. For meal prep or grab-and-go breakfasts, wrap individual rolls in parchment paper and secure with kitchen twine, creating neat packages that are easy to reheat and eat without plates.
Beverage pairing enhances the overall experience. Coffee remains the classic choice, with its bitter notes balancing the sweet filling. However, chai tea echoes and amplifies the warm spice notes in the cinnamon, creating a harmonious combination. For non-caffeinated options, golden milk (turmeric latte) provides anti-inflammatory benefits and complementary warm spices, while fresh-pressed apple cider offers seasonal appeal and natural sweetness that requires no added sugar.
Scaling Recipes for Commercial Kitchens and Large Gatherings
Preparing cinnamon rolls for crowds requires different strategies than single-batch home baking. When making multiple batches, consistency becomes paramount. Create a mise en place with pre-measured ingredients for each batch, ensuring you don’t accidentally double or omit components when making the fourth batch of the morning. Professional bakers often weigh ingredients rather than measuring by volume, as weight measurements eliminate variables introduced by packing or settling. A kitchen scale becomes invaluable when producing large quantities.
Proofing space limitations often challenge large-scale production. Rather than trying to proof twenty dozen rolls simultaneously, stagger your batches. Prepare the first batch’s dough and set it to rise, then start the second batch thirty minutes later, and so on. This rotation keeps you productive while ensuring each batch receives proper attention. Alternatively, use the refrigerator as a proof retarder, allowing some batches to rise slowly while others are actively baking.
Oven capacity requires strategic planning. Most home ovens accommodate two 9×13-inch pans simultaneously, one on each rack. Rotate the pans halfway through baking—move the top pan to the bottom position and vice versa—to ensure even browning. The rolls on the lower rack will brown faster on the bottom, while those on the upper rack brown faster on top. This rotation compensates for uneven oven heat distribution.
For true large-scale production, consider using hotel pans and a commercial convection oven if available. Full hotel pans (roughly 12×20 inches) hold eighteen rolls instead of twelve, and convection heat circulates more evenly, reducing baking time by about 15-20%. However, convection ovens dry out baked goods more quickly, so check for doneness a few minutes earlier than the recipe suggests and consider reducing the temperature by 25°F.
Transporting rolls to off-site events requires planning. Bake them until just done, slightly underbaked if anything, then wrap the pan tightly in foil while still warm. The residual heat continues cooking them slightly while they’re wrapped, and the steam keeps them moist. Transport them in insulated carriers to maintain temperature. At the venue, you can reheat them briefly in an oven if needed, but they’ll often still be perfectly warm if you’ve timed the baking and transport properly.
Cost analysis matters for large events. Calculate the per-roll cost by dividing total ingredient costs by yield. These guilt-free rolls typically cost $0.75-$1.25 per roll when made in large batches, significantly less than purchasing from a bakery or specialty health food store, where similar products run $3-$5 each. This cost-effectiveness makes healthy treats accessible for schools, community events, and workplaces without stretching budgets.
Seasonal Variations and Ingredient Experimentation
The basic cinnamon roll formula serves as a blank canvas for seasonal ingredients that keep the recipe exciting year-round. Fall and winter variations might incorporate pumpkin puree—replace one-quarter cup of the milk with pumpkin puree and add pumpkin pie spice to the dough itself, not just the filling. This creates rolls with a warm, golden color and subtle earthy sweetness that pairs beautifully with traditional cinnamon.
Spring calls for lighter, brighter flavors. Add lemon zest to the dough and replace the cinnamon filling with a mixture of coconut sugar, cardamom, and finely chopped fresh strawberries. The strawberries release juice during baking, creating pockets of jammy sweetness throughout the rolls. Alternatively, incorporate fresh or frozen blueberries, which provide antioxidants and create beautiful purple swirls when cut.
Summer variations might feature peaches or cherries. Dice the fruit small and toss with a teaspoon of cornstarch before adding to the filling to absorb excess moisture. Too much liquid creates soggy spots and prevents proper rising. Stone fruits pair exceptionally well with almond extract—add half a teaspoon to the dough in place of vanilla for a sophisticated flavor profile that elevates the rolls beyond typical cinnamon versions.
Savory adaptations surprise and delight those who don’t typically enjoy sweet breakfasts. Omit the sweetener from the dough and filling entirely, instead using olive oil in place of coconut oil and creating a filling from herbs, garlic, and a small amount of nutritional yeast for umami depth. These savory rolls work beautifully alongside soups, salads, or as unique dinner rolls that spark conversation. Add everything bagel seasoning to the filling for a trendy variation that bridges sweet and savory.
Spice blends beyond cinnamon expand your repertoire dramatically. Chinese five-spice powder creates an exotic variation with complex undertones. Chai spice blend—cardamom, ginger, cloves, and black pepper—delivers warming heat perfect for cold mornings. Za’atar mixed with olive oil makes a Mediterranean-inspired savory version. Each variation maintains the healthy base while offering completely different flavor experiences, preventing boredom with healthy eating.
Incorporating superfoods adds nutritional density without compromising taste. Spirulina or matcha powder mixed into the dough creates visually stunning green swirls and adds antioxidants. Start with just one tablespoon to avoid overpowering flavors or medicinal tastes. Cacao powder in the dough transforms the rolls into a chocolate-cinnamon hybrid that appeals especially to children. Maca powder provides adaptogenic benefits and a subtle malty sweetness that complements the maple syrup. These additions feel indulgent while secretly boosting the nutritional profile even further, embodying the guilt-free philosophy at the recipe’s core.
Frequently Asked Questions
Can I use all-purpose flour instead of whole wheat flour if that’s what I have on hand?
Yes, all-purpose flour will work and create a lighter, fluffier texture. However, you’ll lose the fiber and nutrients that make this recipe guilt-free. If you do substitute, use slightly less flour—start with 2½ cups and add more only if needed, as all-purpose flour absorbs less liquid. For a compromise, use half all-purpose and half whole wheat flour to maintain some nutritional benefits while achieving a lighter texture.
Why didn’t my dough rise properly, and how can I fix this issue?
Yeast is living and sensitive to temperature. If your liquid was too hot (above 120°F), it killed the yeast; if too cold (below 100°F), the yeast remains inactive. Dead yeast won’t foam when you proof it, which is your early warning sign. Check your yeast’s expiration date as well—old yeast loses potency. For the rising environment, choose a warm, draft-free spot. If your kitchen is cold, try placing the covered bowl in a turned-off oven with just the light on, or near (not on) a warm stovetop.
Can I prepare the dough in a bread machine to save time and effort?
Absolutely. Add the ingredients to your bread machine in the order recommended by the manufacturer (typically liquids first, then dry ingredients, with yeast last). Use the dough setting, which mixes, kneads, and completes the first rise automatically. Once the cycle finishes, proceed with rolling, filling, and shaping as directed. This method is particularly helpful on busy mornings or if you find hand-kneading challenging.
How can I tell when the cinnamon rolls are fully baked without overbaking them?
Visual cues include golden-brown tops and edges that have pulled slightly away from the pan. The most reliable method is using an instant-read thermometer inserted into the center of a middle roll—it should read 190-195°F when fully baked. If you don’t have a thermometer, gently press the top of a center roll; it should spring back slowly and feel firm rather than doughy. Underbaking slightly is preferable to overbaking, as these rolls continue cooking briefly after removal from the oven.
What’s the best way to adapt this recipe for a smaller batch or larger gathering?
To halve the recipe, use 1⅓ cups flour, a generous teaspoon of yeast, and scale all other ingredients by half, which yields six rolls perfect for 2-3 people. Bake them in an 8×8-inch pan for similar timing. To double the recipe, prepare two separate batches rather than one large batch, as very large dough quantities can be difficult to knead properly and rise unevenly. Alternatively, make one batch, bake half immediately, and freeze the other half as unbaked shaped rolls for future convenience.
Related posts:
 This 4-Ingredient Vegan Edible Cookie Dough Is So Good It Should Be Illegal
 Flour Measuring Tips
 Making Fathead Pizza Dough
 Does Flour Go Bad? Shelf Life and Storage Tips
 Safe Raw Cookie Dough Recipe
 Almond Flour or Meal: How to Use It and Where to Get It
 The Rise of Apple Flour
 Seed Flour by Simple Mills: A Nutritious Alternative for Baking Enthusiasts