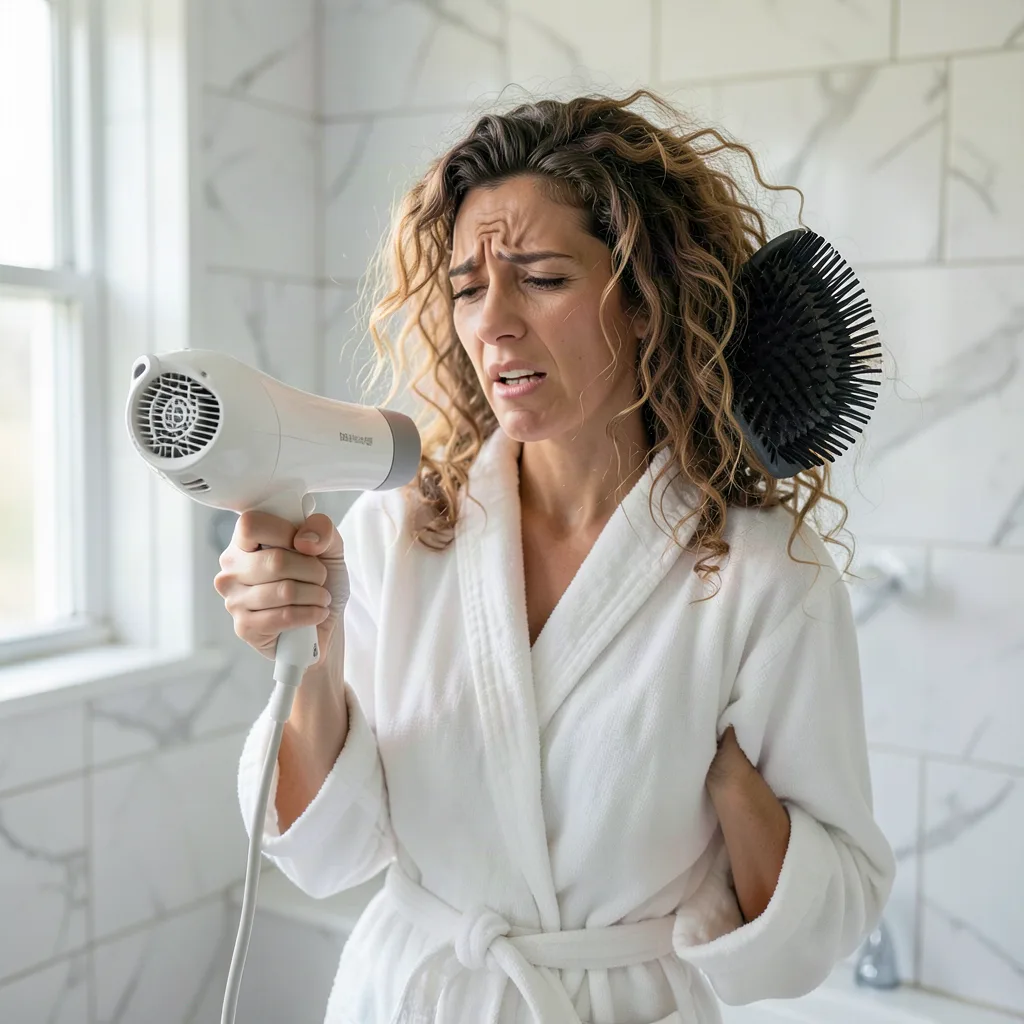
We have all been there: you spend forty-five minutes wrestling with a round brush and a heavy hair dryer, only to emerge from the bathroom with a mane that looks more like a static-charged cloud than a sleek, salon-quality blowout. It is a frustrating reality for many, yet the culprit is rarely the hair itself. Instead, the secret to a perfect finish lies in the technique. The blow dryer is arguably the most powerful tool in your beauty arsenal, but when used incorrectly, it becomes a primary source of mechanical and thermal damage. Understanding the science of how heat interacts with the hair cuticle is the first step toward transforming your morning routine from a chore into a professional-level styling session.
Achieving that elusive ‘just-stepped-out-of-the-salon’ look requires more than just high heat and a blast of air. It requires a mindful approach to hair health, an understanding of your hair’s unique texture, and the patience to follow a systematic process. Many of the most common hair dryer disasters are born out of a desire for speed, but as we will explore, rushing the process often leads to frizz, breakage, and a style that falls flat within hours. By identifying the blow-dry mistakes sabotaging your style, you can reclaim your hair’s natural shine and ensure that your hard work lasts through the day. Let us dive into the technical nuances and practical shifts that will change your relationship with your hair dryer forever.
The Critical Error of Drying Soaking Wet Hair
One of the most frequent mistakes made in the bathroom is reaching for the hair dryer the moment you step out of the shower. When hair is soaking wet, it is at its most vulnerable state. Water causes the hair shaft to swell, stretching the cuticle and making it highly susceptible to breakage. Attempting to manipulate dripping wet hair with a brush and high heat is a recipe for structural damage. Furthermore, it is incredibly inefficient; you are essentially spending the first fifteen minutes of your styling time just trying to evaporate excess water rather than shaping the hair.
To avoid this disaster, the ‘80% rule’ is your best friend. You should aim to air dry or gently towel dry your hair until it is roughly 80% dry before you even think about picking up a brush. During this initial phase, you can use the hair dryer on a medium setting to ‘rough dry’ the hair, using only your fingers to lift the roots and move the moisture away. This preserves the elasticity of the hair and prevents the mechanical stress that occurs when a brush pulls on water-weighted strands. When towel drying, avoid the temptation to rub your hair vigorously with a traditional terry cloth towel. The loops in the fabric can snag the cuticle, leading to instant frizz. Instead, use a microfiber towel or an old cotton T-shirt to gently squeeze and blot the moisture out.
Skipping the Essential Shield: Heat Protectant
If you are not using a heat protectant, you are effectively subjecting your hair to a slow-motion burn. High-quality hair dryers can reach temperatures well over 200 degrees Fahrenheit. Without a barrier, this heat strips the hair of its natural oils and moisture, leading to ‘bubble hair’—a condition where the water inside the hair shaft boils, creating tiny bubbles that permanently weaken the structure. A heat protectant is not just a marketing gimmick; it is a scientific necessity. These products typically contain silicones and polymers that create a thin film over the hair, distributing heat more evenly and slowing down the rate at which the hair heats up.
The mistake many make is either skipping this step entirely or applying the product unevenly. To get the most out of your protectant, section your hair while it is still damp and mist the product from roots to ends. If you are using a cream or serum, work it through with a wide-tooth comb to ensure every strand is coated. Look for ingredients like hydrolyzed wheat protein or panthenol, which help strengthen the hair while providing that thermal barrier. Remember, the goal is to create a buffer that allows the heat to change the hair’s shape without destroying its integrity.
The High-Heat Trap: Matching Temperature to Texture
It is a common misconception that the highest heat setting is the best setting for everyone. While thick, coarse, or curly hair may require more heat to break the hydrogen bonds and reform them into a smooth shape, fine or damaged hair can be scorched in seconds on a high setting. Using excessive heat on fine hair doesn’t just cause damage; it also makes the hair look limp and lifeless. The ‘disaster’ here is a style that looks fried rather than finished.
The key to professional results is heat regulation. Most modern dryers come with at least three heat settings. As a general rule, use the low setting for fine or thin hair, the medium setting for normal or wavy hair, and the high setting only for very thick or coarse textures. Additionally, you should adjust the heat as you move through the drying process. You might start with a higher heat for the initial rough dry and then switch to a lower, more controlled heat when you begin the precision styling with a brush. This prevents the hair from over-heating once the moisture has been removed, which is the point where most thermal damage occurs.
Neglecting the Concentrator Nozzle
That flat, plastic attachment that came in the box with your hair dryer? It is not optional. Many people discard the concentrator nozzle, thinking it is an unnecessary accessory, but it is actually the secret to a frizz-free finish. Without the nozzle, the air from the dryer is turbulent and scattered. It hits the hair from all angles, blowing the cuticle open and creating a rough, dull texture. The nozzle’s job is to focus the airflow into a directed stream, allowing you to point the air exactly where you want it.
The professional technique involves pointing the nozzle downward, from the roots toward the ends. This follows the natural direction of the hair cuticle, smoothing it down as it dries. When the cuticle is flat and smooth, it reflects light better, giving your hair that coveted healthy shine. If you dry your hair without the nozzle, or worse, if you blow the air upward from the ends, you are essentially ‘ruffling’ the hair’s surface, which leads to tangles and a lack of luster. Always keep the nozzle about an inch away from the brush to ensure concentrated airflow without scorching the hair fibers.
The Chaos of Improper Sectioning
Trying to blow dry your entire head of hair at once is a recipe for frustration and an uneven finish. This ‘chaos method’ usually results in the top layer being over-dried and frizzy while the bottom layers remain damp and prone to curling back up. Sectioning is the hallmark of a professional blowout. It may feel like it takes longer, but in reality, it saves time by making each stroke of the brush more effective.
To do this correctly, use professional styling clips to divide your hair into at least four quadrants: two in the front and two in the back. If you have very thick hair, you may need even more sub-sections. Start at the nape of the neck and work your way up. By drying the bottom layers first, you create a foundation for the top layers to rest upon. Each section should be no wider than the brush you are using. This ensures that the heat and airflow can penetrate the entire section evenly, resulting in a consistent texture from the inside out. Once a section is dry, leave it alone; over-brushing a dry section only leads to static and breakage.
Choosing the Wrong Brush for Your Goals
Not all brushes are created equal, and using the wrong one can lead to a hair dryer disaster. For example, using a metal-core round brush on fragile, damaged hair can be incredibly damaging. The metal acts like a curling iron, heating up to extreme temperatures and potentially burning the hair. Conversely, using a small round brush when you want a sleek, straight look will only result in unwanted waves and tangles. Your brush choice should be dictated by your hair type and your desired end result.
For maximum volume and lift at the roots, a round brush is essential. Boar bristle round brushes are excellent for creating tension and smoothing the cuticle, making them ideal for those with frizzy or curly hair. Ceramic or ionic brushes are better for those with thick hair who want a faster dry time, as they distribute heat efficiently. If your goal is a smooth, straight finish, a large paddle brush is your best bet. It covers more surface area and helps to flatten the hair as you dry. Always ensure your brush is clean; a build-up of old product and shed hair on your brush will transfer back onto your clean hair, making it look dull and greasy before you’ve even finished.
The Danger of Proximity: Holding the Dryer Too Close
In an effort to speed up the process, many people press the dryer nozzle directly against the hair and the brush. This is one of the most damaging mistakes you can make. The intense, localized heat can reach temperatures that literally melt the hair’s protein structure. This leads to split ends that travel up the hair shaft and a permanent loss of elasticity. You might get the hair dry faster, but the long-term cost to your hair’s health is immense.
The safe distance for a hair dryer is approximately six to eight inches away from the hair. Even when using a brush to create tension, you should maintain a small gap between the nozzle and the hair. This allows the air to circulate and prevents the heat from becoming trapped against the hair fibers. If you find that your hair isn’t drying fast enough at this distance, the solution is usually to increase the airflow (the fan speed) rather than the heat or the proximity. Moving the dryer constantly is also vital; never let the heat dwell on one spot for more than a second or two.
Forgetting the ‘Cool Shot’ to Lock in the Style
Most hair dryers have a ‘cool shot’ button, yet it is one of the most underutilized features. To understand why it’s important, we have to look at the physics of hair styling. Heat breaks the hydrogen bonds in the hair, allowing us to reshape it (straightening it or adding a curl). However, those bonds only ‘set’ into their new shape once the hair cools down. If you finish a section with hot air and immediately drop it, the weight of the warm hair will cause the style to fall out, leading to a look that doesn’t last.
The professional secret is to use the cool shot at the end of every section. Once the section is dry and shaped around the brush, hit it with a blast of cool air for about five to ten seconds while the hair is still on the brush. This rapidly cools the hair, locking the hydrogen bonds into place and sealing the cuticle. This simple step adds incredible shine and ensures that your volume or smoothness lasts throughout the day. It is the difference between a style that looks good for an hour and one that looks good until your next wash.
Mechanical Stress: Over-Brushing and Friction
Finally, we must address the disaster of over-manipulation. The combination of heat and mechanical tension (pulling with a brush) is what allows us to style hair, but there is a fine line between ‘tension’ and ‘trauma.’ Pulling too hard on the hair, especially when it is still damp, can cause the strands to snap. Furthermore, once the hair is dry, continuing to brush it while applying heat will only create friction and static, leading to the very frizz you were trying to avoid.
Actionable guidance: Listen to your hair. If you hear a snapping sound, you are using too much tension or your brush is snagging. If the hair feels ‘crunchy,’ you have over-dried it. Once a section is dry and has been set with the cool shot, let it be. Avoid the urge to keep running the brush through it. If you need to touch up a spot later, use a tiny amount of finishing oil or serum to smooth it down rather than reaching for the dryer again. Treat your hair like a delicate fabric; it can handle some heat and shaping, but excessive friction will eventually wear it down.
The Invisible Saboteur: Clogged Filters and Airflow Restriction
While much attention is paid to heat settings and brush types, the mechanical health of the hair dryer itself is often overlooked. A hair dryer is a precision instrument that relies on a specific ratio of air intake to heat output. Over time, the rear intake filter becomes a magnet for lint, dust, bathroom aerosols, and even stray hairs. When this filter is clogged, the motor must work significantly harder to pull in air, which often leads to the heating element reaching dangerous, unregulated temperatures. This results in an inconsistent blast of air that is far hotter than the internal sensors intend, leading to localized ‘hot spots’ that can scorch a section of hair in a heartbeat.
A restricted airflow also means the drying process takes longer, exposing your hair to thermal stress for an extended duration. To prevent this, professional stylists recommend a weekly cleaning of the intake screen. Most modern dryers feature a removable back cap; simply pop it off and use an old toothbrush or a vacuum attachment to clear the debris. If your dryer makes a high-pitched whining sound or smells slightly of burning dust, it is a clear sign that the airflow is compromised. Maintaining a clear path for air not only protects your hair from unpredictable temperature spikes but also extends the life of your tool, ensuring the motor doesn’t burn out prematurely.
Beyond the Shield: The Art of Strategic Product Layering
The previous discussion on heat protectants is vital, but achieving a salon-quality finish requires a more sophisticated approach to product ‘cocktailing’ and timing. A common mistake is applying all styling products—volumizers, serums, and hold sprays—to soaking wet hair simultaneously. This dilutes the formulas and often leads to a sticky, weighed-down residue. Instead, product application should be tiered based on the hair’s moisture level. Volumizing mousses and root lifters should be applied to the scalp area while the hair is at its wettest to ensure they are absorbed into the cuticle as it begins to swell with heat.
As you transition from the ‘rough dry’ phase to the precision styling phase (around the 80% dry mark), this is the optimal time to apply smoothing serums or light oils to the mid-lengths and ends. At this stage, the hair is receptive to the product without being so wet that the oil slides off the hair shaft. Furthermore, consider the ‘edge case’ of fine hair: applying a heavy cream-based protectant can flatten the hair before you even begin. In this instance, a lightweight spray-in-distributor is preferable. The goal is to create a multi-layered defense and style-support system that works with the evaporation process rather than against it, ensuring that by the time the hair is fully dry, the products have ‘baked in’ to provide structure and shine.
The Cowlick Conflict: Mastering the Hairline and Fringes
One of the most frustrating blow-dry disasters is a fringe or hairline that ‘sets’ in the wrong direction before you have a chance to style it. The hair around the face and the nape of the neck is typically finer and dries much faster than the rest of the head. If you wait until you have finished the back sections to address your bangs or cowlicks, they will likely have air-dried into a stubborn, unruly shape that no amount of heat can fully correct without causing damage. The professional rule of thumb is to style the ‘problem areas’ first, even before the 80% rough dry is complete.
To tame a stubborn cowlick or a split in the bangs, use the ‘X-pattern’ technique. Using a small round brush or a paddle brush, brush the hair flat against the forehead to the left while following closely with the concentrator nozzle, then immediately brush it to the right. This back-and-forth motion ‘confuses’ the hair follicle and neutralizes the natural growth pattern, allowing the hair to fall straight and centered. For the hairline, use a low-heat, high-airflow setting to gently direct the ‘baby hairs’ downward. By addressing these focal points while they are still highly pliable, you ensure the most visible part of your style looks intentional and polished, rather than a frantic afterthought.
Atmospheric Interference: The Bathroom Steam Trap
The environment in which you blow dry your hair is just as important as the tools you use. Most people perform their styling routine in the bathroom immediately after a hot shower. This is a significant tactical error. The high humidity and lingering steam in the air mean that as soon as you dry a section of hair, it begins to re-absorb the ambient moisture. This causes the hair shaft to swell and the cuticle to lift, leading to immediate frizz and a loss of the ‘set’ you just worked hard to achieve. This is particularly detrimental for those trying to achieve a sleek, straight look or those with naturally curly hair prone to reversion.
If possible, move your styling routine to a bedroom or a space with better ventilation and lower humidity. If you must stay in the bathroom, turn on the exhaust fan, open the door, and wait at least ten minutes for the steam to dissipate. Furthermore, consider the ‘cooldown’ phase. If you step out of a humid bathroom into a cold morning, the rapid change in temperature can cause the hair to ‘shock,’ leading to static. A neutral, dry environment allows the hydrogen bonds to lock in more effectively during the cool-shot phase, resulting in a style that remains crisp and smooth for hours longer than one finished in a damp environment.
The Ionic Debate: When Advanced Technology Works Against You
Ionic technology—the emission of negative ions to break down water molecules—is often touted as a universal benefit. However, a common disaster for those with fine, limp, or thin hair is the over-use of ionic settings. While negative ions are incredible for neutralizing static and closing the cuticle on thick, coarse, or frizzy hair, they can actually make fine hair look flat and greasy. Because ionic dryers are so efficient at sealing the hair and removing moisture, they can strip away the natural volume and ‘grit’ that fine hair needs to hold a style.
If you have fine hair and your dryer has an ‘ion on/off’ switch, consider keeping it off during the root-lifting phase to maintain maximum volume. Only switch the ions on for the final pass over the ends to add shine. Conversely, those with high-porosity or curly hair should lean heavily into ionic technology to prevent the hair from expanding into a cloud of frizz. Understanding that ions are a tool for texture management, rather than just a ‘fast-dry’ feature, allows you to customize the finish. If your hair feels unusually ‘mushy’ or won’t hold a curl after a blowout, your high-tech ionic dryer might actually be the culprit, and switching to a traditional ceramic-only setting could be the solution.
Ergonomics and the ‘Reach’ Factor: Saving Your Shoulders and Your Style
The physical act of blow drying is often a feat of endurance, and poor ergonomics frequently lead to a rushed, sloppy finish toward the end of the session. When your arms get tired, you tend to drop the dryer lower, which changes the angle of the airflow. Instead of the air blowing down the cuticle (as discussed with the concentrator nozzle), it begins to blow sideways or even upward, undoing the smoothing work you did on the previous sections. Furthermore, holding the dryer too high for too long can lead to neck and shoulder strain, causing you to skip the crucial back sections of the head.
To combat this, professional stylists recommend the ‘elbow-in’ technique. Instead of reaching over the top of your head with your arms fully extended, tilt your head to the side and bring the hair toward you. When working on the back sections, bend forward at the waist to let the hair hang down; this allows you to reach the nape of the neck without straining your shoulders. Additionally, ensure you are switching the dryer between your left and right hands. It may feel awkward at first, but developing ambidexterity prevents one side of your hair from being perfectly styled while the other side (the ‘non-dominant’ side) looks frizzy and neglected. A comfortable, sustainable posture ensures that the last section of hair receives the same attention and precision as the first.
The ‘Second Day’ Strategy: Preserving the Blowout
A successful blow dry is an investment of time, and the final disaster is watching it disappear overnight. Many people treat their hair roughly after styling, assuming the ‘set’ is permanent. However, the first 24 hours after a blowout are the most critical, as the hair is still settling into its new shape. Sleeping on a traditional cotton pillowcase is a primary cause of ‘bedhead’—the friction pulls at the cuticle and creates tangles. Switching to a silk or satin pillowcase allows the hair to glide smoothly, preserving the alignment of the strands.
For those who exercise or live in humid climates, the ‘pineapple’ method or a loose silk scrunchie can keep the hair off the neck and away from sweat without creating a crease. If you find your roots looking flat on day two, resist the urge to re-blow dry the entire head. Instead, use a dry shampoo to absorb oils, and then use the hair dryer on a *cool* setting with a round brush just at the crown to revive the lift. This ‘refresh’ technique avoids the cumulative heat damage of a full second styling session. By treating the blowout as a multi-day asset rather than a single-day event, you reduce the overall frequency of heat exposure, leading to significantly healthier hair over time.
Frequently Asked Questions
How do I know if I am using the right heat setting for my hair type?
A good rule of thumb is the ‘back of the hand’ test. If the air feels uncomfortably hot on the back of your hand, it is likely too hot for your hair, especially if your hair is fine or chemically treated. Fine hair should stay on the lowest heat setting, while medium-textured hair can handle the middle setting. Only those with very thick, healthy, and coarse hair should regularly use the highest heat setting, and even then, only for the initial drying phase.
Can I blow dry my hair every day without damaging it?
While it is possible to blow dry daily, it significantly increases the risk of cumulative thermal damage. If you must dry your hair every day, it is imperative to use a high-quality heat protectant and to keep the dryer at a lower heat setting. Incorporating ‘wash-free’ days using dry shampoo can give your hair a much-needed break from the heat. Additionally, ensure you are using a deep conditioning treatment once a week to replenish the moisture that heat styling strips away.
Why does my hair always get frizzy after I blow dry it?
Frizz is usually caused by one of three things: drying the hair without a concentrator nozzle (which ruffles the cuticle), drying the hair from the ends up toward the roots, or skipping the cool shot. When the cuticle is not sealed flat, moisture from the air enters the hair shaft, causing it to swell and frizz. Ensure you are pointing the airflow downward and finishing each section with cool air to seal the cuticle and lock out humidity.
Is an expensive hair dryer really worth the investment?
In many cases, yes. High-end hair dryers often feature better motor technology (like brushless digital motors) that provides stronger airflow with more consistent heat. They also frequently include advanced ionic technology, which emits negative ions to break down water molecules faster and neutralize static. This results in a faster dry time and less heat exposure for your hair. Cheaper dryers can have ‘hot spots’ where the heating element doesn’t distribute warmth evenly, increasing the risk of localized burning.
What should I do if I’ve already damaged my hair from blow drying?
If your hair is showing signs of heat damage—such as split ends, a ‘straw-like’ texture, or lack of elasticity—the first step is to reduce your use of heat tools. Switch to air drying whenever possible and use a microfiber towel to minimize friction. Incorporate bond-building treatments or protein-rich masks to help repair the internal structure of the hair. Ultimately, the only ‘cure’ for severely split ends is a trim, so regular maintenance at the salon is essential to keep damage from spreading up the hair shaft.
Related posts:
 Blow Drying Hair Without Damage: Expert Tips
 Supermodel Hair Blow-Drying Tips
 Easy Summer Updos for Every Hair Type
 Perfect Curly Hair Routine
 Is the Dyson Supersonic Hair Dryer Worth the Splurge?
 Zoe Kravitz’s Coconut Oil Hair Care Secret
 The Game-Changing Air-Dry Shampoo That’s Taking Over Social Media
 L’Oreal’s No Haircut Cream: Maintain Your Style Between Trims