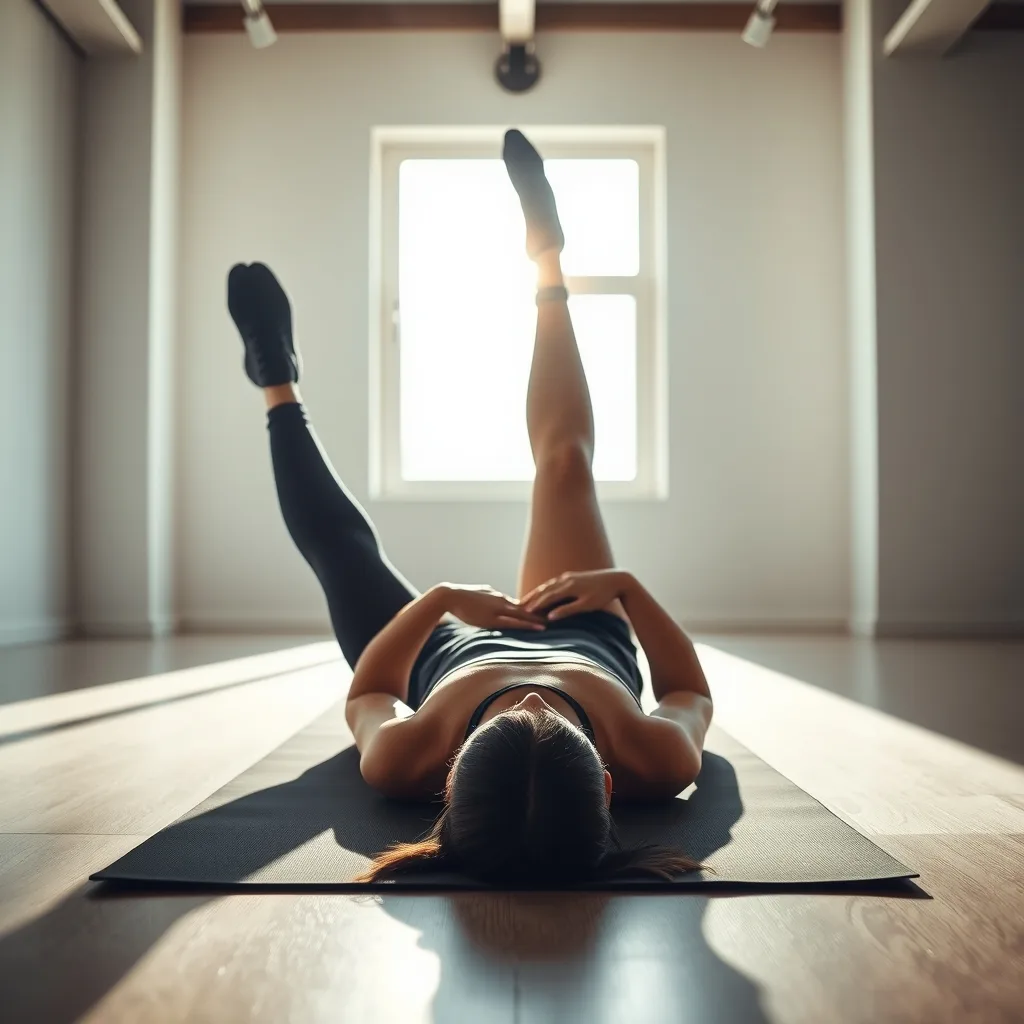
Building a strong, functional midsection does not have to come at the cost of tight or overworked hip flexors. Many popular ab routines — think sit‑ups, leg raises, and bicycles — pull the hip flexors into the movement, which can reinforce poor posture, aggravate lower‑back discomfort, and limit the true engagement of the deeper core muscles. This guide walks you through a complete, hip‑flexor‑free approach to abdominal training, from the science behind the connection to a ready‑to‑use weekly program you can start today.
Key takeaways
- Avoid exercises like sit-ups and leg raises that force hip flexors to dominate abdominal work.
- Maintain a neutral or slightly posterior pelvic tilt to ensure the core muscles, not the hips, provide stability.
- Use controlled movements like dead bugs, planks with shoulder taps, and bird-dogs to maximize core engagement.
- Incorporate diaphragmatic breathing and a 3-second eccentric tempo to increase time under tension safely.
- Perform a simple assessment to identify if your hip flexors are overactive before starting a new core routine.
Why Hip Flexor‑Free Core Work Matters
When the hip flexors dominate a core exercise, the rectus abdominis and transverse abdominis receive less stimulus. Over time this imbalance can lead to an anterior pelvic tilt, reduced hip extension range, and a higher risk of strain during activities like running or squatting. By selecting movements that keep the hips relatively neutral, you encourage the abdominal wall to fire as a stabilizer rather than a hip‑flexor assistant. The result is a more resilient core that supports spinal health, improves force transfer, and feels stronger in everyday tasks such as lifting, twisting, and maintaining upright posture.
Understanding the Hip Flexor–Ab Connection
The primary hip flexors — iliopsoas, rectus femoris, and sartorius — originate on the pelvis and femur and insert near the lumbar spine. When you perform a classic crunch, the torso flexes while the hips stay fixed, but the rectus femoris still shortens to help pull the thigh toward the torso. In leg‑raise variations the hip flexors become the prime movers, lifting the legs while the abs merely stabilize. Recognizing this mechanical overlap lets you choose exercises where the hips stay stationary or move into extension, thereby shifting the workload onto the abdominal musculature.
Core Principles for Hip Flexor‑Free Training
- Keep the pelvis in a neutral or slightly posterior tilt throughout each rep.
- Limit hip flexion to less than 30 degrees; avoid pulling the knees toward the chest.
- Emphasize anti‑extension and anti‑rotation patterns that challenge the core to resist movement.
- Use a controlled tempo — typically 3 seconds eccentric, 1 second pause, 2 seconds concentric — to maximize time under tension without momentum.
- Integrate breathing: exhale during the effort phase, inhale on the return, and maintain intra‑abdominal pressure.
Warm‑Up Moves That Spare the Hip Flexors
A brief preparatory sequence readies the spine, glutes, and deep core without recruiting the hip flexors. Perform each move for 30‑45 seconds, moving smoothly from one to the next.
- Cat‑Cow on all fours — mobilizes the thoracic spine and encourages pelvic awareness.
- Glute Bridge with a 2‑second hold at the top — activates the posterior chain while keeping hips in extension.
- Dead Bug (arms only) — keep knees bent at 90 degrees, press lower back into the floor, and move only the arms overhead.
- Side‑lying Clamshell — fires the gluteus medius, improving pelvic stability for subsequent core work.
Top 10 Hip Flexor‑Free Ab Exercises
- Plank with Shoulder Tap — From a high plank, alternately tap the opposite shoulder while resisting hip sway. Keeps hips level and challenges anti‑rotation.
- Forearm Plank Reach — In a forearm plank, extend one arm forward, hold 2 seconds, return. Maintains neutral pelvis.
- Side Plank with Hip Dip — Lower the hip toward the floor then lift, targeting obliques and quadratus lumborum without hip flexion.
- Bird‑Dog — From quadruped, extend opposite arm and leg, hold 3 seconds. Engages transverse abdominis and multifidus.
- Dead Bug Full — Supine, arms overhead, knees at 90 degrees. Lower opposite arm and leg toward floor while pressing low back down.
- Hollow Body Hold (Modified) — Press low back into floor, lift shoulders and legs just a few inches. Keep hip angle open.
- Ab Wheel Rollout (Kneeling) — Roll forward only as far as you can maintain a neutral spine; avoid excessive hip flexion.
- Standing Pallof Press — Anchor a band at chest height, press straight out while resisting rotation. Core works isometrically.
- Reverse Crunch on Bench (Feet Elevated) — Lie on a bench, hips off the edge, knees bent. Curl pelvis toward ribs using lower abs; hip flexors stay relaxed because thighs stay vertical.
- Cable Woodchop (Low to High) — Rotate torso while keeping hips stable; emphasizes oblique power without hip drive.
Programming a Weekly Hip Flexor‑Free Ab Routine
Structure the week with three dedicated core sessions, each lasting 15‑20 minutes, spaced at least 48 hours apart. Pair each session with a full‑body strength day or a mobility flow to maintain balance.
- Session A (Monday) — Plank with Shoulder Tap 3×30 s, Forearm Plank Reach 3×10 reps/side, Bird‑Dog 3×12 reps/side, Pallof Press 3×12 reps/side.
- Session B (Wednesday) — Side Plank with Hip Dip 3×20 s/side, Dead Bug Full 3×10 reps/side, Hollow Body Hold 3×20 s, Cable Woodchop 3×12 reps/side.
- Session C (Friday) — Ab Wheel Rollout 3×8 reps, Reverse Crunch on Bench 3×12 reps, Glute Bridge Hold 3×30 s (as active recovery), Side‑lying Clamshell 2×15 reps/side.
Progress by adding 5‑10 seconds to holds, 2‑3 reps to dynamic moves, or increasing band tension each week. Keep a training log to track quality over quantity.
Progressing Safely Without Overloading the Hip Flexors
Progression should respect the hip‑flexor‑free principle. When an exercise begins to feel like the hips are pulling, regress the range of motion or switch to a more stable variation. For example, move from a full ab‑wheel rollout to a kneeling rollout with a shorter roll distance. Incorporate unilateral work — single‑arm plank reaches or single‑leg bird‑dog — to expose asymmetries without adding hip flexion. Schedule a deload week every 4‑6 weeks: reduce volume by 30 % and focus on breathing drills and mobility.
Common Mistakes and How to Fix Them
- Arching the low back — Indicates loss of core tension. Reset by pressing the low back into the floor or engaging the glutes.
- Rushing reps — Momentum shifts load to hip flexors. Slow the tempo and pause at the hardest point.
- Allowing hips to sag in planks — Use a mirror or video feedback; drop to knees if needed.
- Neglecting breath — Holding breath spikes intra‑abdominal pressure unevenly. Practice diaphragmatic breathing during each set.
- Skipping warm‑up — Cold muscles recruit compensators. Always complete the warm‑up sequence.
Assessing Hip Flexor Dominance and Core Function
Before adding volume it is useful to know whether the hip flexors are truly taking over during core work. A simple three‑test battery can be performed in a single session and requires only a mat and a stopwatch.
- Thomas Test – Sit on the edge of a table, pull one knee to the chest and roll back. Observe the opposite thigh; if it lifts off the table the hip flexors on that side are short or overactive.
- Prone Hip Extension Hold – Lie face down, engage glutes and lift one leg a few centimeters while keeping the pelvis pinned. Hold for 30 seconds. Inability to maintain a neutral pelvis suggests the hip flexors are pulling the lumbar spine into extension.
- Supine Leg Lowering with Pressure Feedback – Place a blood pressure cuff or a folded towel under the low back at L4‑L5. Lower one straight leg from 90 degrees toward the floor while maintaining constant pressure on the cuff. A drop in pressure indicates loss of anterior core control and compensatory hip flexor recruitment.
Record the results and grade each test on a three‑point scale: 0 = no compensation, 1 = mild compensation, 2 = significant compensation. Athletes scoring 2 on two or more tests should prioritize hip‑flexor‑free drills for at least four weeks before re‑testing.
Edge case: individuals with a history of femoral nerve irritation may experience anterior thigh tingling during the Thomas Test. In that scenario replace the test with a seated knee‑to‑chest stretch held for 20 seconds and note any symptom reproduction.
Video analysis of a standard plank can reveal subtle hip flexion that is not felt. Record a 30‑second plank from the side and use a free angle‑measurement app to track the thigh‑to‑torso angle. An increase greater than 10 degrees from the start position flags hidden hip flexor drive.
Pressure biofeedback units (e.g., a Stabilizer) give a numeric readout of lumbar displacement. Set the target pressure at 40 mmHg and perform a dead‑bug variation; a drop below 30 mmHg signals loss of deep core stiffness and a shift toward hip flexor assistance.
Re‑testing every three to four weeks provides objective data for programming decisions and helps avoid the common trap of adding load while the hip flexors remain dominant.
Advanced Progressions and Load Management
Progressive overload for hip‑flexor‑free core work follows the same principles as any strength quality but the lever arms and stability demands are the primary variables. Start by mastering a static hold with a neutral pelvis for 45 seconds before adding any dynamic component.
- Lever Length – Extend the arms farther forward in a plank reach or increase the distance of the feet from the hands in a rollout. Each 5‑centimeter increase adds roughly 10 percent more torque on the anterior core without recruiting the hip flexors.
- Tempo Manipulation – Use a 4‑second eccentric, 2‑second pause, 1‑second concentric cadence for rollouts and dead‑bug variations. The prolonged eccentric phase forces the transverse abdominis to resist extension while the hip flexors stay lengthened.
- External Load – Place a light sandbag (2‑4 kg) across the upper back during a forearm plank or a weighted vest (5‑10 kg) during a standing Pallof press. The added mass raises intra‑abdominal pressure demand without changing hip angle.
- Unilateral Challenge – Perform a single‑arm plank reach or a single‑leg bird‑dog. The anti‑rotation demand doubles while the hip on the moving side stays in neutral, exposing asymmetries that bilateral work masks.
- Variable Resistance – Attach a light band to the wrist during a plank reach so tension rises as the arm extends. The progressive resistance mimics the force curve of a rollout but keeps the hips fixed.
Periodize these variables in four‑week blocks. Week 1‑2 focus on lever length and tempo; week 3 adds external load; week 4 introduces unilateral and variable resistance. Deload in week 5 by returning to baseline holds and reducing volume by 30 percent.
Monitoring fatigue is critical. If the low back begins to arch or the athlete reports a pulling sensation in the anterior hip, regress the lever length by one step and add an extra 10‑second rest between sets. This auto‑regulation keeps the stimulus on the abdominal wall.
Integrating Hip Flexor‑Free Core Work into Strength and Conditioning Programs
Core training should not exist in isolation; it works best when woven into the main session flow. A practical model places a brief activation circuit before heavy lifts, a targeted anti‑extension set between compound movements, and a conditioning finisher that challenges rotational stability.
- Pre‑Lift Activation – Two rounds of 15‑second forearm plank reach, 10‑second side plank hip dip each side, and 8‑rep standing Pallof press. This primes the deep core and establishes a neutral pelvis before squats or deadlifts.
- Intra‑Set Core – After each set of a primary lift (e.g., bench press) perform a 20‑second hollow body hold with knees bent at 90 degrees. The short duration maintains intra‑abdominal pressure without fatiguing the prime movers.
- Post‑Lift Conditioning – A 5‑minute circuit of 30‑second bird‑dog, 30‑second reverse crunch on bench, 30‑second cable woodchop each side, repeated twice. The metabolic demand improves work capacity while reinforcing hip‑flexor‑free patterns.
For Olympic‑lifting athletes, schedule a dedicated core day 48 hours after the heaviest snatch or clean session. The day includes loaded carries (farmer’s walk 30 m, suitcase carry 30 m each side) which demand anti‑lateral flexion without hip flexion.
Sprint‑oriented athletes benefit from a plyometric core block: 3 × 10‑meter resisted sprint with a sled (10 % bodyweight) followed immediately by 6 × 5‑second maximal effort plank with shoulder tap. The contrast trains rapid force transfer from a stable trunk.
Daily undulating periodization can rotate the emphasis: Monday anti‑extension, Wednesday anti‑rotation, Friday anti‑lateral flexion. This variety prevents overuse of any single pattern and aligns with the multidirectional demands of sport.
Special Populations: Pregnancy, Post‑Rehab, and Aging Athletes
Modifications preserve the hip‑flexor‑free principle while respecting physiological constraints.
- Pregnancy (second and third trimester) – Avoid supine positions after 20 weeks. Replace planks with inclined forearm planks on a bench (30‑45 degrees) and use side‑lying clamshells, standing Pallof press, and seated ball squeezes. Keep holds under 20 seconds and prioritize diaphragmatic breathing.
- Post‑Hip Flexor Strain Rehab – Begin with isometric glute bridges (hold 10 seconds, 5 reps) and supine marching with a towel under the low back for pressure feedback. Progress to dead‑bug arms‑only, then full dead‑bug once the athlete can maintain pressure for 30 seconds without pain.
- Older Adults (65 plus) – Reduce lever arms: use knee‑supported plank, seated torso rotations with a light band, and standing anti‑rotation press at waist height. Emphasize balance by adding a narrow‑stance component to the Pallof press.
- Youth Athletes (12‑16) – Gamify the drills: plank tag (tap a partner’s shoulder while holding plank), bird‑dog relay, and medicine‑ball rainbow passes. Keep sessions under 10 minutes, focus on motor control, and avoid external loading.
For each group, screen with the assessment battery from the first section before prescribing volume. Adjust intensity by 20‑30 percent lower than the standard protocol and increase rest intervals to 60‑90 seconds.
Equipment‑Based Variations: Suspension Trainer, Medicine Ball, and Band‑Resisted Drills
Adding tools expands the movement library while keeping the hips neutral.
- Suspension Trainer (TRX) – TRX plank with feet in straps forces the core to resist both extension and rotation. Progress to TRX pike (hips rise but stay below 30 degrees flexion) and TRX knee‑tuck with a pause at the top.
- Medicine Ball – Rotational wall throws (2‑4 kg) from a half‑kneeling stance train anti‑rotation power. Keep the hips squared to the wall; the throw originates from the thoracic spine.
- Band‑Resisted Dead Bug – Loop a light band around the feet and hold the ends in each hand. As the opposite arm and leg extend, the band pulls the limbs into flexion, demanding greater anterior core stiffness.
- Cable Anti‑Rotation – Set the cable at chest height, stand side‑on, press the handle straight out while resisting rotation. Vary the stance width to change the moment arm.
- Landmine Rotations – Anchor a barbell in a landmine, hold the end with both hands at hip height, rotate the torso side‑to‑side while the hips stay fixed. This mimics a woodchop but with a fixed axis.
- Kettlebell Windmill – Light kettlebell (8‑12 kg) held overhead, hinge at the hips with a slight knee bend, reach the free hand toward the opposite foot. The hip stays in extension; the core resists lateral flexion.
When introducing a new tool, spend the first two sessions on static holds (e.g., TRX plank 3 × 20 seconds) before adding dynamic reps. This builds confidence and ensures the hip flexors remain inactive.
Monitoring Recovery, Fatigue, and Adaptation: Metrics and Auto‑Regulation
Objective and subjective markers guide weekly adjustments and prevent hidden hip flexor overload.
- Rate of Perceived Exertion (RPE) – After each core set, ask the athlete to rate difficulty on a 1‑10 scale. Target 6‑7 for strength‑focused holds, 5‑6 for endurance circuits. A jump of two points week‑to‑week signals accumulated fatigue.
- Heart Rate Variability (HRV) – Morning HRV trends (7‑day rolling average) correlate with autonomic readiness. A drop >10 ms from baseline suggests reducing core volume by 20 percent for that day.
- Core Endurance Test – Maximal front plank hold (neutral pelvis) performed monthly. An increase of 15 seconds indicates positive adaptation; a decrease >10 seconds flags overtraining or hip flexor compensation.
- Repeated Sprint Ability – 6 × 30‑meter sprints with 30‑second rest. Compare the percent decrement pre‑ and post‑core block. A larger decrement after core work may indicate insufficient recovery.
- Subjective Soreness Log – Daily 0‑10 scale for anterior hip, low back, and abdominal region. Persistent hip score >3 for two consecutive days triggers a deload week.
Auto‑regulation algorithm: if any two of the five markers exceed their thresholds on the same day, cut the next core session volume by 30 percent and add an extra mobility flow (cat‑cow, glute bridge, thoracic rotations). Re‑evaluate after 48 hours.
Long‑term tracking in a simple spreadsheet (date, exercise, sets, reps, hold time, RPE, HRV, plank max) reveals patterns such as seasonal dips or response to travel. Use the data to schedule a planned deload every 5‑6 weeks regardless of markers, ensuring structural recovery of the abdominal fascia and hip capsule.
Frequently Asked Questions
Can I still do traditional sit‑ups if I have tight hip flexors?
Traditional sit‑ups heavily recruit the hip flexors, especially the rectus femoris. If tightness or discomfort is present, replace them with the hip‑flexor‑free options listed above until mobility improves.
How do I know my hip flexors are overactive during core work?
Signs include a pulling sensation in the front of the hip, the low back lifting off the floor, or the thighs moving toward the chest unintentionally. Video analysis or a qualified coach can confirm.
Is it safe to train abs every day with these movements?
Daily low‑intensity core work such as breathing drills or short planks is generally safe, but the structured sessions above should be limited to three times per week to allow recovery and adaptation.
What if I feel lower‑back pain during a plank variation?
First, check pelvis alignment — tuck the tailbone slightly and engage glutes. Reduce hold time, drop to knees, or switch to a forearm plank with a wider base. Persistent pain warrants professional evaluation.
Can these exercises improve athletic performance?
A core that stabilizes without relying on hip flexion enhances force transfer in sprinting, jumping, and rotational sports. Consistent practice builds the stiffness and timing needed for high‑level movement.
Related posts:
 7 Best Hip Flexor Stretches
 Here’s exactly how to start planking if you’ve never tried it before
 Managing Hip Pain from Sitting
 The Panther Plank: Your New Favorite Full-Body Workout Move
 5-Minute Plank Challenge
 Understanding Gym Equipment
 Rep Reality Check: How Many is Actually Enough for Results
 The Matching Workout Sets That Will Make You Actually Want to Exercise