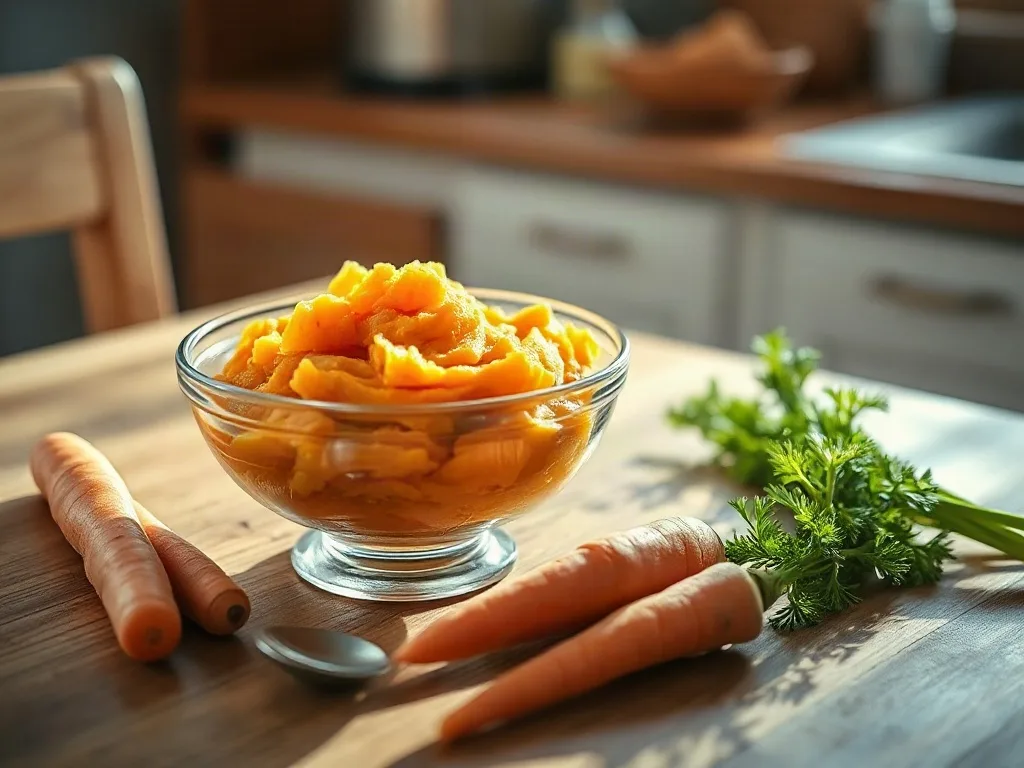
Introducing solid foods is a milestone that brings excitement and a few questions for any parent. Homemade baby food offers control over ingredients, texture, and flavor while fostering a deeper connection with your child’s nutrition. This guide walks you through the why, the what, and the how—covering safety basics, essential equipment, starter recipes, storage solutions, and practical tips for expanding your baby’s palate from the first puree to confident finger‑food exploration.
Key takeaways
- Prioritize nutrient retention by steaming or baking ingredients rather than boiling them to preserve essential vitamins.
- Implement a three-day wait period when introducing new ingredients to effectively monitor for potential allergic reactions.
- Use ice cube trays to batch-cook and freeze single-serving portions for convenient, long-term meal storage.
- Enhance iron absorption in plant-based meals by pairing iron-rich foods with ingredients high in vitamin C.
- Ensure safety by cooking proteins to 165°F and avoiding raw honey, which carries a risk of botulism for infants.
Why Choose Homemade Baby Food?
Choosing to make baby food at home isn’t just a trend; it’s a practical decision rooted in three core benefits:
- Ingredient Transparency: You decide which fruits, vegetables, grains, and proteins go into each batch, eliminating hidden sugars, excessive sodium, and unwanted additives that can appear in commercial jars.
- Nutrient Retention: When you steam or bake foods briefly and puree them immediately, you preserve more vitamins (especially water‑soluble ones like vitamin C and B‑complex) compared to many store‑bought options that undergo high‑heat processing.
- Cost‑Effectiveness: Fresh produce purchased in season often costs less per serving than pre‑packaged baby meals, and you can batch‑cook to stretch ingredients further.
Beyond these practical points, homemade meals allow you to tailor textures and flavors to your baby’s developmental stage, encouraging acceptance of new foods and supporting oral‑motor skill development.
Essential Equipment and Safety Basics
Before you start chopping, a small set of reliable tools will keep the process safe and efficient. Here’s what you’ll need:
- Steamer Basket or Microwave‑Safe Steamer: Gentle steaming retains nutrients better than boiling.
- Food Processor or Blender: A high‑speed model creates smooth purees; a hand‑held immersion blender works well for smaller batches.
- Fine‑Mesh Sieve (optional): For ultra‑smooth textures during the first few weeks.
- Ice Cube Trays or Silicone Portion Molds: Ideal for freezing single‑serving portions.
- Storage Containers: BPA‑free plastic containers or glass jars with airtight lids.
- Thermometer: Ensures cooked foods reach at least 165°F (74°C) to kill potential pathogens.
Safety steps to embed into every preparation:
- Wash hands thoroughly with soap for at least 20 seconds before handling food.
- Rinse all produce under running water; use a produce brush for firm items like carrots or potatoes.
- Sanitize all equipment by washing in hot, soapy water or running through a dishwasher.
- Cook foods to the recommended internal temperature and cool them quickly (within two hours) to avoid bacterial growth.
- Label each container with the date and contents; use the “first‑in, first‑out” rule.
Selecting Fresh, Nutrient‑Rich Ingredients
Seasonality is your ally. Fresh, in‑season produce not only tastes better but also contains higher levels of vitamins and antioxidants. Below is a quick reference for each season in the Northern Hemisphere:
| Season | Fruits | Vegetables |
|---|---|---|
| Spring | Peaches, apricots, cherries | Asparagus, peas, spinach |
| Summer | Mango, watermelon, berries | Zucchini, sweet corn, tomatoes |
| Fall | Apples, pears, pomegranate | Butternut squash, carrots, broccoli |
| Winter | Oranges, clementines, kiwi | Sweet potatoes, parsnips, kale |
When selecting protein sources, opt for organic, hormone‑free chicken, turkey, or beef, and consider adding legumes like lentils or chickpeas for plant‑based protein. Always check for bruises, soft spots, or mold before purchasing.
Core Recipes for the First Six Months
During the initial three to six months, the focus is on single‑ingredient purees with a smooth texture. Below are five foundational recipes, each yielding about 8‑10 servings.
1. Sweet Potato Puree
- Ingredients: 1 large sweet potato (about 300 g), water.
- Method: Peel and cube the sweet potato. Steam until fork‑tender (≈10 minutes). Transfer to a blender, add a splash of the steaming water, and blend until completely smooth. Cool to room temperature before serving.
- Nutrition Highlight: Rich in beta‑carotene (vitamin A) and fiber, supporting vision and digestive health.
2. Pear & Apple Blend
- Ingredients: 1 ripe pear, 1 small apple, water.
- Method: Peel, core, and dice both fruits. Steam together for 5‑7 minutes. Puree with a little steaming water until velvety. This blend offers a gentle introduction to fruit sweetness.
- Nutrition Highlight: Provides vitamin C and soluble fiber, which can help regulate bowel movements.
3. Carrot‑Pea Mash
- Ingredients: ½ cup frozen peas, ½ cup carrot slices, water.
- Method: Steam carrots and peas together for 6‑8 minutes. Blend with a tablespoon of water until smooth. This combo introduces a mild earthy flavor while delivering iron and folate.
4. Avocado & Banana Cream
- Ingredients: ½ ripe avocado, ½ ripe banana.
- Method: No cooking required. Mash both fruits together with a fork until a creamy consistency is achieved. Serve immediately to preserve the delicate fats.
- Nutrition Highlight: Healthy monounsaturated fats from avocado support brain development.
5. Chicken & Sweet Corn Puree
- Ingredients: 2 oz cooked chicken breast, ¼ cup sweet corn kernels, water.
- Method: Steam chicken until fully cooked (165°F/74°C). Simultaneously steam corn for 4‑5 minutes. Blend together with a small amount of water or low‑sodium chicken broth until smooth. This introduces a mild protein source.
Always introduce one new ingredient at a time and wait three to five days before adding another, watching for any signs of allergy such as rash, swelling, or unusual fussiness.
Expanding Flavors and Textures from 6‑12 Months
Between six and twelve months, babies develop stronger chewing skills and a curiosity for new flavors. Transitioning from purees to thicker mash and soft finger foods encourages oral‑motor development and independence at the table.
Introducing Mild Spices
Gentle spices like cinnamon, mild paprika, or fresh herbs (basil, parsley) can be added in tiny amounts once your baby tolerates basic foods. For example, a pinch of cinnamon in an apple‑sweet potato puree adds warmth without overwhelming the palate.
Texture Progression
- Stage 1 (6‑7 months): Slightly thicker purees with a few soft lumps.
- Stage 2 (8‑9 months): Soft mash that can be picked up with a spoon.
- Stage 3 (10‑12 months): Small, bite‑size pieces (e.g., steamed broccoli florets, soft‑cooked pasta shapes).
Sample Finger‑Food Recipes
- Mini Veggie Patties: Blend cooked carrots, peas, and a tablespoon of oats. Form tiny patties, lightly pan‑fry in a non‑stick skillet with a drizzle of olive oil until golden.
- Fruit‑Infused Oatmeal Bites: Mix rolled oats, mashed banana, and a splash of breast milk or formula. Spoon onto a silicone tray and freeze; serve thawed as a cool, chewable snack.
- Soft‑Cooked Pasta Stars: Cook small pasta shapes until very soft, toss with a drizzle of homemade tomato‑carrot sauce (blend cooked tomatoes, carrots, and a pinch of oregano).
Always supervise your baby during finger‑food meals and ensure pieces are appropriately sized to avoid choking hazards.
Batch Cooking, Storing, and Freezing Tips
Efficiency matters for busy parents. Planning ahead saves time while keeping nutrition intact.
Batch‑Cook Strategy
- Pick a day (often weekend) to steam or bake a variety of vegetables and proteins.
- Cool each component on a clean tray; then portion into ice‑cube trays (each cube ≈ 1 oz).
- Freeze until solid, then transfer cubes to labeled freezer bags.
This method allows you to mix and match flavors on the fly—e.g., two cubes of carrot + one cube of chicken for a balanced meal.
Refrigeration Guidelines
- Purees stored in the refrigerator should be used within 48 hours.
- Keep containers tightly sealed and place them on the middle shelf (not the door) where temperature is most stable.
Freezing Best Practices
- Label each bag with date and contents; use a “use‑by” window of 3 months for optimal flavor.
- When reheating, thaw in the refrigerator overnight or use a microwave on low power, stirring frequently to avoid hot spots.
- Never refreeze a batch that has already been thawed.
Portion‑Size Guidance
A typical serving for a 6‑month‑old is about 2‑3 tablespoons; by 12 months, it grows to ½‑¾ cup. Adjust portion sizes based on your baby’s appetite cues rather than a strict schedule.
Reading Labels and Avoiding Common Pitfalls
Even when you buy ingredients like canned beans or pre‑cut fruit, it’s essential to scrutinize labels.
- No Added Salt or Sugar: Babies’ kidneys are still developing; excess sodium can be harmful.
- Avoid Preservatives: Look for “no added preservatives” or “no artificial colors.”
- Check for BPA: Choose glass jars or BPA‑free containers for storage.
- Allergen Awareness: If you plan to introduce common allergens (peanut butter, egg, dairy), follow pediatric guidelines and introduce them one at a time, monitoring for reactions.
Common mistakes to sidestep:
- Using raw honey before 12 months (risk of botulism).
- Adding too much water or breast milk to thin purees, which reduces nutrient density.
- Storing homemade foods at room temperature for longer than two hours.
- Reusing the same spoon without washing, which can introduce bacteria.
Involving Your Baby in the Feeding Journey
Feeding is more than nutrition; it’s an early social experience.
- Family Meals: Sit your baby at the table (in a high‑chair) while the family eats. Mimicking adult eating patterns encourages acceptance of varied foods.
- Self‑Feeding Tools: Offer soft‑grip spoons and age‑appropriate silicone “pincer” toys around 9‑10 months to develop fine‑motor skills.
- Positive Language: Use enthusiastic words like “yummy” and “delicious” to create a pleasant association.
- Routine: Consistent mealtime schedules help regulate hunger cues and make the transition smoother.
Remember, every baby progresses at their own pace. Patience, observation, and a willingness to experiment will make the homemade feeding journey rewarding for both parent and child.
Building a Balanced Baby Meal Plan
Even though babies have small stomachs, they need a surprisingly wide spectrum of nutrients to support rapid brain growth, bone development, and immune maturation. A systematic meal‑plan approach helps you hit the right macro‑ and micronutrient targets without relying on guesswork.
Macro‑nutrient ratios by age
- 6‑8 months: 50‑55% carbohydrates, 30‑35% fats, 10‑15% protein. Fat is especially critical because DHA (docosahexaenoic acid) – the omega‑3 fatty acid linked to visual and cognitive development – is concentrated in breast milk and fortified formulas.
- 9‑12 months: 45‑50% carbs, 35‑40% fats, 15‑20% protein. As the infant begins to chew, lean meats, beans, and dairy become reliable protein sources.
Use a simple spreadsheet to log the grams of each macronutrient per serving. For example, a 2‑oz chicken‑sweet‑corn puree provides roughly 6 g protein, 8 g carbohydrate, and 2 g fat. When you combine it with a 1‑oz avocado‑banana mash (≈5 g fat, 4 g carb), you achieve a balanced macro profile for a single meal.
Key micronutrients and how to hit them
| Micronutrient | Why It Matters | Top Homemade Sources |
|---|---|---|
| Iron | Supports hemoglobin formation and cognitive function. | Lentil‑carrot puree, beef‑sweet‑potato mash, fortified oatmeal. |
| Calcium | Builds strong bones and teeth. | Full‑fat yogurt (if dairy‑tolerant), tofu‑banana blend, salmon with bone broth. |
| Vitamin C | Enhances iron absorption, antioxidant protection. | Pureed peas‑apple, orange‑sweet‑potato blend. |
| Vitamin D | Works with calcium for bone mineralization. | Fortified formula or a few drops of vitamin D supplement as recommended by pediatrician. |
| DHA | Critical for brain and retina development. | Pureed salmon, sardine‑potato mash, DHA‑fortified egg yolk. |
Pair iron‑rich foods with a vitamin C source in the same meal to maximize absorption – a classic example is a lentil‑spinach puree with a splash of orange juice.
Sample weekly schedule (12‑month‑ready)
- Monday: Breakfast – oatmeal with mashed banana and a drizzle of flaxseed oil; Lunch – chicken‑sweet‑corn puree; Dinner – roasted carrot‑parsnip mash with a pinch of mild cumin.
- Tuesday: Breakfast – Greek yogurt (full‑fat) mixed with pureed peach; Lunch – quinoa‑black‑bean mash; Dinner – salmon‑sweet‑potato puree with a squeeze of lemon.
- Wednesday: Breakfast – avocado‑toast‑style soft whole‑grain bread strips; Lunch – turkey‑butternut‑squash puree; Dinner – soft‑cooked pasta stars with homemade tomato‑basil sauce.
- Thursday: Breakfast – millet porridge with pureed pear; Lunch – lentil‑carrot puree; Dinner – mild chickpea‑spinach curry (no added salt) served over soft rice.
- Friday: Breakfast – scrambled egg yolk with finely diced spinach; Lunch – beef‑broccoli mash; Dinner – fruit‑infused oatmeal bites (leftover from Friday snack).
- Saturday: Breakfast – banana‑coconut‑millet blend; Lunch – tofu‑sweet‑potato cubes (soft‑steamed); Dinner – roasted cauliflower‑apple puree.
- Sunday: Breakfast – pumpkin‑rice porridge; Lunch – mixed‑vegetable finger‑food platter; Dinner – leftover‑free‑style “clean‑out‑the‑fridge” puree using any remaining veggies and a protein.
Adjust portion sizes based on your baby’s hunger cues – the guideline of 2‑3 tablespoons per meal at six months gradually expands to ½‑¾ cup by twelve months.
Tailoring Homemade Foods for Specific Dietary Needs
Every family has its own set of health considerations, cultural preferences, or ethical choices. The beauty of cooking from scratch is that you can adapt each recipe without compromising nutrition.
Vegetarian and Vegan Options
Protein can be sourced from legumes, tofu, tempeh, and dairy (if tolerated). A reliable vegan iron‑boosting combo is a lentil‑sweet‑potato puree with a teaspoon of black‑strap molasses (rich in iron) and a splash of orange juice for vitamin C. For calcium, blend soft tofu with banana and a pinch of calcium‑fortified plant milk. Remember to include a DHA supplement derived from algae if you exclude fish.
Allergy‑Friendly Strategies
When introducing common allergens such as peanuts, eggs, or dairy, follow the “single‑ingredient, 3‑day wait” rule. Prepare a separate batch of each allergen‑free puree in a dedicated pot or blender to avoid cross‑contamination. For nut‑allergy families, seed‑based spreads (e.g., sunflower seed butter) can provide a similar texture and healthy fats without the risk.
Reflux‑Sensitive Babies
Some infants experience gastro‑esophageal reflux when meals are too thick or acidic. Opt for low‑acid purees like carrot‑parsnip, sweet‑potato‑banana, or oatmeal‑apple. Avoid adding citrus or tomato‑based sauces until the baby’s digestive system matures. Offer smaller, more frequent meals and keep the baby upright for 20‑30 minutes after feeding.
Low‑Sodium, Low‑Sugar Approaches
Commercial baby foods often contain hidden sodium and sugars. When cooking at home, omit added salt entirely – the kidneys of infants cannot handle excess sodium. For sweetness, rely on naturally sweet fruits (e.g., ripe mango, pear) rather than sugar or honey (which is contraindicated before 12 months). If a recipe feels bland, a pinch of cinnamon or a drizzle of pureed fruit can enhance flavor without extra sodium.
Special Medical Conditions
Babies with metabolic disorders (e.g., phenylketonuria) require strict protein monitoring. In such cases, a pediatric dietitian can help you formulate a low‑phenylalanine puree using rice‑based cereals, low‑protein fruits, and specially measured amino‑acid formulas. The same principle applies to premature infants who may need higher caloric density – blend in a teaspoon of olive oil or avocado to boost calories without increasing volume.
Advanced Cooking Methods and Flavor Development
Beyond steaming and microwaving, a handful of techniques can unlock deeper flavors, improve texture, and reduce cooking time, all while preserving nutrients.
Roasting for Natural Sweetness
Roasting vegetables at 375°F (190°C) for 20‑30 minutes caramelizes their natural sugars, creating a richer taste that many babies love. Try roasting a mix of carrots, parsnips, and a drizzle of olive oil, then pureeing with a splash of the roasting broth. The resulting puree is smoother than a steamed version and introduces subtle smoky notes.
Grilling and Char‑Seared Proteins
Thinly sliced chicken breast or firm tofu can be lightly grilled on a non‑stick pan, then diced into bite‑size pieces. The Maillard reaction adds a savory depth that pureed foods lack. After grilling, de‑glaze the pan with low‑sodium vegetable broth and blend the liquid into the final mash for extra moisture.
Slow‑Cooker and Pressure‑Cooker Convenience
Both appliances are excellent for hands‑free cooking. A slow‑cooker set on low for 4‑6 hours can turn a tough cut of beef into a melt‑in‑the‑mouth puree with minimal prep. A pressure cooker reduces cooking time for legumes – 10 minutes under pressure yields perfectly soft lentils ready for blending. Remember to vent and cool foods quickly before pureeing.
Layering Spices Safely
Introduce spices gradually, starting with a pinch of cinnamon, nutmeg, or mild paprika. Create a “spice‑starter kit” that includes ground cumin, oregano, and turmeric – each in a tiny airtight container. When adding a new spice, blend it into a familiar puree (e.g., a teaspoon of mild paprika into a carrot‑apple mash) and observe for any adverse reaction over 48 hours.
Example Recipe: Roasted Butternut‑Squash & Apple‑Cinnamon Purée
- Preheat oven to 375°F (190°C). Peel, cube 1 cup butternut squash and 1 cup peeled apple.
- Toss with 1 teaspoon olive oil and a pinch of ground cinnamon.
- Roast on a parchment sheet for 25 minutes, turning once.
- Transfer to a blender, add ¼ cup water (or breast milk) and blend until smooth.
- Cool to room temperature, then portion into silicone molds.
This recipe demonstrates how a single spice can transform a basic vegetable into a palate‑pleasing, nutrient‑dense meal.
Reducing Waste and Using Leftovers Creatively
Homemade baby food can generate excess puree, skins, and stems. Instead of discarding, repurpose these components to stretch your grocery budget and lower environmental impact.
Puree‑Based Smoothies for Older Babies
By 10‑12 months, many babies can handle thin, drinkable textures. Blend leftover carrot‑pea puree with a handful of spinach, a splash of orange juice, and a dollop of plain yogurt to create a nutrient‑dense smoothie. Serve in a sippy cup with a straw to encourage self‑drinking.
Freezer‑Bag “Mix‑And‑Match” System
After batch cooking, separate each ingredient into its own freezer bag (e.g., one bag for roasted sweet potato cubes, another for chicken strips). When a new meal is needed, pull the desired combination, thaw, and blend. This method reduces the need for large single‑ingredient batches that might spoil before use.
Composting Fruit Skins and Vegetable Trimmings
Set up a small kitchen compost bin for peels, cores, and stems. Over time, the compost can be used in a garden to grow the very produce you later puree for your baby – closing the loop on food waste.
Turning Stale Bread into Baby‑Friendly Crumbs
If you have a slice of whole‑grain bread that’s gone a bit hard, toast it lightly, then pulse in a food processor to create fine crumbs. Mix the crumbs with a little breast milk or formula to form a soft “bread‑pudding” that can be served as a finger food.
Leftover Protein Repurposing
Cooked chicken that didn’t make it into a puree can be shredded and mixed with mashed avocado to create a soft, protein‑rich dip. Alternatively, blend leftover fish with a small amount of sweet potato for a quick fish‑potato mash.
Batch‑Freezing Tips for Waste Reduction
- Label each freezer bag with a color‑coded system (e.g., green for vegetables, red for proteins) to locate items quickly and avoid duplicate cooking.
- Freeze in portion sizes that match a single meal – typically 1‑oz cubes – to prevent thawing more than needed.
- Rotate stock using the “first‑in, first‑out” method, writing the date in a bold, legible font.
Sensory Exploration and Feeding Techniques
Feeding is a multisensory experience. By deliberately playing with color, texture, and aroma, you can encourage acceptance of new foods and support fine‑motor development.
Color Contrast for Visual Stimulation
Babies are drawn to bright, contrasting colors. Pair a deep‑orange sweet‑potato puree with a vivid green pea mash on the same plate. The visual separation helps the child differentiate foods and may reduce neophobia (fear of new foods).
Texture Ladder – From Smooth to Chunky
- Stage 1 (4‑6 months): Ultra‑smooth purees, optionally strained through a fine mesh.
- Stage 2 (6‑8 months): Introduce tiny, soft lumps – think mashed banana with a few pea pieces.
- Stage 3 (9‑12 months): Soft‑cooked vegetable sticks, shredded cheese, or tiny meatballs that can be picked up.
Transition slowly; if a baby rejects a new texture, revert to the previous stage for a few meals before trying again.
Flavor Pairing Principles
Combine foods that share a natural flavor bridge. For instance, apple pairs well with carrots because both have a subtle sweetness, while mild cheese complements steamed broccoli by softening its bitter edge. Use a “flavor‑pairing chart” to brainstorm new combos without overwhelming the palate.
Responsive Feeding Cues
Watch for signs of readiness: turning the head toward the spoon, opening the mouth, or reaching for food. Likewise, recognize satiety signals – turning the head away, closing the mouth, or losing interest. Responding promptly builds trust and encourages self‑regulation of intake.
Creating a Calm Mealtime Environment
- Limit distractions – turn off the TV and put away toys.
- Maintain a consistent seating arrangement; a high‑chair with a tray that’s always at the same height helps the baby anticipate the routine.
- Use soft background music (classical or nature sounds) to soothe but not overstimulate.
These subtle environmental tweaks can make the difference between a frantic feeding session and a relaxed exploration.
Leveraging Technology and Organization Tools
Modern apps and simple digital tools can streamline the entire homemade‑baby‑food workflow, from planning to inventory management.
Meal‑Planning Apps
Apps such as “Baby Meal Planner” or “Plan to Plate” let you input dietary restrictions, preferred textures, and weekly goals. The app then generates a shopping list, automatically grouping items by store aisle to save time.
Labeling Systems That Stick
Invest in waterproof freezer labels that can be written on with a permanent marker. Use a color‑coding system: blue for fruits, orange for vegetables, pink for proteins. Include the date, portion size, and a brief note on the cooking method (e.g., “steamed 10 min”).
For tech‑savvy families, a QR‑code label can link to a cloud‑based spreadsheet containing the full recipe and nutrition breakdown.
Vacuum‑Sealing for Extended Freshness
Vacuum sealers remove air, reducing freezer burn and extending shelf life from three to six months for many purees. Pair the seal with a silicone tray to create flat, stackable sheets that thaw quickly.
Digital Inventory Spreadsheet
Create a simple Google Sheet with columns for “Food Type,” “Date Prepared,” “Portion Count,” and “Expiration.” Use conditional formatting to highlight items older than 90 days in red, prompting you to use them first.
Share the sheet with caregivers so everyone knows what’s available and can plan meals accordingly.
Smart Kitchen Gadgets
Consider a Bluetooth‑enabled thermometer that sends temperature alerts to your phone, ensuring foods reach the safe 165°F threshold without guesswork. Some high‑speed blenders also have preset “baby puree” programs that automatically adjust speed and time for optimal texture.
By integrating these tools into your routine, you free up mental bandwidth for the more rewarding aspects of feeding – tasting, bonding, and watching your little one thrive.
Frequently Asked Questions
- 1. How long can I keep homemade baby food in the refrigerator?
- Store purees in airtight containers for up to 48 hours. If you notice any off‑smell, discoloration, or mold, discard the batch immediately.
- 2. When is it safe to introduce common allergens like peanut butter?
- Current pediatric guidelines suggest introducing peanuts, eggs, dairy, and wheat after the baby has tolerated several other foods (usually around 6‑9 months). Offer a very thin spread (e.g., ¼ teaspoon mixed with water or breast milk) and watch for any reaction for 48 hours. Consult your pediatrician if there is a family history of severe allergies.
- 3. Can I use a regular blender for purees, or do I need a special baby‑food processor?
- A high‑speed blender works well for most purees, especially when you add a little cooking liquid. For ultra‑smooth textures needed in the first weeks, a fine‑mesh sieve after blending can remove any remaining fibers.
- 4. How do I know if my baby is getting enough iron from homemade foods?
- Iron‑rich foods such as pureed meats, lentils, and iron‑fortified cereals should be part of meals after 6 months. Pair these with a source of vitamin C (e.g., a few drops of orange juice) to enhance absorption. If you have concerns about iron status, discuss a blood test with your pediatrician.
- 5. Is it okay to reuse leftover puree from a previous meal?
- Only if the leftover has been refrigerated promptly and is reheated to a safe temperature (165°F/74°C). However, it’s best to prepare fresh portions whenever possible to maintain optimal nutrient levels and reduce the risk of bacterial growth.
Related posts:
 NYC’s Healthiest Meal Delivery Services That Actually Taste Amazing
 Vegetable-Rich Dinner Ideas
 15-Minute Dairy-Free Dinner Ideas
 Delicious White Bean Sandwich Recipe
 Surprising Sweet Potato Dishes
 Delicious Ground Chicken Recipes
 High-Protein Foods That Pack a Serious Nutritional Punch
 Delicata Squash Masterpiece