
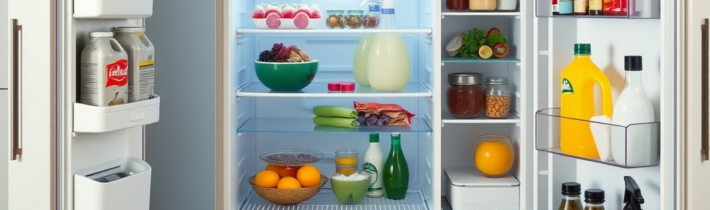
Your refrigerator works hard to keep your food safe, but when was the last time you actually cleaned it? Most people treat their fridge as a set-it-and-forget-it appliance, emptying expired items only when they become obviously unusable. The reality is far less appetizing. Your fridge is home to bacteria, spills, and cross-contamination risks that require a thoughtful cleaning schedule to maintain food safety and prevent foodborne illness.
Understanding how often to clean your fridge isn’t just about aesthetics—it’s about protecting your family’s health and extending the life of your food. This guide explores the science behind fridge cleanliness, practical cleaning schedules, and evidence-based strategies to keep your refrigerator hygienic without obsessive overhaul.
Why Fridge Cleanliness Actually Matters
Your refrigerator isn’t sterile, nor should you expect it to be. However, the environment you create inside it directly influences bacterial growth and food safety. Cold temperatures slow bacterial reproduction but don’t eliminate it entirely. When your fridge contains spills, old food particles, and organic matter, you’re creating conditions where bacteria like Listeria and Salmonella can survive and potentially transfer to fresh foods.
A neglected fridge also develops odors from decaying organic matter and mold growth in hidden corners. These aren’t just unpleasant—they’re indicators that your fridge’s interior isn’t as hygienic as you’d hope. Regular cleaning removes the substrate bacteria need to thrive and keeps your appliance functioning at peak efficiency. A clean fridge also helps you see what you actually have, reducing food waste and saving money.
The Science-Based Cleaning Schedule
Food safety experts recommend a tiered approach to fridge cleaning. A light cleaning—wiping up visible spills and removing clearly expired items—should happen weekly. This is the non-negotiable baseline. A more thorough cleaning of shelves, drawers, and interior surfaces should occur every two weeks to monthly, depending on how much you use your fridge and how organized you keep it.
A deep clean involving shelf removal, interior wall wiping, and drawer sanitization typically occurs every three months. This frequency prevents buildup of organic matter, mold, and bacteria that accumulate despite regular light cleanings. If you notice odors, visible spills have aged, or you’re storing raw meat regularly, increase the frequency of deep cleans to monthly. Households with immunocompromised individuals should also follow more aggressive cleaning schedules.
Weekly Light Cleaning and Spill Management
Your weekly fridge check should take less than ten minutes but prevents most contamination issues. Start by scanning the interior for any obvious spills or leaking containers. Wipe these immediately with a cloth dampened with soapy water or a food-safe disinfectant spray. Don’t let spills dry—fresh, wet spills are easier to clean and prevent bacterial biofilm formation.
While you’re checking for spills, remove obviously expired items. Check yogurt dates, deli meat packages, and condiments that have been open longer than recommended. Keep a simple system: move items toward the front as you use them, so older items are always visible. This reduces the chance that forgotten containers will leak or harbor dangerous bacteria. Wipe down the exterior of sticky jars or containers before putting them back, preventing the sticky residue from spreading to your hands or other items.
Bi-Weekly Sanitization of High-Traffic Areas
Every two weeks, dedicate fifteen to twenty minutes to sanitizing the areas where cross-contamination is most likely. These include the shelves where you store raw meat or seafood, the produce drawer, and any areas where you’ve recently placed damp vegetables or herbs. Remove these items and wipe the underlying surfaces with a cloth dampened in a solution of one part white vinegar to one part water, or use a food-safe disinfectant spray rated for kitchen surfaces.
Pay special attention to the door shelves, which experience temperature fluctuations and are prone to bacterial growth. The rubber door seals, which trap food particles and moisture, also need wiping during this stage. These seals can harbor mold and mildew if neglected. Use a damp cloth or an old toothbrush to get into the grooves. If seals look discolored or are visibly moldy, they may need replacement—most hardware stores carry standard refrigerator seal kits.
Monthly Shelf and Drawer Deep Cleaning
Once monthly, give your fridge a more comprehensive cleaning. Remove everything from one or two shelves at a time, so you’re not overwhelmed and food doesn’t warm up excessively. Check expiration dates on all items as you remove them, discarding anything past its date. Wipe down the shelf itself with a cloth and warm soapy water, then dry it completely before replacing items.
Pull out drawers and clean both the drawer and its frame. Produce drawers especially accumulate moisture and small bits of vegetables that encourage mold and bacterial growth. If your drawers are removable, wash them in warm soapy water in the sink. If they’re permanent, use a cloth to wipe inside thoroughly, paying attention to corners and the frame edges where moisture collects. Dry everything before sliding drawers back in.
During this monthly clean, also check the refrigerator’s drain hole at the back or bottom. Food particles and mineral deposits can clog this, causing water to pool. If it’s clogged, use a thin pipe cleaner or turkey baster to gently flush it with water. A blocked drain leads to standing water, which becomes a breeding ground for bacteria and mold.
Quarterly Deep Cleaning and Maintenance
Four times per year, perform a comprehensive deep clean. Remove all items from the fridge and set them temporarily in a cooler with ice or another cold spot. This is your opportunity to clean everything thoroughly without rushing. Wipe down all shelves with warm soapy water, then with a cloth dampened in vinegar solution for sanitization. Clean the interior walls, paying attention to the top and sides where dust settles.
Remove the crisper drawers and the meat drawer if your model has one. Wash them thoroughly in the sink with warm soapy water. While they’re out, clean the frame and tracks underneath them. Check the bottom of the fridge for accumulated water or debris, and clean or flush the drain line if needed.
This is also the time to clean the exterior coils if your fridge has accessible coils at the back or bottom. Dust buildup on coils reduces cooling efficiency and increases energy costs. Unplug the fridge, use a soft brush or vacuum with a brush attachment to remove dust, then plug it back in. Check the rubber door seals carefully; if they’re damaged, deteriorating, or persistently moldy despite cleaning, order replacement seals.
Organizing and Zoning for Food Safety
Cleaning is only half the equation—organization prevents contamination and makes cleaning easier. Establish clear zones in your fridge based on food types and required temperatures. Raw meat should always be on the lowest shelf to prevent drips onto ready-to-eat foods. Store dairy products together in one area, produce in drawers designed for it, and leftovers in clearly labeled, sealed containers.
Use a simple labeling system for leftovers: a piece of masking tape with the date stored. Most properly stored leftovers are safe for three to four days, but visual labeling prevents the guessing game that leads to mysterious old containers lurking in the back. Clear containers make contents visible without requiring constant inspection. Opaque containers hide expired items, increasing the likelihood of foodborne illness.
Addressing Odors and Mold Prevention
If your fridge smells unpleasant despite regular cleaning, the source is likely hidden organic matter or mold growth in areas you’re not reaching. Conduct a targeted search: pull drawers all the way out and check underneath them, inspect the rubber seals for visible mold, and check the drain hole for blockages. Sometimes a smell persists because a small container of forgotten food or juice has leaked behind a drawer.
To prevent mold and odors, ensure your fridge isn’t overstuffed—air circulation prevents moisture buildup. Keep an open box of baking soda on a shelf; it absorbs odors without adding scent. Replace it monthly. If odors persist after cleaning, place crumpled newspaper or activated charcoal in a container inside the fridge overnight to absorb stubborn smells. Never use strong chemical cleaners inside your fridge, as residues can contaminate food—stick to vinegar, baking soda, and food-safe disinfectants.
Addressing Temperature and Equipment
A fridge that isn’t cold enough won’t preserve food properly regardless of how clean it is. Keep your refrigerator at 40°F or below. Most models have a dial or digital control—if you haven’t checked yours in years, now’s the time. Place a refrigerator thermometer on a shelf to monitor actual temperature. If your fridge isn’t staying cold enough, the door seal may be failing, the coils may need cleaning, or the compressor may need service.
Check the door seal by placing a dollar bill half-in and half-out of the closed door. If it pulls out easily without resistance, the seal isn’t tight enough and should be replaced. A failing seal forces your compressor to work harder, increasing energy costs and reducing the fridge’s ability to maintain safe temperatures. Replacing seals is an affordable maintenance task that dramatically improves efficiency.
Special Considerations for Households and Situations
Families with young children should follow more frequent cleaning schedules, as children’s immune systems are still developing. If you have immunocompromised family members due to illness, medication, or age, increase cleaning frequency to weekly deep cleans. The same applies if you regularly store raw meat or seafood, as these carry higher bacterial loads.
If your fridge has been unplugged for moving or maintenance, clean it thoroughly before restocking with food. The same applies after any period of power loss during storms. Extended time without refrigeration allows bacteria to multiply dramatically, so even food that looks fine may be unsafe. When in doubt, discard it.
The Hidden Bacteria That Survives Your Fridge’s Cold
Most people believe refrigeration kills bacteria, but that’s a dangerous misconception. Cold temperatures slow bacterial growth dramatically, but they don’t eliminate pathogens entirely. Listeria monocytogenes, a particularly dangerous bacterium, actually thrives at refrigerator temperatures and can multiply in stored foods over time. Salmonella, E. coli, and Campylobacter also survive cold storage, though more slowly than at room temperature. This means your fridge is essentially a controlled environment where pathogens are dormant, not dead—they’re waiting for the right conditions to multiply.
Cross-contamination in a dirty fridge accelerates this process. When raw meat drips onto a shelf, bacteria colonize that surface. If you then place ready-to-eat foods on that same shelf, even after wiping, microscopic bacterial cells remain and transfer to your food. Studies using ATP bioluminescence testing show that surfaces that appear clean to the human eye often harbor significant bacterial populations. This is why regular cleaning schedules matter more than most people realize—you’re not just removing visible mess, you’re breaking the chain of pathogenic transfer before it reaches your food.
The challenge intensifies with temperature fluctuations. Every time you open your fridge, the internal temperature rises slightly. If your door stays open for extended periods, or if you have a broken door seal, temperature swings can push the interior above safe thresholds. Bacteria multiply faster in these warmer phases, then slow again when the temperature drops. A fridge that cycles between 35°F and 45°F creates mini-windows of accelerated bacterial growth that a consistently cold fridge never experiences. This is why a properly maintained, well-sealed fridge with accurate temperature control is your first defense—and why regular cleaning complements temperature management rather than replacing it.
Biofilms: Why Wiping Alone Isn’t Always Enough
Surface bacteria don’t exist as isolated cells; they form biofilms—complex communities embedded in a protective slime matrix that makes them resistant to cleaning and disinfection. Once a biofilm establishes on a fridge shelf, casual wiping with a damp cloth might remove some bacteria, but the biofilm structure persists and regrows. This is why you can thoroughly clean your fridge, and within days, odors return or discoloration reappears—the biofilm is regenerating.
Biofilms form most readily in areas with consistent moisture and organic matter: around drain holes, in door seal grooves, under crisper drawers, and in corners where condensation collects. The protective matrix makes pathogens up to 1,000 times more resistant to antimicrobial agents than free-floating cells. This explains why simple vinegar solutions work for light cleaning but don’t fully eliminate established biofilms. For effective biofilm removal, you need either stronger disinfection (like diluted bleach solutions used on surfaces not in contact with food) or mechanical action—scrubbing with a brush or cloth using significant pressure.
Understanding biofilm dynamics changes your cleaning approach. During weekly light cleanings, focus on prevention—removing food debris and spills before biofilms establish. During monthly deep cleanings, use scrubbing action rather than just wiping. For areas prone to persistent biofilms, like door seals, consider replacing them if cleaning doesn’t fully eliminate discoloration or odor. If your drain hole repeatedly clogs despite flushing, it likely has a biofilm-based obstruction; using a thin brush and mechanical action works better than water alone. This knowledge also explains why quarterly deep cleaning with full shelf removal is valuable—it allows you to access areas where biofilms hide and establish permanent colonies.
The Produce Drawer Problem and Ethylene Gas Management
Produce drawers create a unique contamination challenge that generic fridge cleaning addresses only partially. These drawers maintain higher humidity to preserve vegetable quality, but humidity also accelerates bacterial growth and mold development. Spoiling produce releases ethylene gas, which accelerates ripening and decay in nearby fruits and vegetables—a chain reaction that turns fresh produce into a bacterial culture medium within days.
Many people focus on cleaning the drawer itself but miss the critical aspect: ethylene management. Produce drawers with separate humidity controls allow you to isolate ethylene-producing items (like apples, bananas, and stone fruits) from ethylene-sensitive produce (like leafy greens, broccoli, and cucumbers). If your drawers lack this feature, use containers or bags to separate these categories. When produce starts visibly decaying—soft spots, mold, or discoloration—remove it immediately, as it pumps ethylene gas into the drawer and contaminates other items.
Cleaning produce drawers requires attention to the frame and tracks, not just the drawer surface itself. Pull the drawer completely out and inspect the frame where it sits. This area collects moisture, condensation, and small particles of decaying produce that drop behind the drawer. These hidden deposits accelerate mold growth and contaminate fresh produce placed on top of them. During your monthly deep clean, use a cloth or old toothbrush to clean the frame thoroughly, paying special attention to corners and where moisture pools. Dry the frame completely before sliding the drawer back in. If you notice persistent mold in the frame despite cleaning, the drawer’s seal may be failing or humidity control may be malfunctioning—both warrant repair or replacement. Some high-end refrigerators have antimicrobial coatings on produce drawer frames; check your manual to see if yours does and whether cleaning instructions differ to preserve this coating.
The Temperature-Cleaning Interaction: Why Both Matter
Fridge temperature and cleanliness work together in ways most people don’t recognize. A fridge running at 45°F instead of the recommended 40°F or below doesn’t just increase bacterial growth rates—it changes which bacteria survive and thrive. Psychrophilic (cold-loving) bacteria like Listeria dominate at proper temperatures, but as temperatures creep upward, mesophilic bacteria that grow faster at moderate temperatures start competing. This shifts the bacterial ecosystem toward more aggressive pathogens that replicate faster and pose greater food safety risks.
When you combine a slightly warm fridge with infrequent cleaning, bacterial populations explode exponentially. A study tracking bacterial load in home refrigerators found that after two weeks without cleaning, bacterial counts on shelves increased by factors of 10 to 100, depending on what foods were stored. The same shelves in a fridge consistently maintained at 38°F and cleaned weekly showed minimal bacterial growth. Temperature and cleaning create a multiplicative effect—each compensates for modest failings in the other, but both are required for true food safety.
This interaction also explains why certain foods become dangerous faster in your fridge than the label suggests. Deli meats labeled safe for seven days assume a fridge at 40°F with minimal bacterial contamination from the refrigerator itself. If your fridge runs warmer or harbors biofilms from infrequent cleaning, those meats may become unsafe within three to four days. The label isn’t wrong—it’s based on ideal conditions that many home refrigerators don’t maintain. Monitoring both your fridge’s actual temperature and maintaining a regular cleaning schedule ensures you’re meeting the conditions those safety labels assume.
Specialty Foods and Their Unique Contamination Risks
Different foods require different storage strategies and cleaning considerations. Raw seafood presents the highest bacterial load of any common refrigerated food. Seafood contains naturally occurring bacteria like Vibrio and Listeria in much higher concentrations than land animals. If seafood drips onto a shelf, the bacterial contamination is severe. During weekly light cleanings, if you’ve stored seafood, prioritize that area for immediate cleaning. Consider storing raw seafood in sealed containers on dedicated shelves or in specialized compartments if your fridge has them. Clean the shelf beneath seafood storage immediately after removing the seafood, not during your regular cleaning schedule.
Soft cheeses and deli products present a different problem: they’re ready-to-eat foods vulnerable to cross-contamination but also prone to mold growth and Listeria colonization if stored too long. Soft cheeses should be stored in sealed containers in a dedicated zone away from raw proteins. Check them during weekly light cleanings—visible mold means the entire container must be discarded, not just the affected portion. Mold on soft cheese indicates Listeria growth throughout, even where mold isn’t visible.
Leftovers present contamination challenges because they’re already cooked (bacteria reduced by heat) but stored in conditions allowing rapid regrowth. Hot or even warm leftovers placed directly in the fridge can raise local temperatures and create condensation that supports bacterial growth. Cool leftovers to room temperature before refrigerating, or refrigerate them briefly at 40°F in a shallow container for faster cooling, then transfer to sealed storage containers. During weekly cleanings, check leftover containers for leaks or signs of spoilage. Leftovers should be marked with storage date and discarded after three to four days regardless of appearance.
Eggs present a unique consideration: salmonella can survive on eggshells and transfer to other foods. Store eggs in their original carton in a dedicated section of the door or a shelf, never in removable egg racks that allow shell contact with other foods. During monthly deep cleaning, wipe the area where eggs are stored even though they’re not exposed. Similarly, butter and margarine sometimes develop mold on the surface despite cold storage. Store them in sealed containers and inspect during weekly cleanings. If mold appears, discard the entire container—it has penetrated throughout the product even if only surface mold is visible.
Cleaning Strategies for Different Refrigerator Types and Designs
Modern refrigerators vary significantly in design, and cleaning strategies must adapt. French-door models with separate compartments and specialized drawers require attention to each zone during deep cleaning. The narrow shelves in some designs make accessing corners difficult, so during quarterly deep cleans, remove everything to access spaces a cloth can’t reach otherwise. Ice dispensers require specific maintenance: if your fridge has an interior ice maker or dispenser, consult your manual for cleaning protocols, as mineral deposits and bacteria can colonize ice production components.
Side-by-side refrigerator/freezer combinations present unique challenges because the freezer section can accumulate frost that, when it melts during defrost cycles, drips into the refrigerator section. Check the drain hole connecting the freezer to the refrigerator compartment during your quarterly deep clean. This drain hole is often the culprit behind standing water in the fridge section. If it’s clogged, water pools and encourages mold growth. Flush it gently with warm water or use a thin pipe cleaner to clear it.
Refrigerators with built-in water dispensers and ice makers require regular maintenance of the water filter and tubing. Bacteria can colonize the water distribution system if the filter isn’t changed according to the manufacturer’s schedule (typically every six months, though this varies). Mineral deposits and biofilms can also develop inside tubing. Some high-end models have antimicrobial interior coatings or self-cleaning features activated via UV light or ionization. Consult your manual to understand your model’s specific features and whether standard cleaning protocols could damage these features. Using inappropriate cleaners on these surfaces might compromise their antimicrobial properties.
For under-counter and built-in refrigerators, airflow and ventilation present challenges. These units require unobstructed airflow around the compressor and coils. During quarterly maintenance, vacuum around the unit’s exterior to ensure dust isn’t restricting airflow. Check that nothing is blocking the rear vent. Poor ventilation forces the compressor to work harder, reducing cooling efficiency and increasing energy costs. For portable and compact refrigerators, cleaning schedules should be shortened slightly—they cool more slowly and experience more temperature fluctuation, so bacteria grow faster. Increase cleaning frequency to bi-weekly deep cleans for these models.
When Your Fridge Is Telling You It’s Sick
Refrigerators communicate problems through specific signs, and recognizing them lets you clean more strategically or seek repairs before food safety is compromised. Condensation pooling on shelves or under drawers indicates the drain hole is clogged or the fridge isn’t maintaining proper humidity balance. Address this immediately during your next cleaning session by checking and flushing the drain. Persistent condensation also indicates the door seal may be failing, allowing warm air infiltration that causes the cooling system to work harder, producing excess moisture.
Frost buildup in the freezer section that creeps into the refrigerator indicates a defrost system malfunction. Ice means water isn’t draining properly, and standing water becomes a bacterial breeding ground. This requires professional service to fix the defrost cycle, but in the interim, during each cleaning, remove excess ice and water from the refrigerator section and dry it thoroughly. Unusual sounds—clicking, humming that varies in intensity, or grinding—indicate compressor problems or fan issues. While waiting for service, maintain impeccable cleanliness to minimize food safety risks during the appliance’s compromised state.
Unpleasant odors that persist despite thorough cleaning and baking soda odor absorption suggest either a serious contamination you’ve missed or a problem with the appliance itself. Check thoroughly for hidden leaks—sometimes a package leaks behind a drawer or inside the vegetable bin frame. If you can’t locate the source, the smell may indicate mold growing inside the walls, coils, or drainage system, which requires professional cleaning or service. Discoloration on interior surfaces that doesn’t respond to vinegar or food-safe disinfectant solutions also suggests internal problems. A fridge that isn’t maintaining temperature (food warming up or freezing despite correct settings) is unsafe for food storage regardless of cleanliness. This requires service or replacement before continuing to use the appliance for food storage.
Frequently Asked Questions
How often should I replace my refrigerator? Most refrigerators last between 10 and 18 years with proper maintenance. If your fridge is still maintaining temperature properly, cooling efficiently, and not making unusual noises, it doesn’t need replacing based on age alone. However, if repairs are exceeding 50 percent of the replacement cost, or if it’s consistently failing to maintain safe temperatures, replacement is economical.
Can I use bleach to clean my refrigerator? No. Bleach is toxic and can contaminate food. Stick to food-safe options: warm soapy water, white vinegar solution (one part vinegar to one part water), or commercial food-safe disinfectant sprays. These kill bacteria and mold without introducing chemicals that could be harmful if they contact food.
What’s the best way to prevent cross-contamination in a small refrigerator? In limited space, use shelves or containers to create barriers between raw meat and ready-to-eat foods. Store raw meat in sealed containers on the lowest shelf, and place a shelf liner underneath to catch any drips. Use clearly labeled bins for different food categories. Organization is even more critical in small fridges because items are closer together.
Should I unplug my refrigerator to clean it? For routine light cleaning and weekly wiping, you don’t need to unplug it. For deep cleaning involving shelf removal, you can leave it on—just work quickly so food doesn’t warm up. Only unplug it if you’re cleaning the coils or doing work on the exterior that requires it, and always remember to plug it back in immediately afterward.
How do I know if my fridge is clean enough? A clean fridge has no visible spills or discoloration on shelves, no unpleasant odors, no visible mold or mildew on seals or in corners, and no mysterious sticky spots. You should be able to see everything clearly without items crowded together. If you can smell your fridge when you open it and the smell isn’t from food inside, it needs cleaning. Trust your nose and your eyes—they’re reliable indicators of cleanliness.
Related posts:
 Why SCOBY Might Be the Secret Ingredient Your Skincare Routine Needs
 Healthiest Foods to Keep in Your Fridge
 Reusable Straw Cleaning Tips for a Hygienic Sipping Experience
 White Sneaker Cleaning Hack
 Understanding Fridge Temperature Zones
 Inside the Sweetgreen Founder’s Incredibly Organized Fridge
 Common Fridge Storage Mistakes
 Freeze Frame: The Food Storage Mistakes That Are Costing You Money