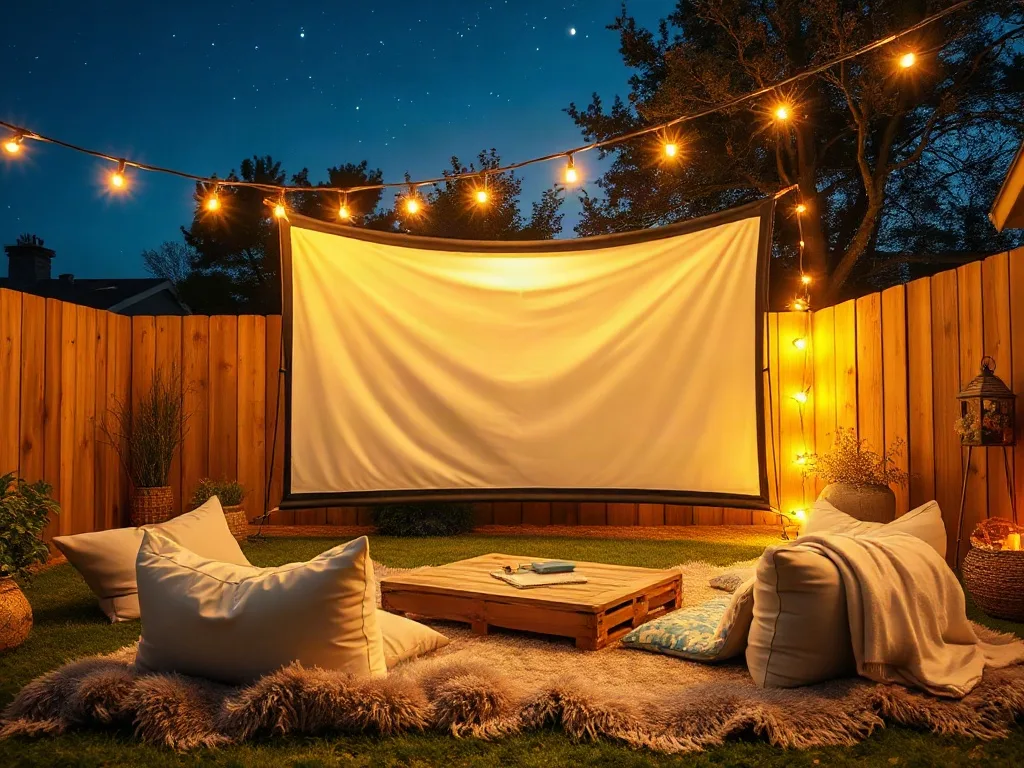
There’s something magical about watching a film under the stars with the people you love. A backyard movie night transforms an ordinary evening into a memorable experience that combines the comfort of home with the excitement of outdoor entertainment. Whether you’re planning a family gathering, a romantic date night, or a fun get-together with friends, creating the perfect outdoor cinema experience requires thoughtful planning and attention to detail.
Key takeaways
- Use a projector with at least 3,000 lumens and position speakers at ear level for optimal outdoor sound.
- Arrange seating in a gentle arc to improve sightlines and use waterproof blankets to protect against damp grass.
- Use outdoor fans to create a breeze that deters mosquitoes, as they are weak fliers and cannot reach guests.
- Test all equipment two hours before showtime to ensure audio sync and resolve any cable or internet connectivity issues.
- Avoid outdoor screenings if wind speeds exceed 15 mph to prevent equipment damage and audio interference.
This guide walks you through everything you need to know to host an unforgettable backyard movie night, from choosing the right equipment to creating a cozy atmosphere that keeps everyone comfortable and engaged throughout the show.
Selecting Your Screening Equipment
The foundation of any successful backyard movie night is quality viewing equipment. Your first major decision is choosing between a projector and a large outdoor TV. Projectors offer a more authentic cinema experience and can create massive images, but they require darkness to perform well. Look for projectors with at least 3,000 lumens for outdoor use—anything less will struggle against ambient light.
For the screen, you have several options. A dedicated outdoor projection screen provides the best image quality, with materials designed to reflect light evenly and resist weather. Budget-conscious hosts can use a white bedsheet stretched taut between two points, though image quality won’t match a proper screen. Some people paint an exterior wall with special projection paint, creating a permanent outdoor theater space.
Screen size matters more than you might think. For comfortable viewing, calculate the distance from your seating area to the screen and divide by two—this gives you the maximum diagonal screen size in feet. For example, if viewers sit 16 feet away, aim for an 8-foot diagonal screen. Going larger can strain necks and eyes.
Don’t forget audio. Built-in projector speakers rarely suffice outdoors where sound dissipates quickly. Bluetooth speakers work for small gatherings of 4-6 people, but larger groups need more power. A portable PA system or outdoor soundbar provides cinema-quality audio. Position speakers at ear level on either side of the screen, angled toward the seating area for optimal sound distribution.
Creating Comfortable Seating Arrangements
Comfort determines whether guests stay engaged or start fidgeting halfway through the movie. Layer your seating options to accommodate different preferences and mobility needs. Start with traditional outdoor furniture like Adirondack chairs or patio seating, which work well for guests who prefer back support.
Add blankets and outdoor cushions on the ground for a casual, picnic-style atmosphere. Waterproof picnic blankets protect against damp grass, while thick outdoor cushions or camping pads provide cushioning. Bean bags are another popular option—they’re comfortable, weather-resistant, and easy to move around.
For families with young children, consider creating a dedicated kids’ zone closer to the screen with sleeping bags or foam mats. This keeps restless little ones from disrupting others while giving them space to lie down if they get sleepy.
Arrange seating in a gentle arc rather than straight rows. This improves sightlines and creates a more intimate, communal atmosphere. Leave walkways so people can get up without stepping over others. As the evening progresses and temperatures drop, have extra blankets and throws readily accessible—guests shouldn’t need to go inside to grab one.
Planning for Weather and Timing
Weather can make or break your outdoor movie night, so planning around forecasts is essential. Check the weather a few days in advance and have a backup plan. If rain is possible, consider rescheduling or preparing an indoor alternative. Wind is particularly problematic—it rattles screens, topples lightweight equipment, and makes audio difficult to hear. Anything above 15 mph typically makes outdoor screening impractical.
Start time depends on when it gets dark in your area and the season. In summer, full darkness might not arrive until 9:00 or 9:30 PM, which can be too late for families with young children. In these cases, start slightly earlier and choose a brighter projector, or schedule your event for fall when darkness comes sooner.
Temperature management matters more than most hosts realize. Even warm days can turn chilly once the sun sets. Check the expected temperature for your screening time, not just the daytime high. Provide blankets, encourage layers, and consider adding portable outdoor heaters for early spring or late fall events. Fire pits create warmth and ambiance but position them away from the viewing area to avoid smoke interfering with the screen.
Humidity and dew are less obvious challenges. Electronics and dew don’t mix, so protect your projector and speakers from moisture. If you’re screening in high humidity, bring equipment outside shortly before showtime rather than hours early, and have towels ready to wipe down any condensation.
Designing the Perfect Ambiance
Lighting sets the mood and ensures safety without interfering with screen visibility. The screening area itself should be as dark as possible—turn off porch lights, close curtains on windows that cast light outside, and ask neighbors to do the same if they’re willing. Even small amounts of ambient light wash out projector images.
For pathways and seating areas, use low-level lighting that provides visibility without glare. Solar pathway lights, string lights positioned behind seating, or LED candles work well. Red lights are particularly useful—they provide visibility while preserving night vision and minimizing screen interference. Place lights low to the ground and angle them downward.
Decorative touches transform a simple screening into an experience. String lights hung in trees or along fence lines create a magical atmosphere before the movie starts (just make sure you can turn them off during screening). Tiki torches add a festive touch while providing light and some insect deterrent, though position them well away from foot traffic.
Consider a theme that matches your movie selection. Showing a beach movie? Add sand buckets, beach balls, and tropical decorations. Planning a classic horror film? Incorporate cobwebs, lanterns, and autumn leaves. These details require minimal effort but significantly enhance the experience.
Curating Your Concession Stand
Food and drinks are integral to the movie theater experience. Set up a designated concession area away from the seating zone to minimize disruption once the film starts. A folding table covered with a themed tablecloth works perfectly.
Popcorn is non-negotiable. Make it fresh in an air popper or on the stovetop, and offer variety with different seasonings: classic butter and salt, white cheddar, caramel, or even creative options like ranch or cinnamon sugar. Serve in individual paper bags or classic red-and-white striped popcorn containers for authentic cinema feel.
Beyond popcorn, offer a mix of sweet and savory options. Pre-packaged movie theater candy, homemade treats like brownies or cookies, veggie cups with dip, and chips with salsa cater to different preferences. For drinks, provide both cold and hot options—lemonade, iced tea, or soda alongside hot chocolate or coffee for when the temperature drops.
Make everything self-serve with clear labels, especially if you’re accommodating dietary restrictions. Use separate serving utensils for each item to avoid cross-contamination. Provide plenty of napkins, small trash bags at seating areas, and a clearly marked larger bin for disposal. Nothing ruins ambiance faster than litter scattered across the lawn.
If you’re hosting adults, a signature cocktail or wine pairing elevates the event. Choose drinks that match your movie theme—margaritas for a Western, champagne for a romantic comedy, or craft beer for an action film.
Handling Technical Setup and Testing
Technical difficulties are the fastest way to drain enthusiasm from your event. Set everything up and test it completely at least two hours before guests arrive, while it’s still light enough to troubleshoot easily.
Start by positioning your projector. Most work best when placed level with the center of the screen, though many can handle some vertical adjustment. The distance from projector to screen depends on your model’s throw ratio—check your manual or use an online throw distance calculator. Secure all cables with tape or cable covers to prevent tripping hazards.
Test your entire signal chain: from source device (laptop, streaming stick, or DVD player) through any adapters to the projector. Play several minutes of actual content, not just a test pattern. Check that audio syncs properly with video and that sound reaches all seating areas at comfortable volumes. Have backup cables on hand—HDMI cables particularly tend to fail at inconvenient moments.
Adjust focus and keystone correction while it’s still light enough to see clearly. Many projectors require different settings as darkness falls, so be prepared to make minor adjustments before the feature starts. Save your settings if possible so you don’t need to recalibrate for future screenings.
Pre-load your movie and have it queued to the opening scene, past previews and menus. Test your internet connection if streaming, and have a downloaded backup if bandwidth is unreliable. Keep your devices fully charged, and have extension cords and power strips ready—you’ll need more outlets than expected.
Managing Pests and Outdoor Challenges
Insects are the uninvited guests at every outdoor gathering. Start prevention early—mow the lawn and remove standing water where mosquitoes breed a day or two before your event. On the day of, use outdoor fans strategically. Mosquitoes are weak fliers, so fans placed around the seating perimeter create a barrier while keeping guests cool.
Citronella candles, tiki torches, and bug-repelling incense provide some deterrence, though their effectiveness varies. Position them upwind from seating so smoke drifts across the area. Make bug spray available at the entrance, and consider providing individual mosquito repellent wipes as party favors.
For a more comprehensive solution, treat your yard with a mosquito spray service 24-48 hours before the event. Many pest control companies offer one-time treatments that significantly reduce mosquito populations for several weeks.
Other outdoor challenges require preparation too. If you’re in an area with active wildlife, secure all food in sealed containers and don’t leave trash accessible. Keep pets inside or in a separate area—even the best-behaved dog can become a distraction or accidentally damage equipment. If neighbors might object to noise, give them advance notice and commit to a reasonable end time, typically no later than 10:30 or 11:00 PM on weeknights.
Selecting the Right Film
Movie selection can make the difference between an engaged audience and people checking their phones. Know your audience—what works for a group of adults differs from family-friendly fare. When in doubt, choose films with broad appeal that most people enjoy rewatching.
Consider the outdoor setting in your selection. Movies with dark, visually complex scenes can be difficult to follow on a projector, even with proper equipment. Films with bright, colorful cinematography work better. Comedies and adventure films typically outperform intense dramas or horror in outdoor settings where minor distractions are inevitable.
Runtime matters more outdoors than in climate-controlled theaters. Two-hour films are ideal; anything over 2.5 hours tests patience as temperatures drop and comfort decreases. If you’re showing a longer film, plan an intermission for bathroom breaks and refreshments.
Think seasonally. Summer screenings pair well with beach movies, comedies, and family adventures. Fall invites Halloween classics and cozy films. Consider nostalgia—movies from guests’ childhoods or films that match the era of your equipment setup create emotional connections.
For families with mixed ages, check ratings carefully and preview questionable films beforehand. What seems harmless on your living room TV can feel more intense on a massive outdoor screen. Have a backup film ready in case your first choice doesn’t fit the mood or if technical issues arise.
Optimizing Your Audio Setup for Outdoor Acoustics
Sound behaves differently outdoors than in enclosed spaces, and understanding these differences is crucial for creating an immersive experience. Unlike indoor environments where walls reflect sound back to listeners, outdoor spaces allow sound waves to disperse in all directions, requiring more power and strategic placement to achieve the same perceived volume.
Speaker positioning requires careful consideration of your yard’s layout. The ideal setup places speakers at a 22-30 degree angle from the center viewing position, creating a stereo soundstage. For gatherings larger than 15 people, consider a center channel speaker positioned directly below or above the screen to anchor dialogue. This prevents conversations from seeming to come from the sides, which can be disorienting on a large screen.
Sound absorption is another critical factor. Grass, trees, and bushes absorb sound rather than reflecting it, meaning you’ll need significantly more wattage than indoor calculations suggest. A general rule: multiply your indoor speaker wattage requirement by three for outdoor use. A speaker rated at 50 watts that works well in your living room needs to be replaced with something closer to 150 watts for outdoor screening.
Latency issues plague many Bluetooth setups, creating noticeable audio lag where dialogue doesn’t match lip movements. This sync problem worsens with distance—the farther your Bluetooth speaker from the source device, the more delay you’ll experience. If using Bluetooth, test thoroughly beforehand and consider aptX Low Latency compatible devices, which reduce delay to imperceptible levels. Alternatively, hardwired connections via aux cable or optical audio eliminate latency entirely, though they require running cables from your source to speakers.
For neighborhoods with noise concerns, directional speakers focus sound toward your seating area rather than broadcasting in all directions. These specialized speakers cost more but dramatically reduce sound spillage to neighboring properties. Position them carefully so the main audio beam targets the center of your seating area. Some hosts use wireless headphones for late-night screenings, though this eliminates the communal audio experience that makes outdoor cinema special.
Wind creates havoc with audio clarity, particularly affecting higher frequencies. If wind picks up during your screening, increase volume slightly and boost treble settings to compensate. Positioning speakers closer to the ground and behind windbreaks like bushes or fences helps minimize wind interference. Professional outdoor venues often use subwoofers positioned on the ground specifically because low frequencies travel better and are less affected by wind.
Power Management and Electrical Safety
Running outdoor electronics safely requires more planning than simply plugging everything into an extension cord. Calculate your total power draw before the event: add the wattage of your projector (typically 200-400W), speakers (50-200W), and any additional devices. Most household circuits provide 15 amps at 120 volts, equaling 1,800 watts of available power. Leave a safety margin—don’t exceed 80% of capacity (1,440 watts) to prevent tripped breakers mid-movie.
Extension cord selection matters significantly. Never daisy-chain multiple extension cords, which creates dangerous resistance buildup and potential fire hazards. Instead, use a single heavy-duty cord rated for outdoor use (look for a “W” in the code—SJTW, SJEOW, or similar). For runs longer than 50 feet, choose 12-gauge wire; standard 16-gauge cords cause voltage drop over distance, leading to dimmer projector output and potential equipment damage.
Ground Fault Circuit Interrupter (GFCI) protection is essential for any outdoor electrical setup. These devices cut power within milliseconds if they detect current leaking to ground—critical protection against electrocution from moisture or damaged cords. Use a portable GFCI adapter at your indoor outlet, or plug into an outdoor GFCI receptacle if available. Test the GFCI before each use by pressing the test button; it should immediately cut power.
Weather-resistant power strips designed for outdoor use should have covered receptacles and be rated at least IP44 for water resistance. Position them off the ground on tables or mounting blocks to avoid puddling water. Even with weather-resistant equipment, never operate electronics in active rain. Morning dew presents a subtler danger—wipe down all equipment before packing it away to prevent moisture-related corrosion over time.
Battery backup systems provide insurance against power interruptions. A UPS (Uninterruptible Power Supply) rated for at least 500VA keeps your projector running through brief outages and provides time to save work if power fails completely. This is particularly valuable in areas with unreliable electricity or when running equipment on a heavily loaded circuit. Some hosts invest in portable power stations (large battery banks with AC outlets) that eliminate extension cords entirely, though these cost several hundred dollars and require recharging between uses.
Cable management prevents tripped breakers from becoming tripped guests. Mark all cables with bright tape or glow strips, especially those crossing walkways. Use cable ramps or covers designed for outdoor use—these rubberized channels protect cords while providing a smooth walking surface. Route cables along fence lines or building edges whenever possible rather than across open lawn space where people walk.
Advanced Screen Solutions and Image Optimization
Screen technology has evolved beyond simple white surfaces, with modern materials offering significant image improvements. Ambient light rejecting (ALR) screens use special coatings that reflect projector light toward viewers while absorbing ambient light from other angles. This technology allows screening in less-than-ideal darkness, though true ALR screens cost $300-$1,000+ depending on size. For budget-conscious hosts, gray screens (rather than white) improve contrast in environments with some ambient light by absorbing more stray illumination.
Screen tension dramatically affects image quality. Wrinkles, sags, and waves create visual distortions that detract from the viewing experience. When hanging a sheet or portable screen, use spring clamps or bungee cords at multiple points along all edges to create even tension. Some DIYers build PVC pipe frames that keep screens taut; these portable frames break down for storage and setup in minutes. For permanent installations, aluminum frames with grommeted screens offer professional results.
Aspect ratio matching prevents the black bars or stretched images that make professional videographers cringe. Most modern content uses 16:9 (widescreen) formatting, while older films and some European content uses 4:3 (standard). Projectors can adjust to either, but your screen should accommodate your most common content. Showing classic films regularly? Consider a 4:3 screen. Mostly streaming modern movies? Stick with 16:9. Some hosts use masking—black fabric panels that adjust screen borders to match content—though this requires additional setup time.
Gain specifications indicate how much light a screen reflects compared to a standard white surface. A gain of 1.0 means neutral reflection, higher numbers indicate brighter reflection, and lower numbers indicate absorption. High-gain screens (1.3-2.5) work well for underpowered projectors but have narrower viewing angles—viewers sitting to the side see dimmer images. Low-gain screens (0.8-0.9) provide wider viewing angles and better color accuracy but require brighter projectors. For most backyard setups with viewers spread across a wide area, stick with gain ratings between 0.9-1.3.
Screen angle optimization is an often-overlooked factor. Rather than mounting screens perfectly vertical, tilt the top slightly back (5-10 degrees from vertical). This compensates for projector keystone when placing the projector at ground level and ensures the bottom of the image remains as bright as the top. This technique, called “tilt correction,” mimics how professional cinemas angle their screens and reduces the keystone correction needed, which degrades image sharpness.
For hosts screening frequently, motorized screens offer convenience and protection. These screens roll up into protective housings when not in use, shielding the surface from weather, UV damage, and debris. Remote-controlled operation adds a theatrical flair to your event—imagine the screen slowly descending as guests arrive. Quality motorized outdoor screens start around $800, but they eliminate setup time and extend screen life significantly compared to screens left permanently exposed.
Creating Themed Experiences and Special Events
Transforming a simple movie screening into a themed event creates lasting memories and gives guests something to talk about long after credits roll. Theme execution goes beyond matching decorations to your film—it encompasses invitations, dress code suggestions, menu planning, and interactive elements that immerse guests in the experience.
For classic film noir screenings, encourage guests to dress in 1940s attire, serve period-appropriate cocktails like Old Fashioneds or Manhattans, and decorate with black and white motifs, vintage suitcases, and art deco elements. Create a photo booth area with props like fedoras, fake cigarettes, and vintage cameras. Play jazz music softly before the film starts to establish atmosphere.
Superhero movie marathons work brilliantly for family audiences. Set up an “origin story” station where kids create their own superhero identity with craft supplies. Serve themed snacks—”Kryptonite” green popcorn, “Spider Bites” (chocolate-covered strawberries), or “Hulk Smash” guacamole. Simple costume contests with small prizes engage younger viewers and create photo opportunities. Consider showing an older superhero film alongside a newer one to bridge generational preferences.
Drive-in movie themes transport guests to the 1950s without leaving home. Set up cardboard cars (refrigerator boxes work perfectly) that kids can decorate before the screening. Serve classic drive-in fare: hot dogs, nachos, and root beer floats. Hang paper menus from the screen area and use retro signage. For added authenticity, transmit audio through FM radio—apps and devices exist specifically for this purpose, allowing guests to tune car radios or portable radios to your broadcast frequency.
Seasonal screenings leverage natural atmosphere. Halloween events benefit from fog machines (used sparingly so they don’t obscure the screen), carved pumpkin luminaries lining pathways, and horror-themed cocktails with dry ice effects. Christmas screenings become magical with white lights, hot cocoa bars with multiple topping options, and fake snow (shredded white paper or cotton batting) creating a winter wonderland. Summer beach party themes incorporate tiki torches, leis for guests, tropical drinks, and beach balls scattered around seating areas.
Interactive elements boost engagement, particularly for films guests have seen before. Rocky Horror Picture Show screenings famously include audience participation, callback lines, and prop bags (toast, water guns, playing cards). Even mainstream films work with planned audience participation—encourage guests to quote along with favorite lines from comedies, or provide lightsticks for epic moments in action films. Just ensure everyone’s comfortable with participation; some guests prefer quiet viewing.
Multi-film marathons require careful programming. Start with shorter, lighter films and progress to longer, more intense ones as the evening deepens. Plan 15-20 minute breaks between features for stretching, bathroom trips, and refreshment restocking. Three films is typically the maximum for all-night events—anything more exhausts even enthusiastic audiences. Consider thematic connections: a trilogy, films from the same director, or movies linked by theme rather than random selections.
Weatherproofing Equipment and Long-Term Storage
Protecting expensive electronics from outdoor elements requires proactive measures, not just reactive responses when weather turns. Projectors, being the most expensive component, deserve particular attention. Never leave projectors outdoors between screenings, even covered—humidity, temperature fluctuations, and insects cause gradual damage. Designate a climate-controlled indoor storage area where equipment stays between uses.
Temporary weather protection during setup involves multiple layers of defense. Position projectors under covered areas like gazebos, overhangs, or pop-up canopies whenever possible. Even without rain, these covers prevent dew accumulation that condenses on cooling equipment after sunset. Keep equipment off the ground using tables or stands—ground level accumulates more moisture and is vulnerable to accidental kicks or spills.
Silica gel packets placed inside storage bags or containers absorb moisture between uses, preventing mold growth and electronic corrosion. Buy them in bulk online and replace every few months. Some hosts use electronic dehumidifiers in storage areas, particularly in humid climates where moisture damage accelerates. For projectors, allow them to cool completely before storage—operating projectors generate significant heat, and covering or storing while hot can damage internal components.
Screen materials vary dramatically in weather resistance. Vinyl screens handle moisture well and clean easily, making them ideal for permanent outdoor installations. Fabric screens provide better image quality but must be completely dry before storage to prevent mildew. After morning dew or unexpected moisture, wipe down screens with a soft, lint-free cloth and allow them to air dry fully. Storing a damp screen, even briefly, creates permanent staining and odors that render it unusable.
Cable maintenance prevents frustrating failures. Inspect all cables before each use for cuts, fraying, or damaged connectors. Coil cables loosely using the over-under technique—this prevents internal wire twisting that causes breaks over time. Never wrap cables tightly around objects or use zip ties that create stress points. Store cables in labeled bags or containers separate from other equipment to prevent tangling and make setup faster.
Lens care is critical for projectors and often overlooked. Dust and fingerprints degrade image quality significantly. Use lens cleaning solution and microfiber cloths specifically designed for optical surfaces—never paper towels or regular cloths that scratch coatings. Clean lenses only when necessary to avoid wearing down protective coatings, but inspect before each use. A lens cap or protective cover should always be in place during storage and transport.
Transport considerations matter for hosts who screen at multiple locations. Hard-shell cases protect projectors during transport far better than soft bags. Foam inserts custom-cut to your equipment provide shock absorption. Label all cases clearly and create a checklist of required components—forgetting a crucial cable or adapter at home ruins events. Some hosts maintain duplicate sets of cables and adapters specifically to leave in transport cases, eliminating the possibility of leaving critical components behind.
Troubleshooting Common Technical Problems
Even with thorough preparation, technical issues arise. Knowing how to diagnose and fix them quickly prevents minor problems from derailing your event. The most common issue—”no image” on the screen—has several potential causes. First, verify the projector is powered on and has completed its startup cycle (typically 30-60 seconds). Check that the correct input source is selected; projectors with multiple inputs (HDMI 1, HDMI 2, VGA) must be set to match your cable connection. Verify the lens cap is removed—obvious, but it happens.
Image focusing problems frustrate many first-time hosts. Most projectors require manual focus adjustment via a ring or dial on the lens. Adjust focus at your actual screening distance, not during initial setup closer to the screen. Focus varies with distance, so testing at 10 feet when your actual distance is 20 feet results in blurry images. If you cannot achieve focus across the entire screen, your projector likely isn’t positioned perpendicular to the screen—adjust the angle and retry.
Keystone distortion creates trapezoidal images where the top or bottom appears wider than the opposite edge. This occurs when the projector isn’t level with the screen center. Digital keystone correction in projector menus fixes this electronically, but it reduces image quality and resolution. Physical adjustment is always preferable: raise or lower the projector until it aligns with screen center, using books, blocks, or adjustable stands. Some projectors have adjustable feet specifically for this purpose.
Audio sync issues where dialogue lags behind lip movements plague wireless setups. If using Bluetooth, toggle the connection off and back on—this sometimes reestablishes sync. Moving the Bluetooth transmitter closer to speakers reduces latency. For persistent problems, switch to wired audio connections or use the audio delay adjustment available in many projector menus and media players. This setting allows you to delay video to match audio, compensating for wireless lag.
Color accuracy problems manifest as tinted images—overly blue, green, or red. Most projectors have color temperature presets (cinema, warm, cool) that significantly impact image appearance. “Cinema” or “Warm” modes typically provide the most natural colors for evening viewing. Avoid “Bright” or “Dynamic” modes, which boost brightness at the expense of color accuracy. Advanced users can access color calibration menus, but preset modes work well for most situations.
Overheating shutdowns occur when projectors pull in dust or run in hot environments without adequate ventilation. Projectors have intake and exhaust vents that must remain unobstructed—position them with at least 6 inches clearance on all ventilated sides. If a projector shuts down during screening, it needs to cool before restarting, typically 10-15 minutes. Clean intake filters monthly if your projector has accessible filters; dust buildup is the primary cause of overheating.
Network streaming failures during online content delivery create embarrassing pauses. Buffer content before the event whenever possible—start playing the movie 5-10 minutes early and pause it, allowing the stream to buffer ahead. For critical events, download content in advance rather than relying on live streaming. If streaming is necessary, close all other applications and devices using your network to dedicate full bandwidth to the stream. Wired ethernet connections to your streaming device are far more reliable than WiFi.
Remote control failures happen frequently in outdoor settings. Line-of-sight between remote and projector must be clear—infrared signals don’t travel through obstacles. Weak batteries cause intermittent operation; replace them before each event. Some projectors include wired remotes or smartphone app controls that eliminate infrared limitations. Keep a backup set of batteries in your equipment bag and know how to access projector controls manually in case remote failure occurs mid-screening.
Frequently Asked Questions
What’s the minimum equipment needed to host a backyard movie night?
At its most basic, you need a projector (at least 2,000-3,000 lumens for outdoor use), a white surface for projection (a sheet or wall works in a pinch), a content source like a laptop or streaming device with proper cables, and external speakers or a Bluetooth speaker. Beyond that, comfortable seating, blankets, popcorn, and ambient lighting dramatically improve the experience. Budget $300-500 for decent entry-level equipment, or significantly more for cinema-quality setup.
How do I prevent my projector image from looking washed out?
Image washout comes from ambient light competing with the projector. Wait until it’s fully dark before starting—at least 30-45 minutes after sunset. Turn off all outdoor lights, close curtains on windows facing the yard, and ask neighbors to dim porch lights if possible. Choose a projector with higher lumens (3,500+ for partial darkness, 2,500+ minimum for full darkness). Position the screen away from streetlights and other light sources. Higher-quality projection screens also reflect light more efficiently than sheets or painted walls.
What’s the best way to handle bathroom breaks during the movie?
For family-friendly events or longer films, plan an intermission at the midpoint. Announce it beforehand so guests know what to expect. Pause at a natural break in the action and keep intermission to 10-15 minutes—enough time for bathroom trips and snack refills without losing momentum. Mark the pathway to your home’s bathroom with small lights or glow sticks so guests don’t need flashlights that disrupt others’ night vision. For casual gatherings, simply pause when someone needs a break.
How can I host a backyard movie night in a small yard?
Small spaces work fine with proper planning. Choose a smaller screen size (5-6 feet diagonal) and position seating closer—10-12 feet away is perfectly acceptable. Angle seating slightly upward using deck stairs, a slight hill, or stadium-style cushion stacking. Mount the projector on a tripod or table behind seating to maximize space. Fewer guests (6-10) work better in compact areas. Consider a short-throw projector, which creates large images from minimal distance. Minimize decorations and focus on vertical space—hanging lights overhead instead of using floor space for lighting.
What should I do if weather threatens to cancel my event?
Monitor forecasts starting five days before your event. If rain looks likely within 24 hours, communicate with guests about either rescheduling or moving indoors. For indoor backup, you’ll need a large wall or white surface, and the same equipment works fine. If the weather is questionable but not definitively bad, prepare a rain cover for equipment and have towels ready. Set up a pop-up canopy over the projector and electronics (never over the screen, which blocks projection). For unexpected weather during the event, pause the movie immediately, protect electronics first, then help guests move seating under cover. Always prioritize equipment safety—projectors and water don’t mix.
Related posts:
 Ultimate Summer Pool Party Planning
 Simple Ways to Reduce Your Screen Time
 The Secret to Throwing Stress-Free Parties Every Time
 IMAX Indoor Cycling Is the Immersive Fitness Trend Taking Over Gyms
 New Tool Detects Melanoma Through Temperature
 Amazon’s New Meditation Podcast
 Airport Temperature Screening Guide
 Audio Workout Apps Taking Over the Gym Scene