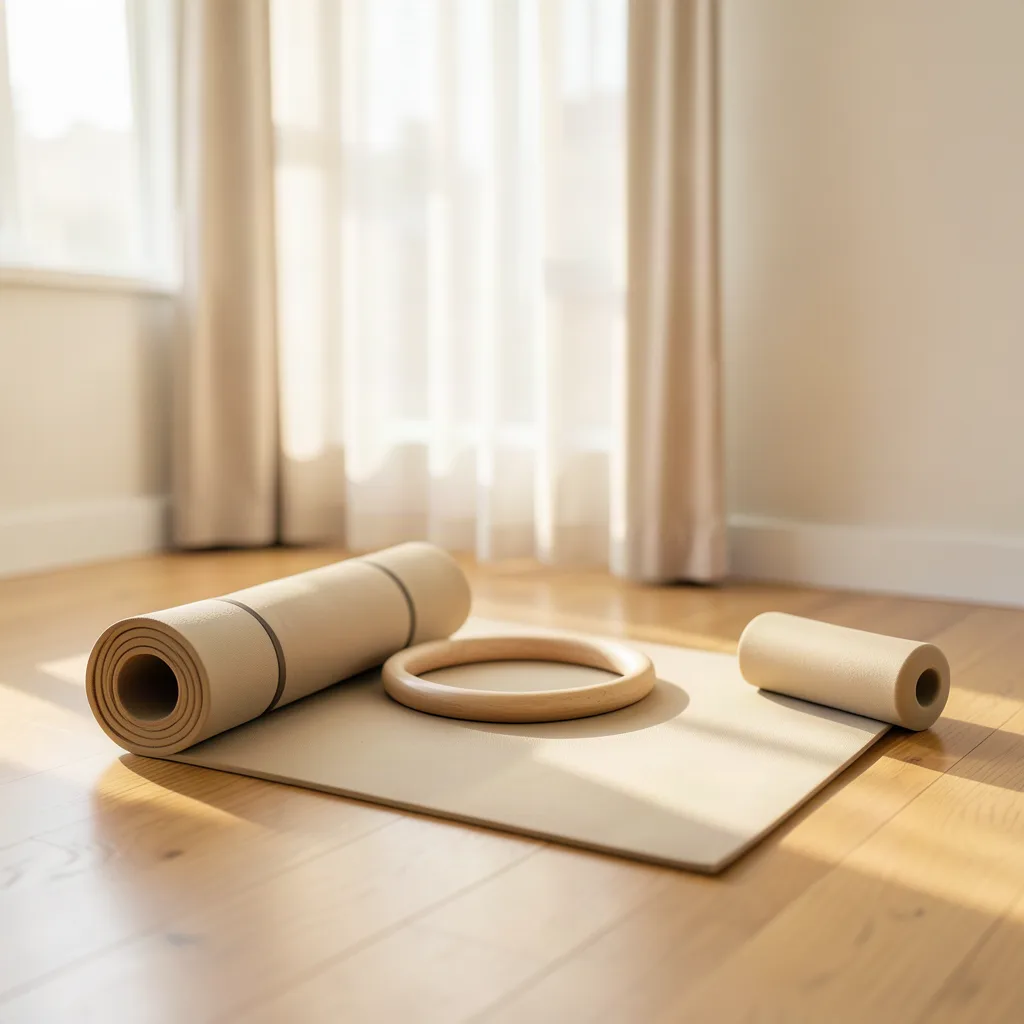
Creating a dedicated space for movement within the sanctuary of your home is one of the most supportive gifts you can give yourself. Pilates, with its focus on core strength, alignment, and mindful breathing, doesn’t require a sprawling commercial gym to be effective. In fact, the intimacy of your own living room can enhance the mind-body connection, removing the distractions of a crowded class and allowing you to tune into your own breath and bodily sensations.
Key takeaways
- Choose a Pilates-specific mat at least 1/4 inch thick to provide necessary spinal support during rolling exercises.
- Ensure a clear six-foot perimeter around your mat to allow for full range of motion without hitting furniture.
- Position digital screens at eye level using an adjustable stand to maintain proper neck alignment and prevent strain.
- Use woven baskets or decorative ottomans to store props like magic circles and resistance bands within easy reach.
- Incorporate a mirror for real-time biofeedback on spinal alignment and a ritual object to help sharpen mental focus.
However, transforming a multifunctional space like a living room into a functional studio requires more than just rolling out a mat. It involves a thoughtful blend of ergonomics, aesthetics, and organization. Whether you are a seasoned practitioner looking to transition your routine home or a beginner embarking on a journey of wellness, the goal is to create an environment that invites you to move. When your environment is prepared, the friction between deciding to exercise and actually starting vanishes, making consistency far more attainable.
Assessing Your Space: Finding the Ideal Corner
Before purchasing equipment or moving furniture, take a moment to observe how you actually use your living room. The “perfect” spot for a Pilates studio isn’t necessarily the largest area, but the one that offers the most psychological and physical freedom. Look for a zone where you can fully extend your arms and legs in all directions without fear of hitting a coffee table or a lamp. A general rule of thumb is to ensure you have a clear perimeter of at least six feet around your mat.
Lighting plays a pivotal role in how you feel during your practice. If possible, position your workout area near a window. Natural light helps regulate your circadian rhythm and provides a refreshing connection to the outside world, which can make a morning session feel energizing and an evening session feel grounding. If your living room is naturally dim, consider adding a floor lamp with a warm, dimmable bulb or a salt lamp to create a soft, calming glow that signals to your nervous system that it is time to transition from the stress of the day to the focus of the workout.
Ventilation is another critical factor. Pilates involves deep, rhythmic breathing, and a stagnant room can quickly become stifling. Ensure your chosen corner has access to a breeze or is near a vent. If the room tends to get warm, a small, quiet oscillating fan can be a lifesaver, keeping you cool without creating a distracting noise that disrupts your concentration.
Essential Equipment for the Home Practitioner
One of the most common misconceptions about Pilates is that you need a massive, expensive Reformer machine to see results. While Reformers are wonderful, Mat Pilates is the foundation of the entire method and can be incredibly challenging and rewarding. To build your home studio, start with the basics and expand as your practice evolves.
The Mat: Not all mats are created equal. A standard yoga mat is often too thin for Pilates, which involves a significant amount of rolling and spinal articulation. To protect your vertebrae and provide necessary joint support, look for a Pilates-specific mat that is at least 1/4 inch to 1/2 inch thick. High-density foam or NBR (Nitrile Butadiene Rubber) are excellent choices as they provide a stable surface that doesn’t bottom out when you perform a “hundred” or a “teaser.”
Small Props for Versatility: Once you have your mat, small props can add resistance and stability, mimicking the feel of studio machines. Consider the following:
- The Magic Circle: This flexible ring is excellent for engaging the inner thighs and arms, providing tactile feedback on your alignment.
- Pilates Ball (Small/Overball): A soft, inflatable ball placed under the sacrum or between the knees can help stabilize the pelvis and deepen core engagement.
- Resistance Bands: These are portable, affordable, and can be used to add tension to arm and leg movements, helping to build lean muscle mass.
- Foam Roller: Ideal for both the workout itself and for myofascial release (rolling out tight muscles) after your session.
For those who truly desire a machine, there are now many compact, foldable Reformers designed specifically for home use. If you choose this route, ensure you have a dedicated spot where the machine can remain assembled, as the effort of setting it up every time often becomes a barrier to actual use.
Optimizing Acoustics and Soundscapes for Deep Focus
While visual clutter is an obvious distraction, auditory clutter is often the silent killer of a productive home practice. In a living room, you are susceptible to the hum of the refrigerator, the distant sound of traffic, or the chatter of other household members. To transform your living room into a true sanctuary, you must curate the sonic environment to match the intention of your Pilates session.
For those who find silence unsettling or too revealing of external noise, the introduction of a curated soundscape can act as a psychological barrier. Consider investing in a high-quality Bluetooth speaker with a 360-degree sound profile, positioned at a medium height—perhaps on a side table—so the sound envelops you rather than hitting you from one direction. For energizing morning flows, a playlist of mid-tempo instrumental music or lo-fi beats can maintain your momentum without the distraction of lyrics. Conversely, for restorative evening work, ambient soundscapes—such as soft rainfall, forest sounds, or binaural beats—can help lower your cortisol levels and deepen your connection to your breath.
An edge case to consider is the “noisy neighbor” or “active household” scenario. If you live in an apartment with thin walls or have children who are unpredictably loud, noise-canceling headphones are a game-changer. However, since Pilates requires you to listen to the sound of your own inhalation and exhalation, choose headphones with a “transparency mode.” This allows you to block out the low-frequency drone of the city while still hearing the rhythmic quality of your own breathing, which is essential for maintaining the timing of your movements.
Furthermore, think about the acoustics of the room itself. Hard surfaces like hardwood floors and large windows reflect sound, which can create an echo that feels clinical or cold. To soften the auditory environment, integrate soft textiles. A thick curtain or a few plush throw pillows placed around the perimeter of your workout zone can absorb excess sound, creating a “cocoon” effect that makes the space feel more intimate and focused.
Clever Storage for Multifunctional Spaces
The primary challenge of a living room studio is the transition. If your equipment remains scattered, your living room feels like a gym; if it is tucked away too deeply in a closet, the friction of setting up may discourage you from practicing. The goal is to implement a storage system that balances accessibility with aesthetic invisibility.
For small props like the Magic Circle, resistance bands, and Pilates balls, avoid the “junk drawer” approach. Instead, opt for a dedicated, aesthetically pleasing container. A large woven seagrass basket or a minimalist felt bin placed in a corner allows you to keep your props organized while adding a natural, organic texture to your decor. To prevent the “tangle effect” with resistance bands, use small Velcro ties or individual mesh pouches within the basket, ensuring you can grab the specific tension level you need without digging through a pile of rubber.
For the mat, consider the architectural possibilities of your furniture. Many modern sofas have a slight gap underneath; a slim, high-density mat can often be slid beneath the couch, keeping it flat and out of sight. Alternatively, a wall-mounted rack—similar to those used for yoga mats—can turn your equipment into a design element. If you prefer a completely hidden look, a decorative storage ottoman with a hollow interior is an ideal solution. It serves as a place to sit or rest your feet during the day and a secure vault for your Pilates gear at night.
If you have invested in a foldable Reformer, the challenge is larger. While these machines are designed to be compact, they still occupy significant visual real estate. To mitigate this, create a “studio zone” using a room divider or a folding screen. When the screen is closed, the machine is hidden from view, allowing the room to return to its function as a social space. When it is open, the screen acts as a visual boundary that signals to others in the home that you are in your “sacred space” and should not be interrupted.
The Psychology of Space and Visual Anchors
The brain is highly responsive to environmental cues. When you step into a professional studio, your posture improves and your focus sharpens because the environment is designed for one purpose. To replicate this in a living room, you must create “visual anchors”—specific elements that tell your subconscious it is time to transition from “home mode” to “Pilates mode.”
One of the most powerful visual anchors is a mirror. While often viewed as a tool for vanity, in Pilates, a mirror is a critical piece of biofeedback equipment. Positioning a full-length mirror opposite your mat allows you to monitor your spinal alignment, pelvic tilt, and shoulder symmetry in real-time. This reduces the reliance on guesswork and prevents the development of compensatory patterns that can lead to injury. If a permanent mirror feels too intrusive, a lean-to mirror that can be shifted or covered with a fabric throw when not in use is a sophisticated alternative.
Color theory also plays a role in your mental preparation. Living rooms are often decorated in neutral or bold tones, but the area where you practice should evoke a sense of clarity. If you use interlocking foam tiles, choose a color that is grounding—such as sage green, slate blue, or a soft sand tone. These colors are associated with stability and calm, helping to lower your heart rate and prepare your mind for mindful movement. Avoid high-contrast, jarring colors like bright red or neon yellow in your workout zone, as these can trigger a “fight or flight” response rather than a “flow” state.
To further refine the psychological boundary, incorporate a “ritual object.” This could be a specific candle you light only during your practice or a small plant, like a peace lily or snake plant, placed at the head of your mat. The act of lighting the candle or glancing at the greenery serves as a sensory trigger, effectively “switching on” your focus and clearing the mental clutter of the day’s chores and stressors.
Integrating Digital Guidance and Ergonomic Tech
Most home practitioners rely on digital instruction, whether through streaming classes, pre-recorded videos, or live Zoom sessions. However, the placement of your device can significantly impact your form. Placing a tablet on the floor often leads to “tech neck,” where you crane your neck downward to see the instructor, compromising the very cervical alignment that Pilates seeks to correct.
To solve this, invest in an adjustable-height tablet stand or a tripod. The screen should be positioned at eye level—or slightly above—whenever you are in a seated or supine position. For those who use a television, ensure the screen is positioned so that you can see it without twisting your torso during lateral movements. If your living room layout makes this difficult, a wireless casting device (like a Chromecast or Apple TV) allows you to beam the workout from your phone to the largest screen in the room, reducing eye strain and allowing you to follow complex movements more accurately.
Cable management is another often-overlooked detail. A tangle of charging cables crossing your workout area is not only an eyesore but a legitimate tripping hazard, especially during movements that involve reaching or rolling. Use adhesive cable clips to run wires along the baseboards or invest in a long, braided charging cable that can be tucked under the edge of your mat. For a completely wireless experience, a high-capacity power bank kept in your prop basket ensures your device stays charged without needing to be tethered to a wall outlet.
For those who enjoy data-driven progress, integrating a smart scale or a wearable fitness tracker can be motivating. However, to keep the practice mindful, create a “tech boundary.” Set your device to “Do Not Disturb” mode, allowing only emergency calls. The goal is to use technology as a bridge to movement, not as a distraction that pulls you back into the digital noise of emails and notifications.
Hygiene, Air Quality, and Sensory Enhancements
A living room is a high-traffic area where dust, pet dander, and skin cells accumulate. Because Pilates involves significant contact with the floor and deep diaphragmatic breathing, the air quality and cleanliness of your equipment are paramount for both health and mental clarity.
Mat hygiene is the first line of defense. Foam and rubber mats are porous and can trap sweat and bacteria. Instead of using harsh chemical cleaners that can degrade the material and irritate your skin, create a natural Pilates spray using a mixture of distilled water, a splash of white vinegar, and two drops of tea tree or lavender essential oil. The vinegar acts as a mild disinfectant, while the tea tree oil provides antimicrobial properties. Keep this spray in a small glass bottle within your prop basket for a quick spritz after every session.
Air quality significantly affects your endurance and focus. If your living room lacks a strong cross-breeze, a HEPA air purifier can remove airborne particulates and allergens, making your deep breaths feel cleaner and more refreshing. To enhance the sensory experience, consider the use of an ultrasonic diffuser. Scent is the fastest way to trigger a change in emotional state. Peppermint or eucalyptus oil can be used during a challenging power session to increase alertness and open the airways, while sandalwood or frankincense can be used during a slow, alignment-focused flow to encourage grounding.
Lastly, consider the impact of indoor plants. Beyond their aesthetic appeal, plants like the Aloe Vera or the Spider Plant act as natural air filters, absorbing toxins and releasing oxygen. Placing a few greenery accents around your studio corner doesn’t just look beautiful; it creates a “biophilic” environment that reduces stress and mimics the feeling of practicing outdoors, which can make a small living room feel expansive and airy.
Managing Boundaries and Household Dynamics
The greatest challenge of a home studio is not the equipment, but the people (and pets) who share the space. The living room is typically the heart of the home, and the sudden appearance of a workout mat can be seen by others as an invitation to interact rather than a signal for privacy.
To manage this, establish a “visual signal” for your practice. A simple but effective method is the “mat rule”: when the mat is unrolled, you are effectively in a different room. To make this more explicit for children or partners, you can use a small, colorful sign or a specific lamp that is turned on only during your session. This creates a non-verbal boundary that respects your time and space without requiring a constant stream of verbal reminders.
Pet owners face a unique challenge: the “cat on the mat” phenomenon. Many pets are drawn to the texture of Pilates mats or the focused energy of their owners. To prevent your pet from disrupting your teaser or rolling into your path, provide a “parallel space.” Place a small, soft blanket or a pet bed immediately adjacent to your mat. By giving your pet their own designated spot in the “studio,” they are more likely to settle in and observe your practice rather than attempting to participate in it.
Scheduling is the final piece of the boundary puzzle. Rather than fitting your practice into the gaps of your day, block it out as a non-negotiable appointment in your digital calendar. Communicate this schedule to your household. When your family knows that 7:00 AM to 7:45 AM is “studio time,” they are more likely to adjust their routines, reducing the number of interruptions and allowing you to maintain the mental flow necessary for a successful Pilates session.
Adaptive Setup for Diverse Living Room Layouts
Not every living room is a wide-open rectangle. Many practitioners must contend with L-shaped rooms, narrow “galley” layouts, or open-concept spaces that blend into the kitchen. Adapting your studio to these specific geometries ensures that you don’t feel cramped or exposed.
In a narrow or “tunnel” style living room, the key is to align your mat parallel to the longest wall. This maximizes the available clearance for arm extensions and prevents you from feeling boxed in. If the room is too narrow for a full perimeter of six feet, prioritize the “long axis” of your body. Since most Pilates movements occur in a linear fashion (forward and backward), you can sacrifice some width if you have ample length. Use a low-profile mirror on the long wall to create the illusion of more space, which reduces the feeling of claustrophobia during wide-reaching movements.
For open-concept spaces, the lack of walls can make you feel vulnerable or distracted by the activity in the kitchen or dining area. In this case, use “zoning” techniques. A large, high-quality area rug can act as a visual island, separating the studio from the rest of the living area. You can also use a tall potted plant or a decorative folding screen to create a partial wall. This provides a sense of enclosure and privacy without permanently altering the room’s architecture.
In L-shaped rooms, the “short arm” of the L is often the perfect location for a studio. These nooks are naturally separated from the main traffic flow of the room, providing a built-in sense of seclusion. To maximize this space, utilize vertical storage—such as floating shelves for your props—to keep the floor clear. If the nook is particularly dim, this is the ideal place to introduce a dedicated lighting solution, such as a warm LED strip along the baseboards, which can create a soft, atmospheric glow that defines the studio as a distinct destination within the home.
Flooring Solutions for Joint Support
Living room floors are rarely designed with fitness in mind. Hardwood, tile, or thin carpeting can be jarring on the spine and wrists during weight-bearing exercises. If you find that your mat isn’t providing enough cushioning, or if you are worried about your equipment sliding on a slick floor, consider a semi-permanent flooring solution.
Interlocking Foam Tiles: These are an excellent, cost-effective way to create a designated “zone.” By laying down a 6×6 foot square of high-density foam tiles, you define the boundaries of your studio. This visual cue tells your brain, “I am now in the workout zone,” while providing an extra layer of shock absorption for your joints. They are easy to clean and can be removed if you need the space for a social gathering.
Low-Pile Area Rugs: If you prefer a more integrated look,
Related posts:
 Pilates for Older Runners: Improving Strength and Flexibility
 Kate Hudson’s Safe Pilates Moves for Pregnancy
 3 yoga mats totally reimagined for the better
 Pilates: The Secret to Core Strength and Stability
 Mat Goals: The Cutest Yoga Mats That Will Make You Actually Want to Namaste
 Inside LekFit: Lauren Kleban’s LA Studio
 2 Brand-New Pilates Studios Just Opened Uptown
 Colleen Saidman’s Tribeca Studio