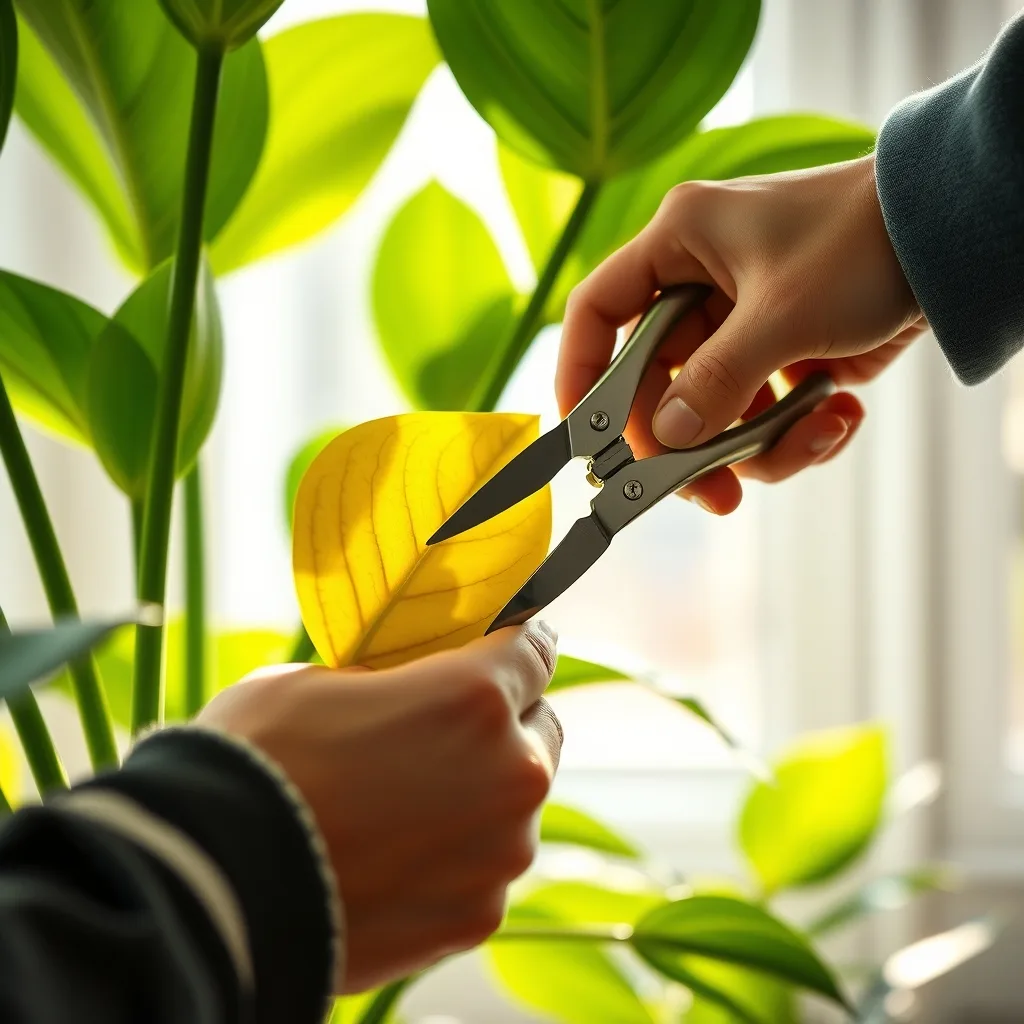
Pruning indoor plants is more than a cosmetic task; it promotes healthier growth, prevents pest infestations, and can even extend the life of a beloved houseplant. Yet many beginners hesitate because they fear damaging delicate foliage or making irreversible mistakes. This guide walks you through the entire process— from recognizing the right time to prune, gathering safe tools, and applying techniques that respect each plant’s unique biology. By the end, you’ll feel confident to trim, shape, and rejuvenate your indoor garden without stress.
Key takeaways
- Prune during active growth periods in spring and early summer to maximize new shoot development.
- Always use clean, sharp, and sanitized tools to prevent the spread of disease between plants.
- Make cuts at a 45-degree angle just above a leaf node to stimulate new bud emergence.
- Never remove more than 25-30% of a plant's foliage at one time to avoid causing significant stress.
Why Pruning Matters for Indoor Plants
Even though indoor plants live in a controlled environment, they still experience the same growth cycles as their outdoor counterparts. Pruning serves several essential functions:
- Encourages New Growth: Removing spent or overly long stems redirects the plant’s energy to fresh shoots, resulting in a fuller appearance.
- Improves Air Circulation: Dense foliage can trap moisture, creating a micro‑climate that encourages fungal diseases. Strategic cuts open up the canopy.
- Controls Size and Shape: Many indoor species, such as ficus or dracaena, can become leggy or outgrow their pot. Pruning keeps them proportionate to the space.
- Removes Damaged Tissue: Yellowed, brown, or pest‑infested leaves are removed before problems spread.
Understanding these benefits helps you approach each cut with purpose rather than fear.
When Is the Right Time to Prune?
Timing is crucial. Most indoor plants have a natural growth rhythm that aligns with the seasons, even under artificial light. Follow these guidelines:
- Spring and Early Summer: This is the primary growth period for many species. Pruning during this window encourages vigorous new shoots.
- Late Summer to Early Autumn: A light trim can tidy the plant before the slower winter phase.
- Winter: Avoid heavy pruning when growth naturally slows; only remove dead or diseased material.
Observe your plant’s leaf emergence pattern. If new leaves appear every 2‑3 weeks, that’s a sign you’re in an active growth phase and can safely prune.
Essential Tools for Safe Pruning
Using clean, sharp tools minimizes stress and reduces the chance of transmitting disease. Here’s a concise checklist:
- Pruning Shears: Stainless‑steel, bypass‑type shears are ideal for stems thicker than a pencil.
- Scissors: Small, sharp scissors work well for delicate foliage or seed‑pods.
- Disinfectant: Rubbing alcohol (70% isopropyl) or a dilute bleach solution (1 part bleach to 9 parts water) to wipe tools before and after each plant.
- Gloves: Optional but useful for plants with spines (e.g., cactus) or sap that can irritate skin.
- Cleaning Cloth: Lint‑free cloth for drying tools after disinfection.
Never use dull or rusted tools; they crush tissue and create entry points for pathogens.
How to Inspect Your Plant Before Cutting
Before you make any cut, conduct a thorough visual inspection:
- Check for Damage: Look for brown tips, mushy stems, or leaves with holes—these are candidates for removal.
- Identify Pests: Small webs, sticky residue, or visible insects indicate a need for targeted pruning to isolate the problem.
- Assess Growth Pattern: Notice if the plant is leaning toward a light source or if certain branches are crowding others.
- Feel the Stems: Healthy stems are firm yet slightly flexible. Brittle or mushy sections should be cut away.
Documenting these observations (a quick photo or note) helps you track progress over time.
Step‑by‑Step Technique for Safely Pruning
Follow this systematic approach for consistent results:
- Sanitize Your Tools: Wipe shears with alcohol before each plant.
- Mark the Cut: Use a pencil or a small piece of masking tape to indicate where you’ll cut. This reduces guesswork.
- Make a Clean Cut: Position the shears at a 45‑degree angle, cutting just above a leaf node (the point where a leaf attaches to the stem). This encourages a new bud to emerge.
- Remove Dead Material First: Start with yellowed leaves and rotting stems. This clears the view for healthier cuts.
- Shape the Plant: Step back frequently to view the overall silhouette. Trim side branches to maintain balance, but avoid removing more than 25‑30% of foliage at once.
- Clean Up: Collect all cut material and dispose of it away from other plants to prevent disease spread.
- After‑Care: Water the plant lightly (if the soil is dry) and avoid fertilizing for two weeks, allowing the plant to focus energy on healing.
Repeating this routine every few months keeps the plant tidy and thriving.
Special Considerations for Common Indoor Species
Different plants have unique pruning needs. Below are concise guidelines for several popular indoor varieties:
- Fiddle‑Leaf Fig (Ficus lyrata): Remove leggy stems at the base to encourage a bushier form. Avoid cutting the main trunk unless the plant is severely overgrown.
- Snake Plant (Sansevieria): Trim only the outer leaves that have become brown or soft. New leaves emerge from the rhizome, so minimal interference is needed.
- Pothos (Epipremnum aureum): Prune trailing vines just above a node to stimulate side shoots. This also prevents vines from choking the pot.
- ZZ Plant (Zamioculcas zamiifolia): Cut back any yellowing leaf stems at the soil line. ZZ plants store water in their rhizomes, so they tolerate less frequent pruning.
- Peace Lily (Spathiphyllum): Remove spent flower stalks at the base to redirect nutrients to foliage. Also trim brown leaf tips to maintain appearance.
When in doubt, consult a reputable plant care guide specific to your species before making major cuts.
Post‑Pruning Care: Water, Light, and Nutrition
Pruning is a stress event for a plant, so supportive care afterward is essential:
- Watering: Check soil moisture 24‑48 hours after pruning. If the top inch feels dry, water lightly. Overwatering can cause root rot, especially when the plant’s transpiration rate drops.
- Light: Ensure the plant receives its preferred light intensity. A newly pruned plant may need a few extra hours of indirect bright light to boost photosynthesis.
- Fertilizing: Hold off on high‑nitrogen fertilizer for at least two weeks. When you resume, use a balanced, water‑soluble formula at half the recommended strength.
- Humidity: Some tropical species benefit from a gentle mist or a pebble tray, especially during the dry winter months.
Monitoring the plant for a week or two will reveal whether it is responding positively (new shoots, firm leaves) or showing signs of stress (wilting, leaf drop).
Common Mistakes and How to Avoid Them
Even experienced growers slip up occasionally. Recognizing these pitfalls helps you correct course quickly:
- Cutting Too Much: Removing more than a third of foliage can shock the plant. Stick to incremental trims.
- Using Dirty Tools: Pathogens travel on contaminated blades. Always disinfect before each use.
- Pruning at the Wrong Time: Winter pruning of a slow‑growing succulent often leads to stunted growth. Align cuts with the plant’s active phase.
- Ignoring the Node Angle: Cutting below a node can leave a dead stub, while cutting too far above may waste potential growth points.
- Neglecting After‑Care: Skipping watering or fertilizing adjustments can delay recovery. Follow the post‑pruning checklist.
By staying mindful of these errors, you’ll keep your indoor garden vibrant.
Advanced Pruning Techniques for Different Growth Forms
Indoor plants exhibit a range of architectural patterns—rosettes, columnar stems, trailing vines, and clumping habits. Tailoring the cut to the plant’s natural form maximizes recovery and encourages the desired silhouette.
- Rosette‑type species (e.g., Aloe, Jade). Instead of slicing the outer leaves, practice leaf‑crown trimming. Cut the leaf base just above the point where the leaf meets the central rosette, preserving the meristematic tissue that will push new leaves upward. This method reduces the risk of exposing the central growth point to pathogens.
- Columnar or upright growers (e.g., Dracaena, Yucca). Apply the top‑cut technique: trim the apex at a 30‑degree angle, leaving a small node below. The plant will often respond by generating lateral shoots from that node, converting a single‑spike into a bushier, more stable structure.
- Trailing vines (e.g., Philodendron, String of Pearls). Use the pinch‑back method. Pinch the tip of a vine with clean fingertips rather than cutting with shears. This encourages a denser branching pattern because the plant perceives a loss of apical dominance and activates dormant buds along the stem.
- Clumping or rhizomatous growers (e.g., Spider Plant, Boston Fern). Separate the offshoots at the rhizome level, ensuring each division retains at least three healthy leaves and a portion of the root mass. This is simultaneously a pruning and propagation step, reducing crowding while increasing the number of plants.
When you understand the underlying growth habit, each cut becomes a strategic tool rather than a random trim.
Integrating Pruning with Propagation Strategies
Pruning does not have to be an isolated maintenance activity; it can be the first step in a propagation workflow. The following workflow merges the two processes efficiently:
- Identify a vigorous segment. Look for a stem that has at least two nodes and shows active growth. This is the ideal candidate for a cutting.
- Make a clean, angled cut. Use a 45‑degree angle just below a node to expose a larger surface area for rooting hormones.
- Prepare the cutting. Remove lower leaves, leaving only the top two to three. For succulent cuttings, allow the cut end to callous for 10‑15 minutes to prevent rot.
- Rooting medium selection. Choose a medium that matches the parent’s moisture preference—cactus mix for succulents, peat‑perlite blend for tropical foliage.
- Environmental control. Maintain high humidity (80‑90%) using a clear plastic dome, but ensure airflow to avoid mildew. Light should be bright, indirect; too much direct sun can scorch the tender cuttings.
- Transition phase. After roots develop (usually 2‑4 weeks), gradually acclimate the new plant to lower humidity and normal watering schedules.
By synchronizing pruning with propagation, you turn waste material into new growth, optimizing space and resources.
Seasonal Light and Temperature Adjustments After Pruning
After a cut, the plant’s photosynthetic capacity is temporarily reduced. Adjusting environmental variables can compensate for this loss and accelerate recovery.
- Spring‑early summer boost. Increase light intensity by 15‑20% for two weeks post‑prune. If you use LED fixtures, raise the output or bring the lamp closer (but keep the recommended distance to avoid heat stress).
- Autumn fine‑tuning. Reduce day‑length exposure gradually (by 30 minutes each week) to mimic natural shortening days. This helps the plant allocate energy to new bud formation rather than premature flowering.
- Winter protection. Keep temperatures 2‑3 °C above the plant’s minimum tolerance. For tropical species, maintain a minimum of 18 °C; for succulents, 15 °C is sufficient. Use a small space heater or a warm windowsill, but avoid drafts that could cause sudden temperature swings.
These seasonal tweaks are especially valuable for plants that are borderline for the indoor climate, such as Ficus elastica in cooler homes or Haworthia in heated rooms.
Pruning for Air Quality Improvement and Pest Management
Indoor plants are often chosen for their ability to filter volatile organic compounds (VOCs) and to act as a biological barrier against pests. Strategic pruning can enhance both functions.
Air‑purifying optimization. Research shows that leaf surface area correlates with VOC absorption rates. By removing older, yellowed leaves and encouraging the growth of fresh, glossy foliage, you increase the active surface area. Schedule a light pruning session every 8‑10 weeks to keep the foliage at peak photosynthetic efficiency.
Targeted pest removal. Some insects, such as spider mites, prefer older, drier leaves. Conduct a “pest‑focus prune” where you isolate and remove only the sections showing early signs of infestation. Immediately bag the removed material in a sealed plastic bag and discard it in the trash to prevent re‑infestation.
Companion‑plant pruning. Pair fast‑growing, low‑maintenance species (e.g., English Ivy) with slower growers. Regularly trim the fast grower to prevent it from shading the slower plant, ensuring both receive adequate light and maintain their air‑cleaning capacities.
Tools Maintenance, Calibration, and Homemade Alternatives
Even the best‑rated pruning shears can develop micro‑damage over time, leading to ragged cuts that stress plant tissue. Follow this maintenance schedule:
- Weekly sharpening. Use a fine‑grain sharpening stone at a 20‑degree angle on each blade. Test the edge on a piece of paper; a clean slice indicates a proper edge.
- Monthly hinge adjustment. Open the shears fully and tighten the screw until there is just enough resistance to keep the blades aligned without wobbling.
- Quarterly deep cleaning. Disassemble the shears, soak the blades in a 10% isopropyl solution for five minutes, then rinse and dry thoroughly.
If professional tools are unavailable, you can fashion effective alternatives:
- Repurposed kitchen scissors. Choose a pair with stainless steel blades and replace the handles with a wooden grip for better ergonomics.
- DIY pruning knife. Sharpen a small, flexible utility knife and attach a wooden handle using epoxy. This creates a low‑cost, single‑edge cutter ideal for delicate stems.
- Improvised disinfectant. Mix one part 91% ethanol with nine parts distilled water in a spray bottle. This solution evaporates quickly and leaves no residue on the blades.
Regular tool care not only extends the lifespan of your equipment but also safeguards plant health.
Recording, Analyzing, and Learning from Pruning Data
Many seasoned growers keep a simple logbook to track the cause‑and‑effect relationship between pruning actions and plant responses. Below is a template you can adopt, either on paper or using a spreadsheet:
| Date | Plant Species | Part Pruned | Amount Removed (%) | Environmental Conditions | Observed Response (2‑4 weeks) |
|---|---|---|---|---|---|
| 2024‑03‑12 | Fiddle‑Leaf Fig | Lower lateral stems | 20 | Light: 250 µmol·m⁻²·s⁻¹; Temp: 22 °C | New buds at nodes, no leaf drop |
| 2024‑04‑05 | Snake Plant | Outer leaf tips | 15 | Light: Low; Temp: 18 °C | Leaf tips remained green, no rot |
Analyzing this data over months reveals patterns such as:
- Optimal pruning percentages for each species.
- Seasonal windows that produce the fastest new growth.
- Correlations between humidity spikes and post‑prune leaf softening.
When you notice a recurring issue—say, yellowing after a 30% cut—you can adjust future pruning intensity or timing, turning intuition into evidence‑based practice.
Troubleshooting Common Post‑Pruning Problems (Beyond the Basics)
Even with careful technique, plants sometimes exhibit subtle signs of stress that are easy to overlook. The following checklist helps you pinpoint the underlying cause.
- Delayed bud emergence. If new shoots are absent after three weeks, check for low night‑time temperatures (<12 °C). Most indoor plants need a minimum of 15 °C at night to break dormancy.
- Edge‑curling leaves. This often signals a temporary calcium deficiency caused by rapid new growth. Apply a diluted calcium nitrate solution (1 g per liter) once, then resume normal watering.
- Excessive sap exudation. Some species (e.g., Ficus) release latex when cut. Wipe the sap with a cloth dampened in rubbing alcohol; avoid letting it dry on the leaf surface as it can attract dust and mold.
- Root rot after heavy pruning. When a large portion of foliage is removed, the plant’s water uptake may exceed transpiration, leading to saturated soil. Reduce watering frequency by 30% and increase airflow around the pot.
- Unusual pest resurgence. If aphids appear shortly after pruning, the plant’s stress hormones may have weakened its natural defenses. Apply a mild neem oil spray (1 ml per liter) and monitor daily for two weeks.
Addressing these nuanced issues promptly prevents minor setbacks from becoming long‑term setbacks, ensuring that each pruning session contributes positively to the plant’s lifecycle.
FAQ
Q1: How often should I prune my indoor plants?
A: Frequency depends on species and growth rate. Fast‑growing vines like pothos may need a trim every 4‑6 weeks, while slower growers such as ZZ plants benefit from an annual tidy‑up during spring.
Q2: Is it safe to prune a plant that has pests?
A: Yes, but treat the infestation first. Isolate the plant, prune away heavily infested stems, and apply a mild insecticidal soap. Disinfect tools between each cut to prevent spreading pests.
Q3: Can I use garden shears for indoor plants?
A: It’s best to reserve garden shears for thicker, woody stems. For most indoor foliage, small bypass pruning shears or sharp scissors provide better control and cause less tissue damage.
Q4: My plant’s leaves turned yellow after pruning. What should I do?
A: Yellowing can indicate over‑watering, insufficient light, or shock from excessive cutting. Check soil moisture, adjust light exposure, and ensure you didn’t remove more than 30% of foliage at once. Give the plant a week to recover before making additional cuts.
Q5: Should I prune roots when repotting indoor plants?
A: Light root pruning is acceptable if the root ball is densely tangled. Trim only the dead or circling roots, using clean scissors, and repot into fresh, well‑draining soil. Avoid heavy root removal unless the plant is severely root‑bound.
Related posts:
 Tiny Green Therapy: How Mini Plants Are Revolutionizing the Workspace
 How to Propagate Succulents
 DIY Hair Emergency: How to Trim Your Own Hair Without Disaster
 Pet-Safe House Plants
 Essential Tips for Better Garden Health
 Simple Tips for Better Indoor Plant Care
 Urban Outfitters’ Faux Plant Collection
 Plant Pruning Tips