
Bodyweight strength training is one of the most accessible ways to build functional muscle, improve joint stability, and boost overall fitness without the need for expensive equipment. Whether you’re recovering from an injury, traveling frequently, or simply prefer exercising at home, starting a bodyweight routine can be both safe and effective—provided you follow a structured approach. This guide walks you through the essential steps, from assessing your current fitness level to designing a progressive program, while emphasizing proper technique, recovery, and long‑term sustainability.
Key takeaways
- Prioritize movement quality and proper form in foundational exercises before increasing difficulty.
- Apply progressive overload by increasing repetitions, sets, or choosing more challenging exercise variations.
- Use dynamic warm-ups and prioritize 7–9 hours of sleep and protein for optimal muscle recovery.
- Log workouts and implement deload weeks to track progress and prevent physical plateaus.
- Modify movements for specific needs, such as using supports for older adults or wall push-ups during pregnancy.
Understanding the Basics of Bodyweight Training
Bodyweight training relies on using your own mass as resistance, which means the exercises can be scaled up or down by adjusting leverage, range of motion, or tempo. Unlike machine‑based workouts, bodyweight movements often engage multiple muscle groups and require core stability, making them excellent for functional strength. The key principles to remember are:
- Progressive overload: Gradually increase difficulty to continue challenging muscles.
- Movement quality: Prioritize controlled, full‑range motions over sheer volume.
- Consistency: Regular practice (2–4 sessions per week) yields the best results.
Common beginner exercises include squats, push‑ups, lunges, planks, and glute bridges. Each can be modified to suit a range of strengths, ensuring a safe entry point for anyone.
Assessing Your Current Fitness Level and Setting Realistic Goals
Before you begin, take a brief fitness assessment to understand where you stand. Simple tests such as a 30‑second wall sit, a maximum‑reps push‑up set, or a single‑leg balance hold provide baseline data. Record the numbers, then set SMART goals—Specific, Measurable, Achievable, Relevant, and Time‑bound. For example, “I will perform 12 full push‑ups with proper form by the end of four weeks.” Having clear milestones helps you stay motivated and makes progress tracking straightforward.
Remember to consider any pre‑existing conditions, such as joint pain or previous injuries. If you have concerns, consult a healthcare professional or a qualified trainer before starting a new program.
Essential Warm‑Up and Mobility Routines
A thorough warm‑up prepares your muscles, tendons, and nervous system for the upcoming load, reducing injury risk. Spend 5–10 minutes on dynamic movements that mimic the patterns you’ll use during the workout. Example warm‑up circuit:
- Arm circles – 30 seconds forward, 30 seconds backward.
- Leg swings (front‑to‑back and side‑to‑side) – 10 each leg.
- Hip circles – 10 each direction.
- World’s greatest stretch – 5 each side.
- Bodyweight squat to stand – 10 reps.
Follow the dynamic warm‑up with a brief activation set targeting the core and glutes, such as a 30‑second plank and 10 glute bridges. This routine elevates heart rate, improves joint range, and primes the nervous system for efficient movement.
Mastering Core Fundamental Movements
Before adding complexity, focus on mastering the foundational exercises. Proper form ensures you recruit the intended muscles and protects joints. Below are key cues for five core movements:
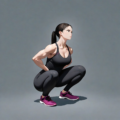
- Squat: Keep feet shoulder‑width apart, chest up, and push hips back as if sitting in a chair. Knees should track over the toes without collapsing inward.
- Push‑up: Hands slightly wider than shoulder‑width, body in a straight line from head to heels, elbows at a 45‑degree angle. Lower until the chest is a few centimeters above the floor.
- Lunge: Step forward, landing with the front knee over the ankle, back knee hovering just above the ground. Keep torso upright.
- Plank: Elbows under shoulders, engage the core, and avoid sagging hips or piking the butt.
- Glute bridge: Press through the heels, lift hips until the body forms a straight line from shoulders to knees, squeeze glutes at the top.
Practice each movement with a focus on technique for at least one week before progressing to more challenging variations.
Building a Progressive Routine: Reps, Sets, and Rest
Once you’re comfortable with form, structure your workouts using the classic set‑rep scheme. For beginners, a 2‑3‑4 approach works well:
- Weeks 1‑2: 2 sets of 8‑10 reps per exercise, 60‑90 seconds rest.
- Weeks 3‑4: 3 sets of 10‑12 reps, 60 seconds rest.
- Weeks 5‑6: 4 sets of 12‑15 reps, 45‑60 seconds rest.
Increase difficulty by:
- Adding a more demanding variation (e.g., incline push‑up → standard push‑up → decline push‑up).
- Increasing time under tension (slow 3‑second eccentric phase).
- Reducing rest intervals.
- Incorporating unilateral work (single‑leg squat, single‑arm push‑up).
Track your sets, reps, and any modifications in a training log. When you can complete the top end of the rep range with good form for all prescribed sets, move to the next progression level.
Incorporating Recovery and Injury Prevention Strategies
Recovery is as vital as the workout itself. Muscles repair and grow during rest, and neglecting recovery can lead to overuse injuries. Follow these guidelines:
- Sleep: Aim for 7–9 hours per night to support hormonal balance and tissue repair.
- Nutrition: Consume a balanced diet with adequate protein (0.8‑1.0 g per kg body weight) and carbohydrates to replenish glycogen.
- Active recovery: On off‑days, engage in light mobility work, walking, or yoga to promote circulation.
- Foam rolling: Spend 5‑10 minutes on major muscle groups after training to reduce tension.
- Listen to your body: Sharp pain, persistent soreness, or joint swelling warrant a pause and possibly professional evaluation.
Integrating these habits helps you stay consistent and reduces the likelihood of setbacks.
Tracking Progress and Adjusting Your Program
Objective tracking keeps motivation high and informs necessary tweaks. Use a simple spreadsheet or a fitness app to log:
- Date and workout type.
- Exercises, sets, reps, and any variations.
- Subjective rating of effort (RPE 1‑10).
- Notes on pain, energy levels, or form cues.
Every four weeks, review the data. If you’re consistently hitting the top of the prescribed rep range with low perceived effort, it’s time to increase difficulty. Conversely, if you’re struggling to complete the lower end, consider extending the adaptation period or reducing volume.
Periodization—alternating phases of higher volume with phases of lower volume but higher intensity—can also prevent plateaus. For example, after six weeks of progressive overload, take a deload week with 50 % of the usual volume.
Sample 4‑Week Beginner Program
The following template illustrates how to apply the principles above. Perform the routine three times per week (e.g., Monday, Wednesday, Friday) with at least one rest day between sessions.
- Week 1 (Foundation)
- Squat – 2 × 10
- Incline push‑up (hands on a sturdy bench) – 2 × 8
- Reverse lunge – 2 × 8 each leg
- Plank – 2 × 30 seconds
- Glute bridge – 2 × 12
- Week 2 (Stability)
- Squat – 2 × 12
- Standard push‑up – 2 × 8 (or continue incline if needed)
- Reverse lunge with a forward reach – 2 × 10 each leg
- Side plank – 2 × 20 seconds each side
- Single‑leg glute bridge – 2 × 8 each leg
- Week 3 (Volume)
- Squat – 3 × 12
- Standard push‑up – 3 × 10
- Walking lunge – 3 × 12 each leg
- Plank – 3 × 45 seconds
- Glute bridge – 3 × 15
- Week 4 (Intensity)
- Bulgarian split squat – 3 × 8 each leg
- Decline push‑up (feet elevated) – 3 × 8
- Jumping lunge – 3 × 6 each leg
- Plank with shoulder tap – 3 × 30 seconds
- Single‑leg glute bridge – 3 × 10 each leg
Adjust the tempo (e.g., 2‑second eccentric, 1‑second pause, 1‑second concentric) to increase time under tension without adding weight. After completing the four weeks, repeat the cycle with the next level of difficulty or introduce new movements such as pistol squats or hand‑stand progressions.
Designing a Personalized Progression Framework
While the original guide outlines a simple 2‑3‑4 set‑rep ladder, long‑term safety and continued adaptation often require a more nuanced structure. Think of your training plan as a series of nested cycles:
- Macrocycle – the big picture, typically 12–24 weeks, where you define a primary outcome (e.g., increase push‑up volume, master the pistol squat, improve joint stability).
- Mesocycle – a 3–6‑week block that focuses on a specific training emphasis (strength, hypertrophy, skill, or recovery).
- Microcycle – the weekly layout that translates the mesocycle goal into concrete workouts.
Within each microcycle, incorporate auto‑regulation by using an RPE (Rate of Perceived Exertion) scale. If a set feels like a 9 on a 10‑point scale, drop the rep count or increase rest; if it feels like a 6, you may safely add a rep or a more challenging variation. This approach respects day‑to‑day fluctuations in sleep, stress, and nutrition, reducing the risk of overreaching.
Example of a 12‑week macrocycle split into four mesocycles:
- Weeks 1‑3 (Foundation) – high volume, moderate intensity (2‑3 sets × 12‑15 reps). Emphasize perfect technique and joint mobility.
- Weeks 4‑6 (Strength) – lower volume, higher intensity (4‑5 sets × 5‑8 reps) using harder variations (e.g., decline push‑ups, Bulgarian split squats).
- Weeks 7‑9 (Skill) – incorporate low‑rep, high‑control skill work (hand‑stand holds, assisted pistol squats) alongside maintenance strength sets.
- Weeks 10‑12 (Deload & Test) – reduce volume by 40‑50 % and use the final week to retest baseline metrics (wall‑sit time, push‑up max, single‑leg balance).
Transition smoothly between mesocycles by adjusting one variable at a time (e.g., increase load before changing tempo). This staged progression minimizes abrupt jumps that can overload connective tissue or compromise form.
Adapting Bodyweight Training for Special Populations
Bodyweight strength work is inherently scalable, but certain groups need extra attention to biomechanics, hormonal changes, or medical history. Below are three common scenarios and concrete modifications.
Older Adults (60+)
- Joint‑friendly ranges: Limit squat depth to a comfortable “chair” position (≈90° knee flexion) before progressing to full depth.
- Balance focus: Add a light support (chair back or wall) for single‑leg exercises. Progress by reducing the support width over weeks.
- Grip strength: Use a thicker surface (e.g., a rolled towel) for push‑ups to stimulate forearm musculature without excessive wrist extension.
- Recovery buffer: Increase rest intervals to 90‑120 seconds and schedule at least two full rest days per week.
Pregnant Individuals (second & third trimester)
- Core safety: Prioritize transverse abdominis activation (drawing the belly button toward the spine) rather than traditional crunches.
- Pelvic‑floor friendly moves: Replace deep lunges with split‑stance squats, and avoid heavy eccentric loading that spikes intra‑abdominal pressure.
- Modified push‑up angles: Perform wall or countertop push‑ups to keep the torso more upright, reducing strain on the lower back.
- Monitoring intensity: Keep RPE below 7 and avoid breath‑holding during the concentric phase.
Adolescents (13‑17 years)
- Growth‑plate protection: Emphasize controlled tempo (2‑second eccentric, 1‑second pause, 1‑second concentric) to avoid rapid, high‑impact loading.
- Variety for motivation: Rotate between strength blocks, plyometric challenges, and skill‑based calisthenics to maintain engagement.
- Education on recovery: Teach the importance of sleep, hydration, and balanced nutrition to support rapid growth.
When working with any special population, a brief consultation with a medical professional or qualified trainer is advisable. Document any modifications in your training log to track how the body responds over time.
Integrating Skill‑Based Calisthenics and Mobility for Long‑Term Growth
Beyond the classic squat‑push‑up‑lunge‑plank combo, true functional strength often emerges from mastering body‑control skills. Skill‑based calisthenics demand both muscular strength and neuromuscular coordination, making them excellent “future‑proof” goals.
Key principle: Treat skill acquisition as a separate training emphasis, not an after‑thought. Allocate 15‑20 % of each session to dedicated skill work, using a “progress‑to‑master” ladder.
Hand‑Stand Foundations
- Wall‑faced shoulder taps – 3 × 5 each side (build scapular stability).
- Wall‑walks – 2 × 30 seconds (increase shoulder flexion range).
- Kick‑up attempts with spotter – 5‑10 reps per session (focus on timing).
- Freestanding hold – start with 5‑second attempts, add 2‑seconds each week.
Edge case: If wrist pain emerges, switch to a fist‑on‑ground position or use parallettes to keep the wrist in a neutral alignment.
Pistol Squat Progression
- Assisted pistol (hold a sturdy pole or TRX strap).
- Box‑pistol (sit back onto a low box, stand up without assistance).
- Negative pistol (slow eccentric, assisted concentric).
- Full pistol – aim for 3‑5 controlled reps per leg.
Mobility checkpoint: Adequate ankle dorsiflexion (>10°) is essential. Use a wall‑ankle stretch (lean forward with foot a few inches from the wall) for 30‑seconds daily if limited.
Planche and Front‑Lever Intro
These advanced holds require exceptional scapular protraction and core tension. Begin with frog‑stand holds (knees on elbows) and progress to tuck‑planche on parallettes. For the front‑lever, start with tucked rows on a low bar, then extend the tuck gradually.
Safety tip: Keep the training volume for these high‑stress holds low (2‑3 sets of 5‑10 seconds) and schedule them on non‑consecutive days to protect the shoulders and lower back.
Leveraging Minimal Equipment and Environmental Variables
Even when you have no dumbbells or barbells, everyday objects can add meaningful overload or change the movement plane, enhancing safety by diversifying stress patterns.
Resistance Bands
- Assisted pull‑ups or chin‑ups: Loop a band over a sturdy bar, place the foot or knee in the loop, and perform the movement with reduced body weight.
- Band‑supported push‑ups: Place a loop around the upper back and anchor the ends under the hands to provide upward assistance.
- Band‑resisted squats: Stand on the band and hold the ends at shoulder height, adding upward tension during the ascent.
Stairs, Steps, and Elevated Surfaces
Stair risers create natural incline/decline angles. Use a step for Bulgarian split squats, decline push‑ups, or elevated planks. The variable height allows progressive overload without extra weight.
Outdoor Terrain
- Sand: Perform squats, lunges, or burpees on a sand patch to increase stabilizer activation and reduce joint impact.
- Grass or turf: Ideal for high‑impact plyometrics (jump lunges, tuck jumps) because the surface absorbs shock.
- Park benches: Serve as sturdy platforms for incline rows, triceps dips, or inverted rows.
Edge case: If you train on uneven ground, start with slower tempos to allow your proprioceptive system to adapt, then gradually increase speed once stability improves.
Monitoring Recovery with Objective Metrics and Biofeedback
Subjective soreness scales are useful, but pairing them with objective data gives a clearer picture of readiness and helps prevent hidden overtraining.
Heart‑Rate Variability (HRV)
Measure HRV each morning using a chest‑strap or finger sensor. A drop of >10 % from your baseline may signal insufficient recovery, prompting a lighter session or an active‑recovery day.
Sleep Quality
Track total sleep time and sleep stages (deep vs REM) via a wearable or phone app. Aim for at least 85 % of the night spent in restorative sleep; if you fall below 70 %, consider adjusting training volume.
Mobility Benchmarks
Re‑test key mobility tests every 4‑6 weeks:
- Deep squat hold – can you maintain upright torso for 30 seconds?
- Shoulder dislocate with a PVC pipe – can you complete a full 360° rotation without pain?
- Active straight‑leg raise – measure the angle of hip flexion achieved.
Regress if you notice a loss of >10 % in range, as this may indicate accumulated fatigue or inadequate soft‑tissue recovery.
Blood‑Based Markers (Optional)
For athletes who want granular insight, periodic blood tests for creatine kinase (CK) or C‑reactive protein (CRP) can reveal muscle damage or systemic inflammation. Elevated CK (>200 U/L) after a session suggests excessive eccentric load; a short deload week may be warranted.
Nutrition Strategies Tailored to Bodyweight Strength Gains
Even without external loads, muscle protein synthesis (MPS) still requires sufficient building blocks and hormonal support.
Protein Timing and Distribution
Consume 0.25‑0.30 g of high‑quality protein per kilogram of body weight within a 2‑hour window after training. For a 70 kg individual, that translates to 17‑21 g of protein (e.g., a whey shake, Greek yogurt, or a plant‑based blend).
Caloric Balance for Different Goals
- Strength‑focused: Maintain a slight caloric surplus (+5‑10 %). This fuels tissue repair without excessive fat gain.
- Body‑composition (lean‑out): Aim for a modest deficit (‑10‑15 %) while keeping protein intake high (≥1.2 g/kg).
- Maintenance: Match intake to estimated total daily energy expenditure (TDEE) to sustain performance.
Micronutrients that Support Connective‑Tissue Health
Vitamin C, zinc, and collagen‑supporting amino acids (glycine, proline) aid tendon and ligament resilience. Include citrus fruits, lean meats, and bone broth or collagen peptides in daily meals.
Hydration and Electrolyte Management
Even low‑impact bodyweight sessions cause sweat loss, especially in warm environments. Aim for 2‑3 L of water per day, and add a pinch of sea salt or an electrolyte tablet after sessions lasting longer than 45 minutes.
Building Sustainable Habits and Mental Resilience
Consistency is the single most powerful predictor of long‑term success. Habit formation techniques can lock training into your daily routine while fostering a growth‑oriented mindset.
Habit Stacking
Pair your workout with an existing daily cue. For example, after brushing your teeth in the morning, immediately roll out a yoga mat and perform a 5‑minute activation sequence. The cue‑routine‑reward loop reinforces the behavior.
Micro‑Goals and Immediate Feedback
Set bite‑sized targets for each session (e.g., “hold the plank for 35 seconds” instead of “improve core strength”). Use a timer or a smartphone app that provides instant visual feedback, which boosts dopamine and reinforces the habit.
Mindful Movement
Before each set, take a brief breath‑pause: inhale for three seconds, exhale for three seconds, then mentally cue the key form point (e.g., “knees over toes”). This practice improves focus, reduces the likelihood of sloppy reps, and cultivates a mind‑body connection.
Dealing with Setbacks
When a missed workout or a minor injury occurs, adopt a “re‑frame” strategy: view the interruption as a data point rather than a failure. Log the reason, adjust the next week’s volume, and celebrate the corrective action. Over time, this reduces guilt‑driven burnout.
Finally, periodically revisit your original SMART goals. If you’ve exceeded them, set new, slightly more challenging objectives (e.g., move from 12‑push‑up target to a 20‑push‑up target, or add a new skill like the frog‑stand). The cycle of goal‑setting, achievement, and re‑evaluation keeps motivation high and ensures that your bodyweight training remains both safe and progressively challenging.
Frequently Asked Questions
1. How many days per week should a beginner train?
Three non‑consecutive days (e.g., Monday, Wednesday, Friday) provide enough stimulus for strength gains while allowing adequate recovery. If you’re very busy, two days can work, but aim for at least six total sessions per month.
2. Do I need any equipment for bodyweight strength training?
No, the core program requires only a stable surface. However, a sturdy chair, bench, or resistance band can add variety and assist with progression (e.g., assisted pull‑ups or band‑supported push‑ups).
3. Is it safe to train if I have a history of lower‑back pain?
Yes, provided you focus on neutral spine alignment, engage the core during lifts, and avoid excessive lumbar flexion. Start with hip‑hinge movements like glute bridges and progress slowly. If pain persists, seek guidance from a physiotherapist.
4. How long will it take to see noticeable strength improvements?
Most beginners notice increased muscular endurance and better movement confidence within 3–4 weeks of consistent training. Visible muscle tone may appear after 8–12 weeks, depending on genetics, nutrition, and overall activity level.
5. Can I combine bodyweight training with cardio?
Absolutely. Pairing 2–3 strength sessions with 2–3 moderate‑intensity cardio sessions (walking, cycling, swimming) supports cardiovascular health and aids recovery. Just ensure you schedule at least one full rest day per week.
Related posts:
 Full-Body Workout Routines for Your Home
 Perfect Your Squat Form
 Understanding Gym Equipment
 Rep Reality Check: How Many is Actually Enough for Results
 The Matching Workout Sets That Will Make You Actually Want to Exercise
 Master the Jump-Lunge-Squat Combo
 Six Powerful Toning Moves from Jenna Dewan
 Get Stronger with Charlee Atkins