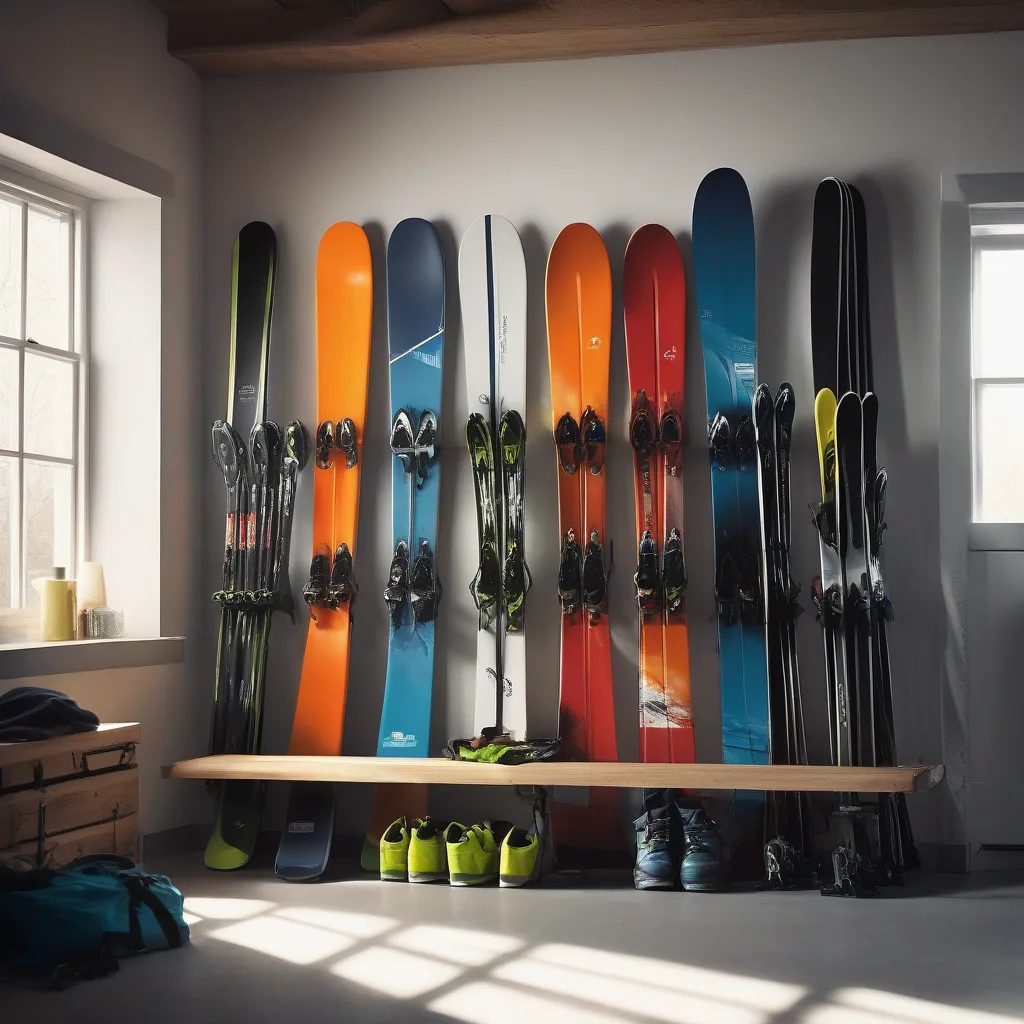
Winter sports bring excitement, fresh air, and a sense of adventure, but the joy can quickly fade if your gear isn’t cared for between seasons. Proper storage protects the performance, longevity, and safety of skis, snowboards, boots, helmets, and accessories. This guide walks you through a step‑by‑step plan to store winter equipment safely, covering cleaning, moisture control, organization, and the occasional “what‑if” scenario. Follow the actionable advice below to keep your gear in peak condition and ready for the first snowfall of the next year.
Key takeaways
- Clean all gear to remove salt and grime, then dry thoroughly using air circulation rather than direct heat sources.
- Store items in cool, dry locations using breathable bags and moisture-absorbing silica packets to prevent rust and mildew.
- Organize equipment with labels and a digital inventory to track maintenance needs and simplify your pre-season setup.
- Manage batteries for heated gear by keeping them at a 40-60% charge in stable, temperature-controlled environments.
1. Clean Every Piece Before It Goes Into Storage
Dust, salt, and sweat are the biggest culprits of corrosion and material breakdown. A thorough cleaning routine removes contaminants that could cause rust on metal edges, degrade plastic shells, or weaken wood cores.
- Skis and Snowboards: Wipe the bases with a soft, lint‑free cloth dampened with warm water. For stubborn grime, use a mild ski‑specific cleaner or a few drops of dish soap diluted in water. Rinse lightly and dry completely. Pay special attention to the edges—use a soft brush to clear any grit, then dry with a microfiber towel.
- Boots: Remove liners and insoles. Brush off snow, then wash the exterior with a gentle soap solution. Rinse and let air‑dry away from direct heat. Clean liners separately according to the manufacturer’s instructions, usually by hand‑washing in lukewarm water.
- Helmets and Goggles: Wipe helmets with a damp cloth; avoid submerging them. Use a non‑abrasive cleaner for the visor and a spray anti‑fog solution for goggles. Allow all components to dry fully before packing.
- Poles and Accessories: Wipe down poles, straps, and bags. For metal poles, dry thoroughly to prevent rust.
Cleaning is the foundation of storage; skipping it can trap moisture that leads to mold, odor, and structural damage.
2. Dry Completely – The Most Critical Step
Even a small amount of residual moisture can cause rust on metal edges and promote mold on fabric. Use the following methods to ensure everything is bone‑dry:
- Place items in a well‑ventilated room for at least 24 hours after cleaning.
- For boots, stuff the interiors with newspaper or a dry towel to absorb lingering dampness.
- Use a low‑heat hair dryer on a cool setting to blow air into hard‑to‑reach areas, such as ski bindings and boot tongues.
- If you have a dehumidifier, run it in the storage space for a few hours to lower ambient humidity.
Never use direct heat sources like radiators or ovens, as they can warp wood cores and melt plastic components.
3. Choose the Right Storage Location
Where you store your gear matters as much as how you pack it. Aim for a space that is cool, dry, and protected from direct sunlight.
- Garage: Ideal if it stays below 70°F (21°C) and humidity is controlled. Use shelving to keep gear off the concrete floor, which can absorb moisture.
- Basement: Works well if it remains dry. Install a waterproof barrier or plastic pallet to keep items off the floor.
- Attic: Generally not recommended because temperatures can swing dramatically, causing adhesives to weaken.
- Spare Bedroom or Closet: If you have space, this is the safest option. Keep gear in a dedicated closet with a breathable storage bag.
Regardless of the room, avoid areas near water heaters, washing machines, or exterior doors that let in drafts.
4. Use Breathable Storage Solutions
Plastic bags that seal completely trap moisture, creating a perfect environment for corrosion. Instead, opt for breathable options:
- Mesh Bags: Allow air circulation while protecting against dust.
- Cloth Storage Sacks: Made from cotton or canvas, they are easy to fold and store.
- Specialized Ski Bags: Look for models with ventilation panels and moisture‑absorbing liners.
Place a small silica gel packet or a reusable moisture absorber inside each bag to capture any residual humidity. Replace the packets every three months.
5. Protect Edges and Bindings
Edges are the most vulnerable part of skis and snowboards. Even a tiny nick can affect performance later.
- Edge Covers: Invest in rubber or plastic edge protectors that slide over the metal. They prevent scratches from other gear and from accidental knocks.
- Binding Locks: Some manufacturers sell small locks that keep the binding plates from moving. If unavailable, wrap the binding area with a soft cloth and secure with a gentle strap.
- Separate Storage: Store skis and boards horizontally, side by side, with a short gap between them to avoid edge‑to‑edge contact.
These simple steps keep the critical performance surfaces intact.
6. Organize With Labels and Inventories
Winter gear can accumulate quickly—multiple pairs of skis, several snowboard setups, and a range of accessories. An organized system saves time and reduces the risk of damage caused by hasty handling.
- Assign each item a short code (e.g., “SK‑01” for the first pair of skis).
- Write the code on a label and attach it to the bag or the edge protector.
- Create a digital inventory spreadsheet that includes: item type, size, purchase year, and any maintenance notes.
- Store frequently used items at eye level; reserve lower shelves for backup gear.
When you pull gear out for the season, a quick glance at the inventory tells you what needs a fresh tune‑up before hitting the slopes.
7. Add a Light Seasonal Maintenance Check
Even with perfect storage, a brief inspection before the next season can catch issues early.
- Edge Inspection: Run your thumb along the edges; feel for burrs or rust. Lightly file any rust spots with a fine metal file.
- Base Inspection: Look for scratches or dry spots. If the base feels dry, apply a thin coat of base cleaner or wax.
- Boot Check: Test the flex and lacing mechanisms. Replace worn liners or broken buckles.
- Helmet Integrity: Examine the outer shell for cracks and the inner foam for compression. Replace if any damage is evident.
Addressing minor problems now avoids costly repairs or safety hazards later.
8. Plan for Long‑Term Storage (More Than One Year)
Some enthusiasts skip a season or relocate, leaving equipment idle for an extended period. For storage beyond twelve months, follow these extra precautions:
- Apply a Light Wax Coat: A thin layer of glide wax on ski and board bases creates a barrier against oxidation.
- Use Desiccant Packs: Place larger, rechargeable silica packs in each storage bag and recharge them every six months.
- Rotate Position: Every six months, move the gear to a different spot in the storage area to prevent pressure points and ensure even air flow.
- Check for Pests: Inspect bags for signs of insects or rodents, especially in basements and garages. Seal any entry points.
These measures keep your equipment in a ready state, even after a multi‑year hiatus.
Adapting Storage to Your Local Climate
Even the most careful storage routine can be undermined if the ambient climate works against you. The key is to match your storage strategy to the dominant weather patterns of your region, and to have a contingency plan for occasional extremes.
Humid coastal zones (think Pacific Northwest, Gulf Coast, or the Great Lakes area) often hover around 70 % relative humidity or higher. In these environments, moisture loves to settle in the tiniest crevices of ski boots, snowboard bindings, and even the polymer cores of skis. To combat this, place a hygrometer in the storage area and aim for a steady reading below 45 %. A small, energy‑efficient dehumidifier set to a 30‑40 % range will pull excess water from the air without over‑drying the wood cores. Pair the dehumidifier with a breathable liner made of Tyvek or a similar material; it acts as a one‑way membrane that lets residual humidity escape while keeping dust out.
Arid interior climates (e.g., desert Southwest) present the opposite problem: the air is bone‑dry, but temperature swings can cause the polymer shells of helmets and goggles to become brittle. In this case, focus on temperature stability rather than moisture removal. A simple insulated storage cabinet—think a small chest freezer without the cooling element—can buffer rapid temperature changes. Add a few rolled towels or a small bag of rice to provide a modest amount of ambient moisture, preventing the plastic from cracking over long periods.
Cold‑climate basements that stay near freezing can cause adhesives in bindings to lose tack. If the space is consistently below 40 °F (4 °C), consider a low‑wattage space heater with a built‑in thermostat to keep the temperature in the 50‑60 °F (10‑15 °C) window. Monitor the heater’s output with a plug‑in power meter to avoid excessive heat that could warp wooden cores.
Seasonal temperature extremes (e.g., a garage that gets hot in summer and freezes in winter) demand a more robust solution: a climate‑controlled storage unit. These units are essentially miniature walk‑in refrigerators that maintain a set temperature and humidity range year‑round. While the upfront cost is higher, the payoff is a dramatic reduction in corrosion, delamination, and foam compression in helmets.
Regardless of the climate, always keep a spare set of silica‑gel packets, but treat them as a supplement, not a replacement, for active humidity control. Replace the packets when they change colour, or recharge them in an oven according to the manufacturer’s instructions.
DIY and Modular Storage Systems That Keep Gear Safe
Commercial ski bags and rack systems are convenient, but building a custom solution can save space, reduce cost, and give you exactly the protection you need. Below are three modular designs that can be adapted to any floor plan.
1. Wall‑Mounted PVC Ski Rack
- Materials: 1‑inch PVC pipe, elbows, T‑connectors, zip‑tied to a wall stud.
- Construction: Cut two 48‑inch lengths for the horizontal arms, and a 24‑inch length for the vertical support. Assemble a “U” shape using elbows and T‑connectors, then secure the base to a stud with heavy‑duty zip ties.
- Usage: Slide each ski or snowboard into the horizontal arms, which act as gentle cradles. The vertical pipe keeps the gear off the floor, protecting the bases from accidental impacts.
- Edge Cases: If your skis have unusually wide tails, add a second parallel PVC pipe 2‑3 inches apart to increase the cradle width.
2. Pallet‑Based Boot Tower
- Materials: Two standard wooden pallets, 4‑inch pipe insulation, zip ties.
- Construction: Stand the pallets side‑by‑side, then insert a row of pipe insulation vertically between them, creating a series of slots. Each slot holds one boot upright, with the toe pointing up.
- Benefits: The insulation absorbs any lingering moisture and prevents the boots from rubbing against each other. The open‑frame design allows air to circulate, reducing the chance of mold.
- Edge Cases: For oversized alpine boots, cut the insulation pipe lengthwise to widen the slot.
3. Modular Cube Storage with Adjustable Dividers
- Materials: Stackable plastic storage cubes (12‑inch), removable cardboard dividers, fabric liners.
- Assembly: Stack three cubes to create a 36‑inch tall column. Insert dividers to create separate compartments for helmets, goggles, gloves, and small accessories.
- Customization: Each liner can be printed with the gear’s code (e.g., “HB‑02” for helmet bag two) to integrate with your inventory system.
- Edge Cases: If you need to store a long pole, replace the top cube with a narrow rectangular container that fits the pole’s length.
All three systems are reversible; if you move houses, you can disassemble and re‑assemble without special tools. The modular nature also means you can add or subtract components as your gear inventory evolves.
Safeguarding High‑Tech and Heated Equipment
Modern winter gear increasingly incorporates electronics—heated boot liners, Bluetooth‑enabled helmets, GPS trackers, and even smart goggles that adjust tint automatically. These components have unique storage requirements that go beyond the basics covered earlier.
Battery Management
- Charge Level: Store lithium‑ion batteries at around 40‑60 % charge. Storing them fully charged for months accelerates capacity loss, while a completely drained battery can enter a deep‑discharge state and become unusable.
- Temperature: Keep batteries in a cool, stable environment (ideally 50‑70 °F / 10‑21 °C). Extreme cold can cause voltage drops, and excessive heat can trigger thermal runaway.
- Isolation: Place each battery in its own anti‑static bag and separate them from metal objects to avoid accidental short circuits.
Protecting Electronics from Condensation
- Silica‑Gel Enclosure: For helmets with built‑in speakers, store them inside a small, sealed container with a fresh silica‑gel packet for at least 48 hours before sealing the container. This removes any lingering moisture that could cause corrosion on circuit boards.
- Desiccant‑Infused Pouches: Commercially available “dry‑box” pouches contain both silica and a moisture‑absorbing polymer. Slip the entire heated glove set into one of these pouches for added protection.
Cable and Connector Care
- Coiling Technique: When storing power cables for heated boots, use the “over‑under” coiling method to prevent internal wire fatigue. Secure the coil with a reusable Velcro strap, not a rubber band, which can leave marks.
- Connector Caps: Many smart helmets come with detachable USB‑C or micro‑USB ports. Keep the supplied caps on these ports to block dust and moisture.
Software Updates and Calibration
- Pre‑Season Firmware: Before the next season, connect each device to its companion app and apply any pending firmware updates. This ensures that sensors (e.g., temperature regulators in heated jackets) operate at peak efficiency.
- Calibration Logs: Record the calibration date and any observed drift in a simple spreadsheet. If a sensor shows a 5 °C deviation after storage, you’ll know to recalibrate before hitting the slopes.
By treating the electronic subsystems as a distinct “mini‑equipment set,” you avoid the common pitfall of tucking them away with the rest of the gear and forgetting their special needs.
Turning Unused Gear Into Cash or Charity: A Pre‑Sale Checklist
When a season ends, you may have extra pairs of skis, a second snowboard, or a set of accessories that you no longer need. Selling or donating these items can free up storage space and benefit the community, but a haphazard approach can reduce the perceived value and even damage the gear.
Step 1: Perform a Light Refurbishment
- Edge Touch‑Up: Use a fine diamond stone to remove any rust or burrs that developed during storage. A smooth edge not only looks professional but also commands a higher price.
- Base Polish: Apply a thin layer of universal base cleaner, let it dry, then buff with a soft cloth. This restores the glossy appearance without committing to a full melt‑wax.
- Boot Refresh: Replace worn out liners with the manufacturer’s replacement kit. If the boot shell has minor scratches, a matte vinyl spray can conceal them without altering the fit.
Step 2: Document the Condition
- Photography: Use natural daylight, a neutral background, and a tripod to capture consistent angles—top view of the ski, side view of the binding, close‑up of the tip. Include a ruler or a known‑size object for scale.
- Condition Scale: Adopt a simple 1‑5 rating system (1 = heavily used, 5 = like‑new) and note any specific flaws (e.g., “minor delamination on left side”). This transparency builds buyer trust.
Step 3: Choose the Right Marketplace
- Local Classifieds (e.g., Craigslist, Facebook Marketplace): Ideal for bulky items; you avoid shipping costs and can negotiate in person.
- Specialty Forums (e.g., Snowheads, EpicSki): These communities value detailed specs and are willing to pay a premium for well‑maintained gear.
- Charitable Drop‑Off: If you opt to donate, research local ski clubs, youth programs, or non‑profits that accept gently used equipment. Some organizations will provide a receipt for tax‑deduction purposes.
Step 4: Packaging for Shipping
- Protective Wrap: Use bubble wrap around the skis or board, then slide them into a sturdy cardboard tube. Seal the ends with packing tape and label the tube with “Fragile – Keep Dry.”
- Insurance: For high‑value items (e.g., carbon‑fiber skis), purchase shipping insurance. The cost is usually a fraction of the item’s value and offers peace of mind.
Following this checklist can turn a dusty attic stash into a quick cash infusion or a meaningful donation, all while preserving the reputation of the seller and the safety of future users.
Smart Monitoring: Using Sensors and Apps to Keep an Eye on Your Storage Environment
Technology has made it possible to monitor temperature and humidity in real‑time, even from a smartphone. Implementing a simple sensor network can alert you before moisture or heat does damage.
Choosing a Sensor
- Bluetooth Hygrometer: Devices like the Govee or SensorPush attach a small probe to a shelf and sync with an app. They provide alerts when humidity exceeds a preset threshold (e.g., 45 %).
- Wi‑Fi Enabled Sensors: For larger spaces, a Wi‑Fi sensor (e.g., Aqara, Ecobee) can log data to the cloud, allowing you to view trends over weeks or months.
- Battery Life: Look for sensors that promise at least 12‑month battery life at a 10‑second sampling interval. This reduces maintenance overhead.
Placement Strategy
- Vertical Gradient: Moisture tends to settle near the floor, while heat rises. Place one sensor low (near the base of a ski rack) and another at eye level to capture any gradient.
- Separate Zones: If you store boots in a different cabinet from skis, give each zone its own sensor. This prevents a single hot spot from being masked by a cooler area.
Automation and Response
- Smart Plug Integration: Connect a dehumidifier or a low‑wattage heater to a smart plug. Set up an IFTTT or Home Assistant rule that turns the device on when the sensor reports humidity above 50 % or temperature below 45 °F.
- Notification Channels: Configure alerts to be sent via push notification, email, or even a text message. A 24‑hour window before the condition becomes critical gives you time to intervene.
Data Review
- Monthly Reports: Export the CSV log from the app and plot temperature versus humidity. Look for recurring spikes (e.g., after a rainstorm) and adjust your storage location or ventilation accordingly.
- Seasonal Baseline: Establish a baseline for each season. If you notice a gradual rise in humidity over several months, it may indicate a seal failure in the storage area that needs repair.
Investing in a modest sensor setup pays off in the long run by preventing costly repairs, preserving performance, and giving you confidence that your gear is protected even when you’re away on a summer vacation.
Coordinating Gear in Multi‑User Households or Rental Scenarios
When more than one person shares the same collection of skis, snowboards, and accessories, the potential for mix‑ups, damage, and disputes rises dramatically. A systematic approach to sign‑out, labeling, and scheduling can keep peace in the household and ensure every rider gets the equipment that fits them best.
Color‑Coded Tag System
- Assign each family member a distinct color (e.g., blue for Alex, red for Jamie). Purchase inexpensive Velcro tags in those colors and attach them to the top of each ski pole, the strap of each boot bag, and the side of each snowboard bag.
- When a piece is taken, the corresponding color tag is moved to a “checked‑out” board. This visual cue instantly tells anyone looking at the rack who the item belongs to.
Digital Sign‑Out Log
- Set up a shared Google Sheet with columns for Date, Item Code, Borrower, Expected Return, and Condition Notes.
- Require a brief note on any observed wear (e.g., “minor scuff on left ski tip”) before the item is checked back in. Over time, this log becomes a maintenance diary, highlighting gear that may need a professional tune‑up.
Scheduling Overlap Prevention
- Use a shared calendar (Google Calendar or Outlook) to block out dates when a specific set of gear is reserved. For example, if the family is planning a weekend trip to Vermont, block the “Family Ski Set” from Friday to Sunday.
- Set automatic reminders 48 hours before the reservation ends, prompting the borrower to return the gear and perform a quick visual check.
Handling Rental Gear
- If you occasionally rent equipment from a shop, create a dedicated “rental” shelf in your storage area. Keep the rental contracts, receipt, and a short checklist (size, condition) in a clear pocket folder attached to the shelf.
- Mark rental items with a bright “R” sticker to differentiate them from owned gear. This prevents accidental mixing and ensures you return the correct set.
Conflict Resolution Tips
- Establish a “first‑come, first‑served” rule for high‑demand items such as a specific set of backcountry skis. Document the rule in the household manual (a one‑page PDF stored on a shared drive).
- If a dispute arises, refer back to the digital log and calendar. The transparency of the system usually resolves misunderstandings without a heated argument.
By combining low‑cost visual cues with a simple digital workflow, multi‑user households can keep their winter arsenal organized, maintain each piece’s condition, and enjoy the slopes without the hassle of misplaced equipment.
FAQ
Can I store my ski boots in a regular shoe rack?
Yes, provided the rack is placed in a dry, temperature‑stable area and the boots are fully dry. Add a breathable boot bag or a silica packet to each pair to control residual moisture.
Is it okay to use a regular household vacuum bag for storage?
Vacuum‑seal bags remove air but also trap any remaining moisture, which can lead to rust or mold. If you must use them, first place a moisture absorber inside and open the bag periodically to let air circulate.
How often should I replace my ski edge protectors?
Edge protectors are inexpensive and can be reused many seasons. Replace them if they become cracked, warped, or no longer fit snugly over the edges.
Do I need to wax my skis before storing them?
Applying a thin coat of glide wax (not a full base melt) helps protect the base from oxidation. Scrape off excess wax before the next season to avoid a sticky surface.
What temperature range is safest for long‑term storage?
Aim for a consistent environment between 40°F and 65°F (4°C‑18°C) with relative humidity below 50%. Extreme cold can make plastic components brittle, while excessive heat accelerates adhesive breakdown.
Related posts:
 Mastering the Ski Erg
 The Best Winter Boots: Combining Function and Fashion
 Fall Boots That Don’t Sacrifice Comfort for Style
 Top US Winter Destinations
 Bottega-Style Boots on a Budget
 Blow Drying Hair Without Damage: Expert Tips
 Best Après-Ski Spa Treatments
 Safety Meets Style: 5 Bike Helmets That Don’t Sacrifice Fashion