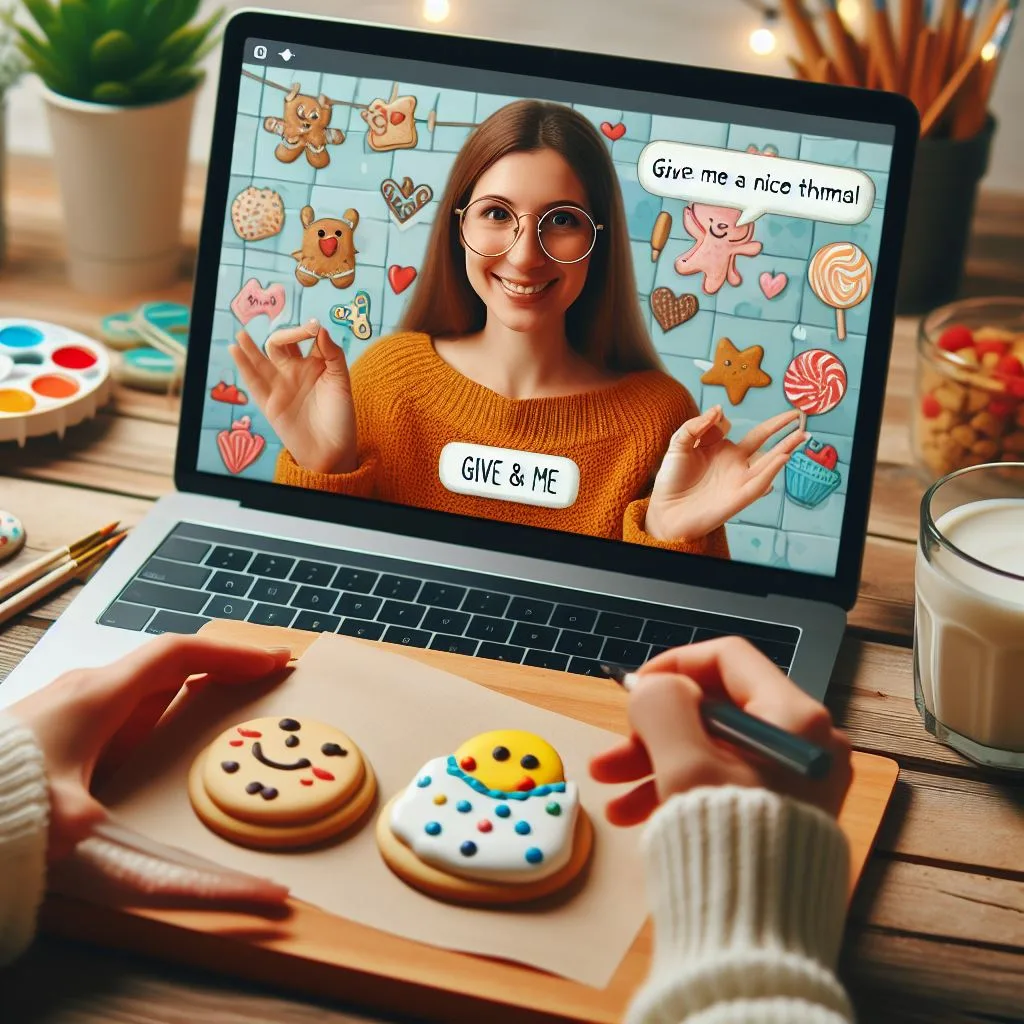
Spread Joy with a Virtual Cookie Party
In times of social distancing, finding creative ways to connect with loved ones is more important than ever. A fun idea is to host a virtual cookie decorating party! This allows friends and family to chat and decorate holiday treats together, even when physically apart.
Choose a Date and Time
First, pick a date and time that works for the guests you plan to invite. An evening or weekend may be best. Consider busy schedules and time zones when deciding. Give guests at least 1-2 weeks notice so they can add it to their calendar.
Make a Guest List
Next, put together your guest list! This likely includes family members, friends, coworkers or neighbors. Anyone with internet access can join. Send digital invitations with the video call link and date/time details. Ask guests to RSVP so you know how many to expect.
Buy Decorating Supplies
Provide guests with a list of recommended decorating supplies like:
- Sugar cookies
- Frosting and sprinkles
- Candy canes or chocolate chips
- Edible glitter or sanding sugar
That way everyone will have what they need on hand.
Set Up Your Video Space
On party day, set up your device in a space with good lighting. Clear clutter from the background area visible on camera. Test your internet connection speed to prevent lagging video. Log in early to troubleshoot any tech issues.
Have Fun Decorating and Chatting!
When guests start joining, give a warm welcome! Encourage people to show their cookie creations on camera and chat while decorating. Make it relaxed and comfortable rather than overly structured. The goal is spark joy, creativity and connection.
Share Your Masterpieces
After cookies are complete, have everyone share their edible works of art. Compliment each other’s decorating skills and enjoy some smiles and laughs. Capture screenshots to remember all the cookie creations.
Set aside a few for shipping if possible! Mail cookies to out of town guests or loved ones to spread more holiday cheer.
Curating a Compelling Theme and Color Palette
While a general cookie party is fun, a specific theme elevates the event from a casual hangout to a curated experience. Selecting a theme helps your guests narrow down their shopping lists and creates a cohesive look when everyone holds their creations up to the camera. For a winter-themed event, you might suggest a “Frosted Forest” motif, focusing on shades of evergreen, icy blue, and white. Alternatively, a “Vintage Kitsch” theme could involve bright pinks, teals, and edible pearls. The theme should dictate the shapes of the cookies as well; suggest stars and snowflakes for winter, or hearts and envelopes for a virtual Galentine’s celebration.
Beyond aesthetics, consider the skill level of your group when choosing a theme. If your guests are novices, a “Polka Dot and Stripes” theme is forgiving and allows for high-impact results with minimal precision. For more experienced decorators, a “Stained Glass” theme using crushed hard candies melted into cookie cutouts provides a technical challenge that looks stunning on screen. Once the theme is set, provide a digital mood board or a Pinterest link in your invitation. This gives guests a visual reference for the types of sprinkles or icing colors that will fit the vibe, ensuring the final group screenshot looks professionally coordinated.
Edge cases like dietary restrictions should also influence your theme. If you have guests who are gluten-free or vegan, choose a theme that naturally accommodates these needs, such as “Fruit-Inspired Designs” where the focus is on bright citrus colors and simple shapes that work well with alternative flour blends. Providing specific brand recommendations for vegan royal icing or gluten-free pre-baked cookies ensures that no one feels like an afterthought. By centering the theme around inclusive options, you foster a sense of belonging from the very start.
The Logistics of Pre-Party Kit Distribution
One of the biggest hurdles for a virtual party is ensuring everyone has the same quality of materials. You can solve this by offering three tiers of participation: the “DIY Scout,” the “Semi-Homemade Helper,” and the “Full Kit Recipient.” For the DIY Scout, provide a precise PDF shopping list including specific icing nozzle sizes (like a Wilton #2 or #3) and preferred food coloring brands. For the Semi-Homemade Helper, suggest specific store-bought doughs or pre-made icing tubs that can be thinned out with corn syrup for better flow. However, for the ultimate experience, consider shipping or hand-delivering custom cookie kits.
If you are shipping kits, packaging is your greatest challenge. To prevent breakage, cookies should be heat-sealed in individual cellophane bags and then placed in a sturdy box with layered bubble wrap. Avoid using loose packing peanuts, as they can create a mess for your guests. If you’re shipping icing, use disposable piping bags tied tightly with rubber bands and placed inside a secondary leak-proof bag. Include a small “Instruction Card” inside the box that tells them not to open the icing until the party starts to prevent drying. If shipping isn’t feasible, you can coordinate a “porch pick-up” where local guests swing by your home to grab a pre-assembled box of baked cookies and colored icing.
For long-distance parties where you cannot ship items yourself, leverage local bakeries in your guests’ respective cities. You can research bakeries near your friends and send them a gift card specifically for a “decorator’s kit.” This not only supports local businesses but also ensures your guests receive fresh, professional-grade supplies without the risk of shipping delays. Remember to set a “Kit Arrival Deadline” three days before the party to allow for any shipping hiccups or the need for guests to buy last-minute replacements if something arrives damaged.
Mastering the Technical Setup for Live Demonstrations
To lead a successful decorating session, your guests need to see more than just your face; they need to see your hands. A single-camera setup often leads to awkward angling where the host is constantly tilting their laptop screen down, risking a flour-covered keyboard. Instead, aim for a dual-camera approach. Use your computer for the face-to-face interaction and join the same meeting with your smartphone mounted on a cheap gooseneck tripod or a DIY stand made of a stack of books. Position the phone directly over your decorating surface to provide a “top-down” view, similar to popular cooking videos.
Lighting is the second pillar of a professional-feeling virtual event. Avoid overhead kitchen lights that create harsh shadows on your cookies. Instead, place a ring light or a desk lamp with a soft white bulb directly in front of your workspace. This ensures the colors of your icing pop on screen and allows guests to see the fine details of your piping. If you are using a top-down camera, ensure your shadow isn’t blocking the view. Side-lighting is often the best way to highlight the texture of the frosting and the shimmer of the sanding sugar.
Managing the audio is equally vital. If you are using two devices, ensure the audio is completely muted on one to prevent a feedback loop. Using a wireless earbud allows you to move freely around your kitchen without losing sound quality. If you plan to play background music, use the “Share Sound” feature on your video conferencing software rather than playing it through a physical speaker. This keeps the music at a consistent volume for everyone without drowning out the conversation. Pro-tip: Create a collaborative Spotify playlist and send the link out before the party so guests can contribute their favorite decorating tunes.
Advanced Decorating Techniques for the Virtual Stage
While the existing guide mentions basic supplies, a truly “fun” party introduces a few “wow” techniques that guests might not try on their own. Start the session with a quick 5-minute tutorial on “Icing Consistency.” Explain the difference between “flood icing” (which should have the consistency of honey) and “detail icing” (which should hold its shape like toothpaste). You can demonstrate the “15-second rule”: run a knife through your icing; if it takes 15 seconds for the line to disappear, it’s perfect for flooding. This technical nugget adds value to the party and helps guests achieve much better results.
Introduce the “Wet-on-Wet” technique, which is incredibly satisfying to watch on camera. Show guests how to flood a cookie with one color and immediately drop dots or lines of a different color into the wet icing. By dragging a toothpick through these dots, they can create hearts, marble patterns, or spiderwebs. This technique is perfect for virtual parties because it doesn’t require any drying time between layers, keeping the momentum of the party moving. You can also demonstrate how to use a “scribe tool” (or a simple toothpick) to pop air bubbles and push icing into tight corners, a small detail that makes cookies look professional.
Another high-impact, low-effort technique is the use of edible dusts and luster. If you included a small pot of gold or silver luster dust in your kits, show guests how to mix it with a drop of clear vanilla extract or vodka to create a “paint.” They can then use a small, food-only paintbrush to add metallic accents to their dried icing. This adds a level of sophistication to the cookies and provides a great “reveal” moment toward the end of the call when the metallic accents catch the light on camera.
Gamifying the Decorating Experience
To keep the energy high throughout a 90-minute session, incorporate structured games that break up the silence of concentrated decorating. A popular choice is the “Mystery Ingredient Challenge.” At a designated point in the party, ask everyone to grab one item from their pantry that wasn’t on the list—perhaps a pretzel, a piece of cereal, or a dried cranberry—and find a way to incorporate it into their current cookie design. This sparks creativity and usually results in some hilarious “Nailed It” moments that lighten the mood.
You can also run a “Speed Decorating Round.” Give everyone exactly three minutes to decorate a cookie based on a prompt you announce on the spot, such as “Your Favorite Movie” or “A Self-Portrait.” The time pressure prevents overthinking and leads to a lot of laughter. For a more relaxed game, try “Cookie Trivia.” Prepare 5-10 questions about the history of cookies (e.g., “Which state claims the Chocolate Chip Cookie as its official state cookie?”) and have guests type their answers in the chat. The winner could receive a small digital prize, like a $5 coffee e-gift card or a custom “Master Decorator” digital badge.
Judging the final products should be handled with a focus on fun rather than strict competition. Instead of a single “Best Cookie” winner, create several categories so multiple people get recognized. Categories like “Most Likely to be Eaten Immediately,” “The Abstract Artist Award,” “Most Enthusiastic Use of Sprinkles,” and “Best Recovery from a Disaster” ensure that everyone’s efforts are celebrated. Use the “Poll” feature in your video software to let guests vote anonymously for their favorites in each category, which keeps everyone engaged until the very end of the call.
Managing the “Mess” and Troubleshooting in Real-Time
Decorating cookies is inherently messy, and doing it near expensive electronics adds a layer of stress. As the host, lead by example and show your “cleaning station.” Suggest that everyone keeps a damp kitchen towel and a bowl of warm water nearby to frequently wipe their hands and the tips of their piping bags. This prevents the dreaded “sticky keyboard” and keeps the icing from drying out and clogging the nozzles. If a guest’s icing bag does clog, instruct them to use a damp cloth to wipe the tip or a toothpick to clear the dried bit, rather than squeezing harder, which often leads to the bag bursting.
Inevitably, someone will have a “cookie catastrophe”—a broken limb on a gingerbread man or a flood of icing that overflows the edges. Use these moments as teaching opportunities. Show them how to use “icing glue” (thick royal icing) to perform surgery on a broken cookie, or how to use a paper towel to carefully blot away excess icing before it dries. Remind the group that these mistakes are often the most delicious ones. If a cookie is truly beyond saving, suggest they crumble it up and use it as “snow” or “dirt” on a different cookie, turning a fail into a creative win.
Address the “runny icing” issue, which is common if guests are mixing their own. If someone’s icing is too thin to hold a shape, advise them to add powdered sugar a teaspoon at a time. If it’s too thick, suggest a few drops of water. These real-time adjustments make the experience feel like a collaborative workshop rather than just a social call. By being the “troubleshooter-in-chief,” you lower the frustration levels and ensure that everyone ends the party with a product they are proud of, regardless of their initial skill level.
Post-Party Engagement and Digital Scrapbooking
The party shouldn’t end when the video call disconnects. To extend the joy, create a shared digital space where guests can upload high-resolution photos of their finished (and dried) cookies. A shared Google Photos album or a dedicated Slack/Discord channel works well for this. Often, cookies look much better once the icing has set and the colors have deepened, so encourage guests to take a “glamour shot” the following morning in natural light and share it with the group. This allows for a second round of compliments and keeps the connection alive.
Consider creating a “Virtual Recipe Book” as a follow-up gift. Compile the cookie recipe used, the icing ratios, and photos of everyone’s creations into a simple PDF. You can use free design tools like Canva to make it look professional. This serves as a lovely memento of the time spent together and provides a resource for guests to use for future baking projects. You can even include a “Tips and Tricks” section based on the troubleshooting that happened during the call, such as “Remember Sarah’s trick for fixing broken stars!”
Finally, encourage a “Cookie Exchange by Mail” for those who are willing. While the party was virtual, the eating doesn’t have to be. Guests can pair up and mail a small box of their decorated cookies to one another. Provide a quick guide on how to pack them safely for shipping (using the same methods discussed for the kits). Receiving a box of handmade treats a few days after the party is a wonderful surprise that reinforces the bond created during the virtual session. It turns a digital event into a tangible, multi-sensory experience that guests will remember long after the last crumb is gone.
FAQ
What if someone can’t make the date/time?
No problem! Record the video call and send them the link to watch later. That way they won’t miss out.
How long should the virtual party last?
Aim for 1-2 hours. This gives enough time for decorating and socializing without guests losing interest and leaving early.
What if a guest doesn’t have decorating supplies?
Get creative! They can use graham crackers and nut butter, or decorate cookies on paper instead. The main idea is to participate and have fun.
Should kids be invited too?
Absolutely! This is a family-friendly event. Set up a kids table or have them decorate alongside parents. It’s a great boredom buster for little ones.
What if someone has tech issues joining?
Ask the guest to reconnect their wifi, restart their device or try a different browser. Also ensure cookies/popups are enabled. Offer to stay on video call to help troubleshoot or provide the dial-in number.
Related posts:
 Overcoming Dinner Party Anxiety When You’d Rather Stay Home
 Ultimate Summer Pool Party Planning
 Fun Games for Christmas Party That Everyone Can Enjoy
 Gluten-Free Sugar Cookie Recipe
 Benefits of Face Icing
 The Secret to Throwing Stress-Free Parties Every Time
 Peanut Butter Cookie Magic
 CDC Releases Updated Holiday Guidelines for Safe Celebrations