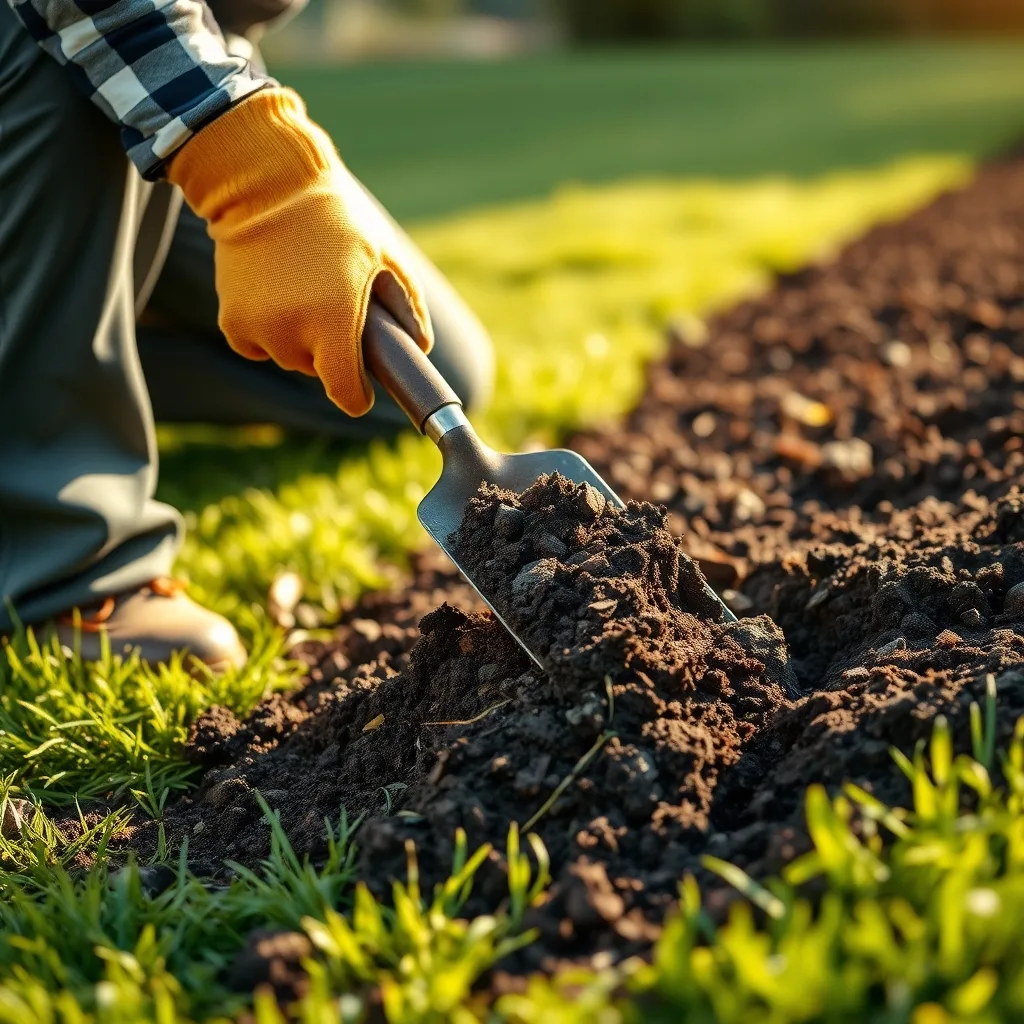
Many gardeners approach their backyard with a focus on the plants—the vibrant blooms of peonies, the crispness of homegrown kale, or the towering height of sunflowers. However, the true secret to a thriving garden lies beneath the surface. Soil is not merely “dirt”; it is a complex, living biological community consisting of minerals, organic matter, water, air, and billions of microorganisms. When your soil is depleted, your plants struggle regardless of how much you water or prune them. Improving your backyard soil quality is an investment in the long-term health of your ecosystem, ensuring that your garden remains productive and resilient for years to come.
Key takeaways
- Test your soil texture and pH to determine specific needs before adding amendments.
- Improve soil structure by top-dressing with organic compost rather than over-tilling.
- Use cover crops and organic mulch to prevent erosion and regulate soil temperature.
- Apply charged biochar to sandy soils to increase moisture and nutrient retention.
- Avoid synthetic fertilizers, opting instead for slow-release organic nutrients to protect beneficial microbes.
Understanding Your Soil: The Foundation of Improvement
Before adding any amendments to your garden, you must first understand what you are working with. Applying the wrong supplement can sometimes do more harm than good. Soil quality is generally defined by three main components: texture, structure, and chemical composition.
Soil Texture refers to the proportion of sand, silt, and clay. Sandy soil drains quickly but struggles to hold nutrients. Clay soil holds nutrients well but drains poorly, often becoming compacted and “suffocating” plant roots. Loam is the ideal middle ground, offering a balanced mix of all three.
Soil Structure is how those particles clump together. Healthy soil has a crumbly texture (called aggregation), which allows air and water to move freely. Compacted soil, often caused by heavy foot traffic or over-tilling, lacks these air pockets.
Chemical Composition involves the pH level and the availability of macronutrients (Nitrogen, Phosphorus, and Potassium). Most garden plants prefer a slightly acidic to neutral pH (between 6.0 and 7.0). To determine these factors, you have two primary options:
- Professional Soil Tests: Sending a sample to a local university extension or a professional lab provides the most accurate data on nutrient deficiencies and exact pH levels.
- The Ribbon Test: A simple DIY method where you moisten a handful of soil and squeeze it into a ribbon. If it breaks immediately, it is sandy; if it forms a long, flexible ribbon, it is clay-heavy.
The Magic of Composting: Feeding the Soil Food Web
If there is one single most effective way to improve any soil type, it is the addition of organic compost. Compost transforms kitchen scraps and yard waste into “black gold,” a nutrient-dense material that improves both the chemical and physical properties of the earth.
Composting works by supporting the soil food web—a network of bacteria, fungi, protozoa, and nematodes that break down organic matter into forms plants can absorb. To create high-quality compost, you need a balance of “Greens” and “Browns”:
- Greens (Nitrogen-rich): Vegetable scraps, fruit peels, fresh grass clippings, and coffee grounds. These provide the protein needed for microbial growth.
- Browns (Carbon-rich): Dried leaves, shredded cardboard, straw, and sawdust. These provide the energy source and create structural air pockets.
A healthy ratio is roughly three parts brown to one part green. For those with limited space, vermicomposting (using red wiggler worms) is an excellent alternative. Worms process organic waste faster than traditional piles and produce “castings,” which are incredibly potent natural fertilizers. When applying compost, avoid burying it deep in the soil; instead, layer it on top (top-dressing) and allow rain and earthworms to pull the nutrients down naturally.
Utilizing Cover Crops as Green Manure
Leaving soil bare during the winter or between planting seasons exposes it to erosion and nutrient leaching. Cover crops, also known as “green manure,” are plants grown specifically to protect and enrich the soil rather than for harvest.
Different cover crops serve different purposes based on your soil’s needs:
- Legumes (Clover, Vetch, Peas): These are essential for nitrogen fixation. They have a symbiotic relationship with bacteria in their root nodules that take nitrogen from the air and convert it into a form that future crops can use.
- Grasses (Winter Rye, Oats): These are excellent for adding organic bulk and improving soil structure. Their deep root systems break up compacted clay.
- Brassicas (Daikon Radish): Often called “tillage radishes,” these grow deep, thick roots that punch through hardpan soil, creating channels for water and air.
The key to using cover crops is the timing of the “termination.” You should mow or crimp the cover crop and incorporate it into the top few inches of soil (or let it decompose on the surface) a few weeks before your primary planting season. This releases a burst of nutrients exactly when your garden needs them most.
Mulching for Moisture Retention and Nutrient Cycling
Mulching is the practice of covering the soil surface with a layer of organic material. While many see mulch as a tool for weed suppression, its primary value is in soil regeneration. Mulch acts as a protective skin for the earth, regulating temperature and preventing the sun from baking the soil microbes.
Organic Mulch Options
The best mulches are those that decompose over time, contributing organic matter back into the soil:
- Straw or Dried Grass: Ideal for vegetable gardens. It keeps fruits (like squash) off the dirt and breaks down moderately quickly.
- Wood Chips or Shredded Bark: Best for perennial beds and around trees. These decompose slowly and are excellent for suppressing aggressive weeds.
- Leaf Mold: Composted autumn leaves are perhaps the best mulch for mimicking a natural forest floor, promoting the growth of beneficial fungi.
To apply mulch effectively, leave a small gap around the stems of your plants to prevent rot. Aim for a layer of 2 to 4 inches. As the mulch breaks down, it feeds the earthworms, who in turn aerate the soil, creating a continuous cycle of improvement.
Managing Soil pH and Nutrient Balance
Even soil rich in organic matter can be unproductive if the pH is off. pH is a measure of acidity or alkalinity; if the soil is too acidic or too alkaline, nutrients become “locked” and unavailable to the plant, regardless of how much fertilizer you add.
Adjusting pH Naturally
If your soil is too acidic (low pH), you can add agricultural lime (calcium carbonate) to raise it. If your soil is too alkaline (high pH), elemental sulfur or organic matter like pine needles and peat moss can help lower it. Always test your soil before adding these, as over-correction can lead to nutrient imbalances.
The N-P-K Balance
Understanding the three primary macronutrients is crucial for targeted improvement:
- Nitrogen (N): Promotes leafy, green growth. If plants are yellowing, they may need more nitrogen (found in blood meal or composted manure).
- Phosphorus (P): Essential for root development and flower/fruit production. Bone meal is a classic organic source of phosphorus.
- Potassium (K): Supports overall plant health and disease resistance. Kelp meal or greensand can provide a steady supply of potassium.
Rather than relying on synthetic, fast-release fertilizers—which can kill beneficial soil microbes and lead to salt buildup—opt for slow-release organic amendments. These provide a steady stream of nutrition and support the long-term vitality of the soil.
The Shift Toward No-Dig and Low-Till Gardening
For decades, the standard advice was to till the garden every spring. However, modern soil science has revealed that excessive tilling can be destructive. Tilling disrupts the mycorrhizal fungi—beneficial fungi that attach to plant roots and help them absorb water and phosphorus. It also collapses the soil structure and brings dormant weed seeds to the surface.
The No-Dig Approach
The “No-Dig” method, popularized by gardeners like Charles Dowding, focuses on adding organic matter to the top of the soil rather than mixing it in. This preserves the soil’s natural layers and protects the earthworm tunnels.
Sheet Mulching (Lasagna Gardening)
If you are starting a new garden bed over a lawn or compacted area, sheet mulching is a compassionate way to build soil without breaking your back or harming the earth. The process involves layering:
- Cardboard or Newspaper: A layer of non-glossy cardboard suppresses grass and weeds by blocking light.
- Green Layer: A layer of fresh grass clippings or composted manure.
- Brown Layer: A layer of straw, dried leaves, or shredded cardboard.
- Finish: A final layer of high-quality compost or topsoil.
Over several months, the cardboard decays, and the layers compress into a rich, spongy soil that is ready for planting without ever needing a tiller.
Solving Specific Soil Challenges
Not every backyard has the same problems. Depending on your geography, you may face specific hurdles that require targeted strategies.
Heavy Clay Soil
Clay soil is nutrient-rich but prone to compaction and waterlogging. The biggest mistake gardeners make is adding sand to clay; this can create a concrete-like substance. Instead, focus on adding coarse organic matter. Compost, aged bark, and leaf mold break up the clay particles, creating the necessary air gaps for root respiration.
Sandy Soil
Sandy soil drains too quickly, meaning nutrients wash away before plants can use them. The goal here is to increase the Cation Exchange Capacity (CEC), which is the soil’s ability to hold onto nutrients. Adding large amounts of organic compost and using heavy mulching helps the soil act like a sponge, retaining moisture and minerals.
Compacted Soil
If your soil is hard as a rock, avoid the temptation to till it deeply, which can create a “hardpan” layer beneath the tilled zone. Instead, use broadforking—a tool that lifts and aerates the soil without flipping it over—or plant deep-rooted cover crops like forage radishes to naturally fracture the compaction.
Long-Term Soil Maintenance and Seasonal Cycles
Improving soil is not a one-time event but a continuous cycle. Soil health fluctuates with the seasons, and your maintenance should reflect that.
Spring: This is the time for top-dressing with a fresh layer of compost and applying pre-season organic fertilizers based on your soil test results.
Summer: Focus on moisture retention. Refresh your mulch layers to prevent the soil from drying out and cracking, which can damage delicate root hairs.
Autumn: This is the most critical time for soil building. Leave the fallen leaves on the garden beds (or shred them) to provide a winter blanket. Plant your cover crops now to ensure the soil is fed during the dormant months.
Winter: Let the soil rest. Avoid walking on wet garden beds, as this causes severe compaction. The freeze-thaw cycle naturally helps break up some soil clumps, preparing the ground for the coming spring.
Integrating Biochar for Long-Term Carbon Sequestration
While compost provides a rapid burst of nutrients and improves soil structure in the short term, biochar offers a permanent structural upgrade. Biochar is a specialized form of charcoal produced through pyrolysis—the heating of organic biomass (such as wood chips, corn stalks, or coconut shells) in a low-oxygen environment. Unlike regular charcoal, biochar is designed specifically for soil amendment, acting as a microscopic “apartment complex” for beneficial microbes and nutrients.
The primary benefit of biochar lies in its immense surface area and highly porous structure. These pores hold onto water and nutrients, preventing them from leaching away during heavy rains. This is particularly transformative for sandy soils, where the biochar acts as a permanent sponge. However, applying raw biochar directly to the garden can be a critical mistake. Because it is so absorbent, raw biochar can initially “steal” nitrogen and phosphorus from the soil to fill its own pores, potentially causing a temporary nutrient deficiency in your plants.
To avoid this, you must “charge” your biochar before application. Charging is the process of saturating the biochar with nutrients so that it becomes a delivery system rather than a vacuum. Effective charging methods include:
- Compost Co-composting: Mix the biochar directly into your compost pile. As the organic matter breaks down, the biochar absorbs the resulting nutrients and becomes colonized by the fungi and bacteria present in the compost.
- Liquid Nutrient Soaking: Submerge biochar in a concentrated solution of fish emulsion, liquid seaweed, or compost tea for several days before mixing it into the soil.
- Manure Slurry: Mixing biochar into a slurry of aged manure allows it to absorb concentrated nitrogen, making it an immediate asset to the soil.
Once charged, biochar should be incorporated into the root zone or mixed into the top 6 inches of soil. Because biochar does not decompose for hundreds or even thousands of years, you only need to apply it once every few years, or even once in a lifetime for certain beds. An edge case to consider is the pH shift; most biochars are alkaline. If you are already dealing with high-pH alkaline soil, look for biochars made from acidic feedstocks or neutralize the biochar with a mild organic acid before application.
Liquid Soil Biology: Compost Teas and Organic Extracts
While solid amendments build the “infrastructure” of the soil, liquid amendments serve as the “software,” introducing active biological populations and readily available nutrients. The most potent of these is Aerated Compost Tea (ACT). Unlike a simple compost soak, ACT uses an air pump to oxygenate water, encouraging the rapid multiplication of aerobic bacteria and fungi while suppressing anaerobic pathogens.
To create a professional-grade ACT, you need a high-quality, mature compost source, a bucket of dechlorinated water, and a powerful air stone. A small amount of molasses is often added as a food source for the bacteria, which triggers a population explosion. The resulting brew is a living liquid that can be applied as a soil drench or a foliar spray. When used as a drench, it inoculates the rhizosphere—the area immediately surrounding the roots—with a diverse army of microbes that protect the plant from root rot and enhance nutrient uptake.
Beyond ACT, other liquid extracts provide targeted benefits:
- Fish Emulsion: A byproduct of the fish processing industry, this provides a fast-acting dose of nitrogen and trace minerals. It is ideal for the early vegetative stage of plant growth but should be used sparingly to avoid odors and potential salt buildup.
- Kelp and Seaweed Extracts: These are not traditional fertilizers but rather “biostimulants.” They contain cytokinins and auxins—plant hormones that stimulate root growth and help plants withstand environmental stressors like drought or extreme heat.
- Compost Extracts: Unlike teas, which are brewed, extracts are made by “washing” the microbes off the compost using a mesh bag and water. This method is faster and avoids the risk of over-feeding the bacteria with molasses, resulting in a more balanced microbial profile.
A common pitfall in liquid amending is the use of chlorinated tap water. Chlorine is designed to kill bacteria, which is the opposite of what you want when brewing a biological tea. Always let your water sit out for 24 hours to allow the chlorine to evaporate, or use a charcoal filter before starting your brew. For those with large gardens, applying these liquids through a drip irrigation system (fertigation) ensures that the microbial populations are delivered directly to the root zone without evaporating on the soil surface.
Leveraging Microbial Inoculants and Symbiotic Fungi
The most sophisticated aspect of soil quality is the invisible partnership between plants and fungi, specifically Arbuscular Mycorrhizal Fungi (AMF). These fungi penetrate the root cells of the plant and extend a vast network of hyphae (tiny threads) far beyond the reach of the roots themselves. In exchange for a small amount of the plant’s sugars, the fungi provide the plant with phosphorus, zinc, and water from distant soil pores.
In many backyard gardens, especially those that have been heavily tilled or treated with synthetic fungicides, these fungal networks are decimated. To restore them, you can use microbial inoculants. These are commercially available powders or gels containing dormant spores of mycorrhizae and Rhizobium bacteria. For maximum efficacy, inoculants should be applied directly to the root ball during transplanting or dusted onto seeds before sowing. This ensures the fungi establish a connection with the plant immediately upon germination.
However, inoculants are not a “magic pill.” Their success depends on the existing soil environment. For example, high levels of soluble phosphorus (often found in synthetic “starter” fertilizers) can actually signal the plant to reject the mycorrhizal partnership, as the plant feels it doesn’t need the fungi to find phosphorus. To encourage fungal growth, shift toward low-phosphorus, slow-release organic fertilizers.
Another critical inoculant is Bacillus subtilis, a beneficial bacterium that acts as a biological shield. It colonizes the root surface and produces natural antibiotics that kill pathogenic fungi like Pythium and Rhizoctonia. By integrating both fungal and bacterial inoculants, you create a “probiotic” soil environment that reduces the need for chemical pesticides and increases the plant’s innate immunity to disease.
Reading the Landscape: Using Bio-indicators to Assess Soil Health
While professional lab tests provide a chemical snapshot, the plants already growing in your backyard—including the weeds—provide a real-time biological report. Bio-indicator plants are species that thrive only under specific soil conditions, allowing you to diagnose soil issues without a laboratory.
By observing which “opportunistic” weeds are dominating your space, you can infer the following:
- Dandelions and Plantain: The presence of these weeds often indicates heavily compacted soil. Their strong taproots are designed to penetrate hard earth, and they thrive where other plants struggle to breathe. If these are everywhere, your soil likely needs aeration or more coarse organic matter.
- Horsetail and Sorrel: These plants typically signal acidic soil with poor drainage. If you see horsetail emerging in the spring, it is a strong hint that your pH is low and the soil may be overly saturated.
- Purslane and Chickweed: These often appear in soils that are very rich in nitrogen but may lack structural stability or be overly moist.
- Mugwort and Nettles: These are classic indicators of high nitrogen and high phosphorus levels, often found in areas where old manure piles were located.
Beyond weed identification, you can perform the “Slake Test” to measure soil stability. Take a dry clump of your soil and gently place it on a wire mesh submerged in a glass of water. If the soil remains intact, it has a strong structure held together by “glomalin” (a glue-like substance produced by fungi). If the soil collapses and dissolves into a cloud of sediment, it lacks the biological glues necessary to resist erosion and compaction.
Another simple sensory test is the “Scent Test.” Healthy soil should smell earthy and sweet, a scent caused by geosmin, a byproduct of Actinobacteria. A sour, rotten-egg smell indicates anaerobic conditions (lack of oxygen), usually caused by waterlogging or over-tilling, signaling that you need to improve drainage or incorporate more aeration.
Managing Salt Accumulation and Urban Soil Contaminants
Gardeners in urban environments or those living in cold climates face a unique challenge: salinity. Salt buildup can occur from road salt runoff, over-application of synthetic fertilizers (which are essentially salts), or naturally saline groundwater. Excess salt disrupts the osmotic pressure in plant roots, making it difficult for them to absorb water even when the soil is moist—a phenomenon known as “physiological drought.”
The primary solution for salt-affected soil is leaching. This involves applying heavy amounts of fresh water to flush the salts deeper into the soil profile, below the root zone. However, leaching only works if the soil has adequate drainage; otherwise, you risk waterlogging the roots. In heavy clay soils where leaching is slow, gypsum (calcium sulfate) is an invaluable tool. Gypsum doesn’t change the pH, but the calcium replaces the sodium on the soil particles, allowing the sodium to be washed away more easily by water.
Urban soils also frequently contain legacy contaminants, such as lead from old paint or petroleum residues from old garages. In these cases, improving soil quality requires a strategic approach to safety. Phytoremediation is the process of using specific plants to extract toxins from the soil. Sunflowers, for instance, are remarkably efficient at absorbing heavy metals. However, plants used for phytoremediation must be disposed of in the trash—never composted—as they concentrate the toxins in their tissues.
For those dealing with contaminated urban soil where phytoremediation is too slow, the safest path is the construction of raised beds with a geotextile barrier. By placing a permeable fabric between the native urban soil and the new organic soil, you prevent roots from dipping into contaminated layers while still allowing drainage and the movement of beneficial soil organisms. This creates a “clean” biological island within a degraded urban landscape.
Strategic Intercropping and Living Mulches for Continuous Regeneration
While the existing methods of cover cropping involve planting and then terminating a crop, living mulches and intercropping provide a more permanent, symbiotic approach to soil improvement. A living mulch is a low-growing plant, such as white clover or creeping thyme, that is grown permanently beneath the primary crop. Unlike traditional mulch, a living mulch is an active biological pump, constantly adding oxygen and nutrients to the soil through its roots.
White clover is the gold standard for living mulches. As a legume, it fixes nitrogen throughout the entire growing season, providing a slow-release fertilizer to the taller plants growing beside it. Furthermore, the dense canopy of a living mulch protects the soil surface from the impact of raindrops—which can cause surface crusting—and reduces water evaporation more effectively than straw or bark.
Intercropping takes this a step further by pairing plants with complementary root architectures and nutrient needs. For example:
- The Three Sisters Method: Planting corn, beans, and squash together. The corn provides structural support, the beans fix nitrogen for the other two, and the large squash leaves act as a living mulch, shading the soil and suppressing weeds.
- Deep-Rooted Pairing: Planting a deep-rooted crop (like carrots or daikon) alongside a shallow-rooted crop (like lettuce). The deep-rooted plants pull minerals from the subsoil up to the surface, where they become available to the shallow-rooted plants as the deeper roots decompose.
Frequently Asked Questions
How long does it take to see a noticeable improvement in soil quality?
While some chemical changes (like pH adjustment) can happen relatively quickly, structural improvements take time. You will likely see healthier plant growth within one growing season after adding compost, but achieving a truly rich, loamy structure usually takes 2 to 3 years of consistent organic amendments and mulching.
Can I use coffee grounds directly in my garden soil?
Yes, but in moderation. Coffee grounds are a great source of nitrogen and can improve soil texture. However, adding them in thick clumps can create a waterproof barrier. It is best to mix them into your compost pile first or sprinkle them thinly across the surface and rake them in.
What is the difference between a soil conditioner and a fertilizer?
A fertilizer provides specific nutrients (like N-P-K) to feed the plant directly. A soil conditioner (like compost, peat moss, or perlite) improves the physical properties of the soil—such as aeration, drainage, and water retention. Think of fertilizer as “food” and conditioner as “housing” for the roots.
Is it safe to use livestock manure in my backyard soil?
Only if it is fully composted. “Hot” or fresh manure is too high in nitrogen and ammonia, which can burn plant roots and introduce weed seeds or pathogens. Ensure manure has been aged or composted for at least six months before applying it to your garden.
Why does my soil still feel hard even though I add compost?
This is often a sign of compaction or a lack of biological activity. If the soil is devoid of earthworms and fungi, the organic matter won’t be integrated into the structure. Try avoiding all foot traffic in the area and use a broadfork to aerate the soil without turning it, which encourages the soil food web to resume its work.
Related posts:
 Essential Tips for Better Garden Health
 Mulching 101: The Secret to a Thriving Garden
 How to Regrow Common Kitchen Vegetables From Scraps
 Simple Tips for Better Indoor Plant Care
 Beginner’s Guide to Composting
 The Best Potting Soil for Houseplants, According to Plant Parents
 Simple Tips for Backyard Composting
 Rose Crystal Garden in NYC