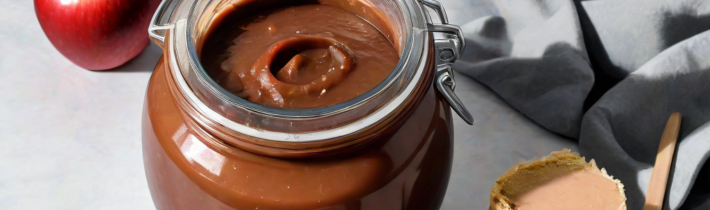
Apple butter is a silky, concentrated fruit spread that transforms fresh apples into something deeply flavored and luxuriously spreadable. Unlike jam, which relies on pectin and sugar to gel, apple butter achieves its thick, glossy texture through slow cooking that breaks down the fruit completely. The result is an intensely aromatic condiment that tastes like concentrated apple essence—perfect on toast, stirred into yogurt, swirled into oatmeal, or used as a base for glazes and baking.
Making apple butter traditionally requires hours of stovetop cooking and constant stirring to prevent scorching. The Instant Pot changes this equation entirely. By using pressure cooking followed by sauté mode, you can produce restaurant-quality apple butter in roughly 90 minutes with minimal hands-on time. The pressure environment accelerates the breakdown of the apples while concentrating their natural sugars and spices, delivering results that rival days of conventional cooking.
This guide walks through the complete process, from selecting the right apples to troubleshooting common issues, so you can make apple butter that’s perfectly suited to your taste and storage needs.
Choosing Apples for the Best Results
The apple variety you choose directly influences the final flavor profile of your apple butter. Some apples are too tart, others too bland, and a few are genuinely perfect for this application.
Granny Smith apples bring sharp acidity and firm flesh that holds up well during extended cooking. They’re excellent for preventing your apple butter from becoming cloying. Honeycrisp apples add natural sweetness and aromatic complexity. For the most interesting results, mix varieties—combine Granny Smith with Honeycrisp, or blend Braeburn with Jonagold. This layering of flavors creates depth that a single variety rarely achieves.
Avoid Red Delicious apples, which become mealy during cooking and contribute little flavor. McIntosh apples work but tend toward wateriness. You want varieties that are crisp, flavorful, and hold their structure. Aim for roughly 3 pounds of apples to fill a 6-quart Instant Pot, though the exact amount depends on how densely you pack them.
Buy apples a few days before cooking if possible. Apples that have been stored for a week or two actually develop more complex sugars and deeper flavor than freshly picked fruit. Wash them thoroughly and remove any bruised portions, which can introduce off-flavors into the finished product.
Preparing Your Ingredients and Equipment
Proper prep determines how smoothly the cooking process goes. Begin by washing your Instant Pot’s inner pot and trivet. Peel, core, and quarter your apples—this takes about 20 minutes for 3 pounds but is worth doing carefully. Discard any seeds or damaged tissue.
Measure your spices before you begin cooking. A typical batch calls for 1 teaspoon of ground cinnamon, ½ teaspoon of ground nutmeg, ¼ teaspoon of ground cloves, and a pinch of sea salt. You can adjust these amounts based on personal preference; more spice creates a warmer profile, while less allows the apple flavor to dominate. Some people add a tablespoon of vanilla extract or a few gratings of fresh ginger, though these are entirely optional.
Decide whether you’re adding sugar. Apples contain enough natural sugars that apple butter works perfectly well without added sweetener, though 2-3 tablespoons of coconut sugar or cane sugar can emphasize the caramelized notes. Brown sugar adds molasses complexity if you want a deeper, more sophisticated flavor. Have your sweetener measured and ready.
Set up your workspace with a fine-mesh sieve, an immersion blender, and glass jars for storage. Having everything within arm’s reach prevents scrambling mid-process when your apple butter is at a crucial cooking stage.
The Instant Pot Cooking Process
Add your quartered apples directly to the Instant Pot’s inner pot—no water needed initially. The apples contain sufficient moisture that they’ll create steam. Sprinkle your spices and salt over the apples, then add your sugar if using it. Stir to distribute the seasonings evenly.
Secure the lid, ensuring the pressure valve is set to sealing position. Select high pressure and set the time to 15 minutes. This duration cooks the apples until they’re completely soft but stops short of turning them into mush. Once the timer sounds, allow the pressure to release naturally for 10 minutes, then switch the valve to venting to release any remaining steam.
Carefully remove the hot inner pot. The apples should be very soft and have released significant liquid. This is exactly what you want. If you see large chunks of apple still present, the pressure cooking didn’t run long enough; this rarely happens at 15 minutes, but it can occur if you used exceptionally firm apples or a particularly full pot.
Using an immersion blender, blend the cooked apples until completely smooth. This takes 2-3 minutes of continuous blending. If you don’t have an immersion blender, carefully transfer the hot apples in batches to a standard blender, blend until smooth, and return the purée to the pot. The result should have no visible apple chunks and a uniform, thick consistency.
Reducing and Concentrating the Flavor
Once blended, your apple mixture is actually still too thin to be true apple butter. It needs to be reduced significantly, which is where the Instant Pot’s sauté function becomes essential.
Select sauté mode and allow the apple purée to come to a gentle simmer. It will bubble and steam actively. This is where you need patience and some attention. Stir every 5 minutes, scraping the bottom and sides to prevent sticking or scorching. The mixture will gradually darken from pale tan to a rich amber-brown color as water evaporates and the natural sugars concentrate.
This reduction phase typically takes 40-50 minutes. You’ll know it’s done when a wooden spoon drawn through the mixture leaves a clear trail that takes a few seconds to flow back together. At this point, the texture should resemble a thick, spreadable jam. If you want it thicker still, continue cooking for 5-10 more minutes, though be careful not to push it too far—overreduction can create a hard, brittle product that won’t spread properly.
Taste the apple butter at this stage. If the flavor seems mild, you can add a tablespoon more sugar and continue cooking briefly. If it tastes too strong or spicy, turn off the heat and let it rest for a few minutes; the flavors sometimes seem more intense when the mixture is still hot.
Blending and Straining for Silky Texture
For apple butter with a completely smooth, refined texture, pass the reduced mixture through a fine-mesh sieve. This extra step removes any small bits of apple skin or fiber, creating something almost creamy in mouthfeel.
This step is entirely optional—many people prefer the rustic texture of unstrained apple butter and appreciate the fiber it contains. But if you’re aiming for the silky, luxurious texture of commercial apple butter, take 5 minutes to push the mixture through a sieve. Use a silicone spatula or the back of a wooden spoon to gently press the apple butter through, leaving behind any coarse material.
If you’ve strained the apple butter, return it to the Instant Pot and run sauté mode for just 2-3 minutes to heat it back through before jarring. This ensures proper food safety for shelf-stable storage.
Storage and Preservation Methods
For immediate use or short-term refrigerator storage, simply spoon the hot apple butter into clean glass jars and refrigerate once cooled. It keeps for up to three weeks in the refrigerator.
For longer storage, you can water-bath can your apple butter. While the mixture is still hot, carefully pour it into sterilized half-pint jars, leaving ¼-inch headspace. Wipe the rims clean with a damp cloth, then cap with sterilized lids. Process in a boiling water bath for 10 minutes (adjust time if you live above 1,000 feet elevation). Properly canned apple butter keeps for up to a year in a cool, dark cupboard.
Alternatively, freeze your apple butter in ice cube trays, then transfer the frozen cubes to freezer bags. This method lets you thaw exactly the amount you need. Frozen apple butter keeps for up to 8 months.
Don’t skip the cooling period before storing. Hot apple butter can condense inside the lid, creating pressure that breaks the seal and spoils the batch. Allow jars to cool to room temperature before refrigerating or canning.
Creative Applications Beyond Toast
While apple butter is traditionally spread on toast or bagels, its concentrated flavor makes it exceptionally versatile in cooking and baking. Stir 2 tablespoons into plain yogurt for a naturally sweetened parfait base. Swirl it into oatmeal or chia pudding for added depth. Layer it into cakes or brownies—it functions beautifully as a filling that adds moisture and flavor.
Use apple butter as a glaze for roasted pork or duck. Whisk 3 tablespoons of apple butter with 1 tablespoon of Dijon mustard and 1 teaspoon of apple cider vinegar to create a sophisticated sauce. Brush it on during the last 10 minutes of roasting for a glossy, flavorful finish.
In baking, substitute apple butter for some of the sugar in quick breads, muffins, and cookies. Use it as the base for a homemade barbecue sauce by combining it with tomato paste, vinegar, and Worcestershire sauce. Stir it into cream cheese for a unique spread. The possibilities genuinely expand once you think beyond breakfast condiments.
Troubleshooting Common Issues
If your apple butter remains too thin after the reduction phase, you either didn’t cook it long enough or your apples had unusually high water content. Return it to sauté mode and continue cooking, stirring every 5 minutes, until it reaches the desired thickness. Some apple varieties genuinely require more reduction time than others.
If it scorches on the bottom—indicated by a burnt smell or dark, crusty spots—turn off the heat immediately and carefully transfer the unburnt portion to a clean pot. Scorching imparts off-flavors that are impossible to mask. To prevent this, stir more frequently during the final stages of reduction and consider using the lowest sauté setting once the mixture becomes quite thick.
If the texture seems grainy or crystallized after cooling, this usually indicates that sugar crystallized during cooking. This rarely happens with low-sugar batches but can occur if you added substantial sweetener. Reheat the batch gently, stir in a tablespoon of water, and cool again. The crystals should dissolve back into the mixture.
If you end up with separated liquid on top of a thick layer of apple butter, your mixture may have cooked too long or at too high a temperature. Stir it well—sometimes this is simply natural separation—or recook everything together at sauté mode for a few minutes to reincorporate the layers.
Flavor Variations and Seasonal Adaptations
Once you master the basic recipe, you can create variations that complement your pantry and preferences. A chai-spiced version uses cardamom and black pepper in addition to cinnamon and nutmeg. A bourbon vanilla version incorporates vanilla extract and a hint of bourbon whiskey (the alcohol burns off during cooking). A maple version uses maple syrup instead of cane sugar for earthy complexity.
In fall, add a small amount of fresh ginger—about ½ teaspoon of grated fresh ginger root adds brightness without overwhelming. In winter, a pinch of star anise or a scraping of nutmeg creates deeper warmth. Some people add a tablespoon of apple cider vinegar during the final minutes of cooking, which brightens the overall flavor and adds complexity.
You can also add complementary fruits. Pear butter made with 60% apples and 40% pears creates something entirely different—lighter and more delicate than straight apple. A few dried cranberries or a handful of fresh raspberries stirred in during the final minutes add tartness and visual interest.
Making Apple Butter Gifts and Batch Cooking
Homemade apple butter makes an exceptional gift, particularly when jarred in attractive containers with handwritten labels noting the date and any custom ingredients. It’s thoughtful without being difficult, and most people genuinely appreciate receiving a jar.
The Instant Pot method scales efficiently. You can make three full batches in a single afternoon—one immediately, then back-to-back batches using the same equipment. Allow only 30 minutes of cooling time between batches, which is enough for safe handling while maintaining momentum.
If you regularly make apple butter, investing in a batch of canning jars and lids makes sense economically and environmentally. Repeat batches become increasingly efficient as you develop a rhythm and become practiced at recognizing when the texture is precisely right.
Understanding Apple Butter Chemistry and Why the Instant Pot Works
Apple butter’s transformation from whole fruit to silky spread involves specific chemical processes that the Instant Pot accelerates dramatically. When apples are heated under pressure, their cell walls break down more rapidly than they would at atmospheric pressure, releasing pectin and natural acids that would normally take hours of stovetop cooking to liberate. The pressure environment essentially compresses what would be a four-to-six-hour process into fifteen minutes of high-temperature, high-humidity cooking.
The natural pectin in apples—particularly in less-ripe varieties—begins to hydrolyze under heat and acid, creating a gel-like structure even without added commercial pectin. This is why apple butter becomes spreadable without any gelling agents; the fruit’s own chemistry handles this transformation. The Instant Pot’s sauté phase afterward concentrates not just water but also allows Maillard reactions to occur between the apples’ proteins and sugars, creating those complex caramelized flavors that make homemade apple butter taste so dramatically different from store-bought versions.
Understanding this chemistry explains why certain adjustments work. If your apple butter won’t thicken despite extended cooking, you likely need either more natural pectin (add slightly underripe apples next time) or more heat-driven concentration time in sauté mode. If flavors seem muted, you haven’t achieved sufficient caramelization; pushing the sauté phase longer develops the deeper, more interesting taste profile. The Instant Pot method works because it creates an ideal environment for both rapid fruit breakdown and flavor concentration.
Adapting Recipes for Different Instant Pot Sizes and Yields
While three pounds of apples in a 6-quart Instant Pot is the standard recommendation, many home cooks own 3-quart or 8-quart models, and adapting the recipe is straightforward once you understand the underlying principles. In a 3-quart Instant Pot, reduce the apple quantity to 1.5 to 2 pounds maximum—filling the pot more than halfway prevents proper pressure building and steam circulation. The pressure cooking time remains fifteen minutes, but watch the heat more carefully during sauté mode, as the smaller surface area concentrates heat more intensely.
For an 8-quart Instant Pot, you can comfortably cook up to five pounds of apples, though some cooks report needing an additional five minutes of pressure cooking with larger batches due to the extra thermal mass. The sauté reduction phase may take slightly longer—sixty minutes rather than forty-five—because the larger volume takes longer to evaporate sufficiently. The actual yield scales proportionally: five pounds of apples typically yields four to five cups of finished apple butter rather than the standard two and a half cups.
Keep one critical constraint in mind: never fill your Instant Pot more than two-thirds full with apples before cooking. The pressure-cooking phase generates steam that needs space to circulate, and overfilling prevents proper pressure building, leading to undercooked apples and a failed batch. It’s better to make two smaller batches than to attempt one oversized batch that won’t cook properly. When making multiple batches in succession, allow the Instant Pot to cool for ten minutes between batches—the inner pot stays hot enough to begin the next batch safely, but rushing directly from one batch to another risks thermal shock or uneven pressure building on the second batch.
Advanced Texture Control and Achieving Restaurant-Quality Results
Professional-grade apple butter achieves its signature silky texture through techniques beyond basic straining. After the initial sieve pass, many experienced cooks run the strained apple butter through a fine food mill or press, which removes even microscopic particles that create any slight graininess. This two-stage straining requires more effort but produces a texture so refined it almost feels luxurious on the tongue—indistinguishable from commercial products made in industrial food processing facilities.
Temperature control during the final sauté phase dramatically affects the finished texture. Using the lowest sauté setting allows the mixture to reduce gradually through gentle evaporation rather than aggressive boiling. At higher heat settings, steam bubbles burst violently and create tiny spatters that can splatter onto the pot’s walls, and the vigorous movement can introduce tiny air pockets that create a slightly grainy mouthfeel rather than a smooth, dense consistency. Low heat requires more patience—the reduction phase might extend to sixty minutes instead of forty-five—but the result justifies the additional time.
Achieving the perfect final consistency involves understanding the difference between what looks done and what actually performs correctly when cool. Apple butter appears thicker when hot because heat reduces its viscosity; the mixture that seems perfectly spreadable at 180 degrees Fahrenheit might become almost paste-like once cooled to room temperature. The plate-freezing test mentioned in the original article works precisely because it accounts for this temperature-dependent consistency change. If your apple butter seems too thin after cooling, return it to sauté mode for an additional ten to fifteen minutes. Conversely, if it becomes too thick or develops a hard, brittle consistency, add water one tablespoon at a time and recook briefly to rehydrate it.
Sourcing Apples Strategically and Seasonal Considerations
While the existing article addresses apple varieties, strategic sourcing unlocks superior batches aligned with seasonal availability and local flavor profiles. During August and early September, when heirloom and specialty apple varieties reach farmers markets at their peak, this is the ideal time to experiment with unusual cultivars. Gravenstein apples—common in late August—bring distinctive tartness and aromatic complexity. Pink Lady apples, available in late summer through early fall, combine tartness with honey-like sweetness. Winesap apples, abundant in autumn, contribute wine-like depth that creates remarkably sophisticated apple butter.
Late-season apples from October onward have developed maximum sugar content after hanging on the tree through cool fall nights, making them ideal for apple butter that emphasizes caramel and molasses notes rather than bright apple flavor. Early-season apples from August tend toward higher water content and sharper acidity, which creates lighter, brighter apple butter that works better paired with savory applications like glazes and meat sauces.
Building relationships with farmers market vendors pays dividends. Many will reserve apples specifically for apple butter makers—sometimes older apples unsuitable for fresh eating but perfect for processing. These cost significantly less than premium eating apples and actually perform better in apple butter due to their softer flesh and concentrated sugars. Asking vendors which varieties will be reaching peak maturity in upcoming weeks allows you to plan batches around optimal sourcing moments.
If you have access to wild crabapples or ornamental apple trees in your area, these highly astringent varieties create exceptional apple butter when blended fifty-fifty with sweeter eating apples. The combination produces an intensely flavored, complex product that tastes nothing like grocery-store apple butter. This sourcing approach requires local knowledge and timing, but dedicated apple butter makers find it worth the effort.
Troubleshooting Advanced Issues and When Batches Fail
Beyond the common issues addressed in the original article, several more subtle problems can undermine batches, and understanding their causes prevents frustration. If your apple butter develops an unpleasant fermented or alcoholic smell during cooking, this indicates bacterial or wild yeast fermentation, usually from apples that had hidden damage or mold. Discard this batch immediately—it’s unsafe to consume. To prevent this, inspect apples extremely carefully before cooking, removing any with soft spots or mold, and always wash your Instant Pot thoroughly between batches.
If the mixture repeatedly scorches despite careful stirring, your apples likely contained too much natural sugar and concentrated too quickly, creating a high-sugar paste that sticks to the bottom. For future batches with similar varieties, increase heat only to medium sauté setting rather than the default higher heat, and stir every three minutes rather than every five. Alternatively, add a quarter cup of water after the initial blending to thin the mixture, extending the reduction time but preventing scorching.
Separation into distinct layers—clear liquid floating above thick apple butter—sometimes indicates the apples broke down unevenly during pressure cooking, with some areas creating more liquid than others. Often vigorous stirring reincorporates everything into a uniform consistency. However, if separation persists or recurs after reheating, this might indicate that the reduction phase didn’t fully integrate the components. Add a tablespoon of water and recook on sauté for five minutes while stirring constantly to reunify the texture.
If your apple butter tastes unusually flat or bland despite extended cooking and multiple apple varieties, the problem might be insufficient salt. Salt amplifies and rounds flavors—many professional recipes use closer to half a teaspoon than a quarter teaspoon. Taste your finished apple butter and add salt incrementally if it seems muted. Start with one-eighth teaspoon, stir thoroughly, and taste before adding more, as salt’s effects are cumulative and difficult to reverse.
Pairing Apple Butter with Savory and Unexpected Applications
Most home cooks limit apple butter to breakfast contexts, but exploring savory applications reveals its true versatility. In Indian cuisine, apple butter serves as an excellent substitute for tamarind paste or amchur (dried mango powder) when making chutneys. Mix apple butter with ginger, cumin, and cayenne for a condiment that elevates curries and dals. This intersection of flavors creates something that tastes intentionally designed rather than like an accident.
Japanese cuisine benefits from apple butter’s concentrated sweetness in glazes for roasted chicken or salmon. Whisk one tablespoon of apple butter with one tablespoon of miso paste, one tablespoon of rice vinegar, and one teaspoon of sesame oil for a glaze that bridges Western and Eastern flavor profiles. Brush this mixture on fish during the last five minutes of roasting or baking.
Cocktail enthusiasts discover that apple butter creates sophisticated syrups and shrubs. Strain your apple butter through cheesecloth to remove any remaining solids, then mix with equal parts vinegar for a shrub concentrate that transforms whiskey or bourbon cocktails. One tablespoon of apple butter shrub per cocktail creates depth and complexity that commercial cocktail syrups rarely achieve.
In cheese boards, position apple butter alongside aged cheddar, blue cheese, or gouda. The concentrated apple flavor and subtle spices complement mature cheeses in ways that fresh fruit cannot, creating bridges between sweet and savory elements. This application transforms apple butter from a breakfast spread into a sophisticated entertaining component.
For vegetarian cooking, apple butter enriches plant-based braises. When braising cabbage, root vegetables, or legumes, stir in one or two tablespoons of apple butter during the final stages of cooking. This adds depth and subtle caramelization that makes vegetarian dishes taste more complex and intentional. The technique works particularly well with red cabbage, carrots, parsnips, and lentil stews.
Preserving Techniques Beyond Water-Bath Canning
While water-bath canning is traditional and reliable, alternative preservation methods suit different situations and preferences. Pressure canning isn’t necessary for apple butter due to its natural acidity, but it’s worth understanding why water-bath canning works: apple butter’s pH is below 4.0 (acidic enough to inhibit botulism), and the dense texture allows penetration of heat to the jar’s center, ensuring complete sterilization.
Freezing in vacuum-sealed bags preserves apple butter’s texture and flavor better than open freezing, which allows ice crystal formation that can create graininess upon thawing. If you own a vacuum sealer, portion apple butter into bags, seal, and freeze. Thaw overnight in the refrigerator before use. This method takes minimal active effort beyond the actual batch-making process.
European-style preserving using Bonne Maman-style jars with snap-close lids works beautifully for shorter-term storage (three to four months) without water-bath processing. The snap-close mechanism creates an airtight seal without heat processing if you fill jars with apple butter that’s still at least 165 degrees Fahrenheit. As the apple butter cools, the lid seals automatically, creating a vacuum. This method requires less equipment than water-bath canning but doesn’t provide the year-long shelf stability of properly processed jars.
For gifts or personal use in smaller quantities, freezing in ice cube trays creates perfect portion-size units. Pop individual frozen cubes into small glass jars, seal, and freeze. This approach allows giving or using exactly one tablespoon without thawing an entire jar. Frozen cubes thaw quickly—placing a cube on toast and letting it sit five minutes usually provides enough softening to spread.
Some experienced preservers use the oven method: after filling jars, place them in a 325-degree Fahrenheit oven for thirty minutes to heat-seal them without water-bath processing. This works but is less reliable than water-bath canning and isn’t approved by the USDA for official food safety purposes. Professional food scientists recommend sticking with water-bath canning or freezing for assured safety.
Batch Cooking Strategies and Building an Apple Butter Stockpile
Efficient batch cooking requires more than simply repeating a single recipe multiple times. Develop a production workflow that minimizes equipment washing and setup time between batches. Prepare all apples for a full day’s cooking session at once—wash, peel, core, and quarter all apples needed for three batches before starting. Organize them into three separate containers. Measure all spices and sugars into labeled bowls. This preparation takes ninety minutes but then cooking proceeds without stopping to prep mid-batch.
Run back-to-back batches by overlapping phases: while the first batch is pressure-cooking for fifteen minutes, begin prepping the second batch. By the time the first batch has released pressure and is beginning the sauté phase, your second batch is ready to pressure-cook. This approach can produce three complete batches in five to six hours of wall-clock time, even though the actual active hands-on work spans only about three hours. The key is avoiding idle time between phases.
Calculate your annual consumption before deciding how many batches to make. A typical American household consuming apple butter on toast several times weekly and using it in occasional recipes consumes roughly three to four cups annually. This equals one to two batches made in autumn, processed by water-bath canning for year-round storage. Families who use apple butter more heavily or give it as gifts might make six to eight batches. Avoid the temptation to make massive quantities beyond what you’ll realistically use—stored apple butter eventually crystallizes or develops off-flavors after extended storage, even when properly canned.
Invest in dedicated apple butter equipment if you plan repeated batches. A high-quality immersion blender costs thirty to fifty dollars and lasts for years. Half-pint canning jars cost roughly five dollars per dozen and are reusable indefinitely (only lids need replacing). A wide-mouth funnel specifically designed for canning costs five dollars and makes jar-filling dramatically easier and cleaner. These minor investments transform batch cooking from frustrating to genuinely enjoyable.
Frequently Asked Questions
Can I make apple butter with a regular blender instead of an immersion blender?
Yes, though you’ll need to work in batches and transfer hot apple mixture carefully. An immersion blender is safer and easier for this task, but a regular blender works if it’s the only option you have. Allow the mixture to cool slightly before blending hot liquid.
How do I know when the apple butter is done reducing?
The classic test is the plate test: place a cold plate in your freezer, drop a small spoonful of apple butter on it, and let it cool for one minute. Push it gently with your finger. If it wrinkles and doesn’t run back together immediately, it’s done. If it’s still too thin, continue cooking and test again in 5 minutes.
Is it necessary to peel the apples before cooking?
Peeling makes the final product smoother and more refined, which is why it’s recommended. However, if you’re straining through a sieve anyway, you can leave the skins on and let the sieve remove them. This saves time but produces slightly more waste as skin remains in the sieve.
Can I use apples that have been sitting in my produce drawer for weeks?
Absolutely. Older apples are actually ideal for apple butter because their flesh has softened slightly and their sugars have concentrated. Avoid apples that are moldy or significantly damaged, but routine age is not a problem.
How much apple butter does a 3-pound batch of apples yield?
Typically 2 to 2.5 cups of finished apple butter, depending on how much water you cook off during reduction. You can fill about four to five half-pint jars, or roughly two large wide-mouth pint jars, though exact yield varies with your specific apples and desired thickness.