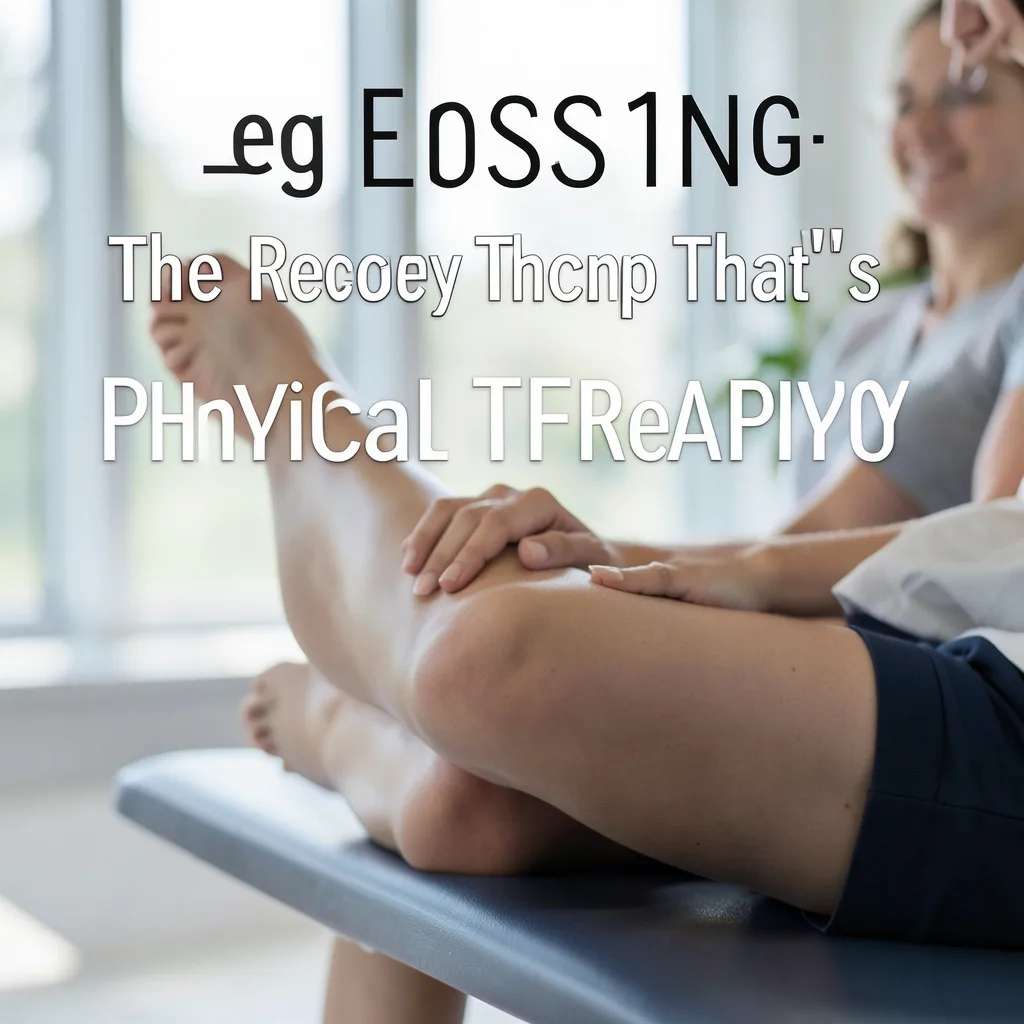
Leg flossing has emerged as a go‑to mobility drill in clinics and home gyms alike. By gently sliding the nervous system and soft tissue through a controlled range of motion, the technique helps restore fluid movement patterns without the intensity of traditional stretching.
What Is Leg Flossing?
Leg flossing is a neural mobilization exercise that moves the sciatic nerve and surrounding fascia through a rhythmic, low‑load pattern. Unlike static stretching, which holds a position, flossing creates a gentle back‑and‑forth glide that encourages the nerve to slide within its sheath. The movement typically involves flexing the hip and knee while simultaneously extending the ankle, then reversing the pattern. Because the load stays low, the drill can be performed early in a rehab timeline or as a daily maintenance routine for athletes and desk workers alike.
The Science Behind Neural Mobilization
Research on neurodynamics shows that nerves require a certain amount of excursion to stay healthy. When a nerve becomes tethered by scar tissue, inflammation, or tight musculature, its ability to glide diminishes, leading to pain, tingling, or weakness. Leg flossing applies a controlled tensile force that promotes intraneural blood flow and reduces adhesions. Studies in the Journal of Orthopaedic & Sports Physical Therapy have demonstrated improved straight‑leg raise range and reduced symptom scores after a six‑week flossing protocol. The key is dosage: low intensity, high frequency, and pain‑free execution.
When to Use Leg Flossing in a Rehab Program
Clinicians often introduce flossing once acute inflammation has subsided and the patient can tolerate gentle movement. It fits well in the early sub‑acute phase for lumbar disc herniation, piriformis syndrome, or post‑operative hamstring repairs. For chronic conditions such as recurrent hamstring strains or sciatic nerve irritation, flossing can be a daily home exercise. It also serves as a warm‑up drill before sprinting, jumping, or heavy lifting, preparing the neural tissue for high‑velocity demands.
Step‑by‑Step Guide to the Basic Leg Floss
1. Lie supine with the non‑involved leg extended on the floor. 2. Bring the involved hip to 90 degrees of flexion and the knee to 90 degrees. 3. Dorsiflex the ankle (pull toes toward shin). 4. Slowly extend the knee while maintaining hip flexion and ankle dorsiflexion, feeling a gentle stretch along the posterior thigh. 5. Return to the start position by flexing the knee again. 6. Perform 10‑15 repetitions, moving smoothly without jerking. Keep the movement within a pain‑free range; a mild ‘pull’ sensation is acceptable, sharp pain is not.
Progressions and Variations for Different Goals
To increase neural tension, add a slight hip internal rotation while extending the knee. For a more functional pattern, perform the floss in a standing position with the foot on a low box, driving the hip into flexion and the knee into extension. Athletes may combine flossing with a light band around the ankle to add resistance during the return phase. Each progression should be introduced only after the basic pattern feels comfortable for at least two sessions.
Common Mistakes and How to Fix Them
Common errors include moving too quickly, holding the end‑range, and allowing the pelvis to rock. Speed reduces the nerve’s ability to glide and can provoke irritation. Holding the stretch turns the drill into a static stretch, losing the flossing benefit. Pelvic rocking shifts load to the lumbar spine instead of the neural tissue. Fixes: use a metronome set to 60 beats per minute, keep the range short enough to avoid a hold, and engage the core to stabilize the pelvis.
Integrating Leg Flossing With Strength and Conditioning
Flossing works well as a pre‑lift activation drill. Perform two sets of 10 reps before deadlifts, lunges, or plyometrics to prime the sciatic pathway. Post‑session, a single set can aid recovery by promoting venous return and reducing neural stiffness. For endurance athletes, incorporate flossing into a weekly mobility circuit alongside hip circles and ankle pumps. Consistency—daily or every other day—yields the best long‑term mobility gains.
Safety Considerations and When to Seek Professional Guidance
Leg flossing is generally safe, but certain red flags warrant a clinician’s evaluation: worsening radiating pain, new numbness or weakness, recent spinal fracture, or unexplained weight loss. Pregnant individuals should modify hip flexion to avoid excessive abdominal pressure. If symptoms persist beyond two weeks of daily flossing, schedule a physical therapy assessment to rule out structural pathology and receive a tailored progression.
Anatomical Foundations: Sciatic Nerve Pathway and Fascial Connections
The sciatic nerve originates from the lumbosacral plexus, weaving through the greater sciatic foramen and descending posterior to the hip joint before dividing into the tibial and common fibular branches near the popliteal fossa. Along its course it is enveloped by the deep fascia of the posterior thigh, the hamstring septum, and the fascial sheath of the gluteus maximus. Understanding these layers helps clinicians appreciate why a simple hip‑knee‑ankle sequence can influence neural glide from the lumbar spine down to the foot.
Fascial continuity extends beyond the posterior chain. The thoracolumbar fascia, the iliotibial band, and the plantar fascia all share tensional relationships with the sciatic nerve sheath. When any of these structures become stiff — whether from prolonged sitting, repetitive running, or scar tissue after surgery — the nerve’s excursion is limited, producing the classic “tight hamstring” sensation that is actually neural tension.
Cadaveric studies show that the sciatic nerve can move up to 20 millimeters relative to surrounding tissue during a full straight‑leg raise. In vivo ultrasound imaging confirms that a controlled flossing motion produces a measurable glide of 4–6 millimeters per repetition. This magnitude is enough to stimulate intraneural blood flow without overstretching the epineurium, which is why low‑load, high‑frequency dosing is emphasized.
Key anatomical landmarks for cueing include the ischial tuberosity (proximal hamstring attachment), the femoral shaft (mid‑thigh reference), and the medial malleolus (distal tibial nerve tension point). Palpating these points while the patient performs the drill provides real‑time feedback on whether the movement is truly neural or merely muscular.
Edge case: In individuals with a high bifurcation of the sciatic nerve (piriformis syndrome variant), the nerve may pass through or above the piriformis muscle. For these patients, adding a slight hip internal rotation during the knee‑extension phase can target the specific tethering site more effectively than the standard neutral‑hip version.
Neurodynamic Assessment: How to Test Before You Floss
Before prescribing any flossing protocol, a quick neurodynamic screen establishes baseline irritability and guides range selection. The slump test, straight‑leg raise with ankle dorsiflexion, and the prone knee bend test each stress different segments of the sciatic pathway. Record the angle at which symptoms first appear, the quality of the sensation (stretch, tingling, deep ache), and whether symptoms centralize or peripheralize.
A positive slump test that reproduces distal foot tingling suggests heightened neural sensitivity at the tibial branch. In this scenario, start flossing with the ankle in a neutral position and only add dorsiflexion once the patient tolerates ten pain‑free repetitions. Conversely, a positive prone knee bend that brings on posterior thigh discomfort points to proximal hamstring or gluteal fascial restriction; here a slight hip internal rotation bias may be introduced earlier.
Quantify irritability using a 0–10 numeric rating scale for the most bothersome symptom during the test. A score of 3 or below generally indicates a “low‑irritability” presentation suitable for standard dosing (2 sets × 10 reps, twice daily). Scores of 4–6 warrant a reduced range (50 % of available motion) and a single daily session. Scores above 6 signal the need for medical review before any neural mobilization.
Document the test results in a simple table: test name, symptom location, angle of onset, irritability score, and recommended starting range. This record becomes the reference point for weekly re‑assessment, allowing objective progression decisions rather than relying on subjective feel alone.
Edge case: Patients with a history of lumbar radiculopathy may exhibit a “double crush” phenomenon where both the nerve root and peripheral nerve are compromised. In these cases, combine the slump test with a cervical flexion‑rotation test to rule out upper‑quarter contribution. If the cervical test is positive, address cervical mobility first; flossing the lower limb alone may yield limited benefit.
Programming Leg Flossing for Specific Populations
Desk workers typically present with shortened hip flexors, a posterior pelvic tilt, and a stiff thoracolumbar fascia. A morning routine that pairs a 30‑second hip flexor stretch with two sets of supine flossing (hip at 80 degrees, knee at 90 degrees) restores anterior chain length before the neural drill, reducing compensatory lumbar extension during the movement.
Runners and sprinters benefit from a pre‑run flossing circuit that mimics the swing‑phase mechanics. Perform the drill in standing with the foot on a 15‑centimeter box, driving the hip into 70 degrees flexion while extending the knee and dorsiflexing the ankle. Add a light resistance band around the forefoot to simulate the eccentric loading of the hamstring during late swing. Two sets of eight repetitions at a cadence of 60 beats per minute prime the sciatic pathway for high‑velocity strides.
Older adults often have reduced nerve compliance and comorbid balance deficits. Begin with a seated version: sit on a firm chair, extend the involved leg, and perform ankle dorsiflexion‑plantarflexion while gently sliding the heel forward and back. This reduces fall risk while still providing a modest neural glide. Progress to supine only after the patient demonstrates stable pelvis control for three consecutive sessions.
Post‑operative hamstring repair patients (typically 4–6 weeks post‑op) can start flossing once the surgeon clears active knee motion to 30 degrees. Use a protected range: hip at 60 degrees, knee moving between 30 and 45 degrees, ankle neutral. Emphasize a slow tempo (3 seconds each direction) and monitor for any increase in posterior thigh pain. Advance range by 5 degrees per week as tissue healing permits.
Edge case: Pregnant athletes in the second trimester may experience increased lumbar lordosis and pelvic girdle laxity. Modify the supine position to a side‑lying “clamshell” floss: top hip flexed to 70 degrees, knee bent 90 degrees, ankle dorsiflexed, then extend the knee while maintaining hip flexion. This avoids supine hypotension and reduces abdominal pressure while still mobilizing the sciatic nerve.
Advanced Progressions: Load, Speed, and Multi‑Planar Variations
Once the basic supine floss feels effortless for two weeks, introduce a controlled eccentric load using a 1‑kilogram ankle cuff. During the knee‑extension phase, let the weight gently pull the ankle into plantarflexion, then actively dorsiflex against the resistance on the return. This eccentric emphasis improves the nerve’s tolerance to tensile strain, a key factor for sprint deceleration.
Speed progression follows a metronome protocol: start at 60 bpm (one full cycle per second), then increase by 10 bpm each week provided symptom scores remain ≤2. Faster cycles train the nerve’s viscoelastic properties, preparing it for the rapid stretch‑shortening cycles of plyometric work. Do not exceed 120 bpm; beyond this the nerve may not have time to glide, converting the drill into a ballistic stretch.
Multi‑planar variations address the three‑dimensional nature of fascial lines. Add a subtle hip abduction‑adduction oscillation (5 degrees each side) while maintaining the primary flexion‑extension rhythm. This engages the lateral fascial chain (iliotibial band, tensor fasciae latae) and the medial chain (adductor magnus, medial hamstrings), promoting a more global neural‑fascial glide.
For athletes needing rotational capacity — such as golfers or throwers — incorporate a thoracic rotation component. While in the supine floss position, place the contralateral hand behind the head and rotate the upper thoracic spine toward the involved side during knee extension. This couples upper‑quarter mobility with lower‑quarter neural mobilization, reflecting the kinetic chain demands of rotational sports.
Edge case: Individuals with a known peripheral neuropathy (e.g., diabetic neuropathy) have reduced intraneural blood flow reserve. Load and speed progressions should be delayed until baseline flossing is tolerated for four weeks with zero symptom flare. Even then, keep external load ≤0.5 kg and cadence ≤80 bpm, monitoring for any new paresthesia after each session.
Integrating Breath, Motor Control, and Adjunct Modalities
Diaphragmatic breathing synchronizes intra‑abdominal pressure with pelvic stability, creating a stable platform for neural glide. Instruct the patient to inhale for three seconds during the knee‑flexion (return) phase and exhale for three seconds during knee extension. This rhythm calms the sympathetic nervous system, reduces guarding, and improves the quality of the glide.
Motor control drills such as the “dead bug” or “bird‑dog” can be paired with flossing in a superset format. Perform one set of flossing, immediately follow with eight repetitions of dead bug on the same side, then repeat. The core activation from dead bug reinforces pelvic control, preventing the common pelvic rocking error during flossing.
Soft‑tissue adjuncts — foam rolling the posterior thigh, instrument‑assisted soft‑tissue mobilization (IASTM) over the hamstring fascia, or a brief percussive therapy session — can be applied before flossing to lower tissue viscosity. A 2‑minute roll on the mid‑belly of the biceps femoris reduces fascial friction, allowing the nerve to slide more freely during the subsequent neural mobilization.
Neuromuscular electrical stimulation (NMES) set to a low‑frequency (10 Hz) sensory‑level current over the tibial nerve at the ankle can be used concurrently with flossing in a clinical setting. The gentle sensory input enhances cortical representation of the nerve pathway, potentially accelerating the neuroplastic changes associated with repeated glides.
Edge case: Patients with high anxiety or central sensitization may find the combined breath‑flossing drill overwhelming. In these cases, separate the components: first practice diaphragmatic breathing for two minutes, then perform a single set of flossing without breath cueing. Gradually reintroduce the coordinated breath once the patient reports a calm baseline (subjective units of distress ≤3).
Periodization and Long‑Term Progression Strategies
Structure a 12‑week mesocycle that moves from “neural desensitization” (weeks 1‑4) to “neural resilience” (weeks 5‑8) to “performance integration” (weeks 9‑12). In the first phase, keep range at 50 % of available motion, frequency twice daily, and intensity minimal (bodyweight only). Track symptom scores weekly; a consistent drop of ≥1 point per week signals readiness to advance.
Phase two introduces load (ankle cuff 0.5–1 kg), speed increments (10 bpm per week), and one multi‑planar variation per session. Frequency reduces to once daily as the nervous system adapts to higher tensile demands. Add a weekly “test‑retest” slump assessment to ensure irritability remains low; any spike >2 points triggers a deload week (return to phase‑one parameters).
Phase three aligns flossing with sport‑specific warm‑ups. For a sprinter, embed the standing box floss into the dynamic warm‑up after A‑skip drills. For a powerlifter, place a single set of supine floss immediately before the first deadlift warm‑up set. The goal is to make the neural glide a habitual primer rather than a separate rehab exercise.
Maintenance beyond the mesocycle: two to three sessions per week, alternating between a “low‑load high‑frequency” day (bodyweight, 60 bpm, 15 reps) and a “high‑load low‑frequency” day (1 kg cuff, 80 bpm, 8 reps). This undulating approach preserves neural compliance while preventing accommodation.
Edge case: Athletes returning from a prolonged off‑season (≥8 weeks) may experience a temporary increase in neural sensitivity when re‑introducing flossing. Begin with a “re‑entry” microcycle of three days: day 1 – bodyweight only, 50 % range; day 2 – add 0.5 kg cuff, 60 % range; day 3 – full phase‑two parameters if symptom scores stay ≤2. This graded exposure mitigates flare‑ups and restores confidence in the drill.
Frequently Asked Questions
How often should I perform leg flossing?
Most people benefit from one to two sessions per day, each consisting of 10‑15 pain‑free repetitions. Adjust frequency based on symptom response and clinician advice.
Can leg flossing replace stretching?
Flossing complements stretching but does not fully replace it. Static stretches target muscle length, while flossing addresses neural mobility. A balanced program includes both.
Is it normal to feel a tingling sensation during the drill?
A mild tingling that disappears quickly can occur as the nerve glides. Persistent or worsening tingling signals that the range or intensity is too high; reduce the motion and consult a professional.
What equipment do I need?
No equipment is required for the basic version. A yoga mat for comfort and an optional light resistance band for progressions are sufficient.
Can I do leg flossing if I have a herniated disc?
Many disc‑related sciatica cases improve with neural mobilization, but the exercise must be cleared by a healthcare provider. Start with a very small range and stop if symptoms increase.
Related posts:
 The Simple Ankle Fix That Will Transform Your Entire Workout
 Perfect Your Squat Form
 Why Your Limbs Go Numb During Workouts (And How to Fix It)
 Managing Hip Pain from Sitting
 Stretches to Relieve Foot Pain
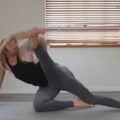 Lower Body Flexibility Routine
 Why Your Feet Fall Asleep During Workouts and How to Stop It
 ACL Injury Surgery: What You Need to Know