
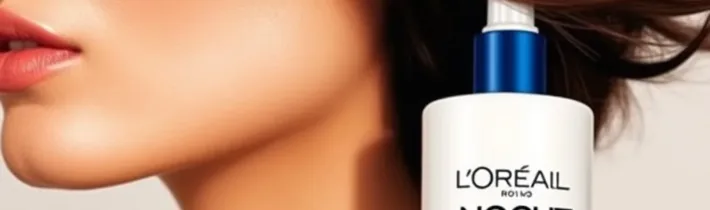
There is a specific kind of frustration that accompanies the “in-between” phase of a haircut. Whether you are growing out a bob, maintaining a sharp pixie, or trying to keep long layers from looking frayed, that window between the fourth and eighth week after a salon visit is often the most challenging. Your silhouette begins to lose its intentionality, split ends become more apparent, and the effortless “wash-and-go” morning routine suddenly requires twenty minutes of fighting with a round brush. While no topical product can physically replace the precision of professional shears, the right styling and maintenance creams—specifically those from L’Oreal’s professional and consumer lines—can effectively mimic the look of a fresh trim.
Maintaining your style between trims is less about “fixing” the hair and more about managing the cuticle and the hair’s structural behavior. When hair is freshly cut, the ends are blunt, sealed, and healthy. As time passes, environmental stressors, heat styling, and mechanical friction cause the cuticle to lift and the ends to fray. This is where the strategic use of smoothing and bonding creams comes into play. By using a high-quality cream to seal the shaft and add controlled weight, you can maintain the visual integrity of your haircut for several extra weeks, extending the life of your style and reducing the frequency of emergency salon visits.
Understanding the “In-Between” Phase: Why Hair Loses Its Shape
To understand how a maintenance cream works, we first have to understand why hair seems to “fall apart” between cuts. Hair is composed primarily of keratin, a tough protein. The outermost layer, the cuticle, consists of overlapping scales that protect the inner cortex. When you get a haircut, the stylist creates a clean, perpendicular edge. This edge is structurally sound and reflects light evenly, which is why hair looks so shiny and “healthy” immediately after a trim.
Over the following weeks, the ends of the hair are subjected to the most wear and tear. They are the oldest part of the hair fiber and lack the natural oils that the scalp provides. As the cuticle wears down, the hair fiber begins to split—first at the very tip, then traveling up the shaft. These split ends don’t just look messy; they change how the hair behaves. Instead of falling in a cohesive line, frayed ends tend to “fly away” or curl irregularly, which disrupts the overall shape of the haircut. This is the primary reason why a bob begins to look “poofy” or layers start to look disjointed.
Environmental factors accelerate this process. UV rays from the sun degrade the protein bonds in the hair, while humidity causes the hair shaft to swell and contract, further stressing the cuticle. By the time you hit the six-week mark, the cumulative effect of these stressors makes the haircut look outdated. The goal of using a specialized maintenance cream is to provide a synthetic “seal” that mimics the bluntness of a fresh cut, smoothing those frayed ends back into the main body of the hair.
How Smoothing Creams Mimic a Fresh Trim
L’Oreal’s range of smoothing and styling creams utilizes a combination of polymers, silicones, and nourishing oils to achieve a “no-haircut” effect. These ingredients work through several different mechanisms to restore the visual appearance of a precision cut.
Cuticle Sealing: Many of these creams contain lightweight polymers that act as a temporary adhesive. When applied to the ends, these polymers fill in the gaps where the cuticle has lifted and “glue” split ends back together. While this is a cosmetic fix rather than a permanent cure, it eliminates the frizz and flyaways that signal a haircut is overdue.
Weight Distribution: One of the hallmarks of a fresh haircut is how the hair “hangs.” As ends fray, they become lighter and more prone to static. A high-quality cream adds a minute amount of strategic weight to the ends of the hair. This encourages the hair to lay flat and follow the intended line of the cut, rather than springing outward in an uncontrolled manner.
Light Reflection: Split ends create a rough surface that scatters light, making the hair look dull. Smoothing creams create a uniform, reflective film over the hair shaft. By smoothing the surface, the hair reflects light more consistently, mimicking the high-shine finish typically seen immediately after a professional treatment and trim.
Moisture Retention: By creating a hydrophobic barrier, these creams prevent moisture from leaving the hair and prevent excess humidity from entering. This stability prevents the “poofing” effect that often makes a haircut look overgrown.
Choosing the Right L’Oreal Cream for Your Hair Type
Not all hair requires the same type of maintenance. To effectively extend your style, you must match the cream’s formula to your specific hair texture and the type of cut you are maintaining.
For Fine Hair and Pixie Cuts: If you have fine hair, the biggest risk is weighing it down too much, which can make a fresh cut look greasy or flat. Look for “lightweight” or “volumizing” smoothing creams. These typically use smaller molecules that provide shine and seal the ends without compromising lift at the root. For pixie cuts, a cream with a slight hold (like a styling pomade-cream hybrid) is ideal for redefining the edges and keeping the nape of the neck looking clean.
For Medium to Thick Hair and Bobs: Bobs require a focus on the “line.” To keep a bob looking sharp, you need a cream with a higher concentration of smoothing agents and perhaps some light oils. A cream that focuses on anti-frizz and humidity control will help the blunt edges of a bob stay together, preventing the “triangle shape” that often occurs as the hair grows out.
For Curly and Coiled Hair: Curls lose their shape differently than straight hair; they tend to lose their definition and become frizzy at the ends. For this hair type, a rich, nourishing curl-defining cream is essential. These products often contain ingredients like shea butter or argan oil, which provide the intense moisture needed to keep the curl pattern tight and cohesive, making the trim look fresh for longer.
For Color-Treated or Damaged Hair: If your hair is chemically processed, the split ends will be more pronounced. In this case, look for “bonding” creams or those containing ceramides. These ingredients penetrate deeper into the hair shaft to reinforce the structure, providing a more substantial “fill” for the damaged areas.
Step-by-Step Application for Maximum Longevity
The effectiveness of a maintenance cream depends entirely on how it is applied. Slapping product on the top of your head will only lead to greasiness. To mimic a fresh trim, you must be strategic about placement.
Step 1: Start with Damp, Towel-Dried Hair. Most smoothing creams work best when the hair is damp because the water helps distribute the product evenly across the hair shaft. Gently pat your hair with a microfiber towel—do not rub, as rubbing creates more friction and worsens split ends.
Step 2: The “Nickel-Sized” Rule. Start with a small amount of product—roughly the size of a nickel for medium-length hair. It is always easier to add more product than to wash out an excess that has made your hair look limp.
p>
Step 3: Emulsify. Rub the cream between your palms for 5-10 seconds. This warms the product, breaking down the waxes and oils so they spread smoothly and don’t clump in one spot of your hair.
Step 4: Focus on the Bottom Third. Avoid the roots and the mid-lengths unless you are dealing with extreme frizz. Focus your application on the bottom three inches of your hair. This is where the “cut” lives. Use a “smoothing” motion, sliding your hands down the hair shaft toward the ends.
Step 5: The “Twist and Seal.” For those with layers or curls, take small sections of the ends and gently twist them. This helps the cream encapsulate the hair fibers and ensures that every single split end is coated in the sealing agent.
Step 6: Air Dry or Blow Dry. If air drying, avoid touching your hair while it sets. If blow drying, use a nozzle attachment to point the airflow downward. This flattens the cuticle further, enhancing the smoothing effect of the cream.
Managing Split Ends Without the Scissors
It is important to be realistic: a cream cannot weld a split end back together permanently. However, it can manage the perception of damage. To maximize this effect, you can combine your L’Oreal cream with a few other non-invasive techniques.
The Power of Ceramides: Look for L’Oreal products that mention ceramides. Ceramides are lipids that help hold the hair cells together. When these are applied topically via a cream, they act like a “mortar” between the “bricks” of your hair cuticle, making the hair feel smoother and look more cohesive.
Avoiding the “Towel Friction” Trap: One of the fastest ways to ruin the effect of a maintenance cream is to use a rough terry-cloth towel. The loops of the fabric catch on the frayed ends of the hair, pulling them further apart. Switch to a silk wrap or a microfiber towel to preserve the seal created by your cream.
Strategic Brushing: Use a wide-tooth comb or a boar-bristle brush. Boar bristles are excellent for distributing the maintenance cream from the mid-lengths down to the very tips of the hair, ensuring that no part of the “cut line” is left unprotected.
The Cold Rinse: Before applying your cream, rinse your conditioner out with the coldest water you can stand. Cold water helps close the cuticle, providing a smoother base for the cream to adhere to, which results in a more polished, “just-trimmed” look.
Pairing Your Cream with Other L’Oreal Care
A maintenance cream is the final step in a larger system. To truly extend the life of your style, the foundation of your hair care routine must support the goals of the cream.
The Shampoo Phase: Use a sulfate-free shampoo. Sulfates are harsh detergents that strip the hair of its natural oils, leaving the ends brittle and more prone to splitting. By using a gentler cleanser, you maintain the hair’s natural elasticity, which helps the cream perform better.
The Conditioning Phase: Use a deep conditioner or a mask once a week. While the cream works on the surface, a mask works on the interior. By hydrating the cortex of the hair, you prevent the split ends from traveling further up the shaft, which means the maintenance cream has less “damage” to cover up.
The Heat Protection Phase: If you use a flat iron or curling wand, always use a heat protectant. Heat is the primary enemy of a fresh haircut; it “cooks” the proteins in the hair, leading to immediate fraying. Applying a heat protectant before your styling cream ensures that you aren’t creating new split ends while trying to hide the old ones.
The Nightly Seal: For those with long hair, applying a tiny amount of L’Oreal hair oil over your maintenance cream before bed can lock in the moisture and protect the ends from rubbing against your pillowcase throughout the night.
Daily Habits to Extend Your Haircut’s Life
Using a cream is a great tactical move, but long-term style maintenance requires a shift in daily habits. The goal is to minimize the mechanical and chemical stress placed on the ends of your hair.
Switch to Silk: Cotton pillowcases are surprisingly abrasive. As you toss and turn, the cotton fibers tug at your hair ends. A silk or satin pillowcase allows the hair to glide, preserving the smoothing effect of your cream and preventing new splits from forming.
Limit High-Heat Styling: Try to limit the use of flat irons to once or twice a week. When you do use them, keep the temperature below 350°F (175°C). Overheating the hair causes the moisture to evaporate violently from the shaft (bubble hair), which makes the ends look frizzy regardless of how much cream you apply.
Hydration from Within: Hair health starts with nutrition. Ensure you are consuming enough Omega-3 fatty acids (found in salmon, walnuts, and flaxseeds) and biotin. While these won’t fix existing split ends, they ensure that the new hair growing in is stronger and more resilient, making your future haircuts last even longer.
Avoid Over-Brushing: Brushing your hair too often, especially when it’s wet and fragile, can snap the ends. Use a leave-in cream to provide “slip,” which allows the brush to glide through without snagging the ends.
When a Cream Isn’t Enough: Recognizing True Damage
While maintenance creams are powerful tools, it is important to recognize the limit of their capabilities. There is a difference between “overgrown style” and “compromised hair health.” Using creams to mask severe damage can actually be counterproductive if it leads you to skip necessary trims.
The “White Dot” Test: Take a strand of hair and look closely at the end. If you see a tiny white dot at the tip, the hair has completely split. Once the split has traveled significantly up the shaft, a cream can only hide it temporarily. At this point, the hair is structurally compromised and needs to be removed.
Loss of Elasticity: Gently stretch a strand of hair. If it snaps immediately without any stretch, or if it stretches and doesn’t return to its original shape (feeling “mushy”), your hair has lost its protein integrity. No amount of smoothing cream can restore this; a trim is necessary to stop the damage from spreading.
The “Tangle Knot” Phenomenon: If you find that your ends are knotting together into “fairy knots” (tiny, tight knots) despite using creams and oils, it is a sign that the cuticles are so damaged they are interlocking. This is a clear signal that it is time for a professional trim.
Remember, the purpose of the “no-haircut” approach is to extend the time between visits, not to eliminate them entirely. A trim every 8-12 weeks is generally recommended to keep the hair healthy and the style intentional.
Real-World Scenarios: Morning Routines for Different Styles
To help you implement this, here are three common scenarios and how to use L’Oreal creams to maintain the look.
Scenario A: The Grown-Out Bob. Your bob is now hitting your shoulders and losing its sharp line. Routine: Apply a smoothing cream to damp hair, focusing on the perimeter. Use a round brush to curve the ends slightly inward. The cream will add the weight needed to keep the ends from flipping outward, maintaining the “bob” silhouette.
Scenario B: The Shaggy Layered Look. Your layers are starting to look frizzy and disjointed. Routine: Use a curl-enhancing or texturizing cream. Instead of smoothing the hair flat, “scrunch” the cream into the ends. This defines the layers and makes the growth look like an intentional “lived-in” style rather than a lack of maintenance.
Scenario C: The Pixie in Transition. The hair around your ears and neck is getting too long. Routine: Use a small amount of a high-hold styling cream. Slick down the hair around the ears and use the cream to “piece out” the top. By creating a very deliberate, groomed shape, the overgrown areas look like a stylistic choice.
Seasonal Adjustments for Maintenance Creams
The behavior of your hair changes with the seasons, and consequently, the way you use L’Oreal maintenance creams must evolve to keep your haircut looking fresh. Environmental shifts alter the porosity of the hair shaft and the way the cuticle reacts to moisture, meaning a routine that works in July may fail in January.
The Winter Challenge: Static and Dryness. During winter, the air is devoid of moisture, and indoor heating further strips the hair of its natural lipids. This leads to increased static electricity, which causes the ends of a haircut to “fly away” regardless of how blunt the cut is. In this season, you should lean toward creams with a higher lipid content—those rich in oils or butters. Instead of a lightweight smoothing lotion, opt for a denser cream that provides a more substantial occlusive barrier. To combat static, apply a pea-sized amount of cream to dry hair throughout the day, focusing specifically on the outer canopy of your hair where friction from scarves and wool coats is most prevalent.
The Summer Challenge: Humidity and UV Degradation. Summer presents the opposite problem: excess moisture in the air penetrates the hair shaft, causing it to swell and the cuticle to lift. This is when a bob begins to “poof” or curls lose their definition and become a cloud of frizz. During these months, prioritize creams with high polymer concentrations and anti-humectants. These ingredients create a hydrophobic shield that prevents atmospheric moisture from entering the hair. Additionally, because UV rays break down the protein bonds that keep the ends of your hair cohesive, consider layering your maintenance cream under a UV-protectant spray. This prevents the “sun-bleached” brittleness that often makes a haircut look overgrown and frayed faster than usual.
The Transitional Shoulder Season. Spring and autumn often bring erratic humidity levels. The best approach here is a “modular” application. Start with a lightweight smoothing cream on damp hair to establish the shape, but keep a small amount of a richer sealing cream available for the ends. If the day turns humid, you can “spot-treat” the perimeter of your style to keep the line sharp without weighing down the rest of your hair.
Navigating the “Awkward Stage”: Growth Journey Strategies
One of the most difficult periods for any hairstyle is the transition phase—such as growing out a pixie cut into a bob, or a bob into shoulder-length hair. During these stages, the haircut often loses its intentional silhouette, creating an unbalanced look (often referred to as the “mullet phase”). L’Oreal maintenance creams can be used strategically to manipulate the shape of the hair, masking the uneven growth.
From Pixie to Bob: Managing the Nape. When growing out a pixie, the hair at the nape of the neck usually grows faster and becomes “shaggy” before the top reaches a cohesive length. To maintain a polished look, use a high-hold styling cream. Apply it generously to the nape and sides, smoothing the hair inward toward the neck to create a tighter, more controlled perimeter. This prevents the hair from flaring out and makes the growth look like a deliberate “tapered” style rather than a missed appointment.
From Bob to Mid-Length: Controlling the “Flip.” As a bob grows, the ends often hit the shoulders and begin to flip outward in opposite directions. This disrupts the clean line of the original cut. To counteract this, apply a weighted smoothing cream to the bottom two inches of the hair. Use a round brush to curve the ends slightly inward while blow-drying. The cream provides the necessary tension and weight to “anchor” the hair, forcing it to follow the curve of the jawline rather than bouncing off the shoulders.
Managing Layered Transitions. When growing out heavy layers, the “gap” between the shortest and longest lengths can become jarring. Use a texturizing cream to blend these sections. Instead of smoothing the hair flat, use a “scrunching” motion to create consistent waves throughout. By introducing a uniform texture, the eye focuses on the overall volume and wave pattern rather than the disjointed lengths of the layers, effectively hiding the need for a corrective trim.
Advanced Product Cocktailing for Custom Finishes
Professional stylists rarely use a single product; they “cocktail” or layer different formulas to achieve a specific result. You can replicate this at home by combining L’Oreal creams with other styling agents to customize the “no-haircut” effect based on your daily needs.
The “Glass Hair” Cocktail (High Shine/High Smoothness). For those wanting a mirror-like finish that mimics a fresh, blunt-cut bob, combine a smoothing cream with a lightweight serum. In your palm, mix a nickel-sized amount of cream with two drops of serum. The cream provides the structural seal and weight, while the serum adds a layer of high-refractive silicones. Apply this to damp hair and blow-dry with a paddle brush. The result is a cohesive, reflective surface that hides split ends and looks surgically precise.
The “Lived-In” Cocktail (Matte/Textured/Natural). If you have a shaggy or layered cut and want to avoid the “greasy” look that some creams can produce, mix a small amount of smoothing cream with a volumizing mousse. Apply the mousse first to the roots for lift, then work the cream through the ends. This creates a contrast: volume at the top and controlled, sealed ends at the bottom. It provides the health benefits of the maintenance cream without the heavy shine, making the growth look effortless and “undone.”
The “Maximum Control” Cocktail (Anti-Frizz/High Humidity). In extreme humidity, a single cream may not be enough. Use the “sandwich method”: apply a leave-in conditioner, followed by a smoothing cream, and finish with a tiny amount of hair oil on the very tips. The conditioner hydrates the core, the cream seals the cuticle, and the oil provides a final waterproof barrier. This triple-layer approach is the most effective way to prevent the “poofing” that signals an overgrown haircut.
Tool Synergy: Maximizing the Cream’s Effect
The tool you use to distribute the product and set the shape of your hair can significantly amplify or diminish the effect of the maintenance cream. The goal is to ensure the product is distributed with microscopic precision and that the cuticle is flattened.
The Paddle Brush vs. The Round Brush. For a blunt cut, a paddle brush is superior. It provides a larger surface area to pull the hair taut, allowing the smoothing cream to be “pressed” into the hair shaft as you blow-dry. This creates a flat, cohesive line. A round brush, however, is ideal for managing the “flip” of a grown-out bob. By using the cream as a “grip” agent, the round brush can curve the hair into a specific shape that holds throughout the day, effectively redefining the perimeter of your style.
The Ionic Blow-Dryer. Using an ionic dryer is highly recommended when using smoothing creams. Ionic technology breaks down water molecules faster and helps close the hair cuticle. When combined with a smoothing cream, the ionic airflow works in tandem with the polymers to “lock” the hair in a smooth, flat position. This results in a significantly more polished look than a traditional dryer, making the maintenance cream’s effect more apparent.
The Boar Bristle Brush for Finishing. Once your hair is dry, a boar bristle brush is the best tool for finishing. Because the bristles are denser and more uniform, they can distribute any remaining product from the mid-lengths down to the very ends. This is a a critical step for the processos of “sealing” the ends; a wide-tooth comb may miss some strands, but a boar bristle brush ensures every single hair fiber is coated in the protective film, eliminating any stray flyaways.
Integrating Maintenance Creams into a Professional Care Cycle
To prevent the long-term build-up of polymers and the hair’s reaction to the “masking” effect of creams, you must integrate these products into a structured care cycle. Relying solely on smoothing creams can lead to a “heavy” feel to the hair over time, which can actually make a haircut look worse.
The “Reset” Phase: Clarifying and Detoxifying. Every two to three weeks, replace your standard shampoo with a clarifying shampoo. This is essential because the polymers and silicones in maintenance creams are designed to be long-lasting. If they build up, the hair can become dull and look limp. A clarifying wash removes the the same residues that give you the smooth look, providing a “clean slate.” This prevents the hair from becoming over-saturated with product, ensuring that the cream’s light-reflective properties remain effective.
The “Repair” Phase: Deep Conditioning. Immediately after a clarifying wash, the hair is “naked” and more porous. This is the best time to apply a deep conditioning mask. By hydrating the interior of the hair shaft, you increase the hair’s elasticity and the hair’s structural integrity. This makes the hair’s response to the smoothing cream in subsequent washes is more cohesive, as the cream has a smoother, and more hydrated base to adhere to.
Frequently Asked Questions
Q: Can using these creams every day cause build-up on my hair?
A: Yes, it is possible. Because smoothing creams often contain polymers and silicones to seal the ends, they can accumulate over time. To prevent this, use a clarifying shampoo once every two weeks. This removes the residue without stripping the hair, providing a clean slate for your maintenance cream to work effectively again.
Q: Will the cream actually stop my hair from splitting further?
A: While a cream cannot “heal” a split end, it can slow down the progression. By sealing the end of the hair fiber, the cream prevents the split from unraveling further up the shaft. It acts as a protective barrier against the friction and dryness that cause splits to travel.
Q: Can I use the cream on dry hair if I forget to apply it after washing?
A: Yes, but the application method changes. On dry hair, use a very tiny amount (a pea-sized drop) and rub it thoroughly into your palms. Lightly “pinch” the ends of your hair to apply the product. Avoid rubbing it into the hair, as this can create frizz; instead, use a smoothing, downward motion.
Q: Is it okay to use a maintenance cream and a hair oil together?
A: Absolutely. In fact, this is a professional secret called “layering.” Apply the cream first to provide the structural seal and weight, then apply a tiny amount of oil over the very tips to add a final layer of shine and moisture. This combination provides the most convincing “fresh trim” effect.
Q: How do I know if I’m using too much product?
A: The most obvious sign is a lack of volume or a “greasy” appearance, especially at the mid-lengths. If your hair feels heavy or looks clumped together rather than smooth and flowing, you have used too much. Next time, start with half the amount and only add more to the very ends of the hair.
Related posts:
 Perfect Curly Hair Routine
 Zoe Kravitz’s Coconut Oil Hair Care Secret
 The Bowl Method for Curly Hair
 Gray Hair Treatment Options
 Ariana Grande’s Hair Savior: Why Lavender Coconut Oil Is Her Secret Weapon
 Blow Drying Hair Without Damage: Expert Tips
 Supermodel Hair Blow-Drying Tips
 Hair Slugging Beauty Trend Guide