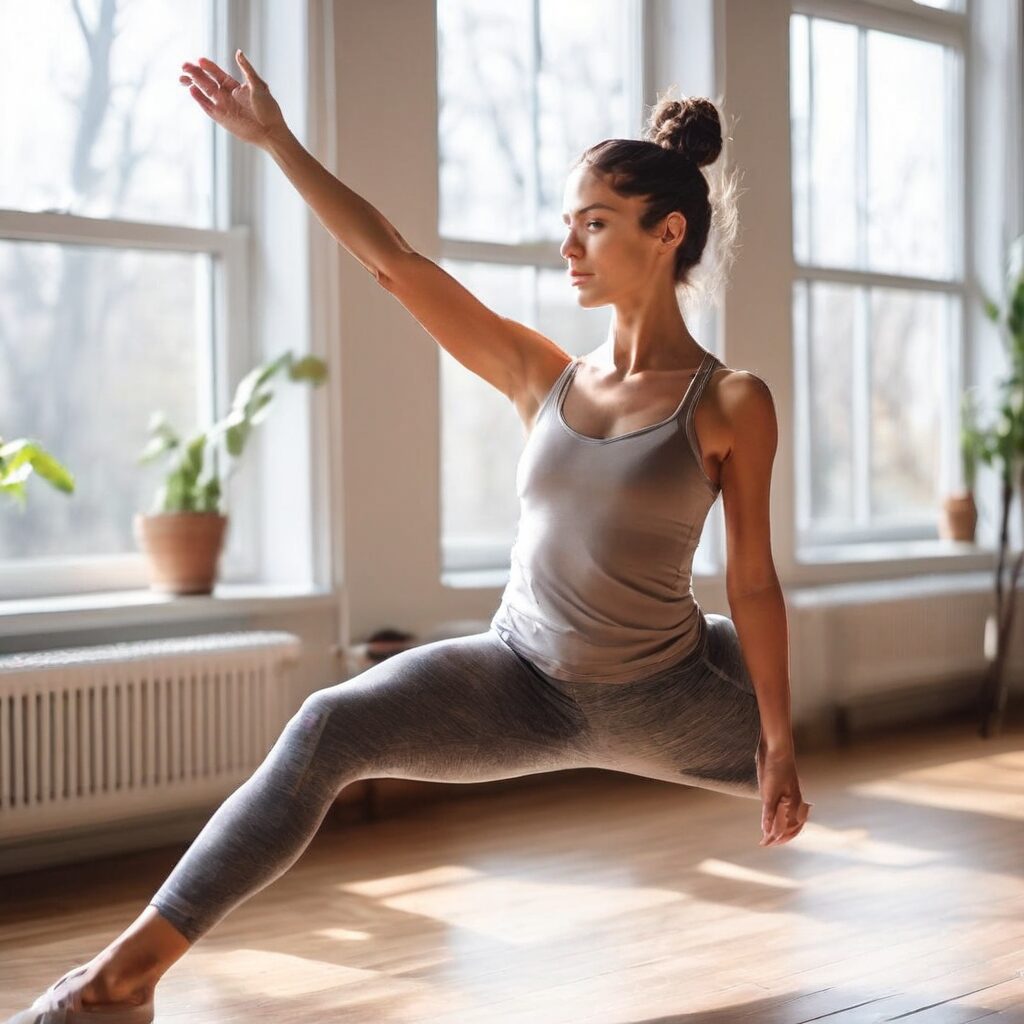
Barre workouts have surged in popularity due to their low-impact nature and ability to build strength and flexibility. This guide will delve into the benefits of a low-impact barre workout, how to get started, and provide a sample routine to incorporate into your fitness regimen.
What is a Low-Impact Barre Workout?
A low-impact barre workout combines elements of ballet, Pilates, and yoga to create a comprehensive fitness routine. Unlike high-impact exercises, barre focuses on small, controlled movements that minimize stress on the joints while still providing an effective workout.
Benefits of a Low-Impact Barre Workout
Barre workouts offer numerous benefits, including:
- Joint-Friendly: The low-impact nature makes it ideal for individuals with joint issues or those recovering from injuries.
- Improved Flexibility: Regular practice can enhance your range of motion and flexibility.
- Strength and Toning: Targeted movements help in building lean muscle and improving overall strength.
- Better Posture: Focus on alignment and core engagement promotes better posture.
- Mental Well-being: Like other forms of exercise, barre can reduce stress and improve mental clarity.
How to Get Started with Barre
Starting a barre workout is simple and requires minimal equipment. Here are some steps to help you get started:
- Find a Class: Look for local studios or online classes that offer barre workouts.
- Gather Equipment: Basic equipment includes a barre (or sturdy chair), light weights, a mat, and resistance bands.
- Wear Appropriate Attire: Opt for comfortable, form-fitting clothing that allows for full range of motion.
- Focus on Form: Proper form is crucial in barre workouts to prevent injury and maximize effectiveness. Pay close attention to the instructor’s cues.
- Start Slow: Begin with beginner classes to familiarize yourself with the movements and gradually increase intensity as you progress.
Sample Low-Impact Barre Routine
Here’s a sample routine to get you started:
- Warm-Up: 5-10 minutes of light cardio, such as marching in place or gentle dancing.
- Plies: Stand with feet hip-width apart, toes turned out. Bend knees and lower into a squat, keeping back straight. Repeat for 1 minute.
- Leg Lifts: Hold the barre or chair for balance. Lift one leg to the side and lower it back down. Repeat for 1 minute on each side.
- Core Work: Sit on the mat with knees bent and feet flat. Lean back slightly and lift feet off the ground. Hold for 30 seconds, then rest. Repeat 3 times.
- Cool Down: Stretch major muscle groups, holding each stretch for 20-30 seconds.
Common Mistakes to Avoid
When practicing barre, be mindful of these common mistakes:
- Overextending: Avoid pushing your body beyond its limits to prevent injury.
- Neglecting Form: Focus on proper alignment and technique to get the most out of each movement.
- Skipping Warm-Up/Cool-Down: Always include a warm-up and cool-down to prepare your body and aid recovery.
- Holding Breath: Remember to breathe steadily throughout the workout to maintain oxygen flow to your muscles.
The Mechanics of the “Barre Shake”: Why Isometric Contractions Work
One of the most distinctive experiences in a low-impact barre workout is the involuntary muscular trembling often referred to as the “barre shake.” This phenomenon is not a sign of weakness but rather a physiological response to isometric contractions and high-repetition fatigue. Unlike traditional weightlifting, which often relies on concentric and eccentric movements (shortening and lengthening the muscle), barre emphasizes isometric holds where the muscle remains at a constant length under tension. This specifically targets Type I slow-twitch muscle fibers, which are built for endurance and postural support.
When you hold a position—such as a mid-range squat or a raised leg—the motor units within your muscles begin to fatigue. As the primary motor units drop out, your nervous system frantically recruits secondary units to maintain the hold. This rapid-fire recruitment and the struggle of the muscle fibers to maintain a steady state of tension create the shaking sensation. To maximize this effect safely, focus on finding your “challenge zone”—that precise inch of movement where the muscle feels most engaged. By staying in this zone rather than moving through a full range of motion, you maintain constant tension, which leads to the metabolic stress necessary for muscle toning without the need for heavy external loads.
Edge cases for the shake include over-training or dehydration. If the shaking is accompanied by sharp pain or if you lose the ability to maintain proper alignment, it is a signal to reset. However, if the alignment is maintained, breathing through the shake is where the most significant neurological and muscular adaptations occur. This process increases muscular endurance and teaches the brain to remain calm under physical stress, a skill that carries over into daily activities and other athletic pursuits.
Mastering Pelvic Alignment: The “Tuck” vs. Neutral Spine
A frequent point of confusion in barre is the use of the “tuck.” In many classic barre methods, a posterior pelvic tilt (the tuck) is used to protect the lower back and engage the deep abdominals. However, modern biomechanics suggests a more nuanced approach. Understanding when to use a slight tuck and when to maintain a neutral spine is essential for preventing sacroiliac (SI) joint pain and ensuring the correct muscles are doing the work. A neutral spine preserves the natural curves of the neck, mid-back, and lower back, which is generally the strongest position for the body to absorb force.
In exercises like the “flat back” against a wall or certain core-focused floor work, a gentle tuck can help engage the transverse abdominis—the deep “corset” muscle of the core. To execute this correctly, think of pulling your hip bones toward your lower ribs using your abdominal muscles, rather than simply squeezing your glutes. This distinction is vital; over-squeezing the glutes can lead to hip flexor tightness and can actually inhibit the deep core. When performing standing leg work at the barre, such as glute extensions, maintaining a neutral spine is often preferable to avoid putting pressure on the lumbar vertebrae.
To find your neutral spine, stand with your back against a wall. There should be a small space between your lower back and the wall—just enough for a hand to slide through—while your tailbone, shoulder blades, and head remain in contact with the surface. Practice transitioning between a neutral spine and a slight tuck while breathing deeply. This awareness allows you to adjust your posture mid-workout, ensuring that you are not “dumping” weight into your joints when your muscles begin to tire.
Upper Body Sculpting: High Repetitions and Scapular Stability
While barre is famous for its lower-body benefits, its approach to the upper body is equally effective for building functional strength and definition. The philosophy relies on high-repetition, low-weight movements that target the deltoids, triceps, and the often-neglected muscles of the upper back, such as the rhomboids and mid-trapezius. Because the weights used are typically between one and three pounds, the focus shifts from sheer power to precision and endurance.
A key element of upper body barre work is scapular stability. Before beginning any arm movement, you must “set” your shoulder blades by drawing them down and back, away from your ears. This prevents the upper trapezius (the muscles around the neck) from taking over, which is a common cause of post-workout neck tension. For example, when performing small arm circles, the movement should originate from the shoulder joint while the rest of the torso remains motionless. This requires significant core stabilization to prevent the ribs from flaring out.
Consider the “Serving the Platter” exercise: extend your arms forward with palms up, elbows slightly bent. As you extend the arms out and pull them back in, focus on the resistance as if you are moving your arms through thick honey. This mental imagery helps engage the biceps and chest without needing heavy dumbbells. For the triceps, movements like “shaving the head” (overhead extensions) or narrow-grip push-ups emphasize the back of the arm. If you find your form slipping, it is better to drop the weights entirely and perform the movements with just the weight of your arms; the high-repetition nature will still provide a significant challenge to the muscular system.
The Role of the Foot and Ankle in Barre Stability
Barre is often performed barefoot or in grip socks, which provides a unique opportunity to strengthen the intrinsic muscles of the feet and improve ankle stability. In a low-impact setting, the feet are your primary foundation. Many barre movements involve “relevé” (rising onto the balls of the feet), which strengthens the calves and the arch of the foot. However, improper weight distribution during relevé can lead to ankle strain or bunion aggravation.
When rising onto the balls of your feet, ensure your weight is distributed evenly across the first and second metatarsals (the big toe and the one next to it). Avoid “rolling out” toward the pinky toes, which destabilizes the ankle and can lead to lateral ligament strain. If you have history of plantar fasciitis or weak arches, you can modify any movement by keeping your heels “heavy” on the floor or only lifting them a fraction of an inch. This still engages the posterior chain without overtaxing the fascia.
Furthermore, the “pointing” of the foot in barre (often called a “tendu”) should be an extension of the leg’s energy. Instead of just scrunching the toes, think of lengthening the top of the foot and reaching through the tips of the toes. This engagement helps activate the entire leg line, from the hip down to the floor. For those with limited ankle mobility, practicing ankle circles and calf stretches between sets can help maintain a full range of motion and prevent the calves from becoming overly tight, which can otherwise pull on the knees and lower back.
Deep Glute Activation: The Science of the “Pretzel” and Fold-Over
To target the gluteus medius and minimus—muscles essential for hip stability and preventing knee pain—barre utilizes specific positions like the “Pretzel.” In this exercise, you sit on the floor with one leg bent in front and the other bent behind you at 90-degree angles. By lifting the back knee or foot just an inch off the floor, you isolate the lateral glutes in a way that traditional squats cannot. This is particularly beneficial for runners or cyclists who often have dominant quadriceps and underactive lateral glutes.
The “Fold-Over” is another staple for posterior chain strength. Standing with your forearms on the barre and your torso parallel to the floor, you extend one leg behind you. The challenge here is to keep the hips “square” to the floor. A common mistake is to let the hip of the working leg rotate upward, which shifts the work into the lower back and away from the glutes. To correct this, imagine you have headlights on your hip bones, and both lights must point directly at the mat at all times.
For an added challenge in the fold-over, place a small resistance ball behind the knee of the working leg and squeeze it. This engages the hamstrings through a sustained contraction while the glute performs the lifting movement. This “dual-threat” approach maximizes the efficiency of the workout. If you feel any pinching in the hip socket, slightly turn the working knee outward (external rotation) to create more space in the joint. These small adjustments ensure the workout remains low-impact on the joints while high-intensity for the muscle fibers.
Adapting Barre for Pregnancy and Postpartum Recovery
Because of its low-impact nature and focus on the pelvic floor, barre is a popular choice for prenatal and postnatal fitness. However, as the body changes, certain modifications are necessary to ensure safety and effectiveness. During pregnancy, the hormone relaxin increases joint laxity, making it easier to overstretch. Therefore, movements should focus on strength and stability rather than pushing the limits of flexibility. Avoid deep “grand plies” which can put excessive pressure on the pelvic floor and hip joints.
As the belly grows, the center of gravity shifts forward, increasing the curve in the lower back. Utilizing the barre for balance becomes even more important. In the second and third trimesters, it is often recommended to avoid lying flat on the back (supine) for core work to prevent compression of the vena cava. Instead, core exercises can be performed standing or in a side-lying position. Focus on the “exhale on the effort” to engage the deep transverse abdominis, which helps support the weight of the baby and can aid in a smoother labor and recovery.
Postpartum, the focus shifts to gentle re-engagement of the core and correcting the rounded-shoulder posture that often comes with breastfeeding and carrying an infant. Start with diaphragmatic breathing and basic pelvic floor lifts (kegels) before moving into more strenuous barre movements. Be mindful of diastasis recti (separation of the abdominal muscles); avoid heavy twisting or “crunching” motions until the core has regained its integrity. Barre’s emphasis on upright posture and controlled movements makes it an ideal bridge back to higher-intensity exercise.
Progressive Overload in Barre: How to Advance Without Impact
A common misconception is that low-impact workouts eventually reach a plateau because they don’t involve increasing heavy weights. In barre, progressive overload is achieved through several variables: duration of holds, range of motion, tempo, and the use of props. Once you have mastered the basic form, you can increase the intensity by slowing down the movements. Moving at a glacial pace removes momentum, forcing the muscles to work through every millimeter of the exercise.
Another way to progress is by decreasing the base of support. For example, if you usually hold the barre with two hands during leg lifts, try using only one hand, then just a few fingers, and eventually let go entirely to test your balance. This forces the core to work significantly harder to keep the body upright. You can also introduce “tempo shifts”—performing three slow counts followed by two quick pulses. These changes in rhythm challenge the neuromuscular system and prevent the body from adapting too comfortably to a routine.
Finally, the strategic use of props like a small Pilates ball or a resistance loop can drastically change the difficulty. Placing a ball between the inner thighs during plies adds an adductor-strengthening component, while a resistance band around the thighs during side-lying leg series increases the load on the outer hips. By varying these elements, a low-impact barre routine can remain challenging for years, providing a sustainable path to long-term strength and mobility without the wear and tear associated with high-impact training.
FAQ
Is barre suitable for beginners?
Yes, barre is suitable for all fitness levels, including beginners. Start with beginner classes to learn the basics and gradually progress.
Do I need special equipment for barre?
Basic equipment includes a barre (or sturdy chair), light weights, a mat, and resistance bands. Many exercises can also be performed without equipment.
How often should I do a barre workout?
For best results, aim to practice barre 3-4 times per week, allowing time for rest and recovery between sessions.
Can barre help with weight loss?
While barre primarily focuses on strength and flexibility, it can contribute to weight loss when combined with a balanced diet and regular cardio exercise.
What should I wear to a barre class?
Wear comfortable, form-fitting clothing that allows for a full range of motion. Grip socks are also recommended to prevent slipping.
Related posts:
 What’s Really Behind the Booming Barre Trend? We Investigate
 Is Lululemon Turning Its Attention to Barre Workouts?
 Barre During Life Transitions
 I Dragged My Boyfriend to Barre Class—and He Loved It
 Barre Workout Modifications: Tailoring Your Practice to Your Needs
 I Tried 3 of L.A.’s Newest, Hottest Barre Studios—These Are My Favorites
 PHA Bodyweight Workout: Efficient Fitness Anywhere, Anytime
 Barre Babes: 5 Vintage Shots of Celebs Pulsing and Plie-ing Way Before Barre Was a Thing