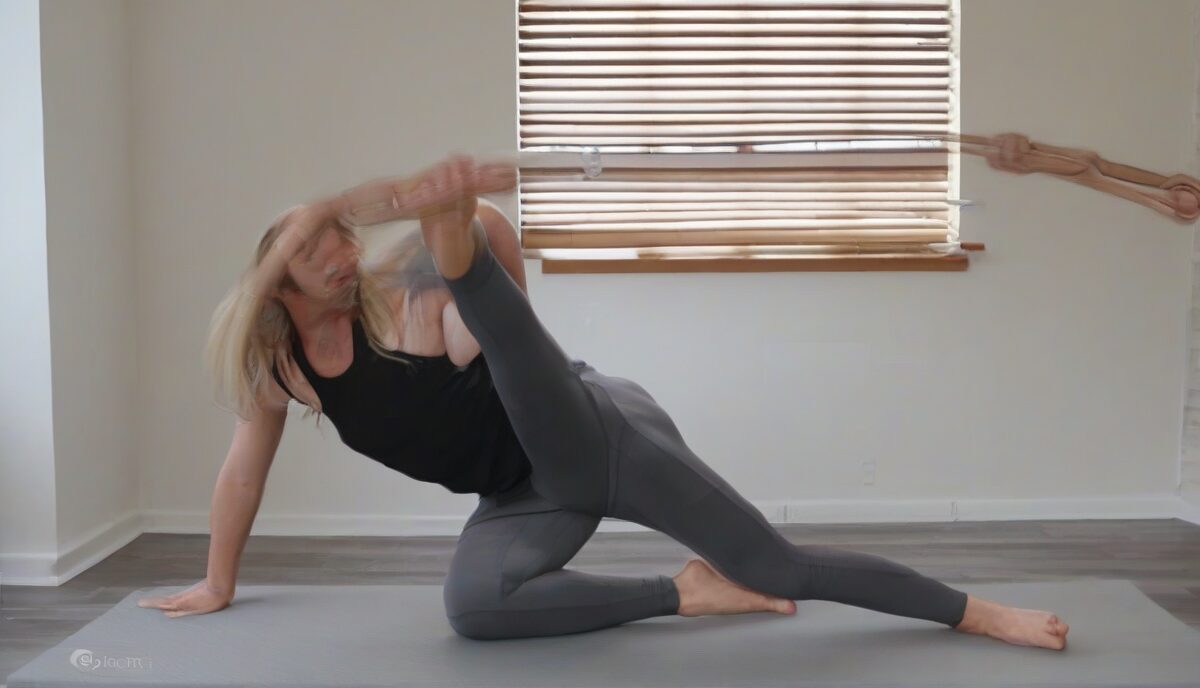
Flexibility is a crucial aspect of fitness that is often overlooked. Incorporating a lower body flexibility routine into your workout regimen can enhance your overall performance, reduce the risk of injury, and promote muscle recovery. This article will guide you through an effective lower body flexibility routine that you can easily incorporate into your daily fitness regime.
Why Flexibility is Important
Flexibility is the range of motion in a joint or group of joints. It helps improve the efficiency of your movements and can have a significant impact on your overall health. Here are some key benefits of maintaining good flexibility:
- Improved posture
- Increased range of motion
- Reduced muscle soreness
- Decreased risk of injuries
- Enhanced performance in physical activities
Pre-Stretch Warm-Up
Before diving into a flexibility routine, it’s essential to warm up your muscles. A proper warm-up increases blood flow to the muscles, making them more pliable and less prone to injury. Here’s a quick pre-stretch warm-up you can do:
- 5-10 minutes of light cardio (jogging, brisk walking, or jumping jacks)
- Dynamic stretches like leg swings, walking lunges, and high knees
Key Stretches for Lower Body Flexibility
Incorporate these stretches into your routine to improve lower body flexibility:
1. Hamstring Stretch
Stand with your feet hip-width apart, and slowly bend forward at the hips, reaching towards your toes. Hold for 20-30 seconds and repeat 2-3 times.
2. Quadriceps Stretch
Stand on one leg, and bring your other heel towards your buttocks, holding your ankle with your hand. Keep your knees close together and hold for 20-30 seconds. Repeat on the other leg.
3. Calf Stretch
Stand facing a wall, place your hands on the wall, and step one foot back, keeping it straight. Bend your front knee and press your back heel into the ground. Hold for 20-30 seconds and switch legs.
4. Hip Flexor Stretch
Kneel on one knee with the other foot in front, forming a 90-degree angle. Push your hips forward gently until you feel a stretch in the front of your hip. Hold for 20-30 seconds and switch legs.
5. Butterfly Stretch
Sit on the ground with the soles of your feet together and your knees bent out to the sides. Hold your feet with your hands and gently press your knees towards the floor. Hold for 20-30 seconds.
Post-Stretch Cool Down
After completing your flexibility routine, it’s important to cool down to help your muscles recover. Spend 5-10 minutes doing light cardio or walking to gradually bring your heart rate down. Follow this with some static stretches to further enhance flexibility and reduce muscle tension.
Tips for Improving Flexibility
Here are some tips to help you improve your flexibility:
- Be consistent: Stretch regularly, ideally every day.
- Hold each stretch for at least 20-30 seconds.
- Breathe deeply and relax into each stretch.
- Avoid bouncing or forcing the stretch.
- Stay hydrated and maintain a balanced diet.
Advanced Proprioceptive Neuromuscular Facilitation (PNF) for Lower Body Gains
While static stretching is a foundational tool for general flexibility, Proprioceptive Neuromuscular Facilitation (PNF) is often considered the gold standard for athletes and individuals looking to make rapid, significant gains in their range of motion. PNF stretching leverages the body’s natural neuromuscular reflexes to bypass the protective “stretch reflex” that often causes muscles to tighten up when they reach their limit. The most common variation is the “Contract-Relax” method, which involves a cycle of isometric contraction followed by a passive stretch.
To perform a PNF stretch on the hamstrings, for example, you would lie on your back and have a partner (or use a sturdy strap) lift your leg to the point of mild tension. From this position, you actively push your leg back down against the resistance for 6 to 10 seconds, engaging the hamstring muscles at about 50% of your maximum effort. This contraction triggers the Golgi Tendon Organs (GTOs), which are sensory receptors located at the junction of muscles and tendons. When the GTOs sense high tension, they send a signal to the spinal cord that causes the muscle to relax—a phenomenon known as autogenic inhibition. Immediately after the contraction, you relax the muscle and move deeper into the stretch for 20 to 30 seconds. You will often find that your range of motion increases by several inches in a single session.
Edge cases for PNF include individuals with recent muscle tears or joint instability. Because PNF involves high-intensity contractions at the end-range of a muscle’s length, it places significant stress on the connective tissues. It is also advised to avoid PNF immediately before explosive activities like sprinting or heavy weightlifting, as the temporary neurological relaxation of the muscle can slightly decrease force production for a short window. For long-term flexibility, integrate PNF sessions two to three times per week, ensuring you are fully warmed up before beginning.
The Couch Stretch: Eradicating Anterior Chain Tightness
The standard hip flexor stretch mentioned in basic routines often fails to address the rectus femoris, which is the only muscle of the quadriceps group that crosses both the hip and the knee joints. To truly unlock the anterior chain, the “Couch Stretch” is an essential, albeit intense, progression. This stretch targets the deep psoas and the entire quadriceps complex, making it particularly effective for those who spend long hours sitting or suffer from lower back pain caused by an anterior pelvic tilt.
To perform the Couch Stretch, find a wall or the end of a couch. Kneel on one knee with your shin vertical against the wall and your toes pointing upward. Place your other foot in front of you in a lunge position. The goal is to bring your torso upright so that your back is eventually touching the wall behind you. Many people will find that their hips are so tight they cannot stand upright initially; in this case, use a yoga block or a chair for support in front of you. The key technical nuance here is the posterior pelvic tilt: squeeze your glutes and tuck your tailbone under. This prevents the lower back from arching excessively and ensures the stretch is localized to the hip flexors and quads rather than the lumbar spine.
Common mistakes include “dumping” the pelvis forward, which creates a false sense of flexibility while actually compressing the lower vertebrae. If you feel a sharp pinch in the front of the hip, try backing off the intensity and focusing on the glute squeeze. For those with knee sensitivity, place a thick pad or rolled-up towel under the kneeling knee. Hold this position for at least 90 seconds per side. Because these tissues are thick and dense, they require longer durations to see structural change compared to the smaller muscles of the upper body.
Restoring Ankle Dorsiflexion for Squat Depth and Knee Health
Ankle mobility is the most frequently overlooked component of a lower body routine, yet it dictates the mechanics of every movement from walking to deep squatting. Limited ankle dorsiflexion—the ability to bring the top of the foot toward the shin—forces the body to compensate by over-arching the back or allowing the knees to collapse inward. This often manifests as knee pain or “butt wink” during resistance training. To improve this, we must address both the soft tissue of the calves and the joint capsule of the ankle itself.
A highly effective mobilization involves the wall-facing ankle drive. Stand a few inches away from a wall in a staggered stance. Keeping your front heel firmly planted on the floor, drive your knee forward until it touches the wall. If this is easy, move your foot back an inch and repeat. The critical detail is the heel; if the heel lifts even slightly, the stretch is lost. To add a joint distraction element, which helps when there is a “pinching” sensation in the front of the ankle, loop a heavy resistance band around the ankle joint (just below the bony protrusions of the malleoli) and anchor it behind you. The band pulls the talus bone backward, creating space in the joint as you drive the knee forward.
It is also vital to distinguish between the gastrocnemius and the soleus. The gastrocnemius is stretched with a straight knee, while the soleus—a deeper calf muscle—is only targeted when the knee is bent. Incorporating bent-knee calf stretches, such as the “combat stretch” (kneeling on one knee and leaning weight onto the other knee), ensures that the entire posterior lower leg is mobile. Spend 2 minutes on each ankle, focusing on slow, controlled oscillations into the end-range.
Transverse Plane Mobility: Unlocking the Glutes and Piriformis
Most flexibility routines focus on the sagittal plane (forward and backward movement), but the hips are ball-and-socket joints that require significant rotational capacity. The gluteus maximus, medius, and the deeper piriformis are often chronically tight due to lack of lateral movement in modern life. Tightness in these external rotators can lead to piriformis syndrome, where the muscle compresses the sciatic nerve, causing radiating pain down the leg.
The Pigeon Pose is a staple for this area, but it must be executed with precision to protect the knee. Start in a plank position and bring your right knee forward toward your right wrist. Aim to bring your right foot toward your left wrist, but only as far as your flexibility allows without feeling torque in the knee. The most important cue is to keep the front foot flexed (toes pulled toward the shin), which engages the muscles around the knee and protects the ligaments. If your hip does not reach the floor, place a pillow or block under your right glute to keep your pelvis level. Leaning forward over the front leg increases the stretch in the deep gluteal fibers.
For an active variation, try the 90/90 hip switch. Sit on the floor with your front leg at a 90-degree angle and your back leg at a 90-degree angle. Without using your hands, rotate your torso and legs to the opposite side. This movement builds active internal and external rotation. Many people will find internal rotation (the back leg) much more difficult than external rotation. Improving this specific range of motion can alleviate chronic tension in the IT band and improve overall pelvic stability during lateral movements like side lunges or skating.
Adductor Mobilization and the Frog Progression
The adductors, or inner thigh muscles, play a massive role in stabilizing the pelvis and allowing for a wide stance. When these muscles are tight, they pull the knees inward (valgus stress) and can limit the depth of your squats and the fluidity of your gait. While the butterfly stretch is a good starting point, it doesn’t provide enough leverage for most people to see significant long-term changes in the adductor magnus, the largest of the group.
The Frog Stretch is a more potent alternative. Begin on all fours and spread your knees as wide as possible while keeping your feet in line with your knees (shins parallel to each other). Lower yourself onto your forearms. From this position, slowly rock your hips backward toward your heels. You should feel a deep stretch along the entire inner thigh. To advance this, straighten one leg out to the side while keeping the other knee bent. This “half-frog” variation targets the gracilis, the only adductor muscle that crosses the knee joint. By keeping the leg straight, you put that muscle under a greater stretch.
A common mistake in adductor stretching is allowing the lower back to collapse into a deep arch. To protect your spine and maximize the stretch, keep your core slightly engaged and your spine neutral. If you experience a sharp sensation in the groin, you may be pushing too far into the joint capsule; ease off and focus on breathing into the belly. This area is highly sensitive to the nervous system, so using long, slow exhales is essential to signal the muscles to let go of their protective tension.
Myofascial Release (SMR) and the Role of the Fascial System
Sometimes, what feels like muscle tightness is actually a restriction in the fascia—the connective tissue that wraps around every muscle fiber. When fascia becomes “sticky” or develops adhesions due to dehydration, overuse, or lack of movement, traditional stretching can only go so far. This is where Self-Myofascial Release (SMR) using foam rollers, lacrosse balls, or specialized massage tools becomes invaluable as a precursor to your flexibility routine.
Focus on the Tensor Fasciae Latae (TFL), a small muscle on the side of the hip that often becomes overactive and tight. Lay on your side with a lacrosse ball placed just below your hip bone (not on the bone itself). Gently roll until you find a “hot spot” or trigger point, and hold the pressure there for 30 to 60 seconds while taking deep breaths. This mechanical pressure stimulates mechanoreceptors that tell the brain to decrease the tone in that specific area. Similarly, use a foam roller on the quadriceps, but instead of just rolling up and down, try the “pin and stretch” technique: find a tender spot, keep the roller there, and then slowly bend and straighten your knee. This forces the different layers of tissue to slide over one another, breaking up adhesions.
Another critical area for lower body health is the plantar fascia on the bottom of the foot. A tight plantar fascia can create a ripple effect of tightness up the entire posterior chain (calves, hamstrings, and even the lower back). Spend 2 minutes per foot rolling a firm ball from the heel to the base of the toes. Improving the pliability of the tissue on the bottom of your feet can often lead to an immediate, measurable improvement in a standing forward fold stretch.
Neural Gliding: Addressing Tension Beyond the Muscle Fiber
In many cases, what people perceive as “tight hamstrings” is actually neural tension in the sciatic nerve. Nerves do not like to be stretched; they prefer to “glide” or “slide” within their surrounding sheaths. If a nerve is trapped or compressed by tight muscles or inflamed tissue, traditional static stretching can actually make the sensation worse, leading to more tightness as the body tries to protect the nerve.
To determine if your tightness is neural, perform a seated sciatic nerve glide. Sit on the edge of a chair with a slumped posture, chin tucked to your chest. Straighten one leg out in front of you. If you feel a sharp, tingly, or intense pull, point your toes away from you (plantarflexion) and lift your head up at the same time. Then, as you pull your toes back toward your shin (dorsiflexion), tuck your chin back down. This creates a “flossing” effect where the nerve is pulled from one end and relaxed at the other, allowing it to move through the neural canal without being over-tensioned.
FAQ
1. How often should I do a lower body flexibility routine?
For best results, aim to incorporate a lower body flexibility routine into your daily fitness regimen. Consistency is key to improving and maintaining flexibility.
2. Can I do flexibility exercises on rest days?
Yes, flexibility exercises can be done on rest days. They help promote muscle recovery and can reduce muscle soreness.
3. Is it normal to feel discomfort while stretching?
It’s normal to feel a gentle pull or mild discomfort while stretching, but you should not feel pain. If you do, ease off the stretch or stop altogether.
4. Can stretching help with muscle soreness?
Yes, stretching can help reduce muscle soreness by increasing blood flow and promoting muscle recovery.
5. How long should I hold each stretch?
Hold each stretch for at least 20-30 seconds to effectively improve flexibility.
Related posts:
 Managing Hip Pain from Sitting
 Stretches to Relieve Foot Pain
 Desk Yoga for Back Pain Relief
 Dangers of Over-Stretching
 How to Stretch Safely Without Going Too Far
 The Simple Ankle Fix That Will Transform Your Entire Workout
 Anabolic Stretching Claims to Build Muscle While You Stretch
 The Lunge Mistakes Everyone Makes According to a Top Trainer