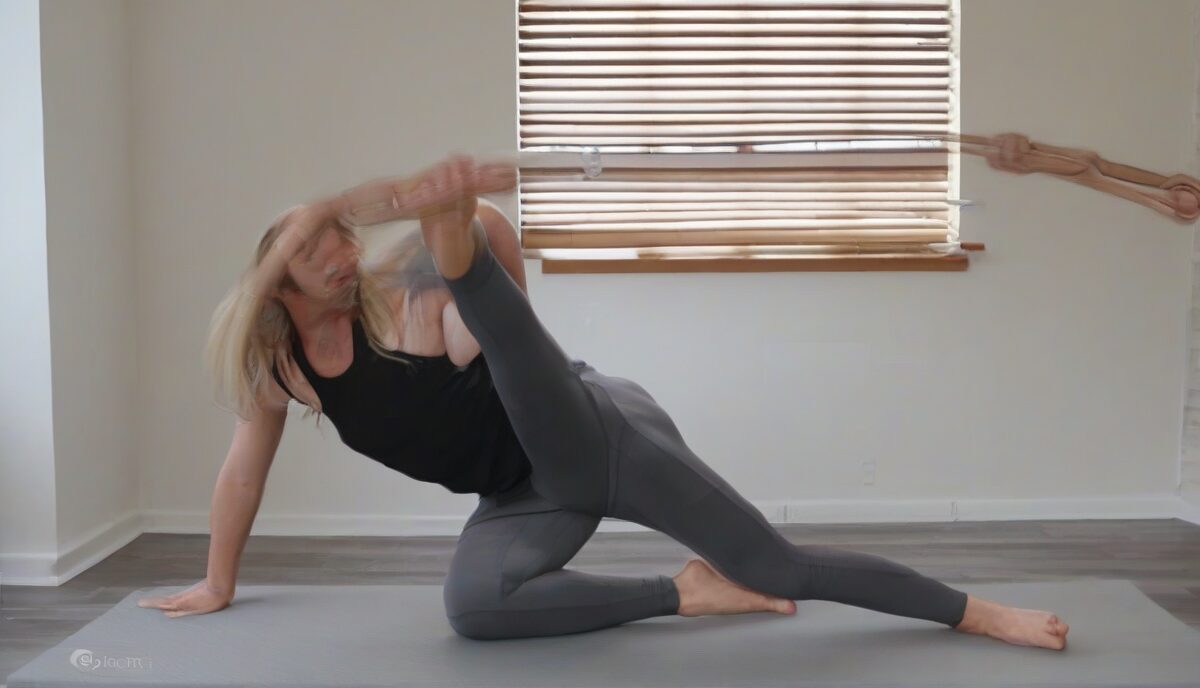
Improving lower body flexibility is essential for maintaining overall body mobility, reducing the risk of injuries, and enhancing athletic performance. Whether you’re an athlete, a fitness enthusiast, or someone looking to improve daily movement, incorporating a lower body flexibility routine into your regimen can yield significant benefits.
The Importance of Lower Body Flexibility
Lower body flexibility is crucial for various activities, from walking and running to lifting objects and performing daily tasks. Flexible muscles and joints allow for a greater range of motion, reducing the likelihood of strains and sprains. Additionally, improved flexibility can alleviate muscle tension and reduce pain, especially in the lower back and legs.
Warm-Up Before Stretching
Before diving into your stretching routine, it’s essential to warm up your muscles. A proper warm-up increases blood flow to the muscles, making them more pliable and less prone to injury. Consider starting with 5-10 minutes of light cardio activities such as jogging, jumping jacks, or cycling.
Essential Lower Body Stretches
Here are some effective stretches to include in your lower body flexibility routine:
1. Hamstring Stretch
Sit on the ground with one leg extended and the other bent, with the sole of your foot against the inner thigh of the extended leg. Reach forward towards your toes, keeping your back straight. Hold for 20-30 seconds and switch legs.
2. Quadriceps Stretch
Stand on one leg, using a wall or chair for balance if needed. Bend the other leg behind you and grab your ankle, pulling your heel towards your buttocks. Hold for 20-30 seconds and switch legs.
3. Calf Stretch
Stand facing a wall, place your hands on the wall at shoulder height, and step one foot back, keeping it flat on the ground. Lean forward into the wall until you feel a stretch in your calf. Hold for 20-30 seconds and switch legs.
4. Hip Flexor Stretch
Kneel on one knee with the other foot in front, forming a 90-degree angle with both legs. Push your hips forward, feeling a stretch in the front of your hip. Hold for 20-30 seconds and switch sides.
5. Inner Thigh Stretch
Sit with your feet together and knees bent out to the sides, forming a diamond shape with your legs. Hold your feet and gently press your knees down towards the floor. Hold for 20-30 seconds.
Tips for Effective Stretching
- Breathe deeply and relax into each stretch.
- Avoid bouncing or forcing your body into a stretch.
- Hold each stretch for at least 20-30 seconds.
- Incorporate stretching into your daily routine for best results.
- Listen to your body and avoid overstretching, which can lead to injury.
Incorporating Flexibility Training into Your Routine
To maximize the benefits of your lower body flexibility routine, aim to stretch at least three times per week. You can incorporate these stretches into your post-workout cool-down or as a standalone flexibility session. Consistency is key to seeing improvements in flexibility over time.
Advanced Myofascial Release Techniques for the Lower Body
While static stretching focuses on lengthening the muscle fibers, myofascial release (MFR) targets the connective tissue, or fascia, that surrounds those muscles. Over time, due to repetitive strain or inactivity, this fascia can develop adhesions or “knots” that restrict movement regardless of how much you stretch the muscle itself. Incorporating tools like foam rollers, lacrosse balls, or specialized massage sticks can “unstick” these layers, allowing the stretches mentioned earlier to be significantly more effective.
To begin, focus on the Tensor Fasciae Latae (TFL), a small but powerful muscle on the side of the hip that often contributes to IT band syndrome. Lie on your side with a foam roller placed just below the hip bone. Use your arms and the opposite leg to slowly roll over the area. When you find a tender spot, stop and hold the pressure for 30 to 60 seconds until the sensation of tension begins to dissipate. This process, known as autogenic inhibition, signals the nervous system to allow the muscle to relax. Following this with a standing IT band stretch creates a synergistic effect that static stretching alone cannot achieve.
Another critical area often overlooked is the plantar fascia on the bottom of the foot. The lower body kinetic chain begins here; tightness in the arches can translate to tension in the calves and hamstrings. Use a lacrosse ball or a firm trigger point ball while standing. Roll the ball along the length of your foot, applying moderate pressure from the heel to the base of the toes. Spend extra time on the inner arch. By releasing the plantar fascia, you may find that your ankle mobility improves instantly, making your calf stretches deeper and more productive.
Dynamic Mobility: Preparing the Kinetic Chain for Movement
Dynamic mobility differs from static stretching by moving joints through their full range of motion in a controlled, rhythmic manner. This is particularly beneficial before physical activity, as it prepares the nervous system for the demands of movement. Instead of holding a position, you are actively engaging the muscles to create length. This approach not only improves flexibility but also enhances coordination and balance.
One of the most effective dynamic movements is the Cossack Squat. Stand with a very wide stance, toes pointed slightly outward. Shift your weight to one side, bending that knee while keeping the other leg perfectly straight with the heel on the ground and toes pointed upward. Sink as low as your mobility allows, then drive through the heel to return to center and switch sides. This movement targets the adductors, hamstrings, and ankles simultaneously. It is an excellent “diagnostic” move; if you find one side is significantly tighter than the other, it indicates a functional asymmetry that needs more focused attention.
Leg swings are another essential dynamic drill. Find a wall for balance and swing one leg forward and backward like a pendulum. Focus on keeping your torso upright and your core engaged to prevent the lower back from arching. This dynamic movement pumps synovial fluid into the hip joint, lubricating it for more intense activity. Transition from forward swings to lateral (side-to-side) swings to address the inner and outer hip. Perform 15 to 20 reps per leg, gradually increasing the height of the swing as the muscles warm up. This active lengthening prepares the hamstrings and hip flexors for the explosive movements found in running or jumping.
PNF Stretching and Isometric Loading for Rapid Gains
Proprioceptive Neuromuscular Facilitation (PNF) is often considered the gold standard for rapid flexibility gains. It involves a cycle of stretching and contracting the target muscle to bypass the “stretch reflex,” a protective mechanism that causes muscles to contract when they are pulled too far or too fast. By intentionally contracting the muscle while it is at its end range, you trick the nervous system into allowing a deeper stretch during the subsequent relaxation phase.
A classic example is the PNF Hamstring Stretch. Lie on your back and raise one leg toward the ceiling, using a towel or strap looped around your foot to pull it into a comfortable stretch. Hold this for 10 seconds. Then, actively push your heel down against the resistance of the strap as if you are trying to push your leg back to the floor. Contract the hamstring at about 50% of your maximum effort for 6 seconds. Finally, relax the muscle and gently pull the leg closer to your chest. You will likely find that the leg moves several inches further than it did during the initial stretch. This “contract-relax” method can be applied to nearly any muscle group, including the quads and hip flexors.
Isometric loading takes this a step further by building strength at the end of your range of motion. For example, when performing a deep lunge for the hip flexors, try to “scissor” your legs together by driving your front heel back and your back knee forward without actually moving them. This tension strengthens the muscle in its lengthened state. This is vital because flexibility without strength is a recipe for injury; you need the neurological control to support the new range of motion you have unlocked.
Addressing Ankle Dorsiflexion and Joint Capsule Restriction
Often, what feels like muscle tightness in the calves is actually a restriction in the ankle joint capsule itself. Ankle dorsiflexion—the ability to pull the toes toward the shin—is a fundamental requirement for deep squats, lunges, and efficient walking. If the talus bone in the ankle does not slide backward properly, the joint will feel “blocked” at the front, no matter how much you stretch the gastrocnemius or soleus muscles.
To test and improve this, perform the Knee-to-Wall Test. Stand facing a wall with your toes about four inches away. Attempt to touch your knee to the wall without letting your heel lift off the ground. If your heel lifts or your knee cannot reach, you have a dorsiflexion restriction. To fix this, use a heavy resistance band anchored to a sturdy post behind you. Loop the band around the very top of your ankle (below the shin bones). Step forward until there is significant tension. Perform the knee-to-wall movement repeatedly. The band provides a posterior glide to the talus bone, clearing the joint restriction and allowing for a smoother, deeper range of motion.
Edge cases for ankle mobility often involve previous injuries, such as old sprains that left behind scar tissue. For these individuals, manual mobilization is key. While in a half-kneeling position, place your hand on top of the foot to stabilize the heel and use the other hand to guide the knee forward over the second toe. Avoid letting the arch collapse inward (pronation), as this is a common compensation for poor ankle mobility. By keeping the foot straight and the heel grounded, you ensure the stretch is targeting the intended structures.
The Role of Pelvic Alignment in Functional Flexibility
Flexibility is not just about the length of individual muscles; it is heavily influenced by the position of the pelvis. Many people suffer from an Anterior Pelvic Tilt (APT), where the pelvis tips forward, lengthening the hamstrings and shortening the hip flexors. If you try to stretch your hamstrings while your pelvis is already tilted forward, you are essentially pulling on a muscle that is already overstretched, which can lead to “yoga butt” or proximal hamstring tendinopathy.
To correct this and make your lower body routine more effective, you must incorporate pelvic tucks. Before starting a hip flexor stretch, perform a posterior pelvic tilt by tucking your tailbone under and squeezing your glutes. This “locks” the pelvis in place, ensuring that the stretch actually targets the psoas and iliacus rather than just arching the lower back. You will find that even a small movement provides an intense stretch when the pelvis is properly aligned. This principle applies to the quadriceps stretch as well; if your back is arched, you are losing the effectiveness of the stretch at the hip joint.
Furthermore, glute activation is the necessary counterpart to hip flexibility. Due to a phenomenon called reciprocal inhibition, when the glutes (the extensors) are weak or “sleepy,” the hip flexors (the antagonists) will remain chronically tight to provide stability. By performing a few sets of glute bridges or lateral monster walks before your flexibility routine, you signal the hip flexors that they can safely let go and lengthen. This neurological balance is the key to lasting changes in mobility.
Specialized Stretching for Sedentary Lifestyles and Desk Workers
Modern life often involves hours of sitting, which places the lower body in a compromised position: hips flexed, knees bent, and ankles neutral. Over time, the body adapts to this position, leading to “adaptive shortening” of the hip flexors and a weakening of the posterior chain. For those who spend most of their day at a desk, a standard stretching routine may not be enough to counteract 8 to 10 hours of compression.
The “Couch Stretch” is perhaps the most potent antidote to a sedentary lifestyle. This is an intensified version of the hip flexor stretch where you place your back foot up against a wall or the cushion of a couch while kneeling. The goal is to get your shin vertical against the wall and your torso upright. This targets the rectus femoris—the only quadricep muscle that crosses both the hip and the knee. Because this muscle is often the tightest in desk workers, this stretch can feel quite intense. Hold it for 2 minutes per side to allow the deep tissues to actually deform and reset.
Additionally, the Deep Squat Hold (or the “Third World Squat”) is an essential restorative pose. Simply squatting down as low as possible with your heels on the floor and staying there for several minutes can decompress the lower back and open the hips and ankles. If you cannot keep your heels down, hold onto a doorframe or a heavy table for support. This position is a natural human resting posture that we have largely lost in Western culture. Spending 5 to 10 minutes throughout the day in this position can prevent the stiffness that accumulates from prolonged sitting.
Periodization and Long-Term Flexibility Programming
Just like strength training, flexibility training requires a structured approach to see long-term results. You cannot expect to achieve a full split or a deep squat in a single session. Progress should be tracked and the intensity of the routine should be periodized. This means alternating between high-intensity sessions (incorporating PNF and long holds) and low-intensity recovery sessions (focusing on gentle movement and myofascial release).
For the first four weeks of a new routine, focus on “Foundational Mobility.” This involves identifying your tightest areas and using myofascial release and basic static stretches to restore a baseline range of motion. During this phase, consistency is more important than intensity. Aim for 10 to 15 minutes every single day. Once you have established a baseline, move into the “Developmental Phase,” where you introduce PNF stretching and isometric loading twice a week. These sessions are more taxing on the nervous system and require more recovery time.
It is also helpful to use objective measurements to track progress. Use a tape measure to check the distance between your fingers and your toes in a seated forward fold, or take photos of your maximum squat depth. Over time, you may notice that your flexibility fluctuates based on stress levels, hydration, and sleep quality. This is normal. On days when you feel particularly tight, revert to gentle dynamic movements rather than forcing a deep stretch. By listening to these signals and adjusting your volume and intensity, you ensure that your lower body flexibility routine remains a sustainable part of your long-term health and fitness journey.
FAQ
1. How often should I do lower body stretches?
For optimal results, aim to stretch at least three times per week. Consistency is crucial for improving flexibility over time.
2. Can I stretch without warming up?
It’s best to warm up before stretching to increase blood flow to the muscles, making them more pliable and reducing the risk of injury.
3. How long should I hold each stretch?
Hold each stretch for at least 20-30 seconds to allow the muscles to relax and lengthen effectively.
4. Can stretching help with muscle soreness?
Yes, stretching can help alleviate muscle soreness by increasing blood flow and reducing tension in the muscles.
5. What should I do if I feel pain while stretching?
If you feel pain while stretching, stop immediately. Stretching should cause mild discomfort but not pain. Adjust the stretch or consult a professional if necessary.
Related posts:
 Lower Body Flexibility Routine
 Dangers of Over-Stretching
 Transform Your Living Room Into a Stretch Studio With These Wall Moves
 Stretches to Relieve Foot Pain
 The Simple Ankle Fix That Will Transform Your Entire Workout
 How to Stretch Safely Without Going Too Far
 Anabolic Stretching Claims to Build Muscle While You Stretch
 PHA Bodyweight Workout: Efficient Fitness Anywhere, Anytime