
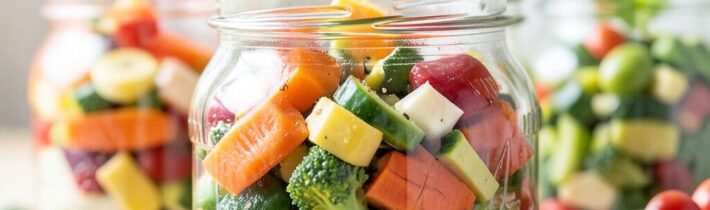
Mornings can feel like a mad dash, especially when you’re trying to eat a wholesome, plant-based breakfast. That rushed feeling often leads to grabbing whatever’s easiest, which might leave you hungry and unsatisfied by mid-morning. Enter the ultimate solution: make-ahead vegan savory breakfast jars. These portable, layered jars are your ticket to a stress-free, nutrient-dense start to the day. They combine whole-food ingredients that you can prepare on a quiet Sunday afternoon, storing in your fridge for grab-and-go convenience all week long.
Unlike sweet overnight oats or chia puddings, savory jars cater to those who crave hearty, umami flavors in the morning. They are incredibly versatile, built on a foundation of whole grains or legumes, layered with roasted vegetables, plant-based proteins, and creamy sauces. The best part? They are fully customizable based on your preferences and what you have on hand, eliminating breakfast boredom and food waste.
This guide will walk you through everything you need to know to master the art of the savory breakfast jar. We’ll cover the essential components, provide seven foundational recipes, share expert tips for storage and assembly, and answer all your FAQs. Get ready to transform your morning routine.
The Core Components of a Perfect Savory Jar
Think of your breakfast jar as a layered parfait of savory goodness. Each layer serves a purpose, contributing to texture, flavor, and lasting energy. Here’s the breakdown of the essential building blocks.
The Base (The Foundation): This is your source of complex carbohydrates and fiber. It soaks up flavors and provides substance. Excellent options include:
– Cooked quinoa: A complete protein, light, and fluffy.
– Steel-cut or rolled oats: Yes, oats can be savory! They become creamy and comforting.
– Millet or farro: For a chewy, nutty texture.
– Mashed chickpeas or lentils: For a high-protein, hummus-like base.
– Cauliflower rice: A low-carb, veggie-packed option.
The Protein Layer (Staying Power): This is crucial for satiety. Plant-based proteins keep you full for hours.
– Crispy baked tofu cubes (marinated in tamari or smoked paprika).
– Cooked black beans, pinto beans, or chickpeas.
– Vegan “sausage” crumbles (store-bought or homemade from walnuts and lentils).
– Shelled edamame or steamed tempeh cubes.
The Vegetable Layer (Color & Nutrients): Roasting brings out natural sweetness. Aim for a mix of colors.
– Roasted sweet potato or butternut squash cubes.
– Sautéed kale, spinach, or Swiss chard.
– Roasted bell peppers, zucchini, or cherry tomatoes.
– Quick-pickled red onions or shredded carrots for crunch.
The Creamy Element (Flavor & Moisture): This ties everything together and prevents dryness.
– Creamy tahini sauce: Blend tahini, lemon juice, garlic, and water.
– Avocado cilantro lime crema: Avocado, cilantro, lime, and plant-based yogurt.
– Cashew “sour cream” or cheese sauce.
– Simple vegan pesto or a sun-dried tomato spread.
The Crunchy Topping (The Finishing Touch): Added just before eating to preserve texture.
– Toasted pumpkin seeds (pepitas) or sunflower seeds.
– Crumbled nuts like almonds or walnuts.
– Hemp hearts or nutritional yeast for a cheesy flavor.
– Crunchy chickpeas or vegan “bacon” bits.
Essential Equipment and Jars
You don’t need fancy gear. The key is choosing the right jar. Wide-mouth Mason jars (16-ounce or pint-size) are ideal. They allow for easy layering and eating straight from the container. Ensure your jars are heat-safe if you plan to reheat contents. You’ll also need basic kitchen tools: baking sheets for roasting, pots for cooking grains, and a blender for sauces.
A note on food safety: Always let cooked components cool completely before assembling jars to prevent condensation and sogginess. Use clean, dry utensils when building your layers to maximize freshness.
Recipe 1: The Mediterranean Quinoa Power Jar
This jar is bright, fresh, and packed with Mediterranean flavors. It’s a fantastic introduction to savory breakfasts.
Base: 1/2 cup cooked quinoa, cooled.
Protein: 1/3 cup chickpeas (tossed with olive oil, cumin, and a pinch of salt).
Vegetables: 1/4 cup diced cucumber, 2-3 halved cherry tomatoes, a spoonful of quick-pickled red onion.
Creamy Element: 2 tablespoons lemon-tahini sauce (2 tbsp tahini, juice of 1/2 lemon, 1 minced garlic clove, water to thin).
Crunchy Topping: 1 tablespoon toasted pine nuts and a sprinkle of fresh dill.
Assembly: Layer quinoa, followed by chickpeas, then vegetables. Drizzle the tahini sauce over the veggies. Seal the jar. Store topping separately. To eat, shake vigorously or stir, then top with nuts and dill.
Recipe 2: Southwest Black Bean & Sweet Potato Scramble Jar
Hearty and slightly smoky, this jar feels like a warm breakfast burrito in a portable form.
Base: 1/3 cup mashed sweet potato (roasted and skin removed).
Protein: 1/3 cup seasoned black beans (cooked with onion, garlic, and chili powder).
Vegetables: 1/4 cup roasted corn kernels, 2 tablespoons diced red bell pepper.
Creamy Element: 2 tablespoons avocado crema (1/2 avocado, lime juice, cilantro, blended with a splash of water).
Crunchy Topping: 1 tablespoon crushed tortilla chips or toasted pepitas.
Assembly: Smash sweet potato at the bottom. Layer black beans, then corn and peppers. Dollop avocado crema on top. Seal jar. Add crunchy topping just before eating. Can be eaten cold or heated.
Recipe 3: Savory Steel-Cut Oats with Mushrooms & Greens
Proof that oats aren’t just for sweetness. This is a deeply comforting, porridge-like breakfast.
Base: 1/2 cup cooked steel-cut oats, prepared with vegetable broth instead of water.
Protein: 1/4 cup crumbled baked tofu or cooked brown lentils.
Vegetables: 1/3 cup sautéed mushrooms and onions, a handful of wilted spinach.
Creamy Element: A drizzle of white miso-tahini sauce (1 tsp white miso paste blended into the tahini sauce).
Crunchy Topping: 1 tablespoon chopped green onion and a dash of black pepper.
Assembly: Place oats at the bottom. Layer with sautéed veggies and protein. Drizzle with sauce. Seal. Reheat gently in the microwave (with lid slightly open) or eat warm after assembly. Top with green onions.
Recipe 4: Asian-Inspired Peanut Noodle Jar (Cold)
For a completely different texture, this cold noodle jar is refreshing, flavorful, and perfect for warmer mornings.
Base: 1 serving of cooked and cooled brown rice noodles or soba noodles.
Protein: 1/4 cup shelled edamame, 2-3 baked sesame-crusted tofu cubes.
Vegetables: Shredded red cabbage, matchstick carrots, and sliced sugar snap peas.
Creamy Element: 2-3 tablespoons of a spicy peanut sauce (natural peanut butter, lime juice, tamari, maple syrup, sriracha, and warm water to thin).
Crunchy Topping: Chopped roasted peanuts and sesame seeds.
Assembly: Place noodles at the bottom. Pile vegetables and protein on top. Pour peanut sauce over everything. Seal tightly. Store topping separately. Shake well before eating and sprinkle with peanuts and seeds.
Recipe 5: Hummus & Roasted Veggie Supreme Jar
This jar leverages hummus as both a base and a creamy element, making it incredibly simple yet satisfying.
Base: 1/3 cup of your favorite plain or flavored hummus.
Protein: Already in the hummus (chickpeas). Add optional roasted chickpeas for extra bite.
Vegetables: A mix of roasted zucchini, bell pepper, and red onion.
Creamy Element: A dollop of vegan tzatziki (plant-based yogurt, cucumber, garlic, dill).
Crunchy Topping: A handful of baby spinach or arugula and a sprinkle of za’atar seasoning.
Assembly: Spread hummus at the bottom. Layer roasted vegetables. Add a dollop of tzatziki. Seal jar. Just before eating, add fresh greens on top, stir, and enjoy with pita bread if desired.
Recipe 6: Lentil & Walnut “Sausage” with Mashed Cauliflower
A low-carb, high-flavor option that’s hearty and savory, mimicking a classic breakfast plate.
Base: 1/2 cup mashed cauliflower (steamed and mashed with a touch of nutritional yeast and garlic powder).
Protein: 1/3 cup lentil-walnut “sausage” crumbles (cooked lentils, walnuts, fennel, sage, and smoked paprika pulsed in a food processor and baked).
Vegetables: Sautéed kale or chopped steamed broccoli.
Creamy Element: A simple gravy (made from vegetable broth, tamari, and a thickener like cornstarch or blended cashews).
Crunchy Topping: Freshly cracked black pepper and a pinch of red pepper flakes.
Assembly: Layer mashed cauliflower, then kale, then “sausage” crumbles. Drizzle with a little gravy. Seal. Reheat before eating and add final seasonings.
Recipe 7: The “Everything” Breakfast Burrito Jar
Deconstructed and easier to eat than a wrapped burrito, this jar has all the classic components.
Base: 1/3 cup cooked Spanish rice or cilantro-lime rice.
Protein: 1/4 cup vegan chorizo or seasoned pinto beans.
Vegetables: Sautéed onions and peppers, a spoonful of fresh pico de gallo.
Creamy Element: 2 tablespoons cashew queso or plain vegan sour cream.
Crunchy Topping: Sliced jalapeños, chopped cilantro, and a wedge of lime on the side.
Assembly: Layer rice, beans, sautéed veggies, and pico de gallo. Dollop with queso. Seal. Store toppings separately. To eat, squeeze lime over everything, stir, and top with jalapeños and cilantro.
Mastering the Make-Ahead Process: A Weekly Blueprint
Success lies in a little weekend prep. Dedicate 1-2 hours for a week of effortless mornings.
Step 1: Batch Cook the Foundations (Sunday): Cook 2-3 cups of your chosen grains (quinoa, farro, oats). Roast 2-3 sheet pans of chopped vegetables (sweet potato, peppers, broccoli, etc.). Prepare 1-2 proteins (a batch of baked tofu, a pot of lentils, or seasoned beans).
Step 2: Whip Up the Sauces: Make 2-3 different sauces (e.g., a tahini sauce, a peanut sauce, an avocado crema). Store them in small containers or squeeze bottles.
Step 3: Cool & Assemble: Let all cooked components cool completely. This is critical. Then, assemble 3-5 jars for the next few days. Keep crunchy toppings and delicate greens separate in small bags.
Step 4: Store & Grab: Store assembled jars in the refrigerator for up to 4 days. In the morning, grab a jar and its separate toppings. Eat cold, at room temperature, or reheated.
Customization & Dietary Tweaks
The beauty of these jars is their adaptability.
For Gluten-Free: Use certified gluten-free oats, quinoa, rice, and tamari instead of soy sauce.
For Nut-Free: Substitute seed butters (sunflower, pumpkin) for nut butters in sauces. Use seeds for crunch.
For Lower-Carb / Keto-Friendly: Use cauliflower rice or mashed avocado as a base, increase high-fat proteins like tofu and tempeh, and focus on non-starchy vegetables.
Boosting Protein: Add an extra scoop of hemp seeds, use lupini bean hummus, or incorporate a scoop of unflavored plant-based protein powder into your sauce.
Don’t be afraid to experiment with global spice blends—harissa, curry powder, jerk seasoning—to keep your taste buds excited.
Optimizing Texture and Mouthfeel Through Layering Strategy
The physical architecture of your jar isn’t just about aesthetics—it’s a functional design to combat sogginess and preserve distinct textures until the moment you eat. Start with a foundational rule: keep wet away from dry. Your grain or legume base should be completely cool and dry to the touch before it touches the jar; any residual steam will condense and create a soggy bottom layer. For grain bases like quinoa or farro, spread them on a baking sheet after cooking to allow maximum surface area for cooling and evaporation. If using a moist base like mashed chickpeas or sweet potato, consider a thin, protective layer. A sprinkle of hemp hearts or nutritional yeast at the very bottom can act as a moisture barrier, absorbing any excess liquid from the base before it compromises the jar’s structure.
When adding your creamy element, placement is critical. For jars meant to be eaten cold, like the Mediterranean or Asian-inspired versions, drizzle the sauce directly over the vegetable layer, allowing it to seep down gradually. This marinates the veggies slightly without drowning the base. For jars intended for reheating, like the savory oats or lentil “sausage” jars, place the sauce in a small container or sealed baggie at the very top of the jar, under the lid. This lets you mix it in after heating, preserving the sauce’s fresh flavor and preventing it from breaking or becoming oily when microwaved. For ultra-creamy components like hummus or avocado crema that oxidize, press a piece of parchment paper directly onto the surface before sealing, then remove it when you’re ready to eat to reveal a bright green layer untouched by air.
Managing crunch requires a multi-stage approach. Hard, durable toppings like toasted pepitas, sunflower seeds, or baked chickpeas can be added to a small inner compartment—many Mason jar lids have a separate, shallow screw-top insert perfect for this. For more delicate crunches like tortilla chips, croutons, or fresh herbs, use a separate tiny container or a snack-sized zip-top bag taped to the outside of the jar. An advanced pro-tip: for a warm, just-toasted feel, pack raw nuts or seeds in your topping container. Before eating, sprinkle them over your reheated jar; the residual heat from the food will gently warm and slightly soften them, mimicking a freshly toasted texture without any extra equipment.
Advanced Flavor Development: Infusions, Ferments, and Umami Bombs
Move beyond basic seasoning by building layers of deep, complex flavor directly into your components. For your grain base, cook it in a fortified broth instead of water. Simmer vegetable scraps (onion skins, celery ends, mushroom stems) with a strip of kombu (edible kelp) and a teaspoon of white miso paste to create an instant umami-packed cooking liquid. This technique embeds savoriness into every grain, so even a simple quinoa base carries profound flavor. For bean and legume proteins, don’t just drain and rinse—give them a quick roast. After patting cooked chickpeas or black beans dry, toss them with a touch of oil and a flavor-dense powder like smoked paprika, onion powder, or ground porcini mushroom. Spread on a parchment-lined sheet and roast at 400°F for 15-20 minutes until slightly crispy. This intensifies their flavor and improves texture.
Incorporate small-batch ferments for probiotic benefits and bright acidity. Instead of plain quick-pickled onions, try a fermented version: submerge thinly sliced red onions in a 2% saltwater brine (19g salt per liter of water) for 3-5 days at room temperature. The result is a tangy, crisp condiment with deeper flavor and gut-friendly bacteria. A spoonful layered into your jar adds complexity. Similarly, a homemade cashew “cheese” sauce can be elevated by blending in a tablespoon of rejuvelac (a fermented grain liquid) or store-bought vegan yogurt culture and letting it culture at room temperature for 8-12 hours before refrigerating. This creates a tangy, creamy sauce with nuanced flavor far beyond blended nuts alone.
Create “umami bombs”—small, intensely flavorful additions that permeate the entire jar. Finely grind dried shiitake mushrooms into a powder and mix a pinch into your dry grain before cooking, or stir into your tahini sauce. Make a batch of crispy garlic or shallot chips by frying thin slices in avocado oil until golden, then draining on paper towels. Stored separately, a small handful added just before eating provides an incredible burst of aroma and savoriness. For a secret depth in Mexican-inspired jars, char a poblano pepper directly over a gas flame or under a broiler, steam in a bowl, peel, and chop. Mixing a tablespoon of this smoky, sweet pepper into your rice or bean layer adds a dimension store-bought spices can’t match.
Seasonal Rotation Guide: Maximizing Freshness and Cost-Efficiency
A sustainable make-ahead habit aligns with the produce calendar. In early spring, pivot to lighter, greener jars. A base of lemony, herb-studded quinoa pairs beautifully with quickly blanched asparagus tips, fresh peas, and a protein of dill-marinated tofu cubes. The creamy element could be a green goddess sauce made with avocado, fresh herbs, and capers. For the crunchy topping, use toasted hazelnuts or breadcrumbs. This seasonal shift avoids the heaviness of winter roasts and utilizes the first crisp vegetables of the year.
High summer demands no-cook or minimal-heat assemblies. Utilize a spiralized zucchini or cucumber “noodle” base, kept crisp by salting it briefly and pressing out excess water. Layer with uncooked heirloom tomatoes, fresh corn kernels cut from the cob, and canned white beans. A creamy element of basil pesto (made with sunflower seeds for a nut-free option) ties it together. The protein can be chilled, pre-baked tofu or simply extra beans. This jar is refreshing, requires no stove time, and capitalizes on peak-season produce at its cheapest and most flavorful.
As fall arrives, embrace earthy tones and hearty textures. A base of roasted, mashed delicata squash (skin-on for ease and fiber) is naturally sweet. Layer with massaged kale (rubbed with a bit of salt and lemon to soften), protein-rich black lentils, and a creamy element of tahini-miso sauce. Top with toasted walnuts and a sprinkle of dried cranberries for a sweet-tart contrast. This jar leverages sturdy squash and kale that hold up well for days in the fridge. In deep winter, focus on roasted root vegetables. A base of parsnip and cauliflower mash, layered with roasted Brussels sprout halves, tempeh bacon bits, and a rich gravy made from blended roasted onions and nutritional yeast creates a comforting, warm meal perfect for reheating on dark mornings.
Scaling for Families and Adjusting Portion Strategies
Adapting the jar system for multiple people requires a shift from individual assembly to a “build-your-own” station. Instead of pre-layering seven individual jars, prepare large, separate containers of each component: a big bowl of cooled quinoa, a sheet pan of roasted veggies, a container of baked tofu cubes, and two to three sauces in squeeze bottles. Store these in the fridge. In the morning, each family member grabs a jar and adds their preferred layers. This approach respects individual taste preferences (one child might skip onions, another might want extra sauce) and prevents ingredient fatigue. It also solves the problem of varying appetites—teenagers can pack their jars to the brim, while younger kids might make a smaller portion.
For precise nutrition tracking or calorie-conscious eating, the component method allows for easy measuring. Use a kitchen scale to weigh portions directly into the jar: 40g of grain base, 75g of roasted vegetables, 60g of protein, and a tablespoon (15g) of sauce. This data can be logged if needed. For volume measures, keep a set of dedicated scoopers in each bulk container—a half-cup scoop for the base, a third-cup for veggies, etc. This maintains the speed of assembly while ensuring consistency. For those looking to increase caloric density for athletic needs, keep add-on containers of high-energy toppings like a nut/seed mix, olive oil, or vegan cheese shreds by the station for an extra post-assembly sprinkle.
Consider alternate vessels for different needs. For young children, a wide, shallow container with compartments (like a bento box) might be easier to eat from than a deep jar. For a partner who prefers a hot breakfast, assemble the dry components (grains, veggies, protein) in a microwave-safe container with a vented lid, and pack the sauce and fresh toppings separately. They can heat the main container at work and add the finishes after. For truly time-crunched mornings, the ultimate hack is the “freezer puck.” Puree a balanced combination of cooked grains, steamed vegetables, and soft tofu or beans with just enough broth to blend. Pour the mixture into silicone muffin tins and freeze. Pop out the pucks and store in a freezer bag. In the morning, place 1-2 pucks in a jar, microwave for 90 seconds, stir, and add your fresh crunchy topping. It’s a uniform, spoonable breakfast in under two minutes.
Troubleshooting Common Issues: From Soggy Grains to Bland Flavors
If your grain base turns mushy or watery by day three, the issue is almost always residual moisture. After cooking, spread the grain in a thin layer on a baking sheet and let it cool, uncovered, in the refrigerator for an hour before jarring. For extra insurance, toss the cooled grains with a teaspoon of oil or lemon juice; the light coating helps repel moisture from the layers above. If you’re using a watery vegetable like zucchini or tomatoes, roast them until they’re slightly caramelized and their edges are dry, or give them a quick salt and drain before adding to the jar. They should not release liquid when pressed.
Blandness often stems from under-seasoning individual layers. Season each component aggressively as if it were going to be eaten alone. Your roasted veggies need more than just oil and salt—add garlic powder, onion powder, and at least one dried herb (like thyme or oregano) before roasting. Your beans should be simmered with a bay leaf, a strip of kombu, and a clove of garlic, not just heated from a can. Your sauce should have a balance of fat, acid, salt, and sweetness. If a pre-assembled jar tastes flat, keep a small shaker of an all-purpose seasoning blend (like a mix of nutritional yeast, smoked paprika, garlic powder, and salt) in your bag to add at mealtime.
Dealing with oxidation, particularly with avocado-based cremas, requires a two-pronged approach. First, ensure the crema is very smooth and acidic. Blend your avocado with lime or lemon juice, a handful of cilantro (which contains antioxidants that slow browning), and a tablespoon of plant-based yogurt or mayonnaise. The emulsification and acid help. Second, use the parchment paper press method mentioned earlier, or transfer the crema to a small, narrow container that minimizes surface area. Squeeze bottles are excellent for this—you can squeeze the crema onto your jar as the last step before eating, guaranteeing a vibrant green color. If you must layer it in advance, covering it with a thin layer of oil before sealing can also create a barrier against air.
Beyond Breakfast: Repurposing Components for Lunch and Dinner
The components you prepare for breakfast jars form a powerful “meal prep matrix” for the rest of the day. That batch of roasted sweet potatoes and black beans? At lunch, they can be quickly transformed into a loaded sweet potato: microwave a whole sweet potato, split it open, and top with the beans, leftover roasted corn, a dollop of avocado crema, and those reserved tortilla chip crumbs. Your breakfast prep just built a satisfying lunch in three minutes. The cooked quinoa and tahini sauce can become the base for a grain salad by adding chopped parsley, diced cucumber, and cherry tomatoes—a different combination than the jar, preventing monotony.
For dinner, leverage your pre-cooked proteins and sauces to build fast bowls. Sauté any remaining greens (kale, spinach) with garlic, pile them over a base of reheated grains, add your baked tofu or lentils, and drizzle with the miso-tahini or peanut sauce. Top with your crunchy seeds. This is essentially a deconstructed, warm version of your breakfast jar, but the different temperature and slight variation in vegetable preparation make it feel like a distinct meal. The lentil-walnut “sausage” crumbles are incredibly versatile: use them as a filling for stuffed peppers, a topping for pasta, or mixed into a tomato sauce for a hearty vegan Bolognese.
Think of your weekly prep not as making breakfast, but as creating a set of fundamental building blocks—Flavorful Proteins, Roasted Vegetables, Cooked Grains, and Signature Sauces. With these four blocks in your fridge, you can assemble infinite combinations. A stir-fry becomes a matter of heating a protein and veggie block in a pan with a splash of tamari. A wrap is a tortilla spread with a sauce, filled with a grain and veggie block. This systemic approach turns your Sunday investment into a week of effortless, diverse meals, maximizing the return on your prep time and ensuring no component goes to waste.
Economic and Sustainability Analysis: Cost vs. Convenience
Let’s break down the real cost of a week of breakfast jars versus common alternatives. For a Mediterranean Quinoa Power Jar, the per-jar cost (using dry beans, bulk grains, and seasonal vegetables) averages approximately $1.75-$2.50, depending on organic status and location. This compares to a store-bought vegan breakfast sandwich at $4.50-$6.00, or a smoothie from a cafe at $7+. Over a month, the savings are substantial, easily exceeding $60-$100. The initial investment in a set of Mason jars ($15-$25) pays for itself in under two weeks. The primary cost drivers are sauces (if using premium tahini or nut butters) and out-of-season produce. Mitigate this by making sauces from sunflower seeds (more affordable than cashews) and strictly following the seasonal rotation guide to buy produce at its cheapest.
From a sustainability angle, the jar system significantly reduces single-use packaging waste. Eliminating daily disposable wrappers, clamshells, and cups has a measurable impact. Preparing beans from dry (using a pressure cooker to cut time) versus canned reduces packaging and is often cheaper per serving. The method also drastically cuts food waste. Those half-used bell peppers, the last scoop of quinoa, the wilting spinach—all become valuable layers rather than forgotten leftovers destined for the compost bin. Planning your prep around a “clear-the-fridge” jar at the end of the week is an effective strategy: combine any remaining bits of grains, roasted veggies, and protein with a robust sauce for a unique, no-waste creation.
Time is the final currency. The active prep time for a week’s worth of jars is 1.5-2 hours. Spread over 5 breakfasts, that’s 18-24 minutes of prep per meal. However, this doesn’t account for the time saved each morning (easily 10-15 minutes of scrambling). More importantly, it eliminates the daily decision fatigue and mental load of “what’s for breakfast?” This consistent, reliable system frees up cognitive bandwidth for more pressing morning tasks, making the time investment profoundly worthwhile from a productivity and stress-reduction standpoint. The true value isn’t just in the dollars saved, but in the calm, controlled start to the day it purchases.
Frequently Asked Questions (FAQ)
Q1: How long do assembled breakfast jars last in the refrigerator?
A: Properly assembled with cooled ingredients and stored in airtight jars, they will keep well for 3-4 days. For best quality, add fresh herbs, leafy greens, avocado, and crunchy toppings just before eating.
Q2: Can I freeze these savory breakfast jars?
A: It’s not generally recommended for fully assembled jars, as the textures of vegetables and sauces can degrade upon thawing. However, you can freeze individual components like cooked grains, roasted vegetables, and sauces in separate containers for up to 3 months. Thaw in the fridge overnight before assembling.
Q3: Are these jars meant to be eaten cold or hot?
A: They are incredibly flexible! Most can be enjoyed straight from the fridge. Grain-based and oat-based jars can be gently reheated in the microwave (remove any metal lid first and heat in 30-second intervals, stirring). Jars with fresh, crunchy vegetables are best cold.
Q4: I’m new to savory breakfasts. Will these keep me full until lunch?
A> Absolutely. The combination of complex carbohydrates, plant-based protein, healthy fats (from nuts, seeds, avocado, or tahini), and high fiber from vegetables and whole grains creates a balanced meal that digests slowly, providing steady energy and curbing mid-morning hunger pangs far better than a sugary pastry or cereal.
Q5: What’s the best way to pack these for commuting or eating at the office?
A: Pack your sealed main jar and a small separate container or bag with your dry toppings (nuts, seeds, chips) and any fresh garnishes (cilantro, green onion, lime wedge). When you’re ready to eat, combine everything. This ensures your meal stays fresh and the textures remain perfect.
Making breakfast a nourishing, non-negotiable part of your day doesn’t have to be a chore. With a bit of strategic prep and these versatile vegan savory breakfast jar formulas, you can ensure you start every morning with a delicious, wholesome meal that fuels your body and mind. Say goodbye to morning stress and hello to a new ritual that supports your health and busy lifestyle.
Related posts:
 5 Brilliant, Easy, and Healthy Summer Mason Jar Recipes
 Delicious Ground Chicken Recipes
 Easy Trader Joe’s Dinner Ideas
 Wellness Influencers Share Their Most Instagram-Worthy Salad Creations
 Keto Mexican Night: Cauliflower Enchiladas That Actually Taste Amazing
 Fall Cauliflower Recipes You’ll Love
 Perfect Somen Noodles Recipe
 Why Avocado Toast Dominated Breakfast Trends in 2017