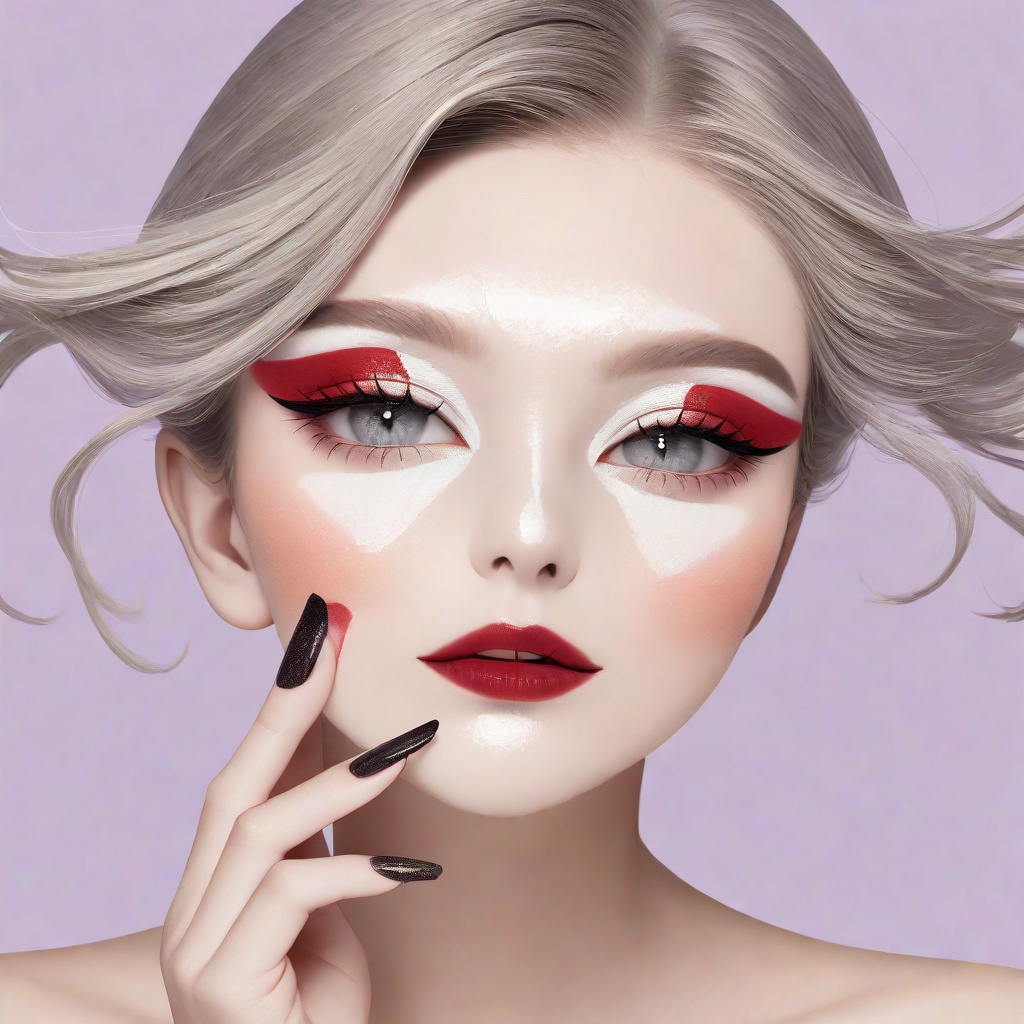
Makeup has the remarkable ability to transform not just how we look, but how we feel. The right techniques can accentuate your favorite features, soften areas you’re less confident about, and create an overall harmony that brings out your unique beauty. The best part? You don’t need a professional makeup artist’s kit or hours in front of the mirror. A few strategic tricks, applied with intention, can completely change your appearance in minutes.
This guide walks you through the makeup techniques that deliver the most impact. These aren’t trendy hacks that come and go—they’re foundational principles that work across different face shapes, skin tones, and styles. Whether you prefer a natural look or full glam, these approaches will help you achieve results that look polished and intentional every time.
Prepping Your Canvas for Transformation
The most transformative makeup trick happens before you apply a single product: proper skin preparation. Think of your skin as the canvas. Even the most expensive foundation will look uneven and cakey on dry, poorly prepped skin, while affordable products can look flawless on well-cared-for skin.
Start with a gentle cleanse to remove any overnight products or morning oils. Follow with a hydrating toner or essence—this helps subsequent products absorb better and creates that plump, healthy base. Even if you have oily skin, don’t skip hydration. Dehydrated skin produces more oil to compensate, which leads to makeup breakdown throughout the day.
Moisturizer is non-negotiable. Choose one appropriate for your skin type: gel formulas for oily skin, cream for dry skin, and lightweight lotions for combination. Let it absorb for at least five minutes before applying primer. This waiting period allows the moisturizer to fully sink in and prevents pilling when you layer products.
Primer creates the bridge between skincare and makeup. For smoothing large pores, a silicone-based primer works wonders—press it into the skin rather than rubbing. For dullness, opt for an illuminating primer. If redness is your concern, color-correcting primers in green tones neutralize flush before you even apply foundation.
Color Correcting to Cancel Out Imperfections
Color correcting is one of those professional techniques that sounds complicated but is actually straightforward once you understand color theory. The principle is simple: colors opposite each other on the color wheel cancel each other out. This allows you to neutralize specific concerns before applying concealer or foundation, meaning you use less product and achieve a more natural finish.
Green correctors neutralize redness from acne, rosacea, or broken capillaries. Apply a small amount only to the red areas—there’s no need to cover your entire face. Blend gently with your fingertip or a small brush, then follow with your regular foundation.
Peach and salmon tones counteract blue and purple discoloration. These are ideal for under-eye circles, especially those with cooler undertones. The lighter your skin, the more peach your corrector should be; deeper skin tones benefit from richer salmon or orange-based correctors.
Lavender correctors address yellow sallowness, common in tired or aging skin. A thin layer brightens the overall complexion without looking unnatural. Yellow correctors, conversely, help with purple veins or deep under-eye circles on medium to deep skin tones.
The key to successful color correcting is less is more. Use the thinnest layer possible and blend thoroughly. Think of it as targeted neutralization rather than coverage. Once your specific concerns are muted, your foundation can do its job more effectively with a lighter hand.
Contour and Highlight for Natural Dimension
Contouring got a reputation for being heavy and obvious during the dramatic Instagram makeup era, but at its core, it’s simply using light and shadow to enhance bone structure. Done correctly, contouring doesn’t look like makeup at all—it looks like you were born with perfectly sculpted features.
The rule is straightforward: matte products create shadows and recede areas; shimmer products catch light and bring features forward. Your contour shade should be a cool-toned matte powder or cream two shades deeper than your skin tone. Warm bronzers aren’t true contours because they add warmth rather than shadow.
Apply contour where natural shadows fall on your face. Suck in your cheeks and follow the hollow beneath your cheekbones, stopping before you reach your mouth. A common mistake is bringing contour too far forward, which creates a muddy appearance. Along your jawline, blend downward into your neck to avoid a visible line. For forehead contouring, apply along the hairline if you want to minimize the forehead’s appearance.
Highlighter placement is equally strategic. The high points of your face are where light naturally hits: the tops of your cheekbones, the bridge of your nose, the cupid’s bow, and the center of your forehead. Use a light hand, especially with shimmer formulas. The goal is a subtle glow, not a visible stripe of product.
For the most natural effect, use cream products on bare skin or over damp foundation, and powder products over set makeup. Mixing textures—cream contour with powder highlight, or vice versa—creates beautiful dimension.
The Three-Point Concealer Method
Most people apply concealer only under their eyes, but strategic placement can completely reshape your face. The three-point method involves placing concealer at specific points to brighten, lift, and define simultaneously.
Point one is the inner corner of your eye. This area naturally shadows, and brightening it makes you look more awake while creating the illusion of closer-set eyes if yours are wide-set. Use a small brush or your fingertip to apply a tiny amount of light-reflecting concealer right at the tear duct area.
Point two is the center of your forehead, between and slightly above your brows. A triangle of concealer here draws light to the center of your face and creates a lifting effect for your entire eye area. Blend upward and outward.
Point three is under your eyes, but not in a large semi-circle. Instead, apply concealer in an inverted triangle shape with the point toward your cheek. This technique covers darkness while creating the illusion of higher cheekbones. The base of the triangle should sit just below your lower lash line, and the point should extend about halfway down your cheek.
Use a shade one or two tones lighter than your foundation for these brightening points. For actual blemish coverage, use a concealer that matches your foundation exactly—lighter concealer on a pimple will highlight rather than hide it.
Blend with a damp sponge using a bouncing motion rather than wiping. This deposits product and shears it out seamlessly. Set with a small amount of translucent powder only where you applied concealer to prevent creasing.
Eye Makeup Techniques That Open and Lift
Eye makeup offers endless possibilities for transformation. The right approach can make small eyes appear larger, close-set eyes look wider, and hooded lids look more defined. Understanding your eye shape is the first step to choosing techniques that flatter your unique features.
For close-set eyes, focus light colors on the inner corners and deeper colors on the outer thirds. This creates the illusion of more space between your eyes. A shimmer shade in the inner corner is especially effective. Avoid bringing dark shadow all the way to your nose.
Wide-set eyes benefit from the opposite approach. Bring darker shadows further inward and keep the outer corners slightly brighter. A darker shade in the crease that extends across the entire lid helps visually pull the eyes together.
Hooded eyes have a fold of skin that covers the mobile eyelid, making traditional eyeliner techniques disappear when eyes are open. The trick is to apply shadow and liner with your eyes open. Look straight into the mirror and apply your crease shade slightly above your natural crease so it remains visible. For eyeliner, draw a thin line that thickens toward the outer corner and flicks slightly upward—this creates the illusion of a lifted eye.
For small eyes, skip the black liner that closes them in. Instead, use a nude or white pencil on your waterline to make eyes look larger and more awake. Curl your lashes and apply mascara focusing on the roots rather than loading the tips. A thin line of brown or charcoal shadow along the upper lash line defines without the hardness of liquid liner.
Tightlining—applying liner between your upper lashes—creates definition without a visible line. Use a gel pencil or brush and small, pressing motions. This makes your lash line look fuller and your eyes more defined while looking completely natural.
Brow Shaping to Frame Your Face
Eyebrows are the unsung heroes of facial transformation. They frame your eyes, define your expressions, and can make your face look more lifted or balanced. The shape, thickness, and arch placement of your brows influences your entire appearance.
The ideal brow starts aligned with the bridge of your nose, not the inside corner of your eye. If your eyes are close-set, starting your brows slightly further apart creates the illusion of more space. The arch should fall above the outer edge of your iris when looking straight ahead. The brow should end at a point where a line drawn from your nostril through the outer corner of your eye meets your brow bone.
When filling brows, use short, hair-like strokes rather than drawing a solid line. Choose a pencil or powder one to two shades lighter than your brow hair for a natural effect. If you have very dark brows, match your color exactly or go one shade deeper—but never lighter, as it will look ashy.
Brow gel is transformative for keeping hairs in place and adding subtle fullness. A tinted brow gel in a matching shade adds color and volume in one step. For a laminated look without the chemical treatment, apply clear brow gel in an upward direction on the inner portion of your brows and along the natural direction toward the tails.
Don’t underestimate the power of brow highlight. A matte highlighter or concealer one shade lighter than your skin tone, applied beneath the arch and blended well, lifts the entire eye area and makes your brow bone appear more prominent.
Lip Techniques to Reshape and Define
Your lips are one of the easiest features to transform with makeup. Whether you want fuller-looking lips, a more defined cupid’s bow, or just longer-lasting color, the right techniques make a significant difference.
For lips that appear larger, start with a lip liner that matches your natural lip color or your lipstick. Outline just slightly outside your natural lip line—not enough to look obvious, but enough to add definition. Focus on the cupid’s bow and the center of the bottom lip. Fill in the entire lip with liner to create a base that helps lipstick last longer.
Applying a slightly lighter or glossier lipstick to the center of your bottom lip and the center of your top lip creates dimension. This is the lip contour technique—lighter colors bring forward, so the center of your lips appears fuller. You can also add a tiny dab of clear gloss just at the center for a highlighting effect.
For thin lips, avoid dark, matte lipsticks that can make lips look smaller. Instead, opt for satin or cream finishes in medium tones. Nudes that are one to two shades deeper than your natural lip color are universally flattering and create fullness. Avoid lining lips too far outside your natural line—this rarely looks natural and can result in bleeding product.
For asymmetrical lips, use liner to even out the shape before applying lipstick. Draw the slightly smaller side to match the fuller side. You can also apply slightly more gloss to the smaller side to bring it forward visually.
Long-lasting lip color starts with prepped, exfoliated lips. Apply a thin layer of foundation or concealer, set with translucent powder, then apply your lipstick. Blot with a tissue, apply a second layer, and blot again. This layering technique locks color in place for hours.
Setting Strategies That Keep Everything in Place
All your careful work means nothing if your makeup slides off halfway through the day. Setting your makeup correctly ensures your transformation lasts from morning to night without touch-ups.
The bake method is particularly effective for concealer. After applying concealer, pack a generous amount of translucent powder over the area using a damp sponge or small brush. Let it sit for five to ten minutes—the heat from your skin sets the concealer, and the powder absorbs any excess oil. Then dust away the excess with a fluffy brush. This technique keeps under-eye concealer from creasing and makes it last all day.
For overall setting, use a large, fluffy brush to apply a thin layer of translucent powder to your T-zone and any areas prone to oil. Avoid powdering dry areas like the tops of your cheeks, as this can emphasize texture and make skin look flat.
Setting spray is the final step that melts all your powder products together and removes any cakey appearance. Hold the bottle about eight inches from your face and mist in an X and T pattern. Let it dry naturally without touching your face. For extremely long wear, sandwich your makeup: setting spray after skincare, after foundation, and as the final step.
For combination skin, consider targeted setting. Use powder only where you get oily and setting spray overall. This prevents over-drying your normal or dry areas while keeping oil at bay in your T-zone.
Understanding Light Theory in Makeup Application
The difference between makeup that looks stunning in your bathroom mirror and makeup that photographs well comes down to understanding how light interacts with different finishes. This principle, often overlooked in everyday routines, determines whether your careful work translates across different environments.
Matte finishes absorb light, which is why they’re ideal for areas you want to recede. This makes matte products perfect for contouring, minimizing the appearance of bumps or texture, and creating a soft-focus effect on areas prone to shine. However, too much matte product can make skin look flat and lifeless, especially in natural daylight.
Satin and dewy finishes reflect light softly, creating the appearance of healthy, hydrated skin. These finishes work beautifully on the high points of your face where you want a natural glow. The key is strategic placement: dewy finish on your cheekbones, down the bridge of your nose, and on your cupid’s bow creates dimension without looking oily.
Shimmer and glitter finishes reflect light intensely and should be used with intention. A shimmer eyeshadow catches light and brings attention to your eyes, but the same finish on textured skin will emphasize every pore and fine line. This is why the same product can look completely different on different people or different areas of the same face.
Consider your environment when choosing finishes. Office lighting, often fluorescent, can make dewy skin look greasy and emphasize texture. In this setting, a soft matte finish with strategically placed satin products photographs better and looks more polished throughout the day. Evening lighting, particularly candlelight or warm restaurant lighting, forgives texture and allows for more luminous finishes.
The layering approach works best for most people: start with a satin-finish foundation, set only your T-zone with matte powder, and add targeted luminosity with cream or liquid highlighters. This creates a multidimensional effect that looks natural in any lighting situation.
The Strategic Blush Placement Revolution
Blush is often applied as an afterthought—a quick sweep across the apples of the cheeks before rushing out the door. But strategic blush placement is one of the most transformative techniques available, capable of lifting your face, changing your perceived face shape, and creating the illusion of higher cheekbones.
The traditional apple-of-the-cheek placement works well for round faces wanting to maintain a youthful appearance. However, if you’re seeking a more sculpted look, try placing your blush higher on the cheekbone, angled toward your temples. This creates a lifting effect and draws attention upward toward your eyes.
For long faces, horizontal blush placement across the cheeks visually shortens the face. Apply your blush in a more horizontal line rather than angling it upward. This creates width and balance for oblong or rectangular face shapes.
Draping, a technique popular in the 1970s and recently revived, involves using blush or bronzer in the hollows of the cheeks and temples rather than on the apples. This sculptural approach creates dramatic dimension and works particularly well for photography. Use a cooler-toned blush for the hollows and a warmer shade on the apples for a sophisticated, multidimensional effect.
The finish of your blush matters as much as the placement. Matte blushes look more natural and work well for sculpting. Satin or shimmer blushes add dimension and are beautiful on top of matte foundation, but they can emphasize texture on skin that isn’t perfectly smooth. For mature skin, cream blushes with a natural finish tend to look more flattering than powders, which can settle into fine lines.
Color selection should complement your natural flush. Pinch your cheeks and match your blush to that color for the most natural effect. If you have cool undertones, look for pink or berry shades. Warm undertones are flattered by peach, coral, or warm rose. Neutral undertones can wear both, though slightly muted versions often look most harmonious.
Layering cream and powder blush creates lasting color with dimension. Apply a cream blush first, set it lightly with translucent powder, then layer a similar-toned powder blush on top. This technique is particularly useful for long events or hot weather when you need your blush to stay put.
Advanced Lip Color Theory and Application
Beyond basic application techniques lies a deeper understanding of how lip color interacts with your overall look. The right lip color can make your teeth appear whiter, your skin look brighter, and your entire face more balanced. This requires considering undertones, saturation, and the relationship between your lips and the rest of your makeup.
Blue-based reds and berries create an optical illusion that makes teeth appear whiter. The cool undertones counteract yellow tones in teeth, creating an instant brightening effect. Warm-toned reds and oranges, while beautiful, can emphasize any yellowing. This doesn’t mean you should avoid warm tones—just be aware of the effect and balance it with other elements of your look.
The saturation of your lip color should relate to the intensity of your eye makeup. A bold lip with dramatic eye makeup can look overwhelming in everyday settings, while the same combination might be perfect for an evening event. As a general guideline, if your eye makeup is the focal point, choose a lip color one or two steps down in intensity. If your lips take center stage, keep your eye makeup more subdued.
Nude lipsticks require careful selection to avoid the washed-out or corpse-like effect that comes from choosing a shade too close to your skin tone. Your perfect nude should be one to two shades deeper than your natural lip color with undertones that match your complexion. A nude with slight pink or peach undertones tends to be more flattering than a true beige, which can look flat against most skin tones.
The ombre lip technique creates dimension and the illusion of fuller lips without obvious liner. Apply a deeper shade to the outer portions of your lips and a lighter shade to the center. Blend where the colors meet using your finger or a lip brush. This creates a gradient that catches light at the center of your mouth, mimicking natural fullness.
For lips with an uneven tone—common as we age—a lip primer or thin layer of foundation creates an even base. This allows your lipstick color to appear true rather than interacting with your natural pigmentation. Set this base with a tiny amount of translucent powder before applying color for extended wear.
The relationship between your lip texture and your overall look matters too. Matte lipsticks make a statement and last longer but can emphasize lip lines and dryness. Satin and cream finishes are more forgiving and comfortable but require more touch-ups. Gloss finishes are youthful and add dimension but can bleed into fine lines around the mouth. Consider using long-wearing liquid lipstick formulas in the center of your lips with gloss just at the center for the best of all worlds.
Mastering the Art of Seamless Blending
The difference between amateur-looking makeup and professional results often comes down to one skill: blending. Products can be expensive, colors perfectly chosen, and techniques correctly executed, but without proper blending, the result will always look like makeup rather than enhanced features.
Blending eyeshadow requires different techniques depending on the desired effect. For a soft, diffused look, use a fluffy brush with loose bristles and small circular motions at the edges of your shadow. The key is to start with a small amount of product and build gradually—you can always add more, but removing excess without disturbing your base is difficult. Keep your brush moving to avoid creating harsh lines.
The windshield wiper motion, often taught as the default blending technique, works well for placing color in the crease but isn’t ideal for all blending. For softening edges, small circular motions are more effective. For diffusing a harsh line, try tapping the edge with a clean brush to soften without moving the product further.
Transition shades—typically matte neutrals close to your skin tone but slightly deeper—are the secret to professional-looking eye makeup. Apply a transition shade to your crease before any other shadow. This creates a soft base that makes subsequent colors easier to blend and prevents harsh demarcation lines between shades.
Blending cream products requires a different approach than powders. Cream bronzer, blush, and highlighter should be blended while they’re still moveable, which means working quickly or in sections. Use a damp sponge for the most seamless effect, bouncing rather than swiping to avoid disturbing your foundation. If you make a mistake with cream products, a clean sponge pressed over the area will lift excess without removing everything underneath.
The order of operations affects blendability. Cream products should go directly over damp foundation or be applied before setting powder. Powder products must go over set makeup to avoid disturbing the base. Mixing textures—cream contour with powder bronzer, for example—creates beautiful dimension, but you must allow each layer to set before applying the next.
Temperature matters for blending. Warmth makes products more moveable, which is why warming a too-stiff cream product on the back of your hand makes it easier to blend. Conversely, if you’re struggling with cream products moving too much, a quick spritz of setting spray on your brush or sponge gives you more control.
For truly seamless foundation, try the stippling technique with a duo-fiber brush. These brushes have a mix of synthetic and natural bristles that deposit product while simultaneously sheering it out. Load the brush, then stipple (bounce) across your face rather than swiping. This creates an airbrushed effect that looks like skin rather than foundation sitting on top of it.
The Hidden Impact of Tools and Application Methods
The tools you use are as important as the products themselves. The same foundation, blush, or eyeshadow can look completely different depending on whether it’s applied with fingers, a brush, or a sponge. Understanding how each tool affects application gives you control over your final result.
Fingers provide the most control and the most natural finish for many products. The warmth of your skin melts cream and liquid products, helping them blend seamlessly into your skin rather than sitting on top. This makes fingers ideal for cream blush, highlighter, and concealer in small areas. The downside is that fingers can disturb makeup already on your face and don’t provide the precision of a small brush.
Brushes come in endless shapes, sizes, and fiber types, each designed for specific purposes. Natural hair brushes pick up powder products well and blend them softly, but they can absorb cream and liquid products, making them less than ideal for those formulas. Synthetic brushes work well with all formulas and are easier to clean, making them a versatile choice for most applications.
Dense brushes deposit more product and provide more coverage. Fluffy brushes deposit less product and blend more. A dense brush pressed into powder then pressed onto your skin gives concentrated color; the same brush used in a sweeping motion sheers out the product. Understanding this principle allows you to get multiple effects from the same brush.
Sponges, particularly when damp, create the most skin-like finish for liquid and cream products. The moisture in the sponge prevents product absorption while the porous texture sheers out foundation to an imperceptible level. The bouncing motion used with sponges deposits product while blending edges, creating a finish that looks like your skin but better.
Brush shape determines application area. Tapered brushes fit into small spaces like the inner corner of the eye or the sides of the nose. Round, domed brushes are versatile for larger areas. Flat brushes pack on color for more intensity. Angled brushes provide precision for liner, brows, and contouring. Investing in a few well-chosen brushes in different shapes serves you better than a large set of mediocre tools.
Cleaning your tools regularly affects both application and skin health. Brushes used for liquid and cream products should be spot-cleaned daily with a brush cleaner spray and deep-cleaned weekly. Powder brushes can go longer between deep cleanings but should still be cleaned regularly to prevent color mixing and bacterial buildup. Dirty brushes don’t pick up product as well, blend poorly, and can cause breakouts.
Correcting and Preventing Common Makeup Mistakes
Even experienced makeup enthusiasts fall into habits that undermine their results. Recognizing these common mistakes—and understanding why they happen—allows you to correct them and elevate your everyday look.
Matching foundation to your face alone is one of the most common errors. Your face is often lighter than your neck and chest due to sun protection and less direct sun exposure. Foundation that matches your face but not your neck creates an obvious mask effect. The solution is to match your foundation to your neck or chest, or choose a shade between your face and neck. Always check your match in natural light before committing.
Overlining lips beyond a millimeter or two outside your natural lip line rarely looks natural in person. The technique photographs well but in real life, the contrast between your lip and the product creates an obvious outline. Instead, focus on defining your cupid’s bow and the center of your bottom lip, and use lighter colors or gloss in the center to create dimension. This mimics the natural variation in lip color without obvious artifice.
Heavy contouring in daylight looks like exactly what it is: stripes of brown on your face. The dramatic contouring that works for photography or evening events requires modification for everyday wear. Use a lighter hand, choose a contour shade only one shade deeper than your skin tone, and focus only on areas where you naturally have shadows. For most people, this means just under the cheekbones and along the jawline.
Skipping primer because you don’t see an immediate difference is a mistake. Primer creates a barrier between your skin and your makeup, helping it last longer and apply more evenly. If you have specific concerns—large pores, redness, dullness—targeted primers address these before you even apply foundation. If you’re short on time, use a moisturizer that doubles as a primer, but don’t skip this step entirely.
Applying concealer before foundation seems intuitive—cover the problem areas first—but this approach often leads to using more concealer than necessary. Apply foundation first and see how much coverage it provides. Then use concealer only where needed, which typically means under the eyes and on any blemishes that still show. This layering approach looks more natural and uses less product overall.
Ignoring your undertones when choosing colors leads to makeup that never looks quite right. That perfect nude lipstick your friend wears might look gray or orange on you. The bronzer that gives her a healthy glow might make you look muddy. Determine your undertones—warm, cool, or neutral—and choose colors that harmonize with them. This single principle improves every product choice you make.
Setting spray as an afterthought misses its potential. Setting spray doesn’t just lock your makeup in place; it also melts powder products together and removes the powdery look that foundation and concealer can have. Spray before and after your makeup for the longest wear, or use it to dampen your brush for more intense eyeshadow application. It’s a versatile product that serves multiple purposes beyond just setting.
Frequently Asked Questions
How do I know what undertones my skin has?
Look at the veins on the inside of your wrist in natural light. If they appear green, you likely have warm undertones. If they look blue or purple, you probably have cool undertones. If you see both or can’t quite tell, you may have neutral undertones. Another indicator is how your skin reacts to sun: warm undertones tend to tan easily, while cool undertones burn more readily. Jewelry preference also offers clues—if gold looks better against your skin, you’re warm; if silver is more flattering, you’re cool; if both look good, you’re neutral.
What’s the difference between baking and setting powder?
Setting powder is the product itself—a finely milled powder used to lock makeup in place and control shine. Baking is a technique using that powder. To bake, you press a generous amount of powder onto areas where you’ve applied concealer, let it sit for several minutes to set the makeup beneath using your body heat, then brush away the excess. Baking gives a more dramatic, long-wearing finish than simply dusting powder over your face. For everyday makeup, light setting is usually sufficient. For special occasions or photography, baking creates that flawless, filtered appearance.
Can I use the same contour shade year-round?
Probably not, as your skin tone changes with the seasons. In summer, you may need a deeper contour to show up against tanned skin. In winter, a lighter shade will look more natural when your skin is at its palest. Having two contour shades—or a contour palette with multiple options—allows you to adjust and even custom-blend the perfect shade for any time of year. The same applies to foundation and concealer. Many makeup artists keep slightly different shades to mix as needed throughout the seasons.
Why does my foundation look orange after a few hours?
This oxidation happens when the pigments in your foundation react with oxygen and your skin’s natural oils. To prevent it, start with a clean, well-moisturized face and let your skincare absorb fully. Use a primer to create a barrier between your skin’s oils and your foundation. When testing foundation shades, wait 30 minutes after application to see if the color changes. If oxidation is a persistent problem, choose a foundation one shade lighter than your ideal match, or look for formulas labeled oxidation-resistant. Setting your foundation with powder immediately after application can also slow the oxidation process.
How can I make my makeup look natural in photos?
Camera flashes and lighting can wash out makeup, making you look bare-faced or uneven. The key is slightly amplifying your normal routine. Increase your contour and blush intensity by about 20 percent. Use matte products rather than shimmer on areas that catch flash, as shimmer can reflect light and look like white spots. Ensure your foundation matches your neck and chest, and blend down past your jawline. Define your brows a bit more than usual—they frame your face in photos. Finally, use a setting spray to unify everything. Take a test photo in similar lighting before your event to check how your makeup translates on camera.
Related posts:
 Katey Denno’s Must-Have Products
 Foundation’s Impact on Skin
 How to Make Lip Stains Work Under Masks
 Why Beauty Experts Are Using Eye Cream on Their Entire Face
 Top Concealer Picks at Sephora
 The Eyeshadow Application Method That Actually Works
 Buxom Power-Full Plump Lip Balm
 Professional Tricks to Make Your Lipstick Last All Day