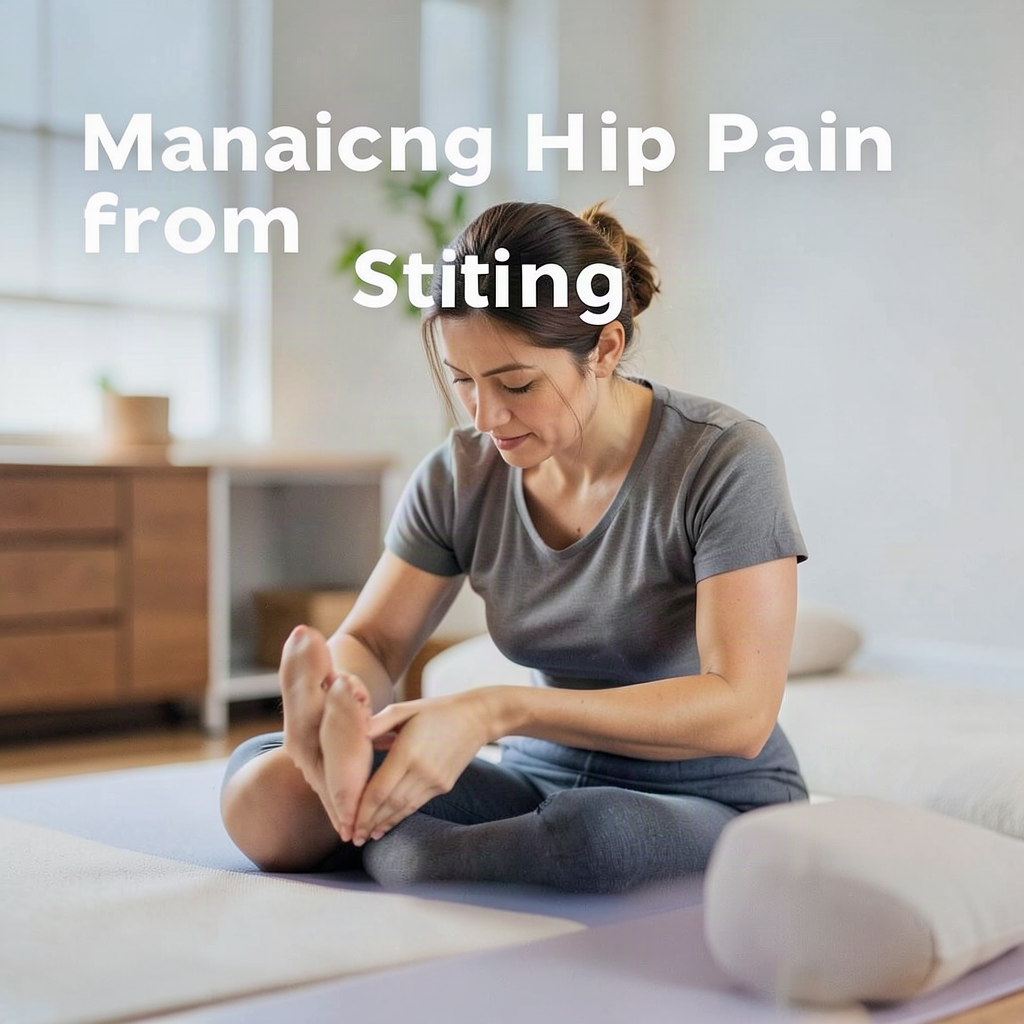
In our modern era, the chair has become a primary environment for work, education, and leisure. While technology has advanced our capabilities, our biological evolution has not yet caught up with the sedentary nature of the digital age. For many, this sedentary lifestyle manifests as a persistent, nagging ache in the hips. Managing hip pain from sitting is not just about finding a more comfortable cushion; it requires a holistic understanding of how the human body responds to prolonged static postures. When we sit for hours, our muscles, tendons, and joints undergo physiological changes that can lead to stiffness, reduced range of motion, and chronic discomfort. However, by implementing targeted ergonomic changes, specific movement patterns, and mindful lifestyle habits, it is entirely possible to reclaim hip health and work without pain.
Understanding the Anatomy of Hip Pain from Sitting
To effectively manage hip pain, one must first understand what is happening beneath the surface. The hip joint is a ball-and-socket joint designed for a wide range of movement, supported by a complex network of muscles including the iliopsoas, the gluteals, and the piriformis. When we sit, the hip is held in a flexed position. This causes the hip flexors—primarily the psoas and iliacus—to remain in a shortened state for extended periods. Over time, these muscles can become chronically tight and overactive.
Simultaneously, the gluteal muscles on the back of the hip are placed in a lengthened, inactive state. In physical therapy, this phenomenon is often referred to as “reciprocal inhibition” or, colloquially, “gluteal amnesia.” Because the hip flexors are so tight, they signal the glutes to relax or “turn off.” This imbalance creates a tug-of-war across the pelvis. The tight muscles pull the pelvis into an anterior tilt, which can compress the lower back and create a pinching sensation in the front of the hip. Furthermore, prolonged pressure on the ischial tuberosities (the “sit bones”) can irritate the surrounding bursa and nerves, leading to localized pain that radiates through the thigh or lower back.
Optimizing Your Ergonomic Environment
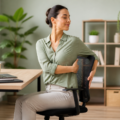
Managing hip pain from sitting starts with the environment where you spend the most time. An ergonomic setup is not a luxury; it is a necessity for joint preservation. The goal of ergonomics is to maintain the “neutral spine” and ensure that no single muscle group is overworked. Start by evaluating your chair. A high-quality ergonomic chair should offer adjustable height and lumbar support that follows the natural curve of your lower back.
Adjust your chair height so that your feet are flat on the floor and your knees are at a 90-degree angle, or slightly lower than your hips. Having your hips slightly higher than your knees can help open the hip angle, reducing the compression on the hip flexors. If your chair is too high and your feet dangle, it places excessive strain on the front of the thighs; use a footrest to alleviate this. Additionally, ensure there is a small gap (about two fingers wide) between the back of your knees and the edge of the seat pan. This prevents pressure on the popliteal fossa, which can impede circulation and irritate the nerves that pass through the hip to the legs.
Targeted Stretches for Hip Flexor Release
Since tightness in the front of the hip is a primary culprit, stretching these areas is essential. However, the technique is crucial. Many people stretch their hips by simply lunging forward, which can actually strain the joint capsule if the pelvis isn’t positioned correctly. To perform a safe and effective half-kneeling hip flexor stretch, follow these steps:
- Kneel on your right knee with your left foot flat on the floor in front of you (a 90-90 position).
- Instead of leaning forward, perform a posterior pelvic tilt. Imagine tucking your tailbone under or pulling your belly button toward your spine.
- Squeeze your right glute firmly. You should feel a deep stretch in the front of the right hip without moving your torso forward more than an inch or two.
- Hold for 30 to 45 seconds, breathing deeply into the abdomen, and repeat on the other side.
Another excellent stretch is the Figure-4 or Seated Pigeon stretch. While sitting in your chair, cross your right ankle over your left knee. Keep your back straight and gently lean forward from the hips—not the waist. This targets the piriformis and deep rotators of the hip, which often become tight and compressed during long sitting sessions.
Strengthening the Posterior Chain
Stretching alone is rarely the complete answer. To prevent the hip flexors from tightening back up, you must strengthen the muscles that support the pelvis from behind. Strengthening the gluteus maximus and medius provides the necessary counter-tension to keep the pelvis stable. One of the most effective exercises for this is the Glute Bridge.
Lie on your back with your knees bent and feet flat on the floor. Drive through your heels to lift your hips toward the ceiling, ensuring you are using your glutes rather than your lower back. At the top of the movement, your body should form a straight line from your shoulders to your knees. Lower slowly and repeat for 3 sets of 15 reps. For those at a desk, “Glute Squeezes” can be done while sitting. Simply contract your glutes as hard as possible for five seconds, then release. This helps maintain blood flow and neurological connection to the muscles throughout the workday.
Clamshells are another vital exercise for hip stability. Lie on your side with your knees bent and stacked. Keeping your feet together, lift your top knee as high as possible without rotating your pelvis backward. This targets the gluteus medius, a muscle responsible for stabilizing the hip joint during walking and standing.
The Importance of Micro-Breaks and Movement Variety
The human body is designed for motion, not stasis. Even the most perfect ergonomic setup will eventually cause pain if you stay in it for too long. Managing hip pain from sitting requires the implementation of “micro-breaks.” A popular and effective strategy is the 20-8-2 rule: for every 30 minutes of work, sit for 20 minutes, stand for 8 minutes, and move or stretch for 2 minutes.
During these two minutes of movement, focus on dynamic mobility. Perform a few standing leg swings (forward and back, and side to side) to lubricate the joint with synovial fluid. Practice “air squats” to engage the full range of motion of the hips. If you have the space, a short walk around the room can reset your posture. The goal is to prevent the tissues from “creeping”—a term used to describe the slow deformation of ligaments and tendons under constant load. By introducing variety, you redistribute the mechanical stress across different tissues, preventing any single area from becoming overloaded.
Managing Inflammation and Systemic Factors
While mechanical stress is the primary cause of hip pain from sitting, systemic factors can exacerbate the discomfort. Chronic sitting can lead to poor circulation in the lower extremities, which may contribute to low-grade inflammation in the hip joints. Staying hydrated is essential, as cartilage—the cushioning tissue in your joints—is largely composed of water. Dehydration can make joints feel stiffer and more prone to irritation.
Consider your overall inflammatory load. A diet rich in Omega-3 fatty acids (found in walnuts, flaxseeds, and fatty fish) and antioxidants can support joint health. Furthermore, sleep quality plays a significant role in pain perception and tissue repair. If you suffer from hip pain, your sleeping position matters. Side sleepers should place a pillow between their knees to keep the hips in a neutral alignment and prevent the top leg from pulling the pelvis into a rotation. Back sleepers can place a small pillow under their knees to reduce the pull of the hip flexors on the lower spine during the night.
When to Seek Professional Guidance
While lifestyle adjustments can resolve many cases of hip discomfort, it is important to recognize when professional intervention is necessary. Managing hip pain from sitting involves knowing the difference between muscle tightness and structural issues. You should consult a healthcare professional or a physical therapist if you experience any of the following “red flags”:
- Sharp, stabbing pain that causes you to limp or catch your breath.
- Numbness, tingling, or a “pins and needles” sensation that radiates down to the foot.
- Pain that persists at night and prevents sleep.
- A feeling of the hip “locking” or “clicking” accompanied by sudden weakness.
- Swelling or heat around the hip joint.
A physical therapist can provide a personalized assessment to determine if your pain is stemming from bursitis, tendinopathy, labral tears, or perhaps referred pain from the lumbar spine. They can offer manual therapy to release deep tissue restrictions and create a progressive loading program to build the resilience of your hip joints.
Developing a Sustainable Daily Routine
Success in managing hip pain from sitting comes from consistency. It is better to do five minutes of hip mobility every day than an hour-long session once a week. Create a “Hip Health Ritual” that integrates into your existing schedule. For example:
- Morning: Start with three minutes of cat-cow and bird-dog exercises to wake up the spine and core.
- Workday: Set a timer every 50 minutes to stand up and perform three deep lunges on each side.
- Lunch: Take a 10-minute walk to encourage blood flow and glute activation.
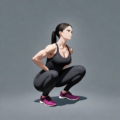
- Evening: Spend five minutes in a deep squat (supported by a doorframe if needed) or a butterfly stretch while watching television.
By making these movements non-negotiable parts of your day, you transition from a reactive approach (treating pain when it happens) to a proactive approach (preventing pain before it starts). Remember that your body is adaptable; just as it adapted to the chair by becoming tight, it can adapt to movement by becoming flexible and strong.
The Hidden Impact of Adductor Tightness and Internal Rotation
While much attention is paid to the hip flexors and glutes, the adductor group—the muscles of the inner thigh—plays a significant role in the development of hip pain during prolonged sitting. When we sit, especially in chairs that are too soft or when we adopt a slumped posture, the knees often gravitate toward one another, or we cross our legs tightly. This position keeps the adductors in a shortened, hypertonic state. Over time, these muscles, which include the adductor magnus, longus, and brevis, can become restrictive, pulling the femur into a chronic state of internal rotation. This internal rotation is problematic because it alters the way the head of the femur sits within the acetabulum (the hip socket), potentially leading to impingement or ‘pinching’ sensations in the groin area.
To address this, one must move beyond simple linear stretches. A practical approach involves the ‘Seated Adductor Release.’ While sitting at your desk, place your elbows on the insides of your knees and gently push outward while simultaneously resisting with your leg muscles for five seconds. Release and allow the knees to fall further apart. This utilizes PNF (Proprioceptive Neuromuscular Facilitation) to signal the nervous system to let go of the protective tension. Additionally, for those who habitually cross their legs, the ‘Tactile Cueing’ method is effective: place a small, underinflated ball or a rolled-up towel between your knees. The goal isn’t to squeeze it constantly, but to maintain just enough awareness to keep the legs parallel, preventing the adductors from collapsing into that shortened, internal rotation that irritates the medial hip joint.
Edge cases often involve individuals with ‘Femoroacetabular Impingement’ (FAI). For these people, traditional adductor stretches might actually cause more pain if the joint is forced into end-range abduction. If you feel a sharp, ‘bony’ block when trying to open your knees, focus instead on isometric strengthening of the external rotators. By strengthening the muscles that pull the hip outward, you provide a functional counterbalance to the tight inner thigh muscles without forcing the joint into a painful range of motion.
The Diaphragm-Psoas Link: Breathing Your Way to Hip Relief
An often-overlooked anatomical reality is the direct physical connection between the respiratory diaphragm and the psoas muscle. The psoas major originates from the T12 to L4 vertebrae, and its fascia is continuous with the crus of the diaphragm. This means that every breath you take has the potential to either massage or tighten your hip flexors. When we are stressed at work, we tend to engage in ‘chest breathing,’ using the secondary respiratory muscles in the neck and shoulders while the diaphragm remains stagnant. This lack of diaphragmatic movement prevents the psoas from experiencing its natural rhythmic glide, causing it to ‘stiffen’ in its already shortened seated position.
To manage hip pain through the breath, practice ‘360-Degree Expansion’ while sitting. Place your hands around your lower ribcage. As you inhale through your nose, imagine your breath pushing your hands outward to the sides and backward into the chair, rather than just lifting your chest. This downward pressure of the diaphragm creates a gentle, internal mobilization of the psoas. If you can master this, you are essentially performing a micro-stretch of the hip flexors with every breath you take during your workday.
For a more targeted intervention, try the ‘Psoas-Diaphragm Reset’ during your lunch break. Lie on your back with your lower legs resting on a chair or ottoman (the 90-90 position). This position slackens the psoas completely. Place a light weight, like a heavy book, on your lower abdomen. Breathe so that the book rises and falls, but your chest remains still. This recalibrates the relationship between your core stability and your hip tension, teaching the psoas that it does not need to act as a primary stabilizer of the spine while you are trying to sit and work.
Self-Myofascial Release (SMR) for the Lateral Hip and TFL
While stretching targets the length of the muscle fibers, Myofascial Release targets the ‘fuzz’ or adhesions that build up in the connective tissue surrounding the muscles. The Tensor Fasciae Latae (TFL) is a small muscle on the side of the hip that often becomes incredibly dense and painful in chronic sitters. Because the TFL helps with hip flexion and internal rotation, it is doubly taxed when we sit. This can lead to lateral hip pain that is often misdiagnosed as bursitis.
To perform an effective SMR routine at home, you will need a lacrosse ball or a firm foam roller. However, a common mistake is rolling directly over the bony prominence of the hip (the greater trochanter). This can actually increase inflammation. Instead, find the soft tissue just slightly forward and above that bone. This is where the TFL resides. Pin the ball between your hip and a wall (this is easier to control than lying on the floor). Lean your weight into the ball and perform small, circular movements. When you find a particularly ‘hot’ or tender spot, stop and hold the pressure while slowly swinging your leg forward and back. This ‘pin and stretch’ technique manually breaks up the adhesions that a standard stretch cannot reach.
Another critical area is the ‘Gluteus Medius’ and ‘Minimus’ on the side of the pelvis. These muscles often develop trigger points from the constant pressure of the chair seat. Using the same lacrosse ball, sit on a hard chair and place the ball under the fleshy part of your outer buttock. Shift your weight until you find the tender point. Once found, slowly open and close your knee (like a seated clamshell). This active mobilization under pressure helps to rehydrate the fascia and improve blood flow to the deep rotators, which are frequently compressed during long calls or deep-work sessions.
Correcting “Sacral Sitting” and Posterior Pelvic Collapse
Many people suffer from hip pain not because of the chair itself, but because of a postural habit known as ‘sacral sitting.’ This occurs when a person slides their pelvis forward on the seat pan and leans their upper back against the chair, effectively sitting on their tailbone (sacrum) rather than their sit bones (ischial tuberosities). This position puts the hip joint in a state of ‘passive flexion,’ where the ligaments at the back of the hip are overstretched while the labrum at the front is compressed. It also forces the hamstrings to work in a state of constant tension to keep you from sliding further off the chair.
To correct this, you must develop ‘Sit Bone Awareness.’ Reach under your glutes and feel for the two hard bones. These are your natural ‘rockers.’ Your weight should be centered directly on top of them, or slightly toward the front of them. If you feel you are sitting behind them, your pelvis is tucked, and your hips are at risk. A helpful drill is the ‘Pelvic Clock.’ While sitting, imagine your pelvis is a clock face. Tilt your pelvis forward to 12 o’clock (arching the back), then tuck it back to 6 o’clock (slouching). Find the ‘neutral’ 12:30 or 1:00 position where your spine feels long and your hips feel ‘light.’ This small adjustment changes the mechanical loading of the hip socket, moving the pressure away from the sensitive labral tissue and onto the robust bony structures designed to handle the weight.
Dynamic Loading: Transitioning from Stretching to Functional Resilience
A major pitfall in managing hip pain is the ‘flexibility trap’—the idea that if a hip hurts, it must be stretched. However, if a hip is painful because it is unstable, stretching will only make it worse. We must transition from passive stretching to dynamic loading. This means teaching the hip to be strong in the very positions where it usually feels weak or tight. For the chronic sitter, this involves ‘eccentric’ exercises, which strengthen the muscle as it lengthens.
One of the most effective exercises for this is the ‘Eccentric Step-Down.’ Stand on a small step or even a thick book. Slowly lower your non-standing leg toward the floor by hinging at the hip and bending the knee of the standing leg. The key is to keep the hips level; do not let the ‘floating’ hip drop. This forces the gluteus medius and the deep stabilizers of the standing hip to work under tension. By controlling the descent, you are building the exact type of stability needed to maintain a healthy pelvic position when you eventually return to your chair.
Another powerful tool is the ‘Isometric Desk Push.’ While seated, place your hands on the outside of your thighs. Try to push your knees outward against your hands, but don’t let them move. Hold this maximum contraction for 10 seconds, then relax. Then, place your hands on the inside of your knees and try to squeeze your knees together against your hands. These isometric holds ‘wake up’ the neuromuscular pathways that often go dormant during long periods of static sitting. They provide the ‘tone’ necessary to keep the femoral head centered in the socket, reducing the micro-instability that leads to chronic aching.
The Influence of the Ankle and Foot on Proximal Hip Pain
The hip does not exist in a vacuum; it is the middle link in a kinetic chain that starts at the foot. If your ankles are stiff—specifically, if you lack ‘dorsiflexion’ (the ability to pull your toes toward your shin)—your body will compensate by altering your sitting and standing mechanics. Many people sit with their feet tucked back under their chair. This keeps the ankles in ‘plantarflexion’ (toes pointed down) for hours, which shortens the calves and, through the posterior chain fascia, increases the tension on the hamstrings and the back of the hip.
Check your ankle mobility by sitting with your feet flat and trying to lift the front of your foot while keeping the heel down. If you can’t get much lift, your stiff ankles might be pulling your pelvis into a ‘tuck’ every time you try to stand or sit. To combat this, use a slanted footrest under your desk that encourages a dorsiflexed position. This keeps the calves long and reduces the ‘upward’ pull of tension toward the hip joint. Furthermore, avoid wearing high-heeled shoes or shoes with a significant ‘drop’ while working at a desk, as these artificially shorten the posterior chain and tilt the pelvis forward, exacerbating hip flexor tightness.
Psychological Stress and the “Emotional Hip” Connection
The psoas is often referred to in somatic therapy as the ‘muscle of the soul’ because of its intimate connection to the sympathetic nervous system. In a state of ‘fight or flight’—which many of us experience as work-related stress, tight deadlines, or endless emails—the body’s natural instinct is to curl into a fetal position for protection. This involves a subtle, chronic contraction of the hip flexors. If you are stressed, your brain is literally signaling your hips to tighten up, regardless of how ergonomic your chair is.
Frequently Asked Questions
1. Is a standing desk the ultimate cure for hip pain?
While a standing desk is a valuable tool, it is not a panacea. Standing for eight hours straight can create its own set of issues, such as lower back fatigue and varicose veins. The key is not standing instead of sitting, but rather alternating between the two. The “best” posture is always the next posture. Use a standing desk to break up sitting intervals, but ensure you are wearing supportive footwear and not locking your knees while standing.
2. Why does my hip pain feel worse when I first stand up after sitting?
This is often due to the “stiffening” of the connective tissues. When you sit, your hip flexors are in a shortened position. When you suddenly stand, those tight muscles pull forcefully on the pelvis and spine. Additionally, the lack of movement reduces the circulation of synovial fluid, which acts as a lubricant for the joint. A few seconds of gentle movement before fully standing up can help ease this transition.
3. Can tight hamstrings cause hip pain while sitting?
Yes, absolutely. The hamstrings attach to the ischial tuberosity (the sit bone). If the hamstrings are excessively tight, they can pull on the pelvis, contributing to a posterior pelvic tilt or putting pressure on the sciatic nerve. Maintaining a balance of flexibility between the front (quads/flexors) and the back (hamstrings/glutes) of the hip is essential for sitting comfort.
4. How can I tell if my hip pain is muscle-related or a joint issue like arthritis?
Generally, muscle-related pain feels like a dull ache or tightness that improves with movement and stretching. Joint-related issues, such as osteoarthritis, often manifest as stiffness that is worse in the morning, a decreased range of motion (difficulty putting on socks), and pain that feels “deep” in the groin. However, an accurate diagnosis requires a clinical evaluation by a medical professional.
5. Are there specific office chairs recommended for hip pain?
There is no single “best” chair, as bodies vary significantly. However, look for chairs with a “waterfall” seat edge (which reduces pressure on the thighs), adjustable seat tilt (allowing you to open the hip angle), and high-quality foam or mesh that distributes weight evenly. The most important feature is adjustability, allowing you to customize the chair to your specific leg length and torso height.