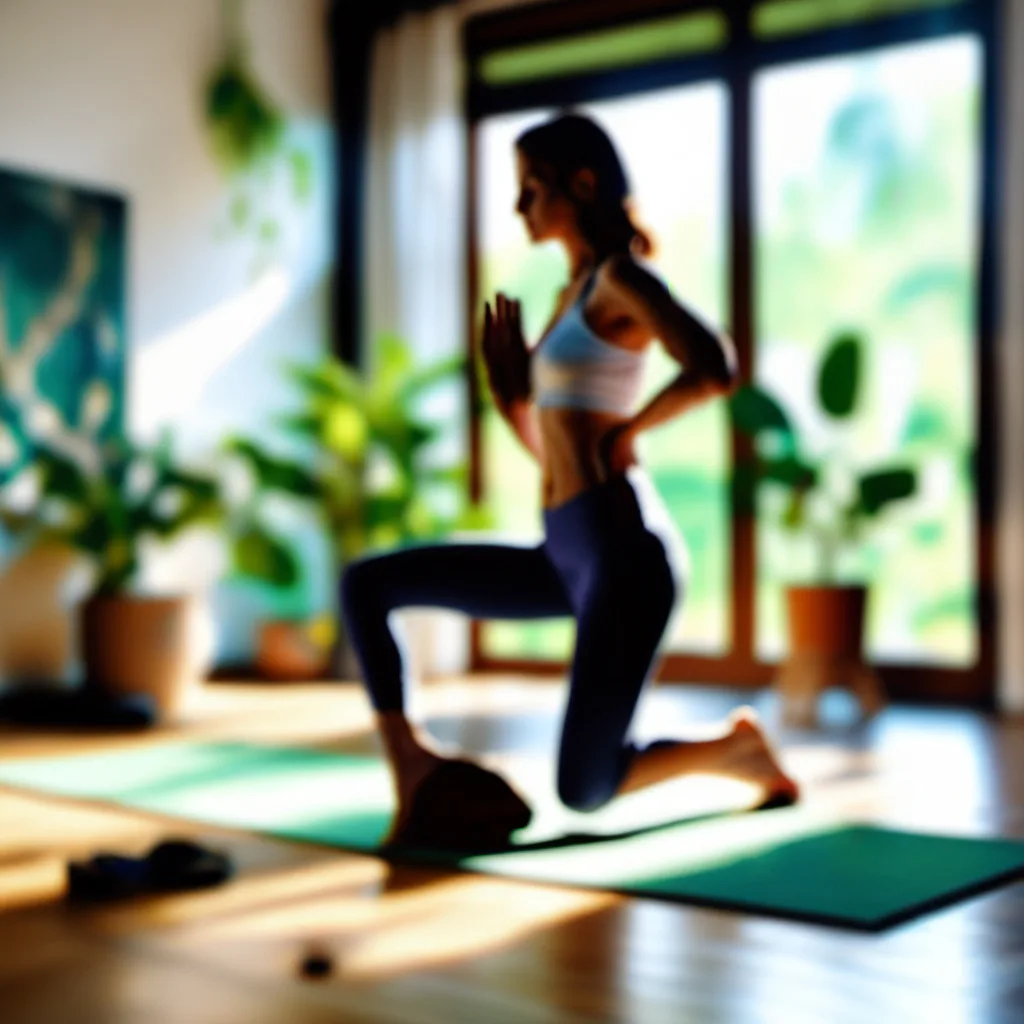
Chair pose—known in Sanskrit as Utkatasana—has earned a reputation as one of yoga’s most humbling postures. You sink into what looks like an invisible chair, your thighs burn, your balance wavers, and suddenly you’re wondering why something so simple feels so impossibly hard. If you’ve ever wobbled, tipped backward, or abandoned chair pose halfway through, you’re not alone. This foundational pose challenges strength, balance, and body awareness all at once, but with the right approach, you can build the stability and confidence to hold it steady.
Key takeaways
- Start with feet hip-width apart and press into all four corners of each foot to establish a stable foundation.
- Use a hip hinge to sit back while keeping your shins and torso at roughly the same parallel angle.
- Engage your core by drawing the lower belly in and up to prevent lower back arching and swaying.
- Modify the pose by placing hands at heart center or using a wall to build strength and confidence.
- Improve ankle mobility by placing a rolled towel under your heels or practicing daily calf and toe raises.
The good news? Falling out of chair pose isn’t a sign of failure—it’s feedback. Your body is telling you exactly what needs attention, whether that’s ankle mobility, core engagement, or weight distribution. This guide breaks down the mechanics of chair pose, explores why balance fails, and offers practical strategies to help you find your steady foundation. Whether you’re new to yoga or returning after a break, you’ll learn how to modify, progress, and truly master this deceptively challenging posture.
Why Chair Pose Feels So Unstable
Chair pose demands a precise alignment of multiple body parts working in concert. When you lower into the posture, your center of gravity shifts backward and downward, requiring your ankles, knees, hips, and spine to maintain a delicate balance. Unlike standing poses with a wide base of support, chair pose keeps your feet together or hip-width apart, creating a relatively narrow foundation for a significant postural challenge.
The instability stems from several factors. First, the pose requires significant strength in muscles that many people underuse in daily life—the quadriceps, glutes, and deep core stabilizers. When these muscles fatigue or fail to engage properly, your body searches for compensation patterns, often leading to wobbling or backward tipping. Second, ankle mobility plays a crucial role. As you sink deeper, your shins need to tilt forward over your toes, requiring adequate dorsiflexion. Limited ankle range of motion forces your weight onto your heels, destabilizing the entire structure.
Additionally, many practitioners struggle with proprioception—the body’s sense of where it is in space. Chair pose removes visual reference points; you’re staring forward or upward rather than down at your feet. Without developed body awareness, it becomes difficult to sense whether your weight is distributed evenly or whether one part of your body has drifted out of alignment. Understanding these challenges is the first step toward addressing them systematically.
Finding Your Foundation: Foot and Ankle Setup
Stability in chair pose begins at the ground. Before you even think about lowering your hips, establish a solid, active foundation through your feet. Start by standing with feet hip-width apart—this provides more stability than feet together while you’re building strength and balance. Press down through the four corners of each foot: the base of your big toe, the base of your little toe, and both sides of your heel. This creates a stable platform and activates the small stabilizing muscles in your feet and ankles.
Pay attention to your weight distribution. Many people unconsciously shift their weight back onto their heels when entering chair pose, which immediately compromises balance. Instead, maintain weight slightly forward in the balls of your feet while keeping your heels grounded. Imagine you’re pressing the floor away from you rather than sinking into it. This active engagement prevents passive collapse and maintains muscular tone throughout the pose.
If ankle mobility is limited, try this modification: place a rolled towel or yoga wedge under your heels. This elevation reduces the ankle dorsiflexion requirement and allows you to maintain better alignment without tipping backward. As your ankle mobility improves over weeks and months, gradually reduce the height of the support. You can also practice ankle mobility exercises outside of your yoga practice—simple movements like standing calf raises, toe raises, and ankle circles performed daily will expand your range of motion.
The Hip Hinge That Changes Everything
The key to stable chair pose lies in understanding that it’s not simply a squat—it’s a combination of a squat and a hip hinge. Many practitioners focus solely on bending their knees, which pushes the knees too far forward and shifts weight onto the toes, creating imbalance. Instead, think of simultaneously bending your knees and pushing your hips back, as if you’re actually preparing to sit in a chair behind you.
To practice the hip hinge, stand a few inches in front of a wall, facing away from it. As you begin to lower into chair pose, reach your hips back toward the wall. You should feel your glutes and hamstrings engage more actively. Your torso will naturally tilt forward slightly—this is correct. You’re not trying to keep your torso perfectly vertical; a slight forward lean actually improves balance by keeping your center of gravity over your base of support.
The relationship between your shins and torso creates the balance point. Ideally, your shins should tilt forward at roughly the same angle that your torso tilts forward from the hips. This parallel alignment distributes your weight optimally. If your shins are too vertical, you’re leaning back too far. If your torso is too upright while your knees travel far forward, you’re putting excessive load on the knee joints without engaging the posterior chain muscles that provide power and stability.
Core Engagement: Your Secret Weapon
A strong, engaged core transforms chair pose from a wobbly struggle into a grounded, powerful stance. Your core doesn’t just mean your abdominal muscles—it encompasses the entire cylinder of muscles that stabilize your torso, including your deep abdominals, obliques, lower back muscles, and pelvic floor. When properly engaged, these muscles create internal stability that prevents swaying and tipping.
To find core engagement in chair pose, take a breath and on your exhale, gently draw your lower belly in and up, as if you’re zipping up a tight pair of jeans. This action activates the transverse abdominis, your deepest abdominal layer. Simultaneously, lengthen your spine by reaching the crown of your head forward and up while drawing your tailbone slightly down. This creates what yoga teachers call “axial extension”—length through the spine that prevents collapse and compression.
Avoid the common mistake of over-gripping your abdominals or holding your breath. Core engagement in yoga should feel active but not rigid. You should still be able to breathe fully and smoothly. If you find yourself holding your breath, you’re working too hard or gripping unnecessarily. Release some of the tension, breathe naturally, and find the level of engagement that provides stability without restriction. Practice this while standing before adding the challenge of the lowered position.
Arm Positioning and Upper Body Alignment
While chair pose is primarily a lower-body challenge, your arms and upper body significantly impact your balance. The traditional expression of the pose has arms extended overhead, but this arm position actually increases the difficulty by raising your center of gravity and requiring more core stability. If you’re struggling with balance, modify your arm position to make the pose more accessible.
Start with hands at heart center in prayer position. This keeps your center of gravity lower and allows you to focus entirely on lower body alignment and stability. Once you feel steady here, try extending your arms forward at shoulder height, parallel to the floor. This position still challenges your balance and core but is more manageable than overhead arms. The forward reach also serves as a counterbalance to your hips pressing back, helping to keep your weight centered over your feet.
When you’re ready to raise your arms overhead, do so with intention. Reach your arms up alongside your ears, keeping your shoulders relaxed and away from your ears. Your biceps should frame your face. If your shoulders are tight, allow your arms to form a V-shape rather than forcing them parallel. Keep your ribcage knitted in rather than letting it flare forward—this common error disrupts core engagement and pulls your center of gravity backward. Think of lifting from your armpits rather than just raising your hands.
Breath Work: Staying Present and Steady
Your breath is intimately connected to your balance and stability. When you hold your breath, your muscles tense unnecessarily, your mind becomes agitated, and your body rigidifies in ways that actually decrease stability. Conversely, smooth, steady breathing calms your nervous system, maintains muscular tone without over-gripping, and helps you stay present with the physical sensations of the pose.
In chair pose, establish a rhythm of deep, even breaths. Breathe in through your nose for a count of four, breathe out through your nose for a count of four. Focus on making your exhales as long or slightly longer than your inhales—this activates the parasympathetic nervous system and promotes a sense of groundedness. If you notice your breath becoming shallow or ragged, that’s a signal that you’re working at your edge and might need to ease up slightly.
Use your breath as a tool for deepening the pose. On each inhale, find length through your spine, reaching the crown of your head forward and up. On each exhale, engage your core more fully and perhaps sink a few millimeters deeper into the pose. This breath-synchronized movement keeps you active and engaged rather than static and collapsed. Many practitioners find that focusing intently on the breath also quiets the mental chatter that often accompanies challenging poses—the “I can’t do this” or “When will this be over?” thoughts that undermine confidence.
Progressive Modifications for Building Strength
Mastering chair pose is a gradual process. Rather than forcing yourself into the full expression before you’re ready, use intelligent modifications to build the strength and stability you need. Modifications aren’t shortcuts—they’re strategic tools that allow you to work at an appropriate level while making steady progress.
Start with a higher chair pose. Instead of lowering your hips toward knee height, only descend a quarter or halfway down. This reduced range of motion still challenges your muscles and balance while allowing you to maintain better form. Hold this position for shorter durations—perhaps five to ten breaths initially—and focus on perfect alignment and steady breathing. As this becomes comfortable over several weeks, gradually lower deeper and hold longer.
Use an actual chair for support. Stand in front of a chair and lower down until you’re lightly touching or hovering just above the seat. This gives you a reference point and safety net, reducing the fear of falling that often creates tension and instability. You can also practice with your back against a wall, sliding down into chair pose while your entire back remains in contact with the wall. This wall support provides feedback about your alignment and prevents you from tipping backward.
Another effective modification is to widen your stance. Place your feet wider than hip-width apart, which increases your base of support and makes balance much easier. As your strength and stability improve, gradually bring your feet closer together. You can also practice chair pose with a block between your thighs. Squeezing the block activates your inner thighs and helps maintain proper knee alignment, which contributes to overall stability.
Common Mistakes That Sabotage Your Balance
Even experienced practitioners sometimes struggle with chair pose because they’ve unknowingly developed compensatory patterns. Learning to identify these common mistakes helps you self-correct and refine your practice. One frequent error is allowing the knees to collapse inward. When your knees cave toward each other, you lose the structural support of proper alignment and place stress on the knee joints. Actively press your knees outward, keeping them tracking in the same direction as your toes.
Another mistake is arching the lower back excessively. This happens when you try to keep your torso too upright or when core engagement is insufficient. An arched lower back not only creates compression and potential discomfort but also shifts your center of gravity in ways that compromise balance. Remember the slight forward lean of the torso and the engagement of your core to maintain a neutral spine.
Looking down at your feet is tempting, but it disrupts the alignment of your spine and shifts your weight forward. Instead, keep your gaze level, looking straight ahead or slightly upward if your arms are overhead. Your head is surprisingly heavy, and its position significantly affects your balance. Similarly, tensing your jaw, shoulders, or face wastes energy and creates unnecessary tension. Consciously soften these areas while maintaining engagement in the working muscles of your legs and core.
Finally, rushing into and out of the pose causes instability. Transition slowly and mindfully, taking several breaths to lower into chair pose and several breaths to rise back up. These transitions are valuable opportunities to practice control and awareness. If you can’t transition slowly without losing balance, you’re not yet ready for the full depth of the pose—use modifications and build gradually.
Building a Sustainable Practice
Consistency matters more than intensity when building the strength and skills for stable chair pose. Rather than occasionally attempting to hold the pose for a long time, practice it regularly for shorter, quality holds. Include chair pose in your yoga practice three to four times per week, holding for five to ten breaths initially and gradually increasing the duration as your capacity grows.
Complement your yoga practice with exercises that strengthen the specific muscles chair pose requires. Bodyweight squats, lunges, and glute bridges build lower body strength. Planks and dead bugs develop core stability. Calf raises and single-leg balance exercises improve ankle strength and proprioception. These supplementary exercises accelerate your progress and reduce the risk of overuse injuries from repetitively challenging the same movement pattern.
Track your progress honestly. Keep a practice journal where you note how long you held the pose, what modifications you used, and how it felt. Celebrate small improvements—perhaps you lowered an inch deeper, held for one more breath, or felt more stable than last week. Progress in yoga is rarely linear; some days will feel stronger than others due to factors like sleep, stress, and hormonal fluctuations. Approach your practice with patience and self-compassion rather than judgment.
Remember that mastery doesn’t mean perfection. Even advanced practitioners continue to refine and deepen their relationship with fundamental poses like chair pose. The goal isn’t to achieve some idealized version of the pose and then move on—it’s to develop an ongoing practice of awareness, exploration, and presence in your body. Each time you practice chair pose, you have an opportunity to learn something new about your body, breath, and mind.
The Neurological Side of Balance: Training Your Vestibular System
Balance in chair pose isn’t purely muscular—it’s fundamentally neurological. Your vestibular system, located in the inner ear, works constantly to orient you in space and maintain equilibrium. When you practice chair pose, you’re not just training muscles; you’re refining the communication pathways between your vestibular system, visual input, and proprioceptive feedback from muscles and joints. This neural coordination determines whether you wobble or stay steady.
The vestibular system responds to training just like muscles do. Each time you challenge your balance, you’re strengthening these neural pathways. However, the system needs variety to develop fully. If you always practice chair pose in the same conditions—same time of day, same spot in your living room, same visual environment—you’re training a very specific neural pattern. To build robust balance, occasionally practice with eyes closed for a few breaths, which removes visual input and forces greater reliance on vestibular and proprioceptive information. Try practicing in different rooms, at different times, or even outdoors where uneven ground adds complexity.
Age affects vestibular function, which explains why balance often becomes more challenging as we get older. The good news is that targeted practice can slow or even reverse age-related decline in balance. Research shows that adults who regularly practice balance-challenging activities maintain vestibular function far better than sedentary peers. Chair pose offers an accessible, equipment-free way to maintain this crucial system. If you’re over 50, consider chair pose not just as a yoga posture but as medicine for your nervous system.
Fatigue, dehydration, and illness temporarily impair vestibular function, which is why chair pose feels dramatically harder some days. If you’ve slept poorly, are fighting off a cold, or haven’t drunk enough water, your balance will suffer noticeably. Rather than pushing through, acknowledge these factors and adjust your practice accordingly. Use modifications, hold for shorter durations, or focus on other aspects of your practice. The vestibular system needs recovery time just like muscles do.
Asymmetries and Imbalances: Why You Tip to One Side
Most people discover in chair pose that they don’t wobble symmetrically—they consistently lean or tip toward one side. This reveals underlying asymmetries in strength, flexibility, or neuromuscular control that you might not notice in daily life. These imbalances aren’t failures; they’re valuable information about your body’s current state and opportunities for targeted development.
Common sources of asymmetry include leg-length discrepancies, old injuries that changed movement patterns, and habitual postures from work or sports. If you always carry a bag on one shoulder, drive with your right foot, or stand with weight shifted to one leg, you’ve trained asymmetrical patterns into your body. Chair pose exposes these patterns clearly because the pose demands equal contribution from both sides simultaneously.
To address asymmetries, first identify them. Stand in chair pose and honestly assess where you feel more work happening. Is one quadriceps burning more than the other? Does one ankle feel less stable? Do you drift toward one side as you hold the pose? Once you’ve identified the pattern, practice single-leg chair pose variations to strengthen each side independently. Stand on one leg, bend the knee slightly, and sink into a shallow chair pose on just that leg while the other hovers off the ground. This unilateral work highlights weaknesses that bilateral movements mask.
Don’t try to force symmetry immediately. Bodies are naturally somewhat asymmetrical, and extreme attempts at perfect balance can create new problems. Instead, work gradually to reduce significant disparities. If your right leg is noticeably weaker, spend a few extra breaths in single-leg work on that side. Over months of consistent practice, you’ll notice the gap narrowing. Patience is essential—neuromuscular repatterning happens slowly but permanently when done correctly.
Breathing Mechanics: How Respiration Affects Stability
The relationship between breathing and balance goes deeper than simple relaxation. Your diaphragm, the primary breathing muscle, attaches to your spine and plays a crucial role in core stability. Every inhale and exhale slightly shifts your center of gravity and changes intra-abdominal pressure. Understanding these mechanics helps you use breath strategically to enhance stability rather than undermine it.
During inhalation, your diaphragm descends, your ribcage expands, and your center of gravity rises slightly. This makes you marginally less stable. During exhalation, the diaphragm rises, the ribcage settles, and your center of gravity lowers, creating more stability. This is why many practitioners intuitively feel more grounded on exhales. You can use this knowledge deliberately—when you feel wobbliest in chair pose, emphasize your exhales, making them slightly longer and more complete.
Intra-abdominal pressure, controlled partially through breathing, acts like an internal brace for your spine. When you exhale with core engagement, you create what biomechanics researchers call “abdominal bracing,” which stabilizes the torso from within. This is different from holding your breath, which creates pressure but prevents movement and quickly leads to oxygen deprivation. Instead, breathe naturally while maintaining a baseline level of core engagement throughout the breath cycle.
Experiment with breathing patterns in chair pose. Try equal-length inhales and exhales (four counts in, four counts out). Then try extended exhales (four counts in, six counts out). Notice which pattern makes you feel more stable. Some practitioners find that pausing briefly at the bottom of the exhale—not holding the breath, but simply resting in empty lungs for a moment—creates maximum stability. This works because with empty lungs, your center of gravity is lowest and your core is naturally more engaged. Use these patterns strategically during longer holds.
Mental Focus and the Role of Drishti
Your gaze point—called drishti in yoga—profoundly influences balance. Where you look determines not just head position but also mental focus and even nervous system state. Many balance struggles in chair pose stem from scattered visual attention rather than physical instability. Learning to use drishti deliberately transforms the pose from a wobbly struggle into a meditation on steadiness.
Choose a single, unmoving point at eye level or slightly above and commit to it completely. This could be a spot on the wall, a object across the room, or simply a point in space. The drishti should be far enough away that your eyes can rest in soft focus without straining. Once you’ve chosen your point, let everything else in your visual field blur. This soft, steady gaze activates your parasympathetic nervous system and reduces the visual processing load on your brain, freeing up neural resources for balance.
Avoid the temptation to look around, check your alignment in a mirror, or glance at other students if you’re in a class. Each shift in gaze requires your brain to recalibrate your spatial orientation, which momentarily destabilizes you. Even brief glances down at your feet or up at your hands create micro-wobbles. Commit to your drishti before you enter the pose and maintain it until you’ve fully transitioned out. This unwavering focus trains mental discipline alongside physical balance.
Your drishti also influences your mental state. A steady gaze supports steady thoughts. If you notice your mind racing with self-criticism or countdown thoughts (“only three more breaths, only two more breaths”), return attention to your drishti. Make seeing the point your primary task, with holding the pose secondary. This subtle shift in mental emphasis often paradoxically makes the physical challenge easier because you’re not fighting yourself internally.
Advanced practitioners sometimes practice chair pose with eyes closed to remove visual input entirely, but this is significantly more challenging and should only be attempted once you have consistent stability with eyes open. Start with just one or two breaths with closed eyes, keeping your mental drishti—visualizing that same point in space even though you can’t see it. This practice dramatically accelerates proprioceptive development.
Skeletal Structure and Individual Variations
Not all bodies are built identically, and skeletal variations significantly impact how chair pose feels and looks for different people. The angle of your femur in the hip socket, the length ratio between your femur and tibia, the width of your pelvis, and the architecture of your ankle joint all influence your optimal alignment and depth in the pose. Understanding these anatomical realities frees you from comparing yourself to others or forcing your body into shapes it wasn’t designed for.
Hip socket depth and orientation vary considerably among individuals. Some people have shallow hip sockets with generous range of motion in all directions. Others have deeper sockets that provide more stability but less mobility. In chair pose, this affects how easily you can hinge at the hips while maintaining knee alignment. If you have deeper hip sockets, you might need a wider stance or less depth to achieve proper alignment without strain. This isn’t a limitation—it’s simply your anatomy.
Femur length relative to torso length also matters. People with proportionally longer femurs often need to lean their torso further forward to maintain balance in chair pose, while those with shorter femurs and longer torsos might keep a more upright spine. Neither is more correct—both are appropriate adaptations to individual proportions. If you have long femurs, don’t fight to keep your torso vertical; embrace the forward lean that your structure requires.
Ankle architecture determines available dorsiflexion range. Some people have naturally more mobile ankles, while others are structurally limited by bone shape rather than tight muscles. If you’ve worked diligently on ankle mobility for months without significant improvement, you might have reached your structural limit. This is when props like heel wedges become permanent adaptations rather than temporary modifications. There’s wisdom in accepting your body’s architecture and working skillfully within it.
Previous injuries, surgeries, or conditions like arthritis alter joint function permanently. If you’ve had knee surgery, ankle fractures, or hip issues, your chair pose will necessarily differ from textbook descriptions. Work with healthcare providers or experienced yoga therapists to find variations that respect your history while still challenging your current capacity. Modification isn’t failure—it’s intelligent adaptation.
Energy Management and Muscular Endurance
Chair pose is metabolically demanding. Your muscles consume oxygen rapidly, produce lactate and other metabolites, and fatigue progressively throughout the hold. Understanding the physiology of muscular endurance helps you train more effectively and avoid the common mistake of confusing productive challenge with harmful strain. Building endurance requires strategic stress and adequate recovery, not just repeated suffering.
Muscular fatigue in chair pose typically follows a predictable pattern. Initially, the pose feels manageable as your muscles use readily available ATP and phosphocreatine energy stores. After 15-30 seconds, you shift into aerobic metabolism and begin to feel the burn of working muscles. By 45-60 seconds, lactate accumulates, the burn intensifies, and you might begin shaking. This shake isn’t failure—it’s your nervous system recruiting additional motor units to maintain the contraction as individual muscle fibers fatigue.
To build endurance, you need to regularly work near your current capacity without exceeding it so much that form breaks down. One effective approach is interval training within your practice. Hold chair pose until you reach a seven out of ten intensity (challenging but sustainable), rest briefly in standing or a gentle forward fold, then repeat. Perform three to five rounds. This interval approach builds endurance more effectively than single maximal holds because it allows partial recovery while maintaining training stimulus.
Recovery between practice sessions is when adaptation actually occurs. Muscles don’t get stronger during exercise—they get stronger during the repair period afterward. If you practice chair pose every day without adequate rest, you’ll likely plateau or even regress as fatigue accumulates. For most people, practicing chair pose three to four times weekly with at least one rest day between sessions optimizes progress. On rest days, engage in completely different activities—walking, swimming, or gentle stretching that doesn’t target the same muscle groups.
Nutrition supports muscular endurance development. Adequate protein intake provides building blocks for muscle repair and adaptation. Complex carbohydrates maintain energy stores. Hydration affects everything from oxygen delivery to waste product removal. If you’re training chair pose seriously as a strength practice, support your efforts with appropriate fueling. This doesn’t require complicated protocols—just consistent, quality nutrition timed reasonably around your practice.
Troubleshooting Specific Failure Patterns
Different types of instability require different solutions. Learning to diagnose your specific failure pattern—whether you tip backward, wobble side to side, or rock forward—allows you to apply targeted corrections rather than generic advice. Each pattern reveals specific weaknesses or alignment errors that, once addressed, rapidly improve stability.
If you consistently tip backward, the issue is usually insufficient weight in the balls of your feet or inadequate forward shin angle. Check that you’re genuinely hinging at the hips and pushing them back rather than just bending your knees. Counterintuitively, the solution might be to lean your torso slightly more forward, bringing your center of gravity further over your feet. Practice against a wall, sliding down with your entire back in contact. This prevents backward tipping and teaches the correct weight distribution. Gradually move away from the wall as the pattern becomes familiar.
Side-to-side wobbling usually indicates asymmetrical strength or engagement, particularly in the hip stabilizers—the gluteus medius and minimus. These muscles prevent the pelvis from tilting and the knees from collapsing inward. Strengthen them with exercises like side-lying leg raises, clamshells, and standing hip abductions. In chair pose itself, consciously press your knees slightly outward as if you’re trying to separate them, which actively engages these stabilizers bilaterally.
Forward rocking or weight shifting onto the toes suggests either inadequate hip hinging or weak posterior chain muscles (glutes and hamstrings). Your quadriceps are doing all the work while your backside muscles remain passive. The solution is to emphasize the sitting-back action more strongly. Imagine someone is pulling your hips backward with a rope. Practice chair pose facing a wall, positioning yourself close enough that your knees can’t travel too far forward. This forces proper hip engagement. Supplement with glute-focused exercises like bridges and deadlifts.
Excessive shaking that prevents holding the pose at all often indicates simply working beyond your current capacity. The solution isn’t to push harder—it’s to reduce the challenge temporarily. Hold a higher chair pose, use a wider stance, or place a block under your sitting bones for light contact. Build time and stability at this level before progressing deeper. Sometimes the breakthrough comes not from forcing past the shake but from taking a step back and solidifying your foundation.
Frequently Asked Questions
Why do my knees hurt in chair pose?
Knee pain in chair pose usually indicates alignment issues or muscular imbalances rather than a problem with the pose itself. First, check that your knees are tracking in the same direction as your toes—inward collapse places stress on the knee joint. Second, ensure you’re engaging your hip muscles rather than relying solely on your quadriceps; think about sitting back into your hips and activating your glutes. Third, avoid letting your knees travel too far forward past your toes; emphasize the hip hinge component of the pose. If pain persists despite correct alignment, reduce your depth, widen your stance, or practice strengthening exercises for the muscles that support the knee before attempting full chair pose.
How low should I sink in chair pose?
The ideal depth varies by individual and depends on your current strength, flexibility, and body proportions. There’s no universal standard you must achieve. A general guideline is to work toward thighs parallel to the floor, creating a 90-degree angle at your knees, but this isn’t appropriate or accessible for everyone. More importantly than depth is maintaining proper alignment and engagement throughout the range of motion you’re using. It’s better to hold a higher chair pose with excellent form than to sink deep with collapsed alignment. Progress gradually—if you can hold a quarter-depth chair pose with steady breath and proper alignment for ten breaths, then begin exploring a bit more depth over subsequent weeks.
Should my heels stay on the ground?
Yes, keeping your heels grounded is generally recommended because it provides a more stable base and properly engages the muscles of your legs and hips. If your heels lift, it often indicates limited ankle mobility, too much forward weight shift, or knees traveling too far past your toes. However, some people with structural limitations in ankle flexibility may find that their heels naturally lift slightly in a deep chair pose—this isn’t necessarily wrong if the rest of your alignment is sound. You can use a rolled towel or wedge under your heels as a temporary modification while working to improve ankle mobility. Focus on pressing down through all four corners of your feet rather than rocking forward onto your toes.
Can chair pose help with real-life functional fitness?
Absolutely. Chair pose strengthens the exact muscles and movement patterns you use for everyday activities like sitting down, standing up, lifting objects, and climbing stairs. The quadriceps, glutes, core stabilizers, and ankle stabilizers you develop in chair pose translate directly to improved functional strength. Regular practice can make daily movements feel easier and reduce injury risk during routine activities. The balance and body awareness you cultivate also improve coordination and stability, particularly valuable as you age. Think of chair pose as training for life—you’re not just doing yoga, you’re building capacity for all the movements your body needs to perform comfortably and safely.
How long should I hold chair pose?
Duration depends on your experience level and goals. Beginners might start with three to five breaths (about 15-30 seconds) with proper alignment and gradually build from there. Intermediate practitioners often hold for 30-60 seconds, while advanced practitioners might sustain the pose for several minutes. However, quality always trumps quantity—if your alignment deteriorates, your breath becomes strained, or you start shaking uncontrollably, it’s time to come out of the pose regardless of how long you’ve been holding it. You’ll build more strength and stability with multiple shorter holds in good form than one long hold with compromised alignment. As you progress, you can increase both the duration and depth of your holds, but do so gradually over weeks and months rather than all at once.
Related posts:
 Desk Yoga for Back Pain Relief
 The Simple Ankle Fix That Will Transform Your Entire Workout
 Lindsay Ellingson’s Stress-Relieving Yoga Move
 Perfect Your Glute Bridge
 PHA Bodyweight Workout: Efficient Fitness Anywhere, Anytime
 Managing Hip Pain from Sitting
 The Safe Ab Exercises Every Pregnant Woman Should Know
 Perfect Your Squat Form