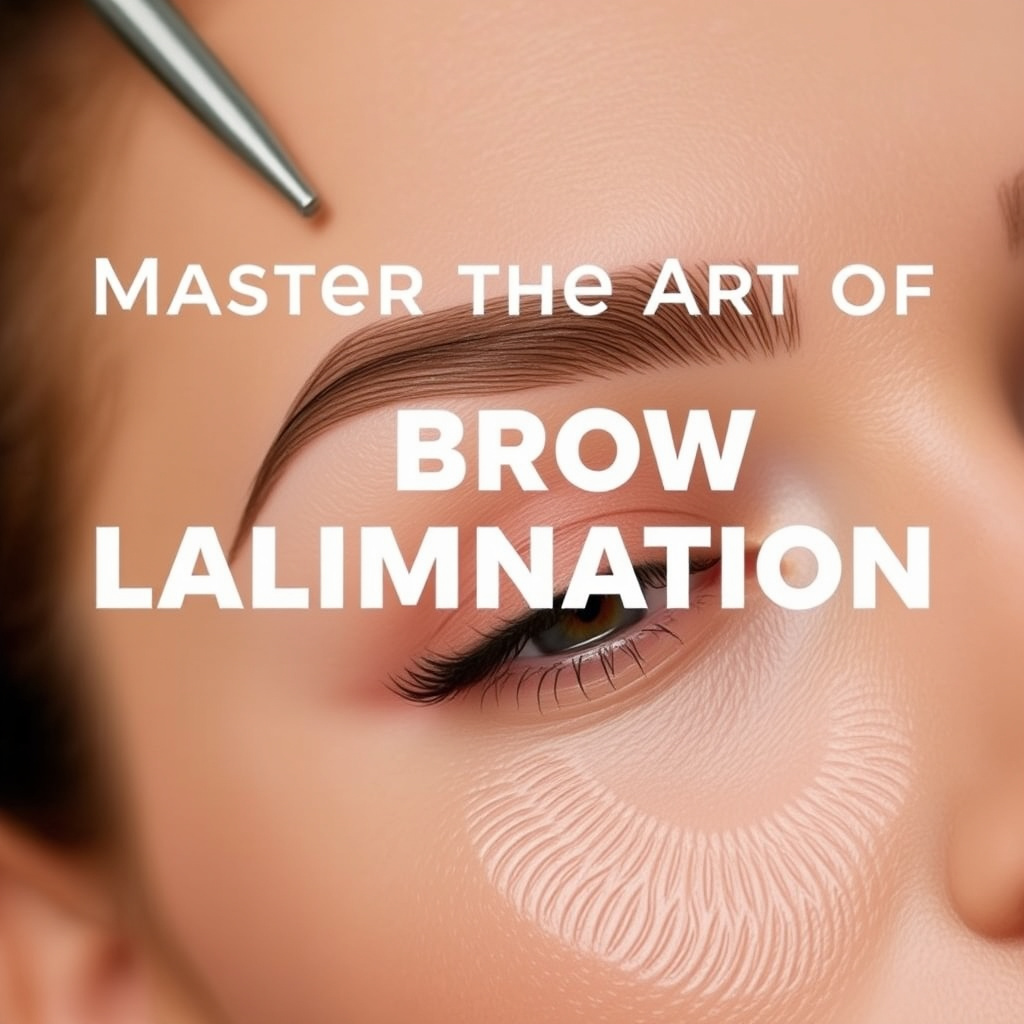
Remember that feeling of walking out of a salon with perfect, fluffy brows that frame your face for weeks? That’s the magic of brow lamination. But between the cost and the time commitment, regular appointments aren’t always practical. The good news? With the right guidance, patience, and a steady hand, you can master the art of DIY brow lamination at home. This comprehensive guide will walk you through every step, from understanding the chemistry to aftercare, so you can achieve professional-looking, brushed-up brows safely from your own bathroom.
What is Brow Lamination, Exactly?
Brow lamination is a semi-permanent styling treatment that restructures your brow hairs. It works by applying a chemical solution—typically a perming lotion—to break down the bonds within each hair strand, making them soft and malleable. The hairs are then brushed and set into an upward, uniform position, and a neutralizing solution is applied to rebuild those bonds, locking the new shape in place. The result is a fuller, more defined, and brushed-up look that lasts 6 to 8 weeks, taming even the most unruly or sparse brows. It’s ideal for creating the illusion of density and a lifted, “clean girl” aesthetic without the need for daily gel or soap.
The Essential Kit: Gathering Your Supplies
Before you begin, gathering a professional-grade kit is non-negotiable for safety and results. Never substitute with hair perming products; the skin around your eyes is exceptionally delicate. A proper at-home kit should include:
- Step 1: Lifting Cream/Perming Solution: This gentle, ammonium thioglycolate-based cream softens the hair bonds.
- Step 2: Neutralizing Cream/Fixing Solution: This hydrogen peroxide-based cream re-hardens the bonds to set the new shape.
- Step 3: Nourishing Brow Serum or Oil: A conditioning treatment to replenish moisture post-process.
- Application Tools: A spoolie brush, angled brush, silicone applicator brushes, or small, disposable makeup brushes for precise application.
- Shaping & Setting Tools: A brow lamination paddle (or a clean, flat-edge gift card/ID), plastic wrap or silicone brow shields, and cotton rounds/pads.
- Prepping & Cleansing: An oil-free makeup remover or micellar water, cotton swabs, and a gentle cleanser.
- Protection: A barrier cream (like petroleum jelly) to protect the skin around your brows.
Always perform a patch test with the solutions on your inner arm 48 hours prior to check for allergic reactions.
Pre-Treatment Prep: The Foundation for Success
Proper preparation is what separates a successful lamination from a patchy or irritated one. Start with clean, completely product-free brows. Use an oil-free cleanser to remove all makeup, sunscreen, and natural oils, as oils can block the solutions from working evenly. Next, map your desired shape. Using a brow pencil, lightly draw the outline of your ideal arch and tail. This acts as your roadmap. Then, apply a thick layer of barrier cream (petroleum jelly works perfectly) meticulously around the perimeter of your brows, on the eyelids below, and the forehead above. This creates a protective shield that prevents the chemical solutions from burning or irritating your skin. Have your timer ready—precision timing is critical.
Step-by-Step Application: The Lamination Process
Step 1: Applying the Lifting Cream. Using a clean spoolie, brush your brow hairs straight up. With your silicone brush, apply a thin, even layer of the Step 1 Lifting Cream, following the direction of hair growth from the base to the tip. Ensure every hair is coated, but avoid piling on product. Immediately use your lamination paddle or card to press and smooth the hairs upward against your forehead, creating a uniform, flat layer. Some kits include plastic strips to place over the brows; if not, cover the treated area with a small piece of plastic wrap to prevent drying. Start your timer. Processing time varies (usually 5-12 minutes); always follow your kit’s specific instructions. Over-processing can damage hair.
Step 2: Gently Removing the Lifting Cream. When time is up, carefully remove the plastic wrap. Use a dry cotton pad to gently wipe away the lifting cream from your brows, brushing upward. Do not rinse with water yet.
Step 3: Applying the Neutralizing Cream. Without brushing the hairs down, immediately apply the Step 2 Neutralizing Cream in the same upward direction, using a fresh applicator. Again, use your paddle to press and set the shape. Cover with plastic wrap and set the timer for the prescribed time (typically equal to the first step). This solution fixes the new shape.
Step 4: The Final Cleanse and Nourish. After the second timer ends, remove the plastic and thoroughly wipe away the neutralizing cream with damp cotton pads. Now, you can gently cleanse the brow area with water and a mild cleanser to ensure all chemicals are removed. Pat dry. Finish by applying the nourishing Step 3 serum or oil, massaging it into the brows to restore hydration and shine.
Troubleshooting Common DIY Challenges
Even with careful planning, you might hit a snag. Here’s how to handle common issues:
- Uneven or Patchy Results: This is often due to uneven application of the creams or brows not being clean of oils. Solution: Wait for your brows to grow out and fully recover before attempting again, ensuring immaculate prep next time.
- Over-Processed or “Crispy” Hairs: If brows feel brittle or look frizzy, processing time was too long. Deep condition with the nourishing serum or a dab of castor oil nightly. Avoid any further chemical treatments for several months.
- Skin Redness or Irritation: This means the solution touched your skin, either due to insufficient barrier cream or messy application. Apply a soothing aloe vera gel or hydrocortisone cream. If burning or swelling is severe, seek medical advice.
- Shape Doesn’t Hold: If brows fall flat within days, the neutralizing step may have been rushed, or the hairs were not kept perfectly in place during setting. Ensure you follow timing to the second and keep firm pressure with your paddle.
The Critical Aftercare Protocol
Your aftercare dictates the longevity and health of your laminated brows. For the first 24 hours, keep them completely dry—no water, steam, sweat, or makeup. Avoid sleeping on your face for the first few nights. For the first week, apply the provided nourishing serum daily. Going forward, brush your brows upward each morning with a clean spoolie. When cleansing your face, avoid rubbing the brow area aggressively. You can use a clear brow gel to set them if needed, but the laminated shape should hold on its own. Most importantly, do not tint your brows for at least 48 hours before or after lamination, as the combined chemicals can be harsh.
Who Should (and Shouldn’t) Try DIY Brow Lamination
DIY brow lamination is a great option if you have steady hands, patience, and sparse, straight, or downward-growing brows you want to lift. It’s less ideal, and potentially risky, for certain individuals. Avoid this treatment if you:
- Have very sensitive skin, eczema, psoriasis, or open wounds/cuts near your brows.
- Are pregnant or breastfeeding, as a precaution due to the chemical exposure.
- Have recently had a chemical burn, waxing, threading, or laser treatment in the area (wait at least 2 weeks).
- Use prescription retinoids (like tretinoin) or strong exfoliants (like glycolic acid) on your forehead, as these can make skin more susceptible to irritation.
- Are unsure about the quality or safety of your kit. When in doubt, consult a professional.
Maintaining the Look: Between Sessions
To extend the life of your lamination, integrate brow care into your routine. Brush them up daily. Apply a growth serum or conditioning oil at night to keep the hairs healthy and strong. Avoid excessive heat from hairdryers directed at your forehead. When the lamination starts to fade (you’ll notice hairs beginning to revert to their original direction), you can gently trim any excessively long tips with cuticle scissors, but avoid over-trimming. Most people find they can space out DIY sessions to every 8-10 weeks, depending on their hair growth cycle.
Advanced Technique: Sculpting Different Brow Archetypes
The standard “brushed-up” look works for many, but true mastery involves customizing the technique to complement your natural brow shape and facial structure. Here’s how to adapt the lamination process for four common archetypes.
For Straight, Low-Arched Brows: The goal is to create an illusion of lift. Instead of brushing all hairs uniformly upward, use a nuanced brushing pattern. Apply the lifting cream as usual. Before setting with the paddle, use the tip of your spoolie to direct the inner third of your brow hairs slightly upward and inward toward the nose. For the middle third and arch area, brush hairs at a steeper, more vertical angle—almost 90 degrees from the skin. For the outer tail, brush hairs up and outward at about a 45-degree angle, following your natural tail direction but amplifying the lift. This multi-directional brushing, locked in by the neutralizer, prevents a “paintbrush” effect and creates a natural-looking, graduated arch that opens up the eye area.
For Naturally Curved or “Hook” Shaped Brows: These brows have a strong downward curve at the tail. Over-laminating them straight up can look unnatural and strain the hair follicle. The key is reformation, not complete restructuring. Apply the solutions, then carefully brush the hairs to follow their natural curved path, but subtly relax the downward hook. Use your paddle to press and set the tail hairs in a more horizontal or slightly lifted position, softening the curve without forcing a vertical spike. This preserves your natural shape while eliminating the droopy appearance.
For Sparse or “Gappy” Brows: Lamination is your best friend, but technique is everything. The temptation is to coat every visible hair heavily. Resist it. Apply a very thin layer of lifting cream, ensuring it doesn’t pool on the skin in sparse areas. During the setting phase, focus on aligning the direction of existing hairs to bridge gaps visually. For example, if you have a gap in the underside of your arch, gently brush the hairs from the upper arch downward to fan over the space. The neutralizer will lock this strategic placement, creating a denser, more connected line without needing extra product.
For Thick, Bushy Brows: Your challenge is control and refinement, not adding volume. Thorough cleansing is even more critical to penetrate the dense hair. After applying the lifting cream, take extra time with your spoolie and paddle to meticulously align each hair subgroup. You might need to work in smaller sections, using the edge of your paddle to isolate and press unruly sections. The result should be a polished, uniform “fluff” where the shape is clean and the hairs lie smoothly together, eliminating the wild or wiry look while maintaining their glorious fullness.
The Chemistry Decoded: What You’re Actually Doing to Your Hair
Understanding the molecular process demystifies timing and troubleshooting. Brow hair is primarily made of keratin, a protein. Its strength comes from disulfide bonds—strong chemical links between sulfur atoms in the keratin chains.
Phase 1: The Reduction (Lifting Cream). The active ingredient is usually a thioglycolate salt (like ammonium thioglycolate). This is a reducing agent. It works by breaking the disulfide bonds. Specifically, it reduces the disulfide links (-S-S-) into two sulfhydryl groups (-SH + HS-). This severs the protein’s internal cross-links, transforming the rigid keratin structure into a soft, pliable one. The “processing time” is the window needed for this chemical reduction to reach the optimal point—enough bonds are broken to allow reshaping, but not so many that the hair loses all integrity. This is pH-dependent; the cream is alkaline (pH ~9-10), which swells the hair cuticle, allowing the reducer to penetrate. Leaving it on too long leads to over-reduction, resulting in weak, gummy, or “crispy” hair that can’t properly reform bonds in the next step.
Phase 2: The Oxidation (Neutralizing Cream). This solution contains hydrogen peroxide (an oxidizing agent) in a slightly acidic base. Its job is twofold. First, it stops the reduction reaction by neutralizing the alkaline lifting cream. Second, and most crucially, it re-forms the disulfide bonds. The peroxide oxidizes the sulfhydryl groups (-SH), forcing them to re-link into new disulfide bonds (-S-S-). However, these bonds are now formed while the hair is held in a new shape (brushed up). This permanently (until new hair grows) sets that shape. The timing here is equally critical; under-processing means bonds don’t fully re-form, leading to weak hold. The acidic pH also helps close the hair cuticle, sealing the hair and restoring its natural protective layer.
This knowledge explains why you must not rinse with water between steps. Water dilutes the chemicals, alters the pH, and can halt the reduction process prematurely, leading to incomplete bonding and a failed lamination. It also underscores why using hair perm solution is dangerous—facial hair is finer and the surrounding skin is more sensitive than the scalp, requiring gentler formulations with lower concentrations and different pH buffers.
Mastering the “Timing Matrix”: Beyond Kit Instructions
Kit instructions provide a safe baseline, but expert results come from adjusting time based on your unique hair characteristics. Think of it as a matrix of hair type, condition, and desired outcome.
Factor 1: Hair Texture & Thickness.
Fine, Baby Hairs: Process at the lower end of the recommended range (e.g., 5-6 minutes instead of 8). Fine hair has less structural mass and processes faster. Over-processing is a high risk, leading to breakage.
Medium, Standard Hair: Follow the kit’s standard timing.
Coarse, Wiry, or Asian Hair Types: These often have more disulfide bonds, making them resistant. You may need the full upper limit of the timing range (e.g., 10-12 minutes). If, after your first attempt, the hold is weak, note to increase timing by 1-2 minutes next session. Never exceed 12 minutes for an at-home kit.
Factor 2: Hair Condition & History.
Virgin, Unprocessed Hair: Follow standard timing. It will react predictably.
Chemically Treated Hair: This includes brows tinted within the last 2 weeks, or hair bleached from sun/skin care. These hairs are porous and compromised. Reduce processing time by 25-30%. For example, if standard is 8 minutes, process for 5.5-6 minutes. The chemicals will work faster on the already-altered structure.
Previously Over-Processed/Damaged Hair: If your brows feel dry or brittle from a past treatment, do not laminate. Wait 2-3 full growth cycles (about 4-6 months) for healthy hair to replace it. Laminating damaged hair will likely cause breakage.
Factor 3: Environmental Conditions. Humidity and temperature affect processing. A hot, humid bathroom accelerates chemical reactions. In such conditions, shave 1 minute off your usual time. In a cool, dry room, you might need the full time. The best indicator? Visual and tactile monitoring. After the minimum time, you can carefully lift a corner of the plastic wrap and gently nudge a hair with your spoolie. If it moves easily and feels very soft, it’s ready. If it still resists and feels stiff, give it another 60 seconds. Develop this sense of observation rather than blind timer reliance.
Strategic Integration with Other Brow Treatments
DIY lamination doesn’t exist in a vacuum. Its power multiplies when sequenced correctly with tinting, trimming, and henna. Get the order wrong, and you risk damage or poor results.
The Lamination & Tinting Power Sequence: This is the most common combination for maximum impact. Always laminate first, then tint. Here’s why: The lamination process opens the hair cuticle. If you tint first, the lifting cream can strip the color unevenly and cause patchiness. The correct sequence is:
1. Perform brow lamination as outlined.
2. Wait a minimum of 48 hours. This allows the hair cuticle to fully close and the laminated shape to stabilize.
3. Apply brow tint. Because the cuticle is still slightly more receptive from the recent chemical process, the tint may develop slightly faster and adhere better. Monitor closely and reduce development time by 1-2 minutes from the tint kit’s instructions.
The result is perfectly shaped, colored, and defined brows that last 4-6 weeks.
Trimming for Precision: Never trim before lamination. You don’t know how the hairs will lay in their new, lifted position. The correct method is to laminate first. Once the 24-hour dry period has passed, assess the shape. Now, with brows brushed up, you’ll see the true length. Using sharp, slanted tweezerman scissors, only trim the absolute tips of any hairs that extend far beyond your desired brow silhouette. Trim in a staggered, feathering motion—cut one hair, skip two, cut another—to avoid a blunt, “chopped” line. This post-lamination trim refines the shape without sacrificing the fluffy texture.
Using Henna as a Stain: For those with sensitive skin who avoid oxidative dyes, vegetable-based henna can be used to stain both the skin and hair for a powder-fill effect. The rule is reversed: Apply henna first, then laminate. Henna needs to stain the skin, which requires clean, product-free skin. Apply henna, process, and remove. Wait 24-48 hours for the stain to fully oxidize and set. Then, proceed with lamination. Be extra cautious with your barrier cream to avoid lifting the fresh skin stain. The lamination will then style the henna-stained hairs perfectly.
The Microblading Exception: If you have microblading or cosmetic tattooing, you must wait until the area is fully, completely healed—typically 6-8 weeks post-procedure, after all peeling and settling. The chemicals can cause severe irritation to healing skin and fade pigment. Once healed, you can laminate, but avoid applying the creams directly onto the tattooed skin strokes. Apply precisely to the natural hair only, using a micro-applicator. This styles your real hair to blend seamlessly with the microbladed strokes.
Building a Professional-Grade Sanitation Protocol
At-home beauty risks infection when sanitation is overlooked. Your brow area is near the eyes, making sterile practice non-negotiable.
Pre-Procedure Setup: Wipe down your entire work surface with 70% isopropyl alcohol. Wash your hands thoroughly with antibacterial soap. Sterilize all non-disposable tools (metal spoolie, scissors, paddle, silicone brushes) by soaking in alcohol for 10 minutes or using a UV sterilizer box. For disposable tools (applicator wands, mascara brushes), use a fresh one for each step and each brow if possible. Never double-dip a used applicator back into the solution bottle; it introduces bacteria and skin cells that can degrade the product.
Solution Management & Shelf Life: Kit solutions are not sterile after opening. Mark the opening date on each bottle. Most have a shelf life of 6-12 months once opened. Store them in a cool, dark cupboard—not the humid bathroom. Signs of expiration include a change in color (lifting cream turning yellow-brown), separation that won’t re-mix, or a foul odor. Using expired solution is ineffective and risky. If your kit uses individual foil packets, this is ideal, as each use is fresh and uncontaminated.
Post-Procedure Tool Care: Immediately after your session, dispose of all used cotton pads, swabs, and plastic wrap. For reusable tools, clean off any residual cream with a paper towel, then re-sterilize with alcohol before storing. Never leave used tools lying around. This prevents cross-contamination for your next use and protects against microbial growth like staph or Pseudomonas, which can cause folliculitis (infected hair follicles) in the brow area.
Recognizing Signs of Infection: Normal post-treatment redness should subside within an hour. Be alert for symptoms appearing 24-72 hours later: increasing redness, warmth, swelling, yellow pustules at hair follicles, or persistent pain/itching. If you see these, stop all product application, keep the area clean and dry, and consult a doctor. It likely requires a topical antibiotic. This is why starting with impeccably clean tools and skin is your first line of defense.
Long-Term Hair Health: The Conditioning Regimen
Repeated chemical processing, even when done correctly, is stressful for hair. A proactive conditioning routine between sessions ensures your brows stay strong, preventing breakage and maintaining softness.
The Daily Nourishment Ritual: Each night, after cleansing your face, apply a single drop of a dedicated brow serum or pure oil to your brows. Effective ingredients to look for:
– Peptides (like Myristoyl Pentapeptide-17): Signal hair follicles to stay in the growth phase.
– Biotin & Niacinamide (B3): Strengthen the hair shaft and improve follicle health.
– Pure Oils: Castor oil (ricinoleic acid may support circulation), Jojoba oil (mimics skin’s sebum), or Argan oil (vitamin E and fatty acids).
Apply by massaging gently along the brow bone with your fingertip for 30 seconds to boost blood flow. This nightly habit repairs the lipid layer of the hair and supports the underlying follicle.
The Weekly Intensive Treatment: Once a week, apply a thicker conditioning mask. Mix a pea-sized amount of a protein-free deep conditioner (like a fragment of a hair mask meant for moisture, not repair) with a drop of your chosen oil. Apply to brows, cover with a small piece of cling film to create occlusion, and leave on for 15-20 minutes. Wipe away with a damp cloth. This gives a burst of hydration to the hair shaft, combating the drying effect of chemical processing.
Recognizing & Addressing Cumulative Damage: Even with good care, after 4-5 laminations over a year, you may notice your brows don’t hold the shape as long, or hairs seem finer. This is cumulative cuticle damage. When this happens, it’s time for a “Brow Holiday.strong> Take a full 3-4 month break from any chemical treatments. During this time, be religious with your nightly conditioning. Consider using a product containing keratin or hydrolyzed silk protein once a week—these can temporarily fill in gaps in the hair cuticle, improving appearance and strength. This rest period allows a full cycle of new, healthy hair growth to replace the over-processed strands.
Psychological & Stylistic Adaptation: Embracing the Change
Such a dramatic change to your facial frame can be psychologically jarring. The first time you see your brows laminated, they may look shockingly bold or “too much.” This is normal and often a matter of perception adjustment.
The 48-Hour Rule: Do not judge the results immediately. The first day, the brows may appear overly slick or stark. After 48 hours, once any residual product is fully washed away and the hairs settle into their new natural state, the look softens significantly. Give yourself this grace period before deciding if you need to adjust your technique next time.
Makeup Recalibration: Your makeup routine will need tweaking. With a stronger, more defined brow, you can often reduce other eye makeup. A simple swipe of mascara and a touch of blush may be all you need, as the brows now provide substantial framing. If you used to draw on a heavy brow pencil, switch to a fine-tipped pencil or powder only to fill in the slightest gaps, using light, hair-like strokes. The goal is to enhance, not overshadow, the beautifully laminated structure you’ve created.
Managing Social Feedback: Be prepared for comments. “Did you get something done?” is common. Have a simple, confident reply ready: “Just trying a new brow routine!” or “Yes, I laminated them for a lifted look.” Owning the change confidently is part of the fun. Remember, this is a temporary styling treatment, not a permanent alteration. If you ever decide it’s not for you, the process will fully grow out in 6-8 weeks, returning you to your natural state with no long-term commitment.
Frequently Asked Questions (FAQ)
Is DIY brow lamination safe?
When performed correctly with a high-quality, dedicated brow lamination kit and by meticulously following instructions—including the patch test and skin barrier steps—it can be safe. The primary risks are skin irritation or chemical burns from improper application, and hair damage from over-processing. Safety hinges entirely on your preparation and precision.
How painful is the process?
A properly performed brow lamination should not be painful. You might feel a slight tingling or warmth when the solutions are on, which is normal. Any stinging, burning, or significant discomfort is a sign that the solution is on your skin, and you should remove it immediately and cleanse the area.
Can I laminate brows that are very sparse or over-plucked?
Yes, in fact, lamination is excellent for sparse brows because it lifts and sets every remaining hair to create a fuller, more uniform frame. It maximizes what you have. However, it cannot create hair where there is none. For extremely sparse areas, you may want to combine lamination with microblading or brow tinting (done at separate times) for optimal density.
What’s the difference between lamination and a brow perm?
The terms are often used interchangeably, as the process is chemically similar to a perm. Typically, “lamination” refers to the technique of setting the hairs in a vertical, brushed-up position. A traditional “brow perm” might set them in a more curved, arched shape. The kits and chemicals used are fundamentally the same.
My brows feel dry after treatment. Is this normal?
Some dryness is common, as the chemical process can be dehydrating. This is why the nourishing serum in the final step is so important. If dryness persists, continue applying a drop of jojoba or castor oil to your brows each night until they regain their softness. Avoid using harsh soaps or makeup removers on them.
Mastering DIY brow lamination is a skill that pays off in convenience, cost savings, and the confidence of perfectly groomed brows every day. By respecting the process, prioritizing safety, and giving your brows the care they need, you can elevate your at-home beauty routine to professional levels. Remember, the first attempt is a learning experience—go slow, follow the steps, and soon you’ll be the architect of your own flawless frame.
Related posts:
 Anastasia Beverly Hills Brow Freeze
 Jenna Dewan’s Drugstore Secret for Perfect Eyebrows
 Eyebrow Extensions Are the New Lash Extensions
 Blow Drying Hair Without Damage: Expert Tips
 Wind-Proof Brow Gels for Winter
 Eyebrow Lamination: The Treatment That Creates Perfect Brows for Weeks
 Patrick Ta’s Major Brow Lamination Gel: Achieving Bold, Feathered Brows
 Natural Products for Bold Brows