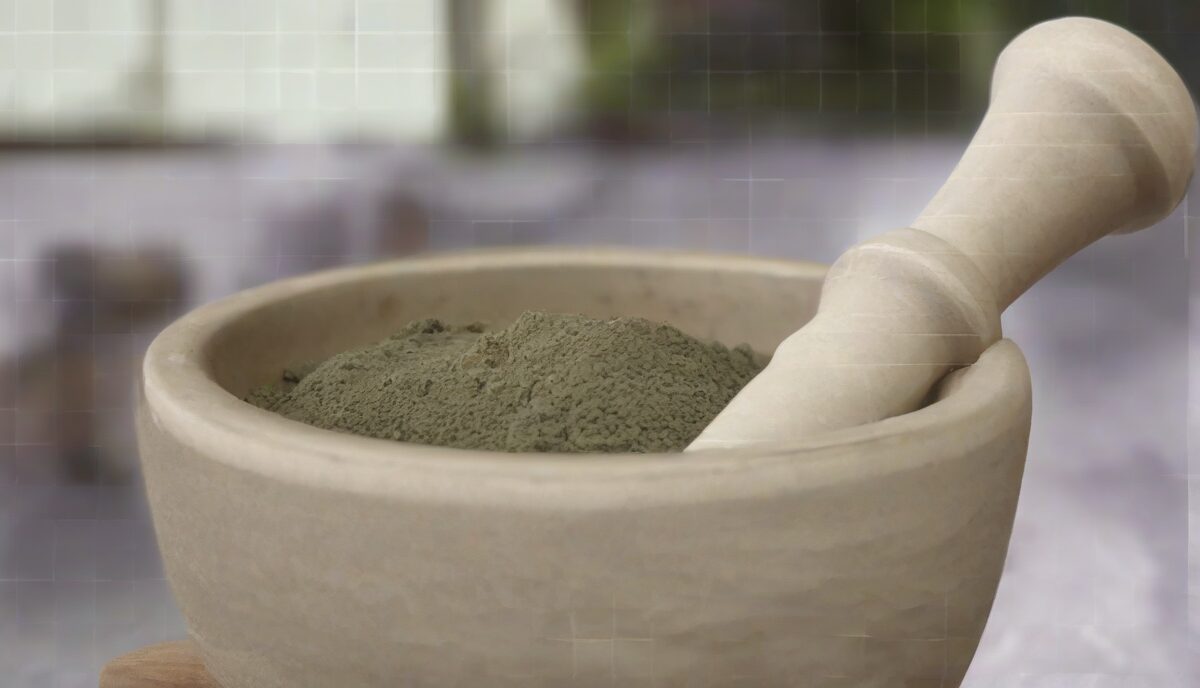
The History and Importance of Mortar and Pestle
The mortar and pestle have been essential tools in kitchens for centuries. Originating from ancient civilizations, these tools were pivotal in the preparation of food and medicine. The use of a mortar and pestle allows for the efficient grinding and mixing of ingredients, which is crucial for unlocking the full flavor and nutritional benefits of various foods.
Choosing the Right Mortar and Pestle
Selecting the appropriate mortar and pestle for your needs is essential. Consider the material, size, and weight:
- Material: Mortars and pestles are made from various materials, including stone, ceramic, wood, and metal. Stone (such as granite or marble) is durable and offers excellent grinding capabilities.
- Size: The size should match your kitchen needs. Smaller sets are ideal for spices, while larger ones are better for making pastes and sauces.
- Weight: Heavier mortars provide stability during use, ensuring that your ingredients are properly crushed.
Using a Mortar and Pestle: Techniques and Tips
Mastering the use of a mortar and pestle involves understanding the right techniques to achieve the best results:
- Crushing: For spices and seeds, use a firm, circular motion with the pestle to break down the ingredients into a fine powder.
- Grinding: For herbs and leafy greens, use a gentle, rolling motion to crush the leaves while preserving their essential oils.
- Mixing: When making pastes or sauces, use a combination of crushing and grinding to blend the ingredients smoothly.
Caring for Your Mortar and Pestle
Proper care of your mortar and pestle will ensure its longevity and effectiveness:
- Cleaning: After each use, rinse your mortar and pestle with warm water and a mild detergent. Avoid using harsh chemicals or abrasive materials that can damage the surface.
- Drying: Ensure the mortar and pestle are completely dry before storing to prevent mold and mildew.
- Seasoning: For new stone mortars, season them by grinding a small amount of white rice to remove any stone particles and to create a smooth surface.
Recipes to Try with Your Mortar and Pestle
Here are some simple recipes to get you started with your mortar and pestle:
- Pesto: Combine fresh basil, garlic, pine nuts, Parmesan cheese, and olive oil to create a flavorful pesto sauce.
- Guacamole: Mash avocados with lime juice, cilantro, and onions for a fresh and creamy guacamole.
- Spice Blends: Grind cumin, coriander, and chili flakes to make a versatile spice blend for various dishes.
Comparative Analysis of Mortar Materials and Their Functional Impact
While basic materials like stone and ceramic are commonly known, the specific mineral composition of your mortar and pestle fundamentally alters the chemical and physical outcome of your ingredients. Understanding these nuances allows a cook to match the tool to the specific culinary goal, whether it is a coarse rub or a silky emulsion.
Granite and Basalt: These are the workhorses of the kitchen. Granite is characterized by its high density and natural grit. This “tooth” is essential for grinding hard seeds, such as peppercorns or coriander, because the surface provides the friction necessary to catch and shear the seed. Basalt, often found in volcanic stone mortars like the Mexican molcajete, is slightly more porous. This porosity allows the stone to absorb a small amount of oils and flavors over time, which some traditionalists argue enhances the depth of subsequent salsas, though it requires more diligent cleaning to avoid rancidity.
Marble: Marble is significantly smoother and denser than granite. Because it lacks a coarse grain, it is less effective for pulverizing hard spices into a fine powder. However, marble is the gold standard for working with salts, sugars, and soft herbs. Its cool temperature makes it ideal for grinding ingredients that might wilt or oxidize under heat, and its non-porous nature ensures that pungent flavors, like garlic or ginger, do not linger in the stone for the next recipe.
Porcelain and Ceramic: These materials are typically non-reactive and extremely hard. Porcelain mortars are frequently used in laboratories because they do not leach minerals into the substance being ground. In the kitchen, they are perfect for medicines or very fine spice powders where purity of flavor is paramount. The downside is their fragility; a heavy-handed strike with a heavy pestle can crack a ceramic bowl, and the surface is often so smooth that seeds may “dance” or slide around rather than being crushed.
Wood and Hardwoods: Wooden mortars, such as those made from acacia or olive wood, are best suited for “bruising” rather than grinding. They are ideal for crushing cardamom pods or lightly smashing garlic. Wood is soft, meaning it will not pulverize a seed into a powder, but it is gentle on delicate aromatics. Note that wood is the most porous material, making it susceptible to absorbing odors and moisture, which necessitates frequent oiling to prevent cracking.
The Culinary Science of Manual Grinding vs. Mechanical Processing
Many home cooks wonder if a mortar and pestle is truly superior to a high-speed food processor or electric spice grinder. The answer lies in the difference between cutting and crushing. An electric blade slices through a cell wall with high velocity, which can lead to rapid oxidation and the loss of volatile aromatic compounds. In contrast, the mortar and pestle utilize shear force and compression.
When you press a pestle into a basil leaf or a peppercorn, you are rupturing the cell walls and squeezing out the essential oils. This process is slower, which prevents the ingredients from heating up. High-speed blades generate friction heat, which can actually “cook” delicate herbs or cause the oils in nuts to turn bitter. By using manual force, you maintain the integrity of the flavor profile, resulting in a taste that is more vibrant and “bright.”
Furthermore, the texture produced by a mortar and pestle is inherently non-uniform. A food processor creates a homogenized puree, whereas a mortar and pestle create a rustic consistency where some pieces are pulverized and others are merely cracked. This variation is crucial for the sensory experience of eating; it allows the palate to encounter bursts of concentrated flavor followed by smoother textures, adding a professional, artisanal quality to the dish.
Consider the case of a traditional Thai curry paste. When processed in a blender, the ingredients often emulsify into a thick, gluey paste. When pounded in a mortar, the lemongrass, galangal, and chilies are crushed into a coarse, aromatic mash that releases oils in a controlled manner, allowing the flavors to bloom more effectively when later fried in oil.
Specialized Global Mortars and Their Cultural Applications
Different cultures have engineered their mortar and pestle sets to suit specific regional ingredients. Understanding these variations can help you choose a tool based on the cuisine you enjoy most.
The Molcajete (Mexico): Carved from volcanic rock, the molcajete is designed for heavy-duty crushing. Its rough surface is perfect for turning charred tomatoes and onions into a chunky salsa. Because it is made of lava stone, it is incredibly heavy, providing the stability needed to mash dense ingredients like avocado or roasted peppers without the bowl sliding across the counter.
The Thai Mortar and Pestle (Krok): Typically made of granite or clay, Thai mortars are deeper and narrower than Western versions. They are paired with a heavy, rounded pestle. This design is optimized for pounding rather than grinding. The depth prevents ingredients from flying out when the chef uses a vertical striking motion to break down fibrous roots like galangal or lemongrass.
The Korean Mortar: Often smaller and made of high-quality ceramic or stone, Korean mortars are frequently used for preparing fine seasonings and medicinal pastes. They emphasize precision and a smooth finish, reflecting the meticulous nature of traditional Korean condiment preparation.
The Apothecary Mortar: These are usually porcelain or glass and are designed for extreme precision. They have a very smooth interior to ensure that every milligram of a powdered substance can be recovered. While less common in modern kitchens, they are excellent for those who make their own skincare products or grind supplements.
Advanced Grinding Strategies for Complex Textures
To move beyond basic crushing, you must adapt your technique to the physical properties of the ingredient. Not all materials respond the same way to pressure, and using the wrong motion can lead to frustration or wasted ingredients.
Hard Seeds and Dried Pods: For ingredients like peppercorns, cumin seeds, or cardamom, start with a “cracking” phase. Use the pestle to apply direct, vertical pressure to break the outer hull. Once the seeds are cracked, switch to a circular grinding motion, pressing the pestle firmly against the sides of the mortar. This uses the walls of the bowl as a secondary grinding surface, accelerating the transition from coarse chunks to a fine powder.
Fibrous Roots and Aromatics: Ginger, galangal, and lemongrass are tough and stringy. If you try to grind these in a circular motion immediately, they will simply slide around. Instead, use a “chopping” motion with the pestle to break the root into smaller pieces first. Once the fibers are shortened, use a twisting motion to bruise the cells and release the juices, eventually forming a paste.
Waxy Leaves and Soft Herbs: Fresh basil, cilantro, or mint contain a high volume of water and oils. To prevent these from turning into a slimy mush, use a “bruising” technique. Instead of grinding them into the stone, use a light tapping and folding motion. If you are making a paste, add a pinch of coarse salt. The salt crystals act as a micro-abrasive, gripping the slippery leaves and helping to break them down more efficiently.
Oily Nuts and Seeds: When working with pine nuts, walnuts, or sesame seeds, be aware of the “oil release point.” As you grind, the nuts will transition from a powder to a thick paste and eventually to a liquid oil. To achieve a consistent nut butter, use a rhythmic, circular motion and scrape the sides of the mortar frequently with a rubber spatula to ensure all the oil is re-incorporated into the mass.
Navigating Common Pitfalls and Technical Troubleshooting
Even experienced cooks encounter issues when using stone tools. Understanding the edge cases of mortar and pestle use can save your ingredients and your equipment.
The “Gray Dust” Phenomenon: When using a new stone mortar, especially granite or volcanic stone, you may notice a gray residue in your food. This is not a defect, but rather loose stone particles from the manufacturing process. While seasoning with rice is a standard fix, for particularly “dusty” mortars, you should grind a mixture of coarse salt and rice, then rinse with water and repeat the process three to four times until the rice remains pure white.
Flavor Carry-Over: Porous stones can hold onto the scent of pungent ingredients like asafoetida, garlic, or strong chilies. If your next recipe is a delicate dessert or a light herb sauce, a simple water rinse may not suffice. To neutralize the stone, create a paste of baking soda and water, apply it to the interior of the mortar, let it sit for ten minutes, and then scrub with a stiff brush. Avoid using soap in porous stone, as the stone can absorb the detergent, which will then leach into your food the next time you use it.
Pestle Slippage: If you find your pestle is sliding off the ingredients, it is often because the ingredients are too dry or the mortar is too smooth. Adding a tiny amount of oil or a pinch of salt can provide the necessary grip. Conversely, if the ingredients are sticking too much to the sides, you may be over-processing them, causing the natural starches or sugars to caramelize or bind to the stone.
Avoiding Thermal Shock: While stone is durable, it can crack under extreme temperature changes. Never take a mortar directly from the freezer and pour boiling liquid into it, nor should you place a hot stone mortar directly into ice-cold water. Allow the tool to reach room temperature naturally to prevent structural fractures.
Expanding Beyond the Kitchen: Apothecary and Wellness Uses
The mortar and pestle is as much a tool of wellness as it is of culinary art. For centuries, it has been the primary instrument for creating natural remedies and skincare.
Homemade Poultices and Salves: Many herbalists use a mortar and pestle to create poultices. By grinding dried herbs with a small amount of warm oil or water, you create a concentrated paste that can be applied to the skin. The manual grinding ensures that the medicinal compounds in the plants are released without being destroyed by the heat of a mechanical grinder.
Custom Supplement Blending: For those who take various powdered supplements, a porcelain mortar allows for a precise, homogeneous blend. This is particularly useful when mixing a small amount of a potent supplement into a larger base of powder to ensure an even distribution of the active ingredient.
DIY Skincare: Creating a face mask using bentonite clay or ground oats requires a tool that can handle thick, viscous materials. A marble mortar is ideal here because its non-porous surface ensures that the clay does not seep into the tool, making cleanup effortless. You can easily mix clay powders with apple cider vinegar or rose water to achieve a smooth, lump-free consistency.
Essential Oil Dilution: When working with resinous materials like frankincense or myrrh, a mortar and pestle are used to break the resin into a fine powder before it is infused into a carrier oil. This increases the surface area, allowing for a more efficient extraction of the aromatic resins.
Master-Level Recipes and Flavor Layering Techniques
To truly master the mortar and pestle, you must move beyond simple mashes and begin layering flavors based on their hardness and volatility. The order of operations is the secret to a professional-grade paste.
The Art of the Thai Green Curry Paste: Instead of throwing everything in at once, follow the “hardness hierarchy.” Start with the hardest ingredients: lemongrass, galangal, and kaffir lime zest. Pound these into a coarse paste first. Next, add the harder seeds and peppercorns. Once those are integrated, add the garlic and shallots. Finally, add the softest ingredients: green chilies and shrimp paste. By following this order, you ensure that the hard ingredients are fully pulverized by the time the soft ingredients are added, preventing the paste from becoming a chunky mess.
Middle Eastern Dukkah: Dukkah is a crunchy condiment that relies on a specific texture. To make it, first toast hazelnuts, sesame seeds, and coriander seeds in a pan. Transfer them to the mortar while they are still warm; the warmth makes the oils more fluid and easier to release. Grind them only partially—you want a coarse, sandy texture, not a powder. Fold in cumin, salt, and dried thyme at the very end using a gentle rolling motion to preserve the aroma of the herbs.
Authentic Chimichurri: While many use a blender for chimichurri, a mortar and pestle create a superior version. Start by grinding coarse salt and garlic into a paste. Add fresh parsley and oregano, using the “bruising” technique to release the chlorophyll and oils without turning the herbs into a puree. Slowly stir in red wine vinegar and olive oil. The result is a vibrant, textured sauce where the garlic is fully integrated but the herbs remain distinct and fresh.
Manual Tahini: For those with a heavy-duty granite mortar, making tahini from scratch is a rewarding challenge. Toast sesame seeds until golden, then add them to the mortar. Use a firm, circular grinding motion. As the seeds break down, they will release their natural oils and form a thick, heavy paste. Slowly drizzle in toasted sesame oil and a pinch of salt, continuing to grind until the mixture becomes a smooth, pourable cream. This method produces a deeper, nuttier flavor than the high-speed shearing of a blender.
FAQ
What materials are best for a mortar and pestle?
Stone materials such as granite or marble are ideal due to their durability and effective grinding capabilities. Ceramic and wood are suitable for lighter use.
How do I clean my mortar and pestle?
Rinse with warm water and mild detergent after each use. Avoid using harsh chemicals and ensure it is thoroughly dried before storing.
Can I use a mortar and pestle for wet ingredients?
Yes, a mortar and pestle are excellent for making pastes and sauces, such as pesto and guacamole.
Do I need to season my mortar and pestle?
For new stone mortars, seasoning with white rice helps remove stone particles and creates a smoother grinding surface.
What size mortar and pestle should I buy?
Choose a size that fits your kitchen needs. Smaller sets are great for spices, while larger ones are better for pastes and sauces.
Related posts:
 Why Every Home Cook Needs a Quality Mortar and Pestle
 Essential Korean Condiments
 The Slow Beauty Movement’s Secret Hydration Recipes
 Homemade Turmeric Paste Guide
 Zoe Kravitz’s Coconut Oil Hair Care Secret
 DIY Natural Cleaning Products with Essential Oils
 Mastering Mortar and Pestle
 How Teeth Grinding Changes Your Face